Seven Things

Seven

I was tagged by the beautiful Tasha Chawner to share seven things about me. While I am flattered that she  thought of me in all my blogging glory, I am having a hard time coming up with seven things to mention…darn it I am just not that interesting! 😉

1. I taught myself the alphabet in Canadian Sign language

…which, for all intents & purposes is American Sign Language – ASL – (we say “zed”, they say “zee”) but as far as the signing, it’s the same. :). Yes my #1 is totally piggy backing on Tasha’s #5. 😉 I taught myself so that I could have hand gestures when singing the alphabet song (heavily requested in my house) with my three year old during circle time. I was quite impressed at how quickly I learned, now I would love to learn more! 🙂

2. I hate spiders but they love me.

Over the years, I have learned to tolerate them, as they do such a nice job keeping the other bug populace down. But they seem to want to be friends even though I would like to remain acquaintances. Here at the computer for instance, on a regular basis they like to come crawling up (or repel downwards), and I usually don’t notice until they’re traveling up my arm or neck. Flick it away and minutes later I witness it crawling back up the chair. Hello…take the hint! Recently I had one crawling up my leg while we were travelling down the interstate in Massachusetts. I had to stifle my screams lest Rick drive off the highway. Plus with the kids I have learned to suppress my disgust for them so to not encourage a phobia of their own. 😉

3. I am afraid of the dark

Totally in the irrational, childlike sense. I don’t think I ever got over fears from childhood, and too many episodes of “Unsolved Mysteries” back in the day really did not help me out there. You remember the original – Robert Stack’s voice, the creepy music…any who…if I have to travel anywhere by myself in the dark – say, to the loo in the middle of the night – I take a deep breath, move as quickly as I can & keep my eyes shut tight as much as possible…lest I see a – dead person or ax murderer or something. Things that go bump in the night – ask my husband, I have woke him many a time to check on a noise that was just the cat vomiting. 😉

4. I prefer to be alone.

Which may come to a surprise to you if we have only interacted in social settings. I have the traits of a person of the melancholic temperament.  I spend a lot of time in my head – contemplating & compartmentalizing everything…so when it comes to socializing in large groups I just don’t know how that chaos fits into my world. Many times people assume that I am depressed or upset or snobby or rude…truthfully I just spend a lot of time “out of my body” as I am so self aware. Over the years I have learned how to be an out-going creature, but  it makes me feel rather drained & it takes me a long time to recover from a social event. This doesn’t mean I don’t enjoy a good party, in fact I do need those as well to help keep me balanced. I really look forward to participating despite the awkward feelings I may have during/after the fact.

5. My dreams predict when something significant will happen to someone close to me.

I could add myself to that as I dreamed I was pregnant with baby girls just days before conceiving both my daughters. I dreamed a close friend was having a boy, and everyone was convinced it was a girl. My dream was right. The last prediction dream I had was two years ago – I dreamed of the death of my mother. One week later she died suddenly at the age of 54. Needless to say this experience has left me rather rattled and I have not had a prediction dream since. I think subconsciously I have turned off that filter, at least for now. The difference between a prediction dream vs. a regular dream is that it is startlingly real. I can  touch, smell, feel everything – know everyone who is in it (I tend to dream about strangers a lot…characters my head seems to make up in slumber land) and I am left feeling like I have be thrust back to earth to my body as if I were in another time or place.

6. I am left handed…sort of…

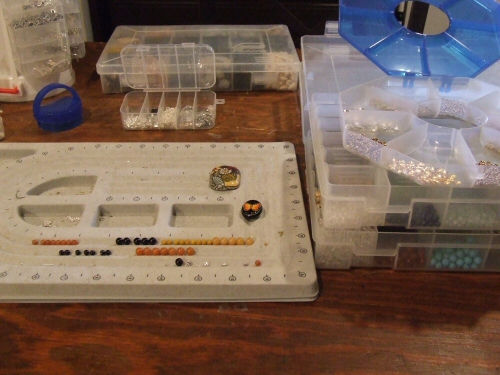
I’m sure that being left handed comes to no surprise seeing how creative I am. But I am actually somewhat ambidextrous – for lack of a better descriptive term. Although I am left hand dominant for writing & using eating utensils, I tend to use my right hand for everything else: using a can opener, scissors or pliers, throwing a baseball… Still, I recognize myself as a south paw; everything creative comes out of my left hand whether it be writing or sketches for jewelry designs.

7. I sweat a lot when I am writing…

…in a creative sense – not when I am say, writing a cheque or even listing a new item in my shops. It’s happening right now! It’s like I have a hot flash when I have to think and write at the same time…I can remember the same thing happening when I used to write essays in high school! My poor little brain cells are firing so fast they are creating a lot of heat in that noggin of mine. 😉

There you have it, Tasha – Seven Things. And yes, it was painful to come up with! I do hope it was somewhat entertaining! 🙂

Creativity Beyond the Beads: Handmade Book

Book

The other day I was looking for a new book to write down my creative ideas, and I came across this one that I had made 10 years ago. A printer, old photos, paper & a hole punch…decoupage et voila: 🙂

After all these years, several moves & even a location to another part of the country – and I had never used this book. Until now. I made this book in a very sad time in my life…I think it was waiting for a more positive time to inspire. 🙂

Jewelry Inspired: Getting Started with Gemstones

Turquoise

Back when I started jewelry making, the thought of using actual gemstone beads in my designs seemed unattainable. I was unemployed, and I had to decide between jewelry making supplies or food much of the time.

Then one day while browsing ebay I stumbled upon chip beads. Long, 18 to 21 inch strands of stone chips with a hole drilled in each – and if you think of how many beads you get per strand, that makes them more affordable than machine cut glass beads.

I must admit in the beginning I had a hard time using these irregular shaped gems in designs. But soon I grew to appreciate the raw feel of the stone. It also was a good practice in judging detail. For example, if I were to make a pair of earrings with chip beads it is important to try & find beads that are similar in shape & size so that both the earrings in the pair appear balanced.

I still have quite a few chip beads from “back in the day”- and will even pick up a strand or two here and there at a Gem Show if they catch my eye. My only word of caution is, they can be soft & fragile due to their irregular shape thickness, so if wrapped too tightly they can break.

Here’s some examples of jewelry I have made with gemstone chips:

Malachite

Mookaite

Howlite (dyed)

Turritella agate

Red tiger eye

Lapis lazuli

emeralds

turquoise

amethyst

garnet

My New Investment: A new DSLR Camera

Dslr

I’ve been quiet as of  late, & that is because last week I finally decided it was time to upgrade my camera & invest in something less automatic. I have been using a digital point-and-shoot camera for 4 years now,  & it has served me well. However I felt very limited. I wanted to be able to customize more, and also achieve true macro photos, rather than ” macro”  (close ups) with a telephoto lens. I wanted to get more detail in my photos; that 3-D effect you see with a true macro lens.I also found photo taking time consuming, as I would have to take several shots, then download them onto my computer, sift through the different angles and choose the best. Time is money. Being able to take a decent picture the first time, crop & go would be heavenly! Especially with the amount of jewelry I have been making lately.

So I assessed my needs. I knew for my budget and experience I wanted something relatively entry level as far as ” pro”  style cameras were concerned. For me that meant being able to add a macro lens. I needed speed & ease of use. I needed something I could learn quickly & start taking decent photos right away without much of a learning curve, but still be able to customize.

So I narrowed it down to the two main players. Will it be Nikon or Canon? In the end I decided on a Canon camera specifically because it comes with computer software (Nikon has software too but you have to purchase it separately). Computer software means – you can control your camera & shoot your photos directly to your computer – which is a huge time saver!

The other reason I was sold on a Canon is because Costco sold them. With Costco I can return the camera with no questions asked, so if it didn’t meet my needs it would be easy change. Also Costco products come with a 2 year warranty with my membership. For my budget, Costco had the Canon EOS Rebel XS and XSi series. The difference was about $200 on the price. In the end I went with the Rebel XS as I wanted to have cash for accessories like a macro lens & a remote switch. I figured a sacrifice of megapixels for a great lens was worth t.

Costco sold both cameras with an add-on package which included a bonus lens (comes with both EF-S 18-55IS and EF-S 55-250IS…I guess “IS ” is a relatively new technology for them that stabilizes the lens to compensate for camera shake) & camera bag. The macro lens and switch I bought from a local camera store. The switch is great because you don’t have to worry about moving/shaking the camera when you press the shutter, but honestly I’m not using it as much as I thought I would since I am controlling the camera from my computer. Still a handy accessory to have.

As far as the macro lens goes, it was a painful decision for me. I knew I wanted the 100mm macro lens, but it was a hard pill to swallow cost wise – more than the price of the camera. So I decided on the 60mm lens: EF-S 60mm f/2,8 Macro USM. It was roughly the same cost as the camera, which was easier for me to live with. I have to be closer to my subject to take the photo but it still photographs wonderfully and the motor is whisper quiet.

This is my old camera…good ol’  point-and-shoot Fuji Finepix. Bought for approx. $300 CAD 4 years ago. Served me well and we will still use it as a back up camera.

But how does it do for taking pictures, you ask? Is it really worth the investment? Keep in mind, I am still learning. But I am impressed by the results despite my limited knowledge of camera settings.

The one on the left is taken with my Fuji camera. That is about as close as I could get to the piece, and about as white as I could get the background without ” photoshopping” .  The one on the right is with the new Canon Rebel camera, absolutely no cleaning or tweaking of the image. Taken by someone who didn’t know what the heck they were doing. The macro lens was pretty much fresh out of the box here. I immediately fell in love. 😉 I’d say not bad for straight off the camera. I know many would argue it is washed out – that is a camera setting thing – I personally like the artistic merit of the image in this form.

Here’s my set up. My old laptop is controlling the camera. 🙂

I think my only disappointment is that there are some tools in the software unavailable for the XS and XSi series that the higher end cameras have the ability to do (like setting custom white balance).  I guess that means upgrade in the next few years. 😉

Read about my other new gadget that I love:  The Nook on my other inspired blog. 🙂

Come Tour My Jewelry Box: Pearls from the Philippines

Pearls

I attended a very dear friend’s wedding today, so I thought blogging about my pearls tonight would be fitting.

During my own wedding a few years ago, my mother’s dear friend whom she had known back in the Philippines traveled all the way from Switzerland to attend. That was an honour in itself, and then she gave me the gift of a string of pearls. What made them particularly special to me, is that they were hand picked from the Philippines. She gave me her blessing to go ahead and restring them.

So I decided to pair them up with some sparkly Swarovski crystal rondelles and add a sterling silver extender chain so that I would have the freedom to wear them at different lengths.

If I have never mentioned it before I will mention it now: I. Hate. Stringing. Pearls. I’ll do it, but I do not enjoy it. I admire anyone who can do it well and quickly: that just ain’t me. 😉

I put two pearls aside to make matching earrings; coupled with silver-gray freshwater pearls for contrast.

Oddly enough, I didn’t wear this set today. 🙂

I cherish having a classic set of pearls which hold such meaning for me.

Check out my fossil/slab necklaces also from my jewelry box. 🙂

Creativity Beyond the Beads: Wedding Invitations

Invitations

Before there was the beads, the wire, the metal – there was paper. I have been in love with paper crafts since I was a little girl. I used to sneak paper out of my dad’s desk and cut it up for later gluing into little books or drawing pictures on – as early as the age of 5.

I had the privilege of designing & making the invitations for  a dear friend’s wedding. The color scheme was lilac (lavender) with a gold accent. After consulting back & forth with my friend I chose card stock for scrapbooking in the two colours. In the beginning we were just going to do lilac & white but after she mentioned it I agreed that the gold accent would be nice.

I cut the lavender paper into strips using a paper cutter, and then cut small lengths of the gold paper to add as an edging.

Ribbon was added to the center of the strip.

This piece was then glued to the middle front of the card.

Inside the card, I had already placed lilac colored paper inside with a vellum overlay. On the vellum was printed the text for the card. The vellum was adhered with a vellum tape so that you did not see a mark where the tape was through the opaque paper.

My friend wanted a monogram design for the card. I designed one on my computer using Paint Shop Pro, and printed them out. Originally I designed this as a square monogram, but the couple preferred oval. At first I wasn’t sure how to achieve the oval shape neatly. Cutting free-hand was not clean or even at all. But before I gave up on the idea altogether the curvy cutter came to my rescue!

Using the graduated oval template for the curvy cutter, I made ovals with the lavender paper slightly bigger than the monogram to adhere as a backing.

I felt that there was an imbalance with the gold only down the sides of the middle strip, so I cut another slightly larger circle out of gold foil paper to make it all come together. I just wanted a bit of gold peeking out the sides.

The assembling…in progress. 🙂

Orphan Beads/Leftover Supply Project 5: Beaded Rings

Ring

I have been making rings like mad lately.

I don’t know why I never thought of this before, but what a great way to use up leftover beads: make some funky little cocktail-style rings with them! There are many affordable add-a-bead type ring bases on the market that you can purchase. These are silver-plated with an adjustable base. I love that they work up quickly and the end result is very cool!

It is a lot of fun to see what patterns emerge when you mix and match different beads. Wrapping them tightly in wire to finish them off makes a nice solid design…the shape is somewhat of a mystery until you finish wrapping.

I especially enjoy using different shapes. The end result is even more intriguing than your usual round bead.

Using up the mishmash of chip beads is by far my favourite material. The beads lay together tightly once wrapped & the colours of the stones blend together very well.

In fact the chip bead rings inspired a new limited edition collection I will be unveiling really soon…:)

Check out my orphan bead project: zipper pulls. 🙂

Come Tour My Jewelry Box: Fossils & Slabs

Fossil

It’s no secret, to anyone who knows me, I love rocks. I was ecstatic to find out my now-husband likes rocks too. Between buying beads, minerals and specimens we can do some major damage at a Gem & Mineral Show. Eventually we both want to get into rock hounding & lapidary. For now we leave that to the experts and simply admire.

These pieces from my jewelry box, are what I call my homage to the Gem Show: Slabs. 🙂

Above is an orthoceras, a common fossil. Both this slab & the one below were set into pendants by a Nova Scotian artist. These were purchased at the Parrsboro Gem & Mineral Show about 7 years ago. Paired with fossil beads (dyed black) and snowflake obsidian chip beads.

The above slab pendant, by the same artist, is paired with bull’s eye agate & flower jade beads, as well as milky quartz chip beads.

This pendant was from the LBS (local bead store). I loved the patterning of the agate & felt it went well with my collection. So I added this to the jewelry box a couple of years ago. 🙂

My style ranges from the big & bold to the sweet & dainty. But everything has meaning. 🙂

Check out my girls’ toddler bracelets also from my jewelry box.

Orphan Beads/Leftover Supply Project 4: Zipper Pulls

Bagcharm

This particular project is combining orphan beads with an excess of nickel lobster clasps. I upgraded to sterling silver lobster clasps sometime ago so I have a wholesale lot of nickel ones sitting around gathering dust.

So applying the same inspirational principle as the key chains and bookmarks, I came up with this zipper pull simply because the metal pull on my girls’ lunch box snapped off.

It gives a nice touch to the usually boring lunch box. I  think these would make cute little gifts for jackets, purses & bags, children’s shoes or even as cell phone charms. Since they are on the lobster clasp, you can easily change the pull to another style as the mood desires. I can see my girls having a lot of fun with these when they get older.

Orphan Beads/Leftover Supply Project 3: Keychains

Keychains

Expanding on yesterday’s post on Beaded Bookmarks – the same theory could be applied to make beautiful & inspirational keychains out of leftover beads:

A little positivity to take with you as you go about the day or a little keepsake for your friends & family to know you care. 🙂

Orphan Beads/Leftover Supply Project 2: Beaded Bookmarks

Bookmarks

Another great way to use up leftover beads is to adorn bookmarks. Bookmark bases come in a variety of shapes & sizes and best of all are readily available at most bead supply stores – many exist on Etsy. Or, you can buy leather cord and make beaded leather book thongs, also an affordable idea.

I like to include a bookmark in a birthday or Christmas card or if I am giving a book as a gift to personalize it even more.

To make them extra special I acquired some inexpensive word charms to make them an inspirational keepsake.

I also find it easier if I have some inexpensive findings on hand, rather than dipping into my main batch of findings for my jewelry work. I am always on the look out for  wholesale closeouts & sales so that I can acquire a large lot of findings cheaply.

Here you see pewter bead caps which I acquired at wholesale & on sale. Buy a large amount to get the best price, and then store them away for these type of mini projects. These bead caps are pewter & have a nice weight to them…and only cost a few pennies a piece.

Check out my orphan bead project idea: Hair Accessories

Artfire Collections & Etsy Treasuries

Artfire

It appears that Etsy has successfully launched their new treasury format, which now allows you to tag your creation with key words so to make it searchable.

Just recently Artfire also launched their Collections and users have been creating fast & furious.

Both platforms are a wonderful way to promote & blend together different art mediums you will find on each site.  heavenlyflower has been featured in:

Funny how the 3 Etsy ones are all featuring my turquoise color pieces! 🙂

Why I don’t Get Anything Done on a Saturday Afternoon…

Zany

I step out of the room for a brief moment, and look who found a new nap spot:

Before I assess the mound of jewelry to be photographed you plowed over, the tools you knocked off the table, and the amount of hair I will now have to delint…

I might as well get some nice shots of you. You are after all, in the photo box!!

That’s the Zany cat – 13 years still ticking & boldly going where no cat has gone before (because the other two are scared as to what I’d do to them if they attempted this!). 😉

All in a day’s work. 🙂

Come Tour My Jewelry Box: Grow-With-Me Toddler Bracelets

Toddler

The next items I wanted to share from my jewelry box, are actually not for me at all, but for my two little ones.

I designed ID bracelets for them that could be adjusted as they grow (currently my girls are 16 months and almost 3 years). Now as they are very young they wear their bracelets as anklets. The bracelet is one continuous chain. I simply slip the piece over their foot & clasp where comfortable. When they grow large enough that I cannot slip it over their foot anymore, they can continue to wear them as bracelets (I can easily slip the 8 inches of chain over my hand to fit my wrist).

I thought of making them baby bracelets and then as they grow designing larger ones however I like the value of being able to use the same object for as long as possible. My jewelry philosophy is to make something that lasts, so why not make an item for growing children that grows with them.

Both bracelets are constructed out of sterling silver chain. The alphabet beads are culinary grade lead free pewter. Both contain their birthstones in Swarovski crystals & a small charm. I added two small freshwater pearls to Sophie’s design.

See more items from my personal jewelry box. Check out my Wedding Jewelry in this post. 🙂

Orphan Beads/Leftover Supply Project 1: Hair Accessories

Hairpins

After 12+ years of jewelry making, I have a lot of beads without a home. Meaning, they are leftovers from past projects – from one to a handful – that I just don’t know what to do with. So when I opened my Etsy Shop, I decided to challenge myself to come up with designs using just the orphans & leftovers. 🙂

I am starting a blog series of quick & easy projects that can be done with leftover beads. I hope this helps kick start your creativity and for you beaders, gives you some inspiration as to what to do with those excess supplies.

The main key to these projects is making sure you have an excess of supplies that can be paired with your beads. So I always have on hand inexpensive ring bases, bead caps, hair pins, etc. that can be adorned with beads.

For idea #1, I give you the hairpin/barrette.

Having two little girls – who both were born with a lot of hair – is my inspiration for this project. I started decorating hair pins and barrettes for Sophie when she was 5 months old. She had quite a bit of hair to begin with, and the bangs were growing fast! I found these were a great way to use up the small lots of leftover beads.

I found out one day, that these hair pins also make great bookmarks! I needed to mark my page in a book, and one just happened to be lying around close by. And voila: dual purposed hair pin/bookmark. 🙂

Besides the hair pins I also like to acquire some of the long metal barrettes to bead on:

Other ideas: bead head bands, hair elastics & hair combs. Hair accessories are an affordable supply to keep around for such projects. They are available practically everywhere. I am always picking them up on sale at local department stores or pharmacies. They are even sold these days at you local Dollar Store. 🙂

Come Tour My Jewelry Box: My Wedding Jewelry Then & Now

Weddingearrings

After my last post about my prophetic charm bracelet – it gave me the idea to start a series on my personal jewelry collection. Over the past couple of years I have really been pairing down the collection to just a few dear pieces. Here’s the rest of my wedding jewelry, then & now. 🙂

I’m not exactly sure why I picked sapphire blue to be my corresponding wedding colour. I know that I wanted something different than the usual creams and lilacs and lavenders – & I was really into blue. I still find it an amazing “coincidence” that sapphire just happens to be Sophie’s birthstone…another major milestone in my life. 🙂

The earrings, then. Sapphire Swarovski crystals and crystal clear Swarovski drops, on sterling silver components.

The earrings, today. The sterling silver wire has a nice patina now that matches the frame.

The necklace was made up of 4mm Swarovski bicone beads & Swarovski briolettes.

The necklace today:

I wasn’t sure if I would make a headpiece, as it was not something I had a lot of experience with. But after seeing my options on the market, I knew I had to make one. I wanted something really simple & understated rather than the usual bling that is out there for wedding head dress. So, not having much experience with wire, I just let it flow adding a few Swarovski crystal beads here and there.

I made it so that I could be worn as a choker necklace ter the big day.

The “tiara” today: you know I have only worn it as a necklace once since! 🙂

The final piece was a last minute addition, & in the excitement of it all I didn’t get a “then” photo. But here it is “now”, my wedding anklet. 🙂

Jewelry Inspired: My Prophetic Charm Bracelet

Weddingbracelet

If you are familiar with my work, or have ever picked up my business card, you may recognize this bracelet. It is the official logo for heavenlyflower.com.

This bracelet has a lot of significance beyond just being something pretty to use as a logo. This piece represents many facets of my life, and it is ever changing.

I designed this bracelet as part of my bridal jewelry. At the time, I wanted something that represented my wedding colours, and a few inspirational charms to serve as good luck for the big day. It wasn’t until after the wedding was long over that I realized that the bracelet held potential to become an ever-evolving keepsake of memories & symbolism.

The bracelet originally was made up of sapphire & clear Swarovski crystals, a few inspirational word charms (“celebrate”, ” honor”, “trust”, “wisdom”, “joy”), symbols (paw print charm for my love of animals, St. Francis of Assisi medal), and an “L” and “R” for our first initials. I also had a mother daughter charm (I will get to that one, shortly…). I used a magnetic clasp because I didn’t want to be fumbling with clasps on the big day! 🙂

Fast forward 16 months after our wedding, and the birth of our first daughter. I started thinking about the bracelet again, and wanting to add elements to it that symbolized me now as a parent.

When I took the bracelet out of the jewelry box, I was astonished to realize that the two types of crystals used symbolized both my birthstone and my daughter’s (Sapphire for September – when Sophie was born, and April is diamonds – signified by clear Swarovski crystals). Sophie was supposed to be born in October – but was 2.5 weeks early. To me, this was fairly significant.

These past couple of years, I have added new elements. An ” S” for my daughter’s fist name, baby feet charm, and a ” Mom” charm. A ” teach” and “patience” charm when I needed to be reminded! Just recently I added an “A” for my second daughter, and updated the clasp to a sterling silver flower clasp.

I mentioned the mother-daughter charm earlier. I have half a heart that says “daughter” – I made a bracelet for my mother for my wedding, and it has the other half of the heart, that says “Mother”. Her bracelet contained the birthstones (symbolized with Swarovski crystals) for myself and two siblings.

My mother passed away suddenly on October 25, 2008 at the age of 54. My dad had asked me if I wanted her engagement ring, and at that moment of grief I decided that she should be buried with this bracelet (I wear her engagement ring on my right hand and am glad I decided to keep it).

Over the weekend I decided to add my youngest daughter’s birthstone to the bracelet – and I used Swarovski bicones instead of the round beads. Ava is very angular in features just like a little ram – she is an Aries afterall, and it just seemed to fit better. 🙂

See the rest of my wedding jewelry in the post: Come Tour My Jewelry Box: My Wedding Jewelry Then & Now

Artist Inspired: Keepsake Necklace Featuring N Valentine Studio

Nvalentine

Last week,  I received a real gem in the mail. Not a precious stone per se, but a handmade keepsake that means the world to me.

This is one of Nicole Valentine-Rimmer‘s (of NValentineStudio) keepsake lampwork beads: and inside contains two locks of hair – each from both my girls’  first hair cuts.

I was so amazed when I received it – I had sent her the locks of hair and was astounded at how she got it inside the bead – and so neatly displayed as well! So my task at hand was – what to design along with it? The bead on its own is a true focal and I didn’t want to attract too much attention away from it. In fact I put it on a sterling silver chain and declared: done! 🙂 But what could I do to make this more special to me, as I wear it on a regular basis?

So I started forming this idea for an asymmetrical style necklace which contained an engraved sterling silver heart pendant (as I am working toward developing a customized engraved line) and a sterling silver word bead. I didn’t want a lot to detract away from Nicole’s keepsake bead – and something asymmetrical to me would still allow the bead itself to be the focal point.

I will have to admit – this was not an easy necklace to photograph. The glass of the bead reflected the light and camera – and I buffed the pendant on my polishing lathe to a high shine so – finger prints – as much as I tried to remove them at set up, would be glaringly obvious, and looked like scratches in the photos. After some fiddling with lights and camera position, here’s what we have:

I engraved my girls’ names on the heart blank – and added a word bead: “inspire” – because I am dedicated to living an inspired life and my children certainly inspire me. I also wanted the word as a reminder to always inspire them.

The word bead is stamped on both sides so regardless of which way you wear it or if the bead flips around it will always say “inspire”. So I needed to engrave something on the back of the heart pendant. I decided to go with a mother and child symbol – a mother holding baby in arms.

When I engraved the symbol – I would have liked it to be one maybe two sizes larger to fill up the pendant more. So I had this idea to adhere Swarovski flatbacks in our birthstone colours to help fill up the space. The larger one on the left is mine: for April – diamond, the girls (September and March – Aquamarine & Sapphire ) on the left.

I’m not sure how I feel about the Swarovski flatbacks. They certainly look nice on the necklace as I wear it, but it is hard to remove finger print smudges around them. One good thing is that they bond really well to the metal. I put them through a bit of abuse this weekend to see if I could get them to fall off – suffice it to say unless I plan on soaking the pendant in acetone, they should stay put. 🙂

I’ve been wearing this necklace all day, and will probably wear it almost everyday! What makes it so special to me, is the keepsake bead.

Nicole has been making beads at her home studio in Victoria, British Columbia for almost 6 years; 2 years full time. Besides making lampwork beads she is  also a metalsmith &  does some viking knit and byzantine. She also teaches her craft, developing a class specifically for silversmithing for lampworkers.

She is inspired by the wilderness, her animals, and  color. “I love color the brighter the better right now.” On her inspiration for the keepsake beads, she says, “I’ve been wanting to offer something unique as a keepsake for a while. We lost a horse last year and I was trying to think of a way to have a memory of him. Hence the filled beads were inspired.”

Check out more of Nicole’s work  by visiting NValetintineStudio on Etsy and her blog.

It is my hope that we can collaborate on this piece together and it is my plan to offer it for sale on my website.  I want to be able to allow the customer to choose either just the bead or add my elements to it as well. Of course, you can also buy the bead direct from Nicole as well! Whatever you decide, it is sure to be cherished for years to come.

My New Comfy Work Chair

Chair

So the other day I was at Costco and broke down & bought myself a “proper” chair. I’m not sure exactly what a “proper” chair for jewelry work would be – before my house I was an apartment couch beader, so it’s all new to me.

All I know is, the chair I was sitting on previously – which was lovely by the way – handmade by the previous owner, sturdy and high backed, was still a dining room chair meant to enjoy meals with & not sit for long periods of time hunched over an engraver or beads.

So this was not too bad, $100 plus an instant $20 rebate. It is definitely comfy. My legs don’t fall asleep anymore, and if I lean back while thinking or doing certain kinds of work it is great. But there is still the problem of leaning over to do accuracy work. I still get pain at times in my middle back/between my shoulder blades. Hubby thinks I need a lower desk – I am using a flea market table due to its large size – but then wouldn’t I be hunching over more? Sure sitting on a yoga ball would probably be the best for my posture but terribly impractical – can you imagine – pliers in one hand and jeweler’s glue in the other – yeah, I see an accident waiting to happen. 🙂

So this will do. For now anyway. What is your work bench set up and how do you find it?

Jewelry Inspired: Custom Engraved Charm Necklace

Om

I have been talking for several months now about my newly acquired manual engravers – AKA pantograph engraver or engravograph as New Hermes likes to call them.

I thought it was about time I finally shared a completed piece of jewelry showcasing their engraving abilities. 🙂

I call this piece a charm necklace because of the size. It is dainty and meant for everyday wear. Above you see the Om symbol engraved onto a 18x11mm sterling silver blank. (Besides the Om, I also have a Celtic knot, mother/child (which you will see in an up-coming post),  heart, butterfly, flower, awareness ribbon, cross, as well as several logos of organizations. I can order more shapes and symbols upon request). Above it hangs a 4mm freshwater pearl – symbolizing wisdom, faith, focus & luck.

I then added a birthstone fairy in Swarovski crystal – the birthstone is emerald, for May.

Here’s a view of the back of the engraved charm – “Aurore” – the name of the recipient (this was a birthday gift for a dear friend – the entire piece is inspired by her).

A view of how the piece hangs when worn.

I loved this design, & decided to make one for myself! Here is the back of mine, showing my name engraved in a cursive font.

Just to get an idea of the size. It is small and ideal for everyday wear – I wear mine almost everyday!

So a little background – how does the pantograph engravers work? I’ll do a future blog post illustrating how they work exactly, but essentially they are large tracing machines. You have fonts and logos usually constructed out of the traditional brass, however recently I have also discovered a kind of hard resin that glides like butter in my machine, & it’s a fraction of the price of the brass sets (for example, a new brass font set with a fancy lettering can run you upwards of $800!) One end of the arm traces the font or logo plate while the other end has a diamond bit graver that engraves the image onto the metal. It works in ratios, so if you have it set to a 2:1 ratio – usually the largest size, the engraved image will be half the size of the template….and through approximately 12 different settings (including half sizes), gets smaller from there.

Unlike hand-stamped jewelry, engraving in this manner will give you a near-perfect image since it’s tracing a template. It does take a bit of practice and skill to not slip while tracing and get the even pressure (since this is manual afterall!) necessary. Also, blackening the image via oxidation as is the norm with hand stamping will give an engraved image a dull appearance – it is best to simply let it it remain in the colour of the metal. (I love hand stamping too and is another skill I hope to acquire down the road! It is a totally different look & feel!).

My mind is bursting with ideas…but before I get ahead of myself, the plan moving forward is to use this piece as the test object for mywebsite of custom jewelry. If all goes well with the programming I will add more pieces from there.

Until then, for more info on ordering this piece contact me directly: leilani@heavenlyflower.com

Cool Tool: Tube Wringer

Tubewringer

I can’t resist a new gadget, especially if it is an affordable one.

So with my Contenti order last week for polishing buffs, I found this little tool that I couldn’t help but add.

Meet the tube wringer. Technically, it is for industrial use to make seals and to squeeze every last bit of product out of well, tubes. Think toothpaste tube – on an industrial scale. 🙂

However, the tube wringer can be used to make an attractive crinkle pattern on metal sheet. Consider it a cheap little rolling mill. So for $22 I thought, why not give it a try.

I got out some copper sheet and the metal snips to cut a length of the metal.

I inserted the metal and the tool clamps shut easy enough. It was awkward at first getting the length to start travelling through the tool evenly. I think with practice, I will be able to get the proper feel for even pressure. But once I got it started, the rest was very easy – very little effort was needed. I am sure this would depend on the gauge of metal sheet or wire you are using.

The crinkled metal. So many ideas come to mind: what would it look like with a patina? Hammered? Riveted to flatter metal…Hmmmmm….

Tool & Supplies: Nu Gold Sheet

Nugold

I needed some fine polishing buffs, so I decided to order a product called “nu gold” along with them to try.

I bought sheet in two gauges, 24 and 26. Nu gold is 85%  copper & 15% zinc. It looks like gold sheet, only at a fraction of the price. I thought it would be a great way to practice working with metal sheet with the appearance of gold without buying the real deal. If I screw this up – who cares? No need to be gun shy working with this product!

Jewelry Inspired: What Summer Means to Me

Butterfly

Artbeads offered us bloggers a chance to try out some supplies* & design a summer theme. My first instinct is to gravitate toward blues, yellows, pinks, white: bright colours & pastels. Then I stopped myself. That is my assumption of summertime jewelry. But what does summer mean to me?

I grew up in Nova Scotia, so the ocean was never far away. But I grew up in the Annapolis Valley Рso the ocean was not the prominent landscape. Now that I live in Qu̩bec, I live near a lake. So there is indeed water, but like the muddy banks of the Bay of Fundy, it is not the crystal clear blue/green water you will see in the Caribbean. It has more of an earthy quality.

Thinking of where I spend most of my time in the summer months, I like to be outside in my garden: either working with the dirt or relaxing in the shade when it’s too hot. I like to observe the plant life and insects as they exist in harmony with one another.

In the summer, you will see me in a lot of khakis, earth-toned capris & shorts: tank tops – very simple & casual. If I go out to an event, chances are you will see me in a simple black dress and black thong sandals. So it occurred to me – what summer means to me: spending time connecting with the earth & casual socializing.

After this contemplation, I decided to choose two pendants from Artbeads that I thought most represented me in the summer months.

This 18x25mm onyx pendant is hand painted with a butterfly by a Russian artist. Butterflies are very symbolic for me: they represent beauty in nature, as well as transformation – something I strive to do many times in my life. This pendant would be perfect in a casual outfit or little black dress.

As mentioned in my last post, I had a hard time choosing colours for this piece. I just have too many hues of yellow & orange in my vast stash of beads! I ended up going with just a splash of colour with these 4mm jade beads. Too much colour with the black onyx and it would look too halloween-ish or bumble bee-ish! Plus I wanted the beauty of the pendant to take center stage & not get lost in a sea of bright colour. So I used mostly onyx beads (6mm and 4mm), sterling silver chain & bead caps.

When I approached the design for the second pendant, I didn’t have to look far for the perfect matching component. Something about this stoneware pendant reminded me of a particular bead. Was it wood? No. It would have to be a stone, with many different colour layers. Then it hit me: Moukite!

Moukite (or mookaite, “mook jasper”) is a type of jasper found in Australia. I love this stone for it earthy colours & broad patterns – anywhere from reddish-brown, gold, white, or even mauve/pinks! It was the perfect compliment to this pendant, which is made of glazed stoneware clay.

The pendant easily accommodates the 10mm beads. I decided to break up the bulk of the beads & add interest with these 8mm sterling silver twisted rope jump rings, mainly because they reminded me of the pattern of the white flower in the pendant.

I thought I’d share a tip: I wanted the rings to lay flat on the neckline. In order to achieve this, I had to pay close attention to the pattern. I noticed that I had to twist the loop wraps around the single beads (the group of three beads have their loops facing the same direction). I had to make sure that the wrapped loops on the single beads were alternating: meaning, instead of them facing the same direction , I needed to have one facing outward. Here is a picture that hopefully will illustrate what I mean (sorry it’s a bad picture):

I held the loop to the left with my fingers, then gently twisted the loop on the right with my pliers 90 degrees. This variance in the loops means the rings laid flat against my neckline instead of sticking out uncomfortably.


Bringing The Beads Back to The Bench…

Bench

I haven’t done any beadwork in quite awhile since I have been teaching myself some metal techniques. Today I brought the beads out again in order to work on my Artbeads Blogging for Beaders Project for Summer.

I doubt I will finish both pieces today…actually I know I won’t, esp. since this beautiful weather is calling me outdoors!

I have to admit something: I have WAY too many supplies. I am serious!! Not exactly a bad thing – but over the past two and a half years, I seem to have had more time to BUY beading supplies than MAKE jewelry! Plus I scope out suppliers, buy wholesale and volume discounts and close outs – well, you get the picture. When I sat down to look at colour options for these two necklaces, I had too. many. choices.!!  In a way it was overwhelming – too many possibilities! I spent a half an hour this morning just looking & considering colour schemes!! I came to the conclusion for example, I have way too many gemstone beads in the hue of ORANGE!! I went to get large guage headpins and paused to consider dozens and dozens of different metal components. And I am organized – believe you me – it’s just too many choices staring at me. At this point, I think I could open a small store…if I had the time! HA!

Anyway, I mean that somewhat in jest of course – but still…anyone else feel the same way – even some days?? The possibilities are endless when it comes to beads…I thought I was limiting myself by not buying glass anymore but nope… 🙂

Happy Creating! I should be posting this project within a couple of days…

Cool Tools: What I Got for My Birthday…

Dapping

I am incredibly lucky to have an extremely supportive spouse. Perhaps maybe too much so: he loves cool tools as much as I do so he rarely tells me “no” if I want something tool related. Thankfully, I have some restraint…. 🙂

Here are a few items I received for my birthday on April 22 – Earth Day! Forget flowers & chocolate: get me some tools!!! 🙂

New metal shears! I have a large pair of shears but I wanted a smaller pair. The ones on the right cut on a curve. Neat-o!

Metal hole punches. I have a screw-style metal punch, but I wanted to try this type as well. I will do a comparison review in an upcoming blog post.

This is the item I wanted the most: a dapping block and punch set! I can’t wait to get my hammer on these! 🙂

This is a really neat tool and a total splurge. It’s a necklace mandrel: so you can form a necklace by lightly hammering so that it lays properly across the neck. Very cool…!

This was real nifty as well…what a great way to organize all the little burs and tools. I really like that I can hang my pliers on the back as well. You don’t know how much running around I do for these items! Now, all in one place. Ahhhhh…. 🙂

I also got muslin buffs for my polishing lathe and metal files but that’s BOR-ING compare to these. Now if I can get caught up housework, I can go play. 🙂