Amazing Dishrags – Knitting Cotton Dishcloths

Knitting cotton dishcloths is a fun and simple project that make great add-on gifts

Why I am Knitting Cotton Dishcloths

When I started knitting cotton dishcloths, I thought I’d maybe make a couple to try and that would be it. I gave one to my husband, who washes the majority of the dishes, to try. “Can you make some more?” He said, “Those are awesome!”. They have become his fave dishcloths, and it has become a ritual that every autumn I make a new batch: some for him, some for gifts.

I also crochet dishcloths which I equally like, but this post will look at simple knitted cotton dishcloths that you can easily make on the go or in front of the TV. You’ll have a ton of gift add-ons in no time!

My wall of cotton yarn, that I hand dyed with fiber reactive dyes – see that racoon on he wall? My mom made that when I was a child. She passed in 2008, so I’m very proud to display it in my studio.

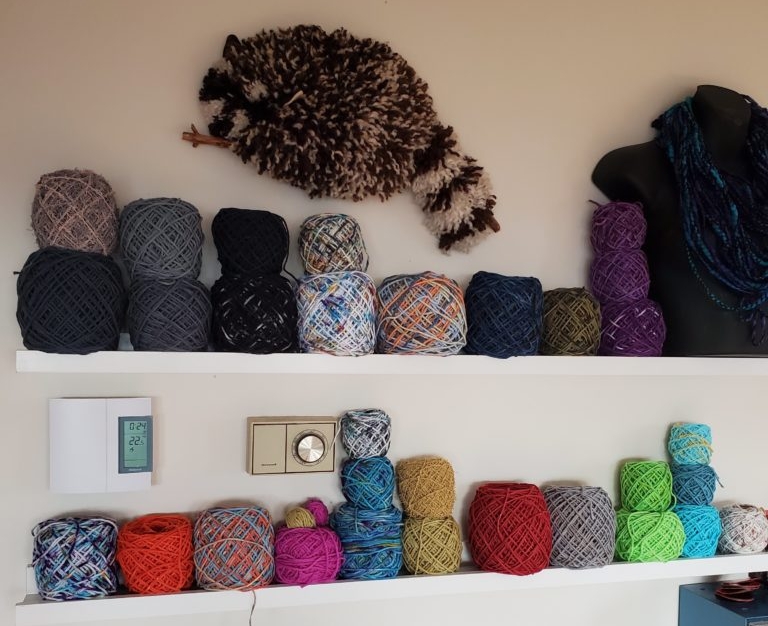
You may have read my post on dyeing cotton yarn. Whether your stash is store bought or hand dyed, these are the simple patterns that I like the most for knitting cotton dishcloths.

Why Make Knitted Cotton Dishcloths

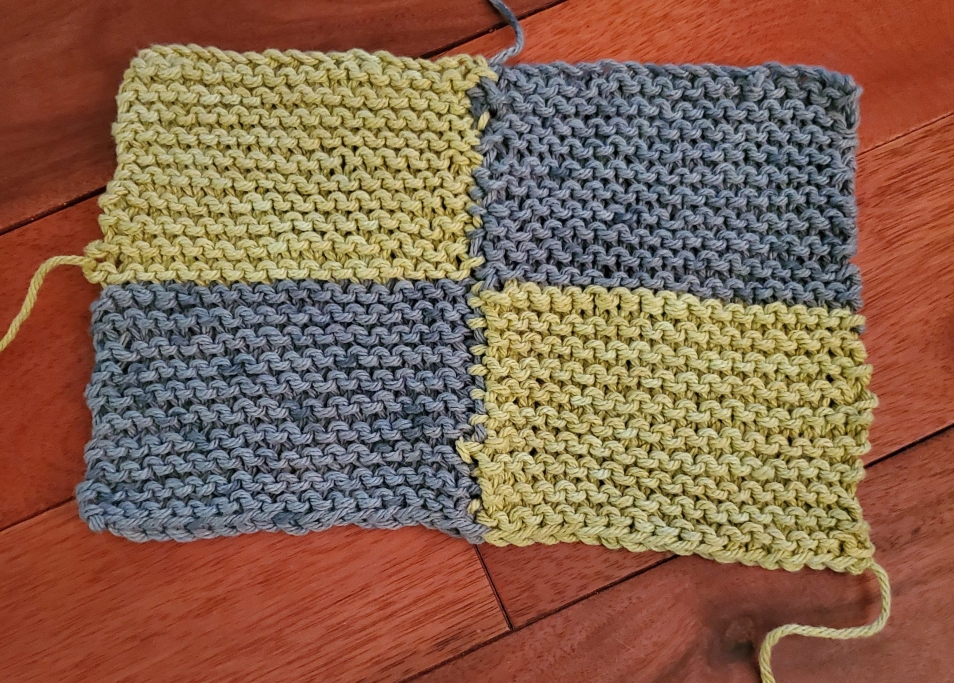
Cotton dishcloths are super absorbent and feel great in hand. I prefer a pattern where front and back look the same or similar. I’ve tried a lot of patterns and the simple, basic knit stitch looks best, in my opinion. To add interest you can accent with different types of stitches mixed in. That means these patterns are perfect for beginners!

Cotton is a completely different textile to knit compared to wool. Yes, the mechanism of knitting is the same, but cotton is not springy like wool. Since it has little to no give I find that it can be hard on the hands if you knit a lot in one sitting. You also don’t want to make your stitches too tight or it’s hard to knit the next row. Too loose however, and you may find your dishcloth falling apart prematurely.

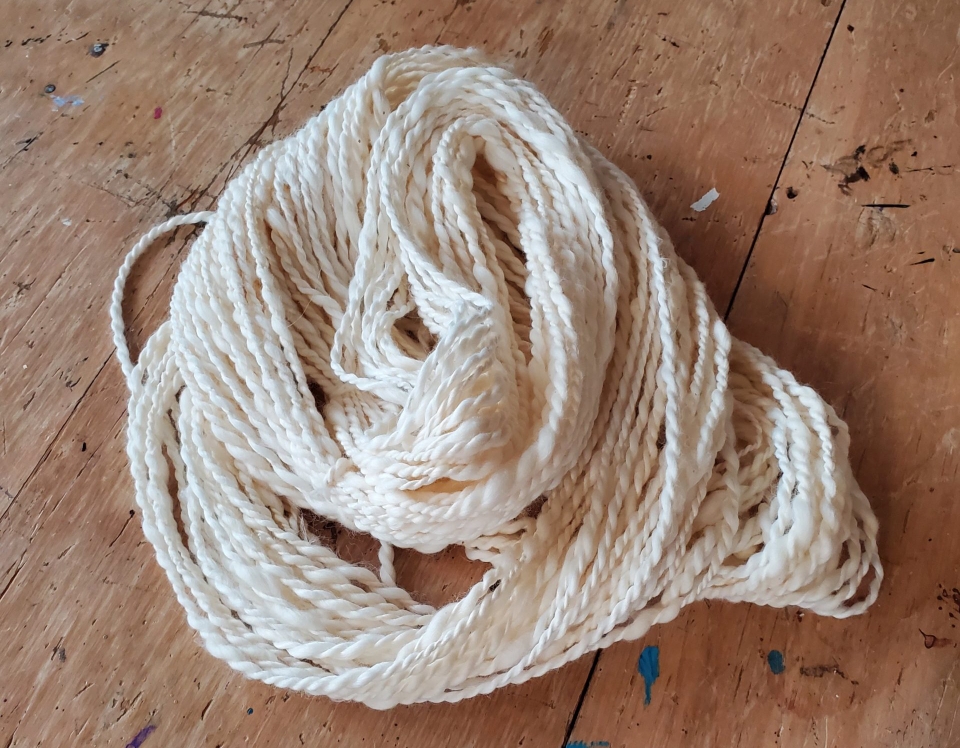
I’m curious how handspun cotton will feel, because I find it to be significantly softer. You can also buy cotton/acrylic hybrid yarn that feels softer in hand, but I personally don’t have any experience with it.

My first attempt at spinning cotton yarn. It’s much softer than the commercial variety. It’s very short stapled so I think next time I will need to spin it from the fold if I want a thinner yarn. I’ll write about dyeing and knitting this yarn, another day.

My Fave Memorized Dishcloth Pattern

My fave simple easy knitted dishcloth using two different colors of yarn. The contrast color was a speckle dye.

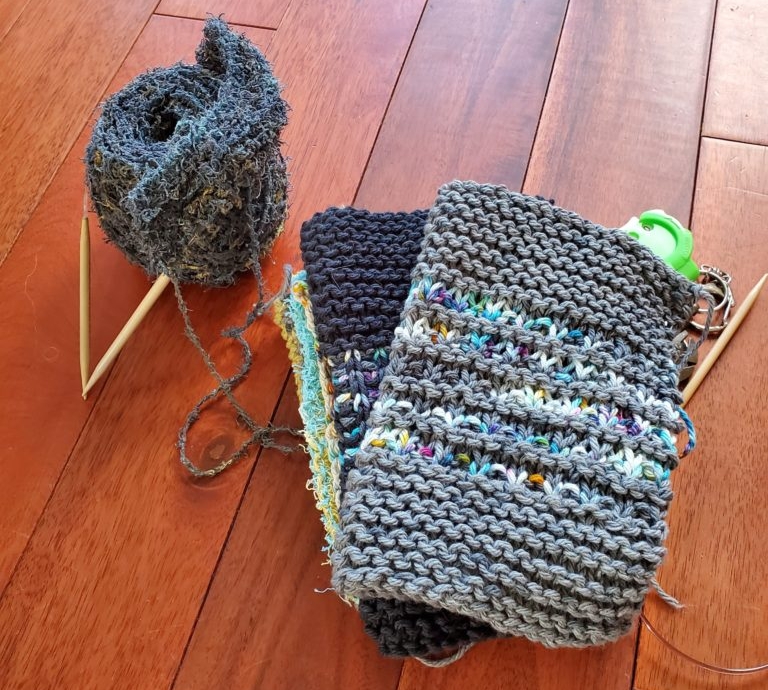
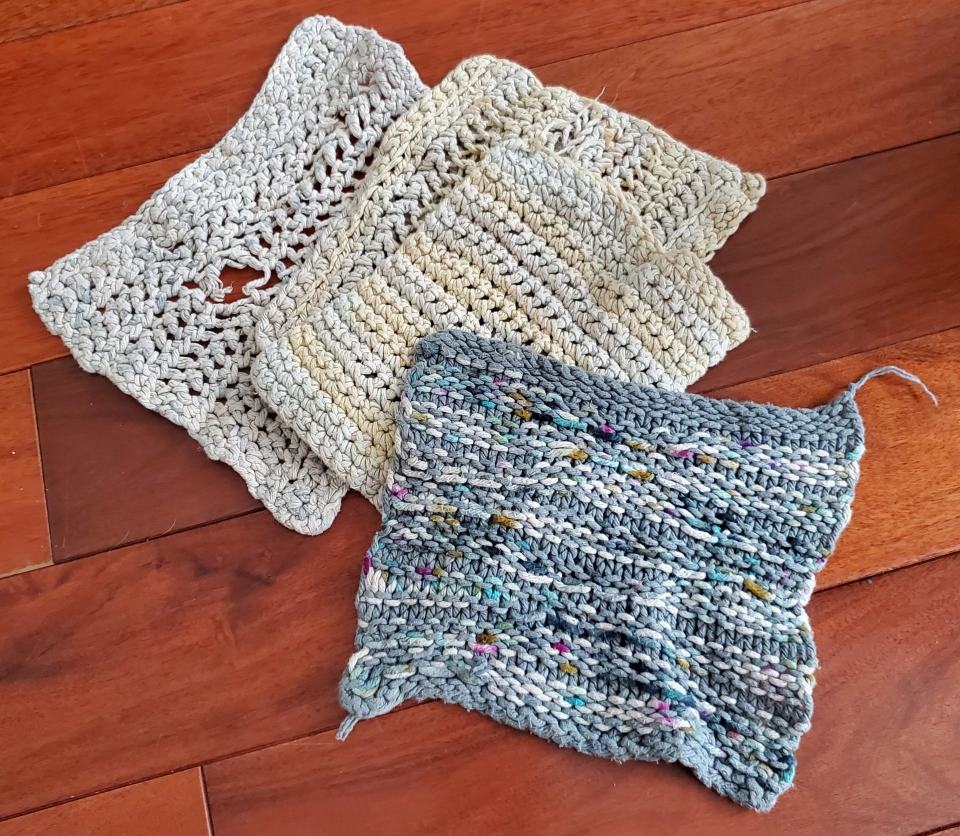
This is a really simple idea for knitting up a basic dishcloth. I was tired one night and wasn’t ready for bed, so I let my hands and brain do what it wanted.

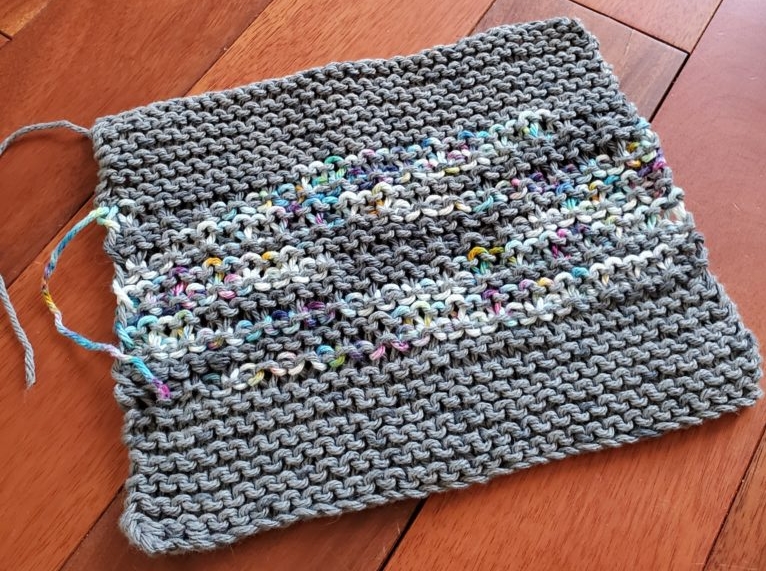
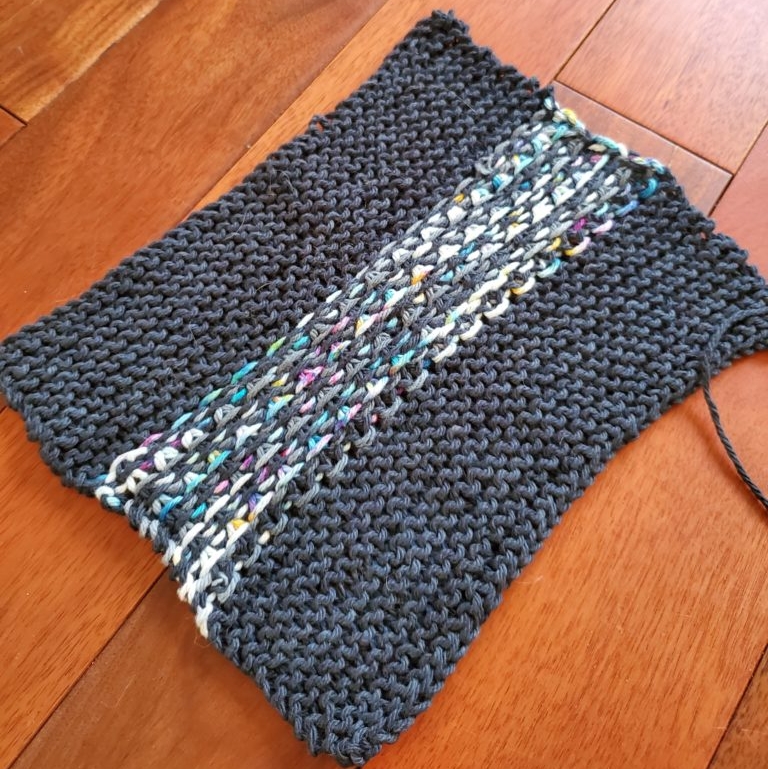
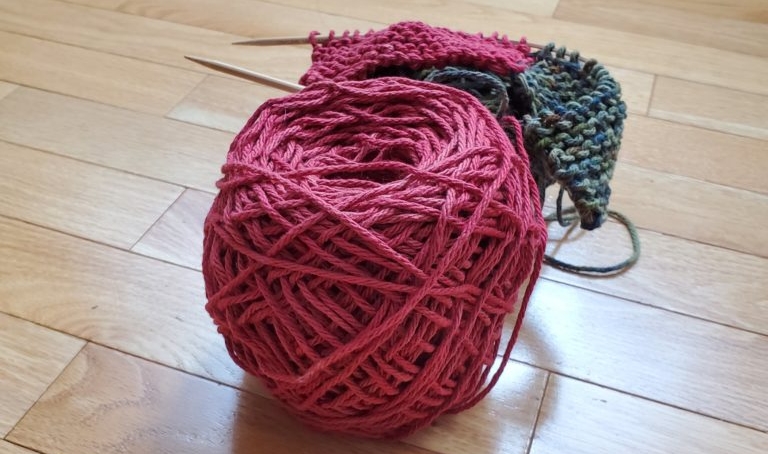
Here’s the pattern, it’s very easy to remember. I’m using mill ends cotton, with size US7 needles. You can make your dishcloths as big as you wish, so simply use my sizing as a guide.

With MC (main color) Cast on 32

K13 rows with MC

Row 14 – switch to C2 (color 2) – K1P1 across

Row15 – K1S1 (knit one, slip one) across with C2

Row 16-17 – with MC, knit across

Repeat Rows 14 – 17 5x

Then knit MC K13 rows

Cast off

I told you it was easy! Perfect for beginners, and easy to do while watching a movie or sitting on the bus (or waiting for kids to be done their activity, which is the story of my life).

This dishcloth was knitted as a variation of Knit Picks Woven Stripes Dishcloth Pattern

Other Easy Patterns You May Wish to Try

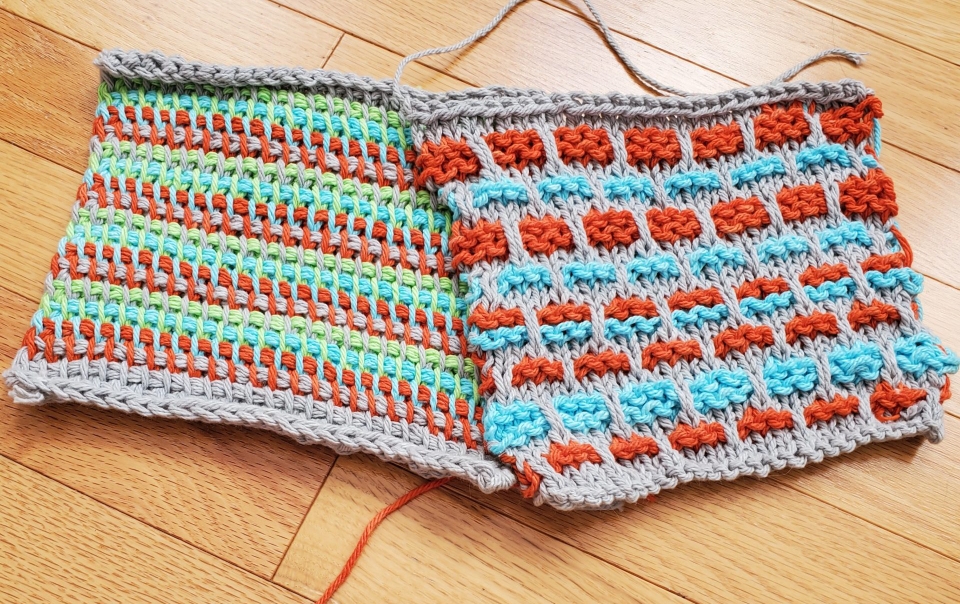
KNIT PICKS WOVEN STRIPES DISHCLOTH

KNIT PICKS WOVEN POLKADOTS DISHCLOTH

KNIT PICKS INTRO TO INTARSIA DISHCLOTH

I like these three patterns as well, free for use from knitpicks.com. Super easy to remember. I make mine smaller than the patterns call for.

As you can see I put off weaving in ends last minute! Probably my least favorite thing to do in knitting projects. I messed up the join in the middle (too loose in some areas), but I cut a long tail and wove it through to remedy that.
Easy Short Row Knitting makes a nice looking dishcloth with two contrasting colors. Why not try 4 colors? That’s on my to try list!

Other Types of Cotton Yarn to Knit With

Cotton scrubby yarn is easy to work with too – since you can’t see the stitches, just do the knit stitch every row. They work wonderfully on stubborn baked on food.

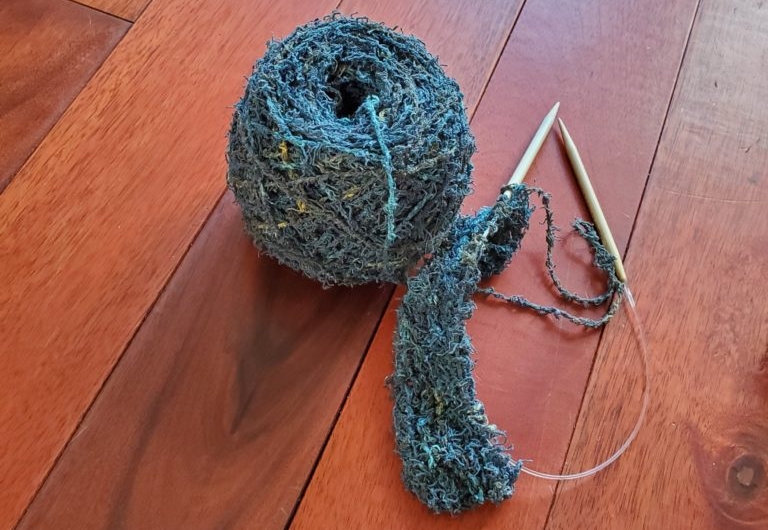
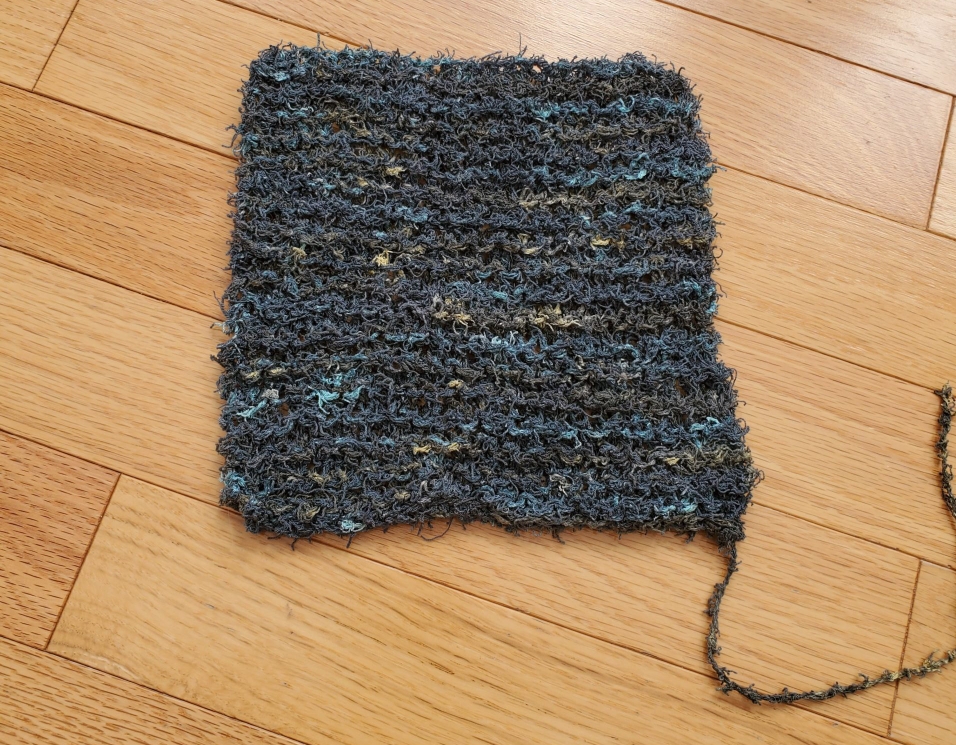
I enjoy making little scrubbies with cotton scrubby yarn. I’ve wondered if I could spin a variation of this, maybe like spinning a bouclé? It’s certainly an affordable yarn to buy commercially, so I’ll stick to that for now. I buy the white and off-white, and dye it myself.

There is also an acrylic equivalent to this yarn, but I have no experience with it. Since it has a texture I don’t do anything fancy with it, just the basic knit stitch. You won’t see the pattern well anyway, due to the yarn construction. I make these even smaller than the traditional knitted dishcloth, by request of my hubby. He liked the smaller size for scrubbing out pots.

The finished scrubby dishcloth. Make them whatever size you desire. My DH likes them on the smaller side.

Other ways to Come up with Dishcloth Patterns

Think of some of the patterns you love in other projects such as hats, scarves or sweaters. One thing I also like to do is practice new-to-me stitch patterns.

Practising tunisian crochet (left) and working out a pattern from my encyclopedia of stitches (right)

How Long Will Knitted Dishcloths Last

Knitted dishcloths do fall apart eventually. The type of stitch you use, as well as how loose your stitches were knitted will make a difference. I also find really lacey patterns, although pretty to look at, fall apart quicker than basic knit and crochet stitches. At least this is true for dishcloths, they would probably be fine for face cloths.

Above is an array of dishcloths in various stages of use. The front cloth was made this time last year, and will have been in circulation for one 1 year later this month. The other two are approx. 3 years older, and you see they are starting to develop holes. We use them until there is basically nothing holding them together anymore, so we still expect to get at least a couple years worth of use from the old ones. Also of note is how my dyeing skills have improved since! You can read my post on dyeing cotton yarn for more info.

Once I get through this batch of cotton yarn I really want to try making dishcloths and hand towels out of bamboo. I’ve heard such great things about bamboo for these practical purposes. I love to spin bamboo, so I think it willbe a fun project to embark on. More on that in a future post.

Do you love or hate to knit with cotton? Will this post encourage you to give it a try or do you have an tips or tricks for me? Would love to hear from you…

Leilani signature

Cat Themed Note Cards

P1040092

P1040092

I needed a quick gift to give a fellow cat lover and there was no time to order jewelry supplies & design something in such a short period of time. One thing I had immediate access to, was cat rubber stamps. So I made a set of note cards.

P1040093

These cards feature stamps from My Favorite Things & Hero Arts sets. They are colored with a water brush & distress inks – mostly the new Oxide inks which I love! They color much differently than the original distress inks – which looks like watercolor paint. The oxide is more vibrant – cartoonish I guess – which I love.

P1040095P1040100P1040101

P1040098

For this next group of cat themed note cards I used a combination of distress inks and copic markers. I wanted a really simple note card but found the end result rather plain. So I added some Nuvo Crystal Jewel Drops and I loved the dimension they added. I adore the jewel drops the most as they have a nice translucency. The final card in this series (above) was to resemble a cat the recipient owns, but it was hard to get his unique black and white coloring.

P1040082P1040083
The next two cards were achieved by masking the stamped area in order to sponge on a background with Distress Oxide ink. I stamped the cats on first and colored them. Then I cut out the stamped image from a piece of full stick post-it notes. After covering the cats with the post-it note cut out (above), I applied the oxide ink with my Ranger ink blending tool, then spritzed & dripped water onto the ink. Here are the results:
P1040097P1040084
White embossing powder sets the sentiment on black paper die cut with a scalloped edge. Sequins made the best finishing touch.

Finally, as a thank you card for the recipient I made this card:

P1040087
P1040088
I love the cat peeking out the window and the curtains, what I don’t love is that I made it in a rush since the other cards took most of my time and all I see is the things I could do better. But, it was cute nonetheless, and practice makes perfect.

I’m thinking of offering some inexpensive cards sets on my website since I love the majority of how these ones turned out. If it comes to fruition, I’ll include a link here when they are available to purchase. Either way, I hope this post inspires your paper crafting or card making.

blogsig2

Loss…Grief…Love

P1030695

I haven’t been in the best of places lately.

Last week, we lost one of our fur babies: suddenly & unexpectedly.

I am wracked with grief. He was only 11 months old. Cause is still unknown.

I can’t even post a picture of him because it hurts too much. Even worse I can’t get the look on his face while he was dying off my mind. Anyone who knows me well, knows my cats are like an extension of my personality. I feel like I failed him – I missed something – I didn’t do enough…

On top of it all I am beating myself up because it is “just a cat”. There is far worse loss I could experience, berating myself to get over it only makes it worse. I am an emotionally fragile person. I am not ashamed to admit that. I live large, I love hard.

I am jumpy. A loud noise, a kid’s cough, a sudden or unexpected movement…I am on edge just waiting for something bad to happen. To top it off one of my senior cats has been in poor health and I sense we will not have him much longer. So I’m on edge about that too.

If I analyze this I think the whole experience takes me back to my mother’s sudden and unexpected death 8.5 years ago. I am reliving some of that grief…and shock…and fear of loss…

Today is the first day I felt like doing….anything. That is, besides my mom duties, that I have been auto-piloting through. I wish I had my children’s acceptance, resilience. They were sad but soon got over it. Today I held on to the small urge to create, and made some new stitch markers inspired by the snow storm we just had. I hate being in the studio because out of all of my cats that was his territory. As I worked away he was always sitting on my desk, on the couch or on my drum carder. There is such an emptiness now that he is gone.

I’m now so very far behind on everything and not even sure where to start. My Etsy shop is back up – I feel ready to make orders again.

Despite how I feel, I was able to create some cards for my girls for Valentine’s day. I also helped my girls finish their cards.

Valentine Shaker Cards for my girls "Love You More"
Valentine Shaker Cards for my girls “Love You More” decorated with distress ink and my new fave product, Nuvo drops

Last month my girls did some watercoloring that I then cut into hearts for their Valentines. We even finished them with a shimmer spray for that extra something something…

watercoloring by my girls - a simple and affordable craft - $3 watercolor pallette on clearance from Staples and 40% off watercolor paper from Michaels
watercoloring by my girls – a simple and affordable craft – $3 watercolor pallette on clearance from Staples and 40% off watercolor paper from Michaels – one of their fave art projects to do

Valentines my girls created for their grandmother

For the above cards, we adhered their watercolor hearts to embossed and distress inked card stock. I asked the girls what sentiment they wanted on the front, printed it on the laser printer and then gold foiled them via a laminator. As a finishing touch the girls added sequins and confetti to their taste.

I also made this little card for my father-in-law. I like to make miniature cards. Something about packing a lot of punch in a small space...
I also made this little watercolor card for my father-in-law. I like to make miniature cards. Something about packing a lot of punch in a small space…

I don’t feel up to explaining in detail the techniques in these cards – if you’d like to know more send me a message, or comment below. I love paper crafting. Glad to be able to share this craft with my girls…

Have you liked my Facebook page? I decided to stop paying to boost my posts there. It’s becoming costly esp. with the difference in the Canadian and US dollar. So if you have liked my page, be sure to like a few of the posts to ensure I show up in your newsfeed.

Anyway, I am pushing myself to be more present today. It is night now, which is by far the worst. I lay in bed and dwell on things. Hoping for some sleep tonight. There has been very little, this past week…

blogsig2

ETA Mar 2: we heard from the vet today re: necropsy. He had feline g.i. eosinophilic sclerosing fibroplasia – if you google this, you will find very little info as it is both rare and a newer disease, even vet researchers are unsure of the cause. There was nothing anyone could have done. Today, I feel like I can be at peace, and remember him fondly.

My boy. RIP I will miss you <3

Knitting Bling: Stitch Markers

Dpp 1307

I don’t know why it took me so long to merge the jewelry making with knitting accessories. It was about a year ago that I looked down at my knitting with the usual plastic craft store stitch markers and thought, “hmmmm….I bet I could make something prettier, and less hard to lose”.  Not long after that knitting bling was born & I cannot churn the ideas for these out fast enough. They are such a cute little accessory for your knitting/crochet. If you spend a ton of time at these activities like I do, why not have something sparkly, fun & useful at hand?

Here’s the designs I currently have available:

IMG_2564
Stitch Markers Knitting Bling: Set of 8

My personal fave, featuring the ball of yarn with needles charm, paired with faceted crystal rondelle. These beads are reconstituted glass and they sparkle like crystal.

DPP_1307
Stitch Markers: Engraved A-H Gold with Freshwater Pearls

I engraved this set of stitch markers from A – H: great for projects such as sock knitting. Slip on needles or clip on stitch. The gold is paired with freshwater pearls. Also available in silver, with silver faceted glass beads.

Stitch Markers Knitting Bling: Stars Size Small

Twinkle twinkle little star: these cute stitch markers are paired with a small star charm & faceted glass rondelle in various colors.

DPP_2048
Stitch Markers: Slip on or Clip On – Bird

Another slip on needles or clip to stitch set of 8, this one with a sweet bird charm & freshwater pearls.

DPP_2054
Stitch Markers: Slip On or Clip On – Owl

I love these little owl charms. Slip on or clip to stitch, set of 8 with freshwater pearls.

More designs will be on their way in the future. I have a few in conceptual stage, as well as more engraved and personalized designs, which I would like to expand on more. How about your own monogrammed stitch markers?? Oh la la… 🙂

If there is any design or variation you’d like to see, leave a comment below…

signature

Drying flowers with silica

Img 2704

IMG_2704

A couple of years ago I bought a container of silica granules from Lee Valley used for drying flowers 3-dimensionally. At the time I had all kinds of plans/ideas for projects/arrangements to do with various flowers particularly the ones growing on our property yada yada…I tend to have a lot of creative ideas but not a lot of time for follow through with 3 kids & a jewelry business…plus a growing love for the fiber arts. 🙂

My girls really enjoy picking flowers mostly everything ankle high; although they’d have at your flower bed if you let them. 😉 So with a growing number of little flowers coming my way daily, and the “I wish I could keep them forever” lament, I decided to dry them & finally try out those silica granules.

I also have a flower press, and we have done projects with it in the past, but never the 3-D way. These are small so they took no time to dry, we let them sit for approx. 3 days at a time. I put half the amount in these glass bowls we use for crafting, carefully arranged the flowers on top, and then poured in more silica burying the flowers with it. I did this process as I did not want my littles eating silica gel…that would be very, very bad…

So now the question is…what to do with them? They are small, so the only thing I have come up with thus far is setting them in resin…maybe making the girls pendants out of them…I can’t seem to think much past the jewelry making aspect…any suggestions of projects are welcome…otherwise, google, here I come… 😉

signature

Our Wedding – Some Inspiration

Dscf2586s

This year during our wedding anniversary, we went through some of our wedding photos for a little nostalgia. I thought I would post photos of our theme for those looking for a little wedding inspiration. I have posted my wedding jewelry on here before but not sure if I shared our favours, etc…

Credit for these photo should go to Chris Gallant Photography (if you are looking for a photographer in Halifax, NS for your event, I would highly recommend Chris & his team for their creativity, easy going attitudes and fun personalities :)).

I cannot remember off the top of my head the suppliers we used for flowers & cake – if you are interested send me a message directly and I will look it up for you. 🙂

Our theme was tropical inspired on account of my Filipino heritage and the fact that we wanted our reception to be low key and laid back, however I still wanted to keep some traditional North American elements. These were the wedding favors I made myself. We had a lot of guests attend from all over Canada & the US, even one couple coming as far as Switzerland. So I got sand from the seaside of Nova Scotia, washed and bottled it myself. The bottles were bought in bulk online – hot sauce jars essentially. I made the labels as well as a “Nova Scotia Facts” tag.

Programs were made at home on my ink jet printer…

This was a fun little game to help our guests pass the time while waiting for us to arrive at the reception. We left cards and pens on the table so they could write predictions of where they saw us in 5 years. After they were completed they places them in a keepsake box on the guestbook table.

Dyed blue roses…they weren’t as expensive as we thought! I wanted something basic/traditional but slightly out of the norm… 🙂

Handmade wedding invitations. Textured paper and faux flowers and ribbon on the outside…

…the inside: announcement printed on vellum paper. The back is more faux flowers arranged on blue paper.

My shoes and clutch. These are ballroom dance shoes (for comfort) I hand dyed blue painting the color on with a brush. I had intended to go much darker but after two applications really liked the subtle blue tone. The clutch & shoes were purchased online. You can see my wedding necklace I made draped on the clutch.

On the guestbook table, we had photos of us as babies as well as a collage of the two of us made up of photos of us growing up (you can see it poking out on the left hand side of this photo).

I remember the cake maker was really excited to make our cake because he never got a request for a blue one.

For wedding jewelry inspiration, you can see mine here on these posts:

https://leilanihandmade.com/tour-jewelry-box-wedding-jewelry/

https://leilanihandmade.com/artist-inspired-prophetic-charm-bracelet/

Cool Tool: Silica Gel Dehumidifiers

Silica

Recently I moved my finished jewelry pieces to a jewelry carrying case equipped with jewelry trays instead of my usual plastic baggie in binder or on shelf option. I wanted everything in one place and most of all – portable so I could easily take my work with me to show potential buyers. However  I was a little concerned about tarnish since the jewelry is no longer concealed in plastic with an anti-tarnish strip. I placed anti-tarnish strips inside the case but I didn’t have  the confidence that they would do the trick.

Then I found these silica gel humidifiers from Lee Valley. They wick the moisture out of the air around metal gardening tools – so why not try them in the jewelry case? I bought the 40g one which is nice & compact. I like that once the beads fill up with moisture you can pop them in the oven & dry them back out – reusable over & over again.

It’s been several weeks now & so far so good. I’m thinking of getting another; one for the bottom of the case & one for the top.

I’ll report back with an update in a few months. I figure if the results are not great then I can always throw these into my garden shed. 🙂 But so far…no complaints.


Creativity Beyond the Beads: Handmade Book

Book

The other day I was looking for a new book to write down my creative ideas, and I came across this one that I had made 10 years ago. A printer, old photos, paper & a hole punch…decoupage et voila: 🙂

After all these years, several moves & even a location to another part of the country – and I had never used this book. Until now. I made this book in a very sad time in my life…I think it was waiting for a more positive time to inspire. 🙂

Creativity Beyond the Beads: Wedding Invitations

Invitations

Before there was the beads, the wire, the metal – there was paper. I have been in love with paper crafts since I was a little girl. I used to sneak paper out of my dad’s desk and cut it up for later gluing into little books or drawing pictures on – as early as the age of 5.

I had the privilege of designing & making the invitations for  a dear friend’s wedding. The color scheme was lilac (lavender) with a gold accent. After consulting back & forth with my friend I chose card stock for scrapbooking in the two colours. In the beginning we were just going to do lilac & white but after she mentioned it I agreed that the gold accent would be nice.

I cut the lavender paper into strips using a paper cutter, and then cut small lengths of the gold paper to add as an edging.

Ribbon was added to the center of the strip.

This piece was then glued to the middle front of the card.

Inside the card, I had already placed lilac colored paper inside with a vellum overlay. On the vellum was printed the text for the card. The vellum was adhered with a vellum tape so that you did not see a mark where the tape was through the opaque paper.

My friend wanted a monogram design for the card. I designed one on my computer using Paint Shop Pro, and printed them out. Originally I designed this as a square monogram, but the couple preferred oval. At first I wasn’t sure how to achieve the oval shape neatly. Cutting free-hand was not clean or even at all. But before I gave up on the idea altogether the curvy cutter came to my rescue!

Using the graduated oval template for the curvy cutter, I made ovals with the lavender paper slightly bigger than the monogram to adhere as a backing.

I felt that there was an imbalance with the gold only down the sides of the middle strip, so I cut another slightly larger circle out of gold foil paper to make it all come together. I just wanted a bit of gold peeking out the sides.

The assembling…in progress. 🙂

Orphan Beads/Leftover Supply Project 4: Zipper Pulls

Bagcharm

This particular project is combining orphan beads with an excess of nickel lobster clasps. I upgraded to sterling silver lobster clasps sometime ago so I have a wholesale lot of nickel ones sitting around gathering dust.

So applying the same inspirational principle as the key chains and bookmarks, I came up with this zipper pull simply because the metal pull on my girls’ lunch box snapped off.

It gives a nice touch to the usually boring lunch box. I  think these would make cute little gifts for jackets, purses & bags, children’s shoes or even as cell phone charms. Since they are on the lobster clasp, you can easily change the pull to another style as the mood desires. I can see my girls having a lot of fun with these when they get older.

Orphan Beads/Leftover Supply Project 3: Keychains

Keychains

Expanding on yesterday’s post on Beaded Bookmarks – the same theory could be applied to make beautiful & inspirational keychains out of leftover beads:

A little positivity to take with you as you go about the day or a little keepsake for your friends & family to know you care. 🙂

Orphan Beads/Leftover Supply Project 2: Beaded Bookmarks

Bookmarks

Another great way to use up leftover beads is to adorn bookmarks. Bookmark bases come in a variety of shapes & sizes and best of all are readily available at most bead supply stores – many exist on Etsy. Or, you can buy leather cord and make beaded leather book thongs, also an affordable idea.

I like to include a bookmark in a birthday or Christmas card or if I am giving a book as a gift to personalize it even more.

To make them extra special I acquired some inexpensive word charms to make them an inspirational keepsake.

I also find it easier if I have some inexpensive findings on hand, rather than dipping into my main batch of findings for my jewelry work. I am always on the look out for  wholesale closeouts & sales so that I can acquire a large lot of findings cheaply.

Here you see pewter bead caps which I acquired at wholesale & on sale. Buy a large amount to get the best price, and then store them away for these type of mini projects. These bead caps are pewter & have a nice weight to them…and only cost a few pennies a piece.

Check out my orphan bead project idea: Hair Accessories

Creativity Inspired ~ Cool Tool: Microwave Flower Press

Flowerpress

Earlier this year I obtained this neat little contraption called a Microwave Flower Press. They are available at many garden supply stores. I wondered if they really would dry flowers in minutes and still retain the same delicate quality of a flower traditionally pressed in heavy books.

The press is comprised of two terracotta slabs, wool pads and broad cloth. It boasts the ability to dry press flowers in as little as three minutes, and that it will retain the colour of the flower better than the slow-drying method.

After laying the wool pads and cloth onto the terracotta, take the flower(s) you want to dry and arrange them on the broadcloth. It was the middle of winter when I tried this experiment, so I obtained some plants with small flowers from the home improvement store.

After you have the flowers placed as you like, carefully place the other broadcloth, the other wool pad and then the other terracotta slab on top – sandwiching the flowers in between.

Into the microwave we go. It’s recommended that you microwave in 30 second intervals so not to over dry the flowers. Since these were small flowers, I complied with the suggestion. It took about 2 minutes to do most of these little flowers.

I did this experiment twice – and these are the successful flowers. One variety would not dry properly at all – either they were over done & flaky – therefore stuck to the broadcloth, or still retained moisture and stuck to the broadcloth – so just as unusable, either way.

These are the variety of flowers that did not work in the microwave press; I pressed them the traditional way – in heavy books – for 3 weeks. I agree with the claim that the colour is retained in the microwave press. The flowers I traditionally pressed did fade somewhat.

I look forward to trying out larger flowers this summer in the press. I’d also like to incorporate this into jewelry making somehow: maybe set the dried flowers in resin? Oh the ideas… 🙂

Creativity Requested: Adventures in Komboloi

Komboloi

DSCF1741

I had a request for a komboloi (worry beads). I have never made worry beads before, so I jumped at the challenge. After getting a few details, I started searching through my supplies to see what I have that would be suitable. Luckily I have a pretty decent stash of supplies now. I buy wholesale, so unless I need to order a few hundred dollars in supplies, I don’t take custom requests unless I have the beads on hand. With the exception of, the chance I may be attending a gem show or personally visiting a supplier where I can pick up a few things at wholesale price. In this instance, I was putting in an order for chain anyway so I added a couple of strands of carved bone beads for accents.

A traditional komboloi is constructed out of light organic materials such as amber, coral, wood or nut beads, bone, horn…although they can be made out of just about any kind of bead from glass, crystals or gemtones. The key is to have a good feel weight wise but still be light enough to make the pleasant clicking/tapping sound when the beads hit together.

So…since I have never constructed one before, this posed several challenges for me. I had to judge size, weight and length as well as decide which materials I felt would work the best.

In the instance that I get a request for something that I have never encountered before, I will come up with a few variational designs (at least three, usually), show them to the potential client, and have them judge which they like best or tweak a design to their liking (if possible). This way the client can see my creative take on the design. Extra pieces get listed in my online shops.

The design itself looked simple enough, but I ran into a few challenges. Without having the client feel the beads first hand, I wasn’t sure which size would be suitable. So I had to do a lot of digging through my supplies picking a few variable sizes that the client could try to help decide which felt the best to them.

Just when I thought I had the right variations, I ran into a major problem with stringing the beads. I had originally laid out some leather cord & chain – of which none of the beads fit through. Holes on stone beads tend to be on the small size to prevent slippage.

So before throwing in the towel I dug deep into my stringing supplies and also got out a very useful tool: a bead reamer! It’s used to help file & shape out the holes of beads to (hopefully) make the passage wider. I ended up with 4 different designs in the end.

DSCF1786

I decided to construct this horn & bone piece first since they had large holes & slipped easily through the chain. 11mm translucent butterscotch horn beads with 10mm carved bone beads on an antiques silver chain.

DSCF1747

I dug out some waxed linen cord to make this one & was delighted that it easily slipped through the holes but has a durability that is needed for the constant clicking together of the beads. This one is 10mm onyx beads with 10mm carved bone beads. A 25x8mm carved horn bead is accented at the bottom.

DSCF1765

I was really excited to work with these beads as they are very unique. I bought them sometime ago with the intention of making a men’s piece out of them, and never got around to it. It’s 14mm black banded agate that has been treated with an acid to give it this cool denim crackle finish. These are the beads that I had to ream (file) the inside of the hole to get he to fit through the chain. But it worked! Accented with a 25x8mm carved bone bead.

DSCF1774

Finally, I chose these 16 – 18mm jade rectangles to make the final piece. It is constructed with a tough beading wire, and accented with a  25x8mm carved bone bead.

It was a fun experiment nonetheless. Always good to be pushed outside the box!