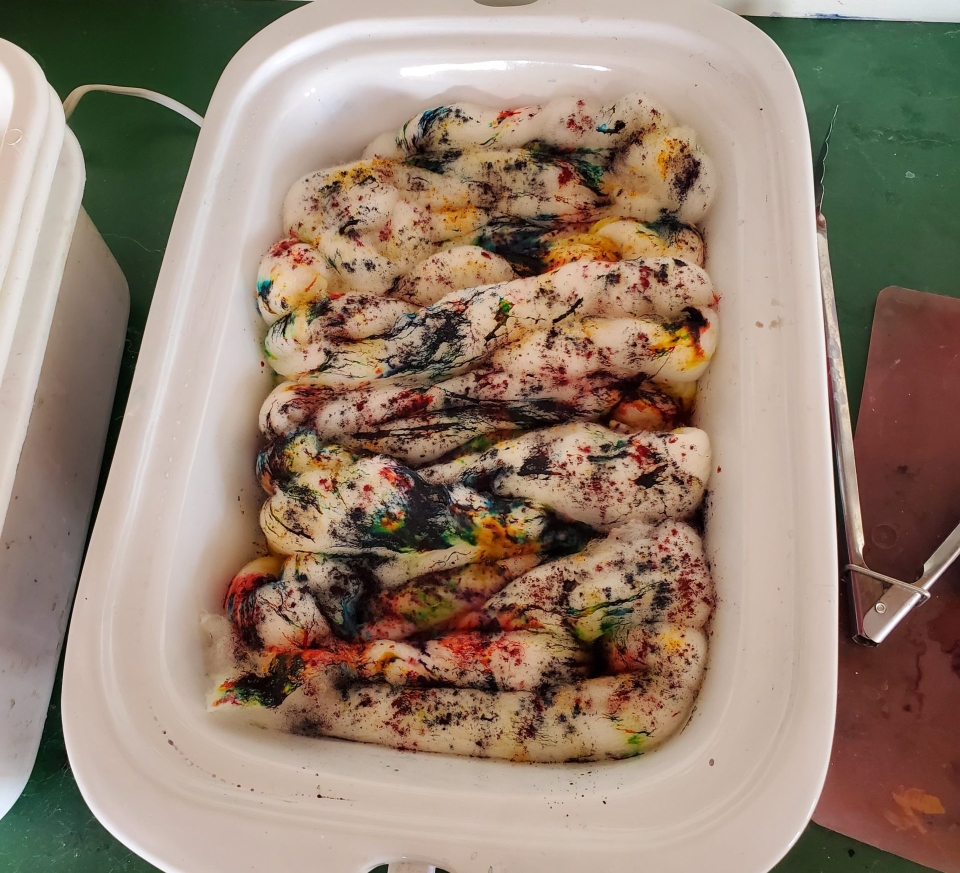
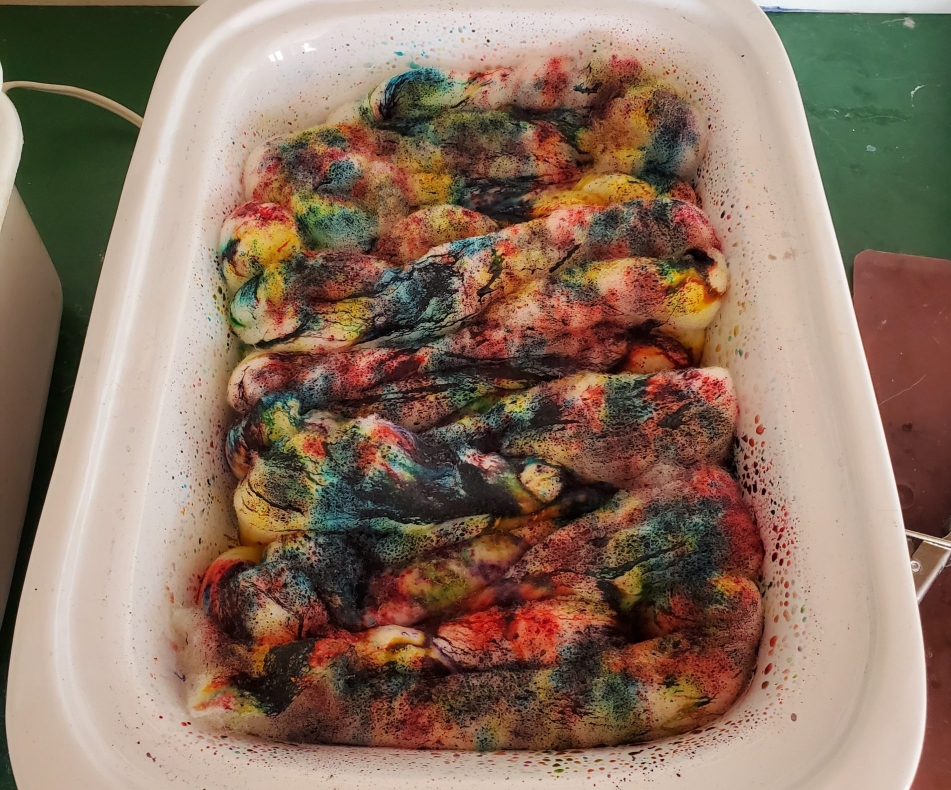
I was curious as to what would happen if I simply set out to dye a piece of roving, throwing all the rules out the window that I ever learned about dyeing fiber, such as not pre-mixing or even measuring dye for that matter, allowing muddy colors (letting the dye colors to all mix together during low water immersion), not setting out with a plan or choosing colors that will compliment rather than clash, for example.
What if I just…dyed roving? Sprinkled on a little powdered dye here and there, what will I end up with, and would the subsequent handspun yarn just be too ugly to even speak of?
What I found is that it’s not so much in how you dye the fiber, but in how you spin it.
Now, if you are the type of person who dyes fiber for spinning for specific projects, this may not be the technique (or lack thereof) for you. But if you are like me and get excited about spinning based on the color (sometimes a challenge) and the journey, then you might want to give this a try.
This is also a great jumping-off point for you if you’ve always wanted to try dyeing but were too scared to try it. Before you reach the level of expertise where you get what you want, I stress the importance of getting a feel for dyeing, much as with spinning or any creative skill.
In Part One I cover the “ugly dye” process:
Dyeing Ugly Roving, Part One
Part two is how I tackled spinning the ugly roving and the final product. Hardly “ugly” – if you ask me. 🙂
Dyeing Ugly Roving, Part Two (the Spinning Part)
Truthfully, I’ve never met a dyed roving I disliked – colorwise anyway. I have bought rovings back in the day at wool shows that were terribly overworked and were slightly felted. They were no fun to spin. So I revamped those by reblending them with either my hackle or drum carder, sometimes with or without added fiber from my studio. This is truly why I love spinning so much – there’s hardly any waste if you are thoughtful. Even if you are learning, you can always revamp those first-time rovings and handspun yarn into other projects (more on that in the future).
Will you give “ugly dyeing” a try or buy that “ugly roving” from the fiber festival? So long as the fibers are not partially felted, rovings of all colors can be a joy (and a pleasant surprise!) to spin.
More “ugly dye” projects are coming up in the future. The best way to know when they are posted is to either check back here on the blog or subscribe to my YouTube channel. I enjoy sharing my spinning experiments and hope they inspire your dyeing and spinning projects.
I’ve owned my Brother Drum Carder for ten, if not 12 years. At the time, it was considered the most affordable drum carder on the market. Although they are still in the cheaper category drum carder wise, the price has increased significantly (what hasn’t?!), which makes me wonder who is affording a drum carder these days!
That said, I wanted to create a video showing how I make textured batts on my drum carder, which I feel very privileged to own these days, given the current economic climate.
Batts vs. Rovings
This post is a companion post to textured blending with a hackle, which is a more cost effective way to texture blend fiber for spinning. I really enjoy my hackle and use it more than my drum carder, though I must say, I do like having the option of using either.
By the way, although this post showcases making batts, you can also use a diz to pull rovings off the drum carder just like with a hackle.
The Wrong Carding Cloth
When I decided to get a drum carder, I really didn’t have that much experience with one, well, I had none really. Just what I saw at wool shows and online as other people demo’d them. It just made common sense to me to have one since I was doing my own fiber processing. I really didn’t understand the different carding cloths and what would suit my needs. So I went with a medium carding cloth, because it’s right in the middle. So that should be precisely what I need, right?
For blending traditional style batts, either out of top or raw (scoured) fiber, the medium cloth is perfect. What I wasn’t expecting was that the batts I preferred to spin were chunky and textured. I should have known, since I was always drawn to the bulky, funky, textured art yarns. You would think I would have realized that I would need a course carding cloth. But noooo…
Stuck with a medium carding cloth but the desire for chunky batts, what should I do? The easiest and most obvious solution is to buy another carding cloth. But truthfully, by that time I had purchased quite a bit of fiber tools, including another spinning wheel (of which I have four now…two were used, okay? 😉 ). I didn’t want to spend any more money.
An Unexpected Solution
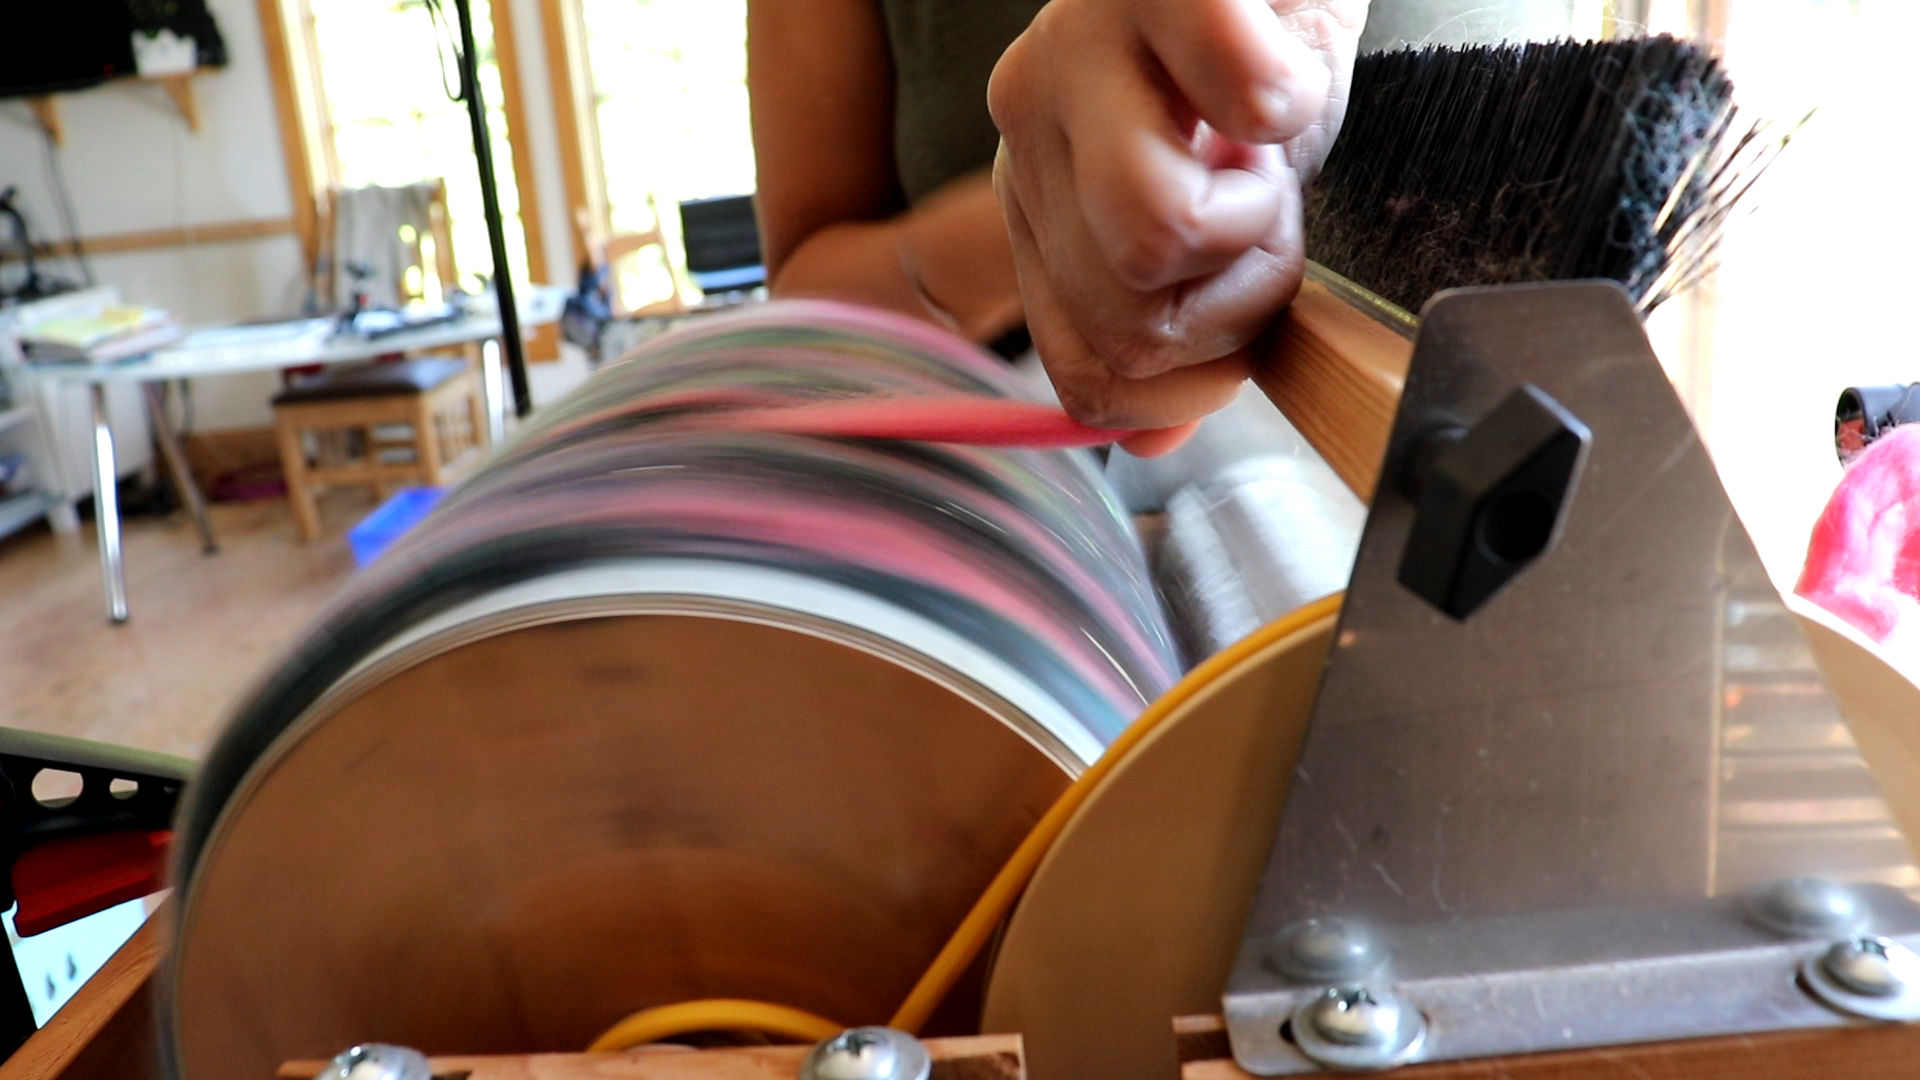
One day, I was blending some silk and became frustrated with how the carder was up-taking the fiber. Too much was going on to the licker-in (the smaller drum). I wasn’t happy with cleaning the licker-in with perfectly fine-to-use silk fiber, and feeding it through again and again. I also couldn’t get the silk divided and fed through so it would blend evenly.
So I got the idea to feed the silk directly onto the main drum while I cranked the handle slowly. And lo’ and behold, this worked wonderfully! I could place the silk wherever I wanted, and it blended just to my liking. I got to thinking: could I make chunky, textured batts this way?
And so this is how this technique was born: a way to achieve a textured chunky batt without a coarse carding cloth.
Watch the Video Demonstrating the Technique
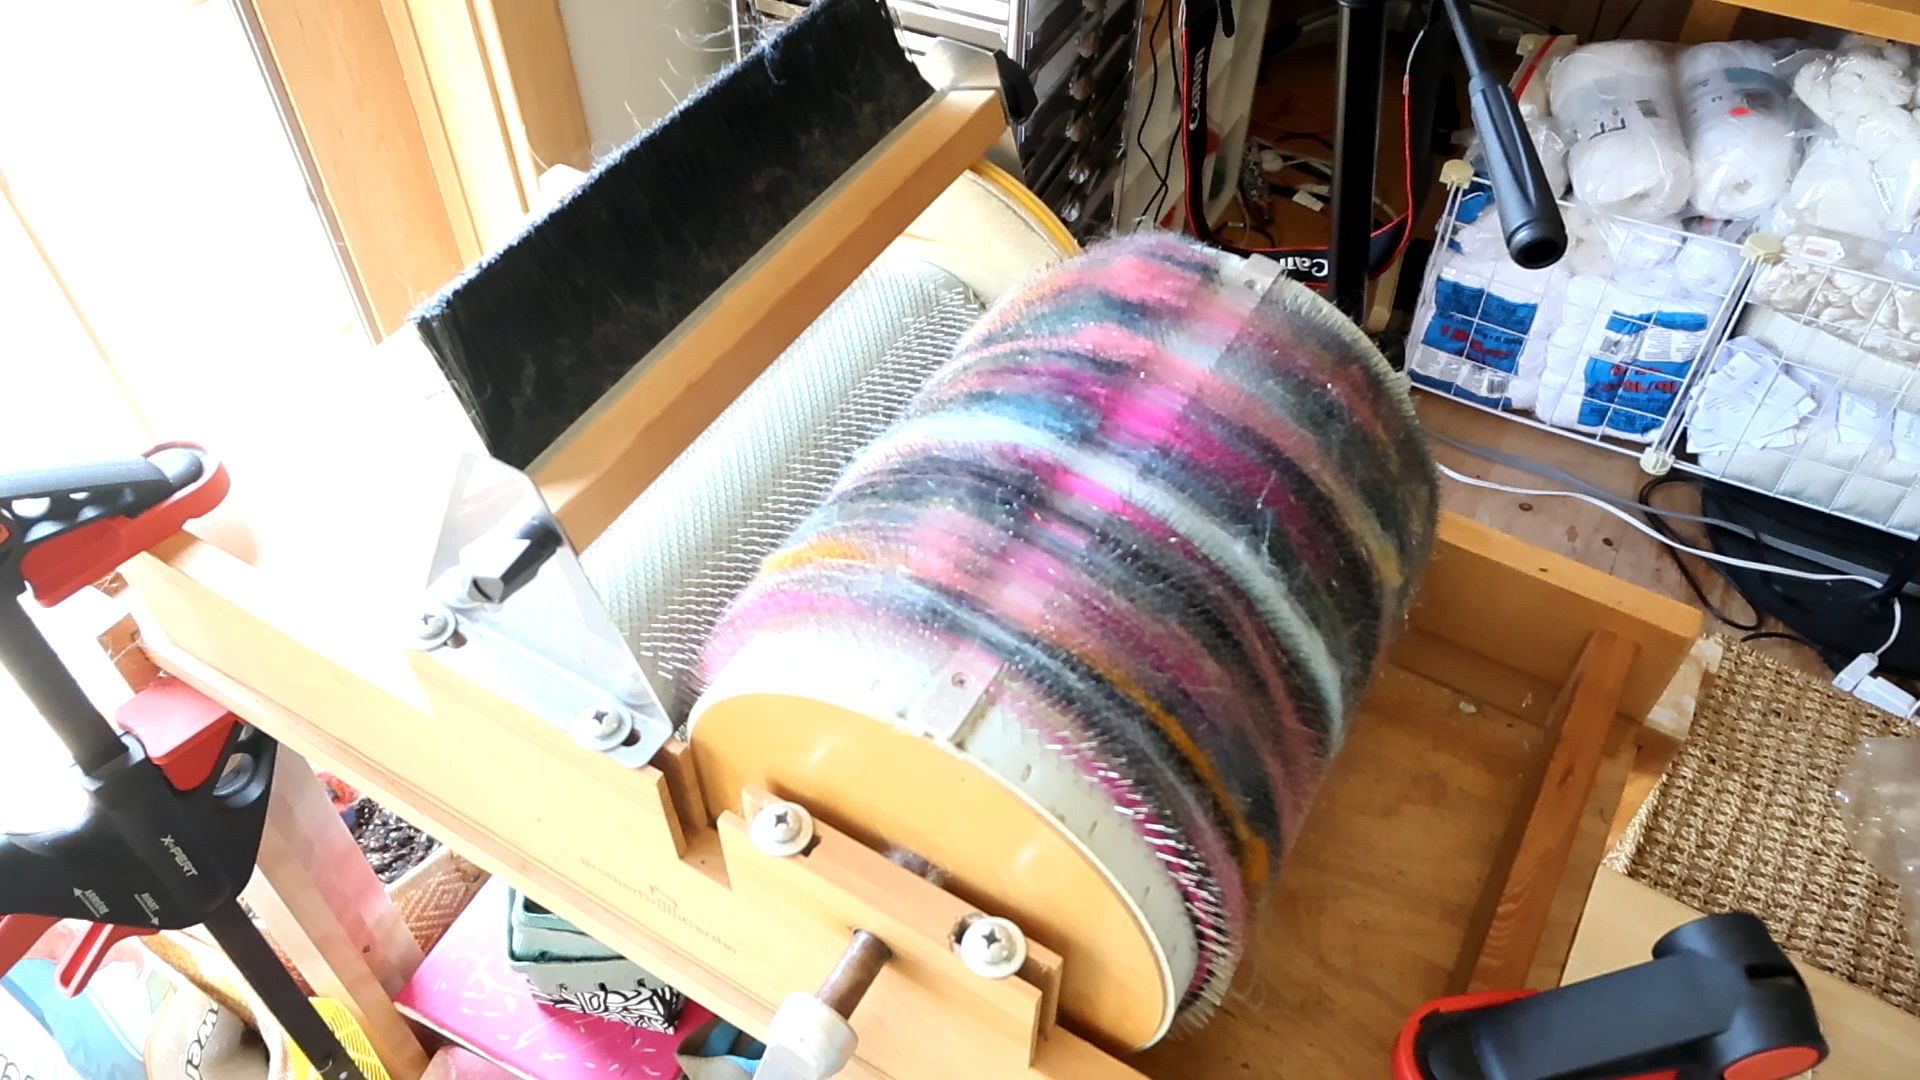
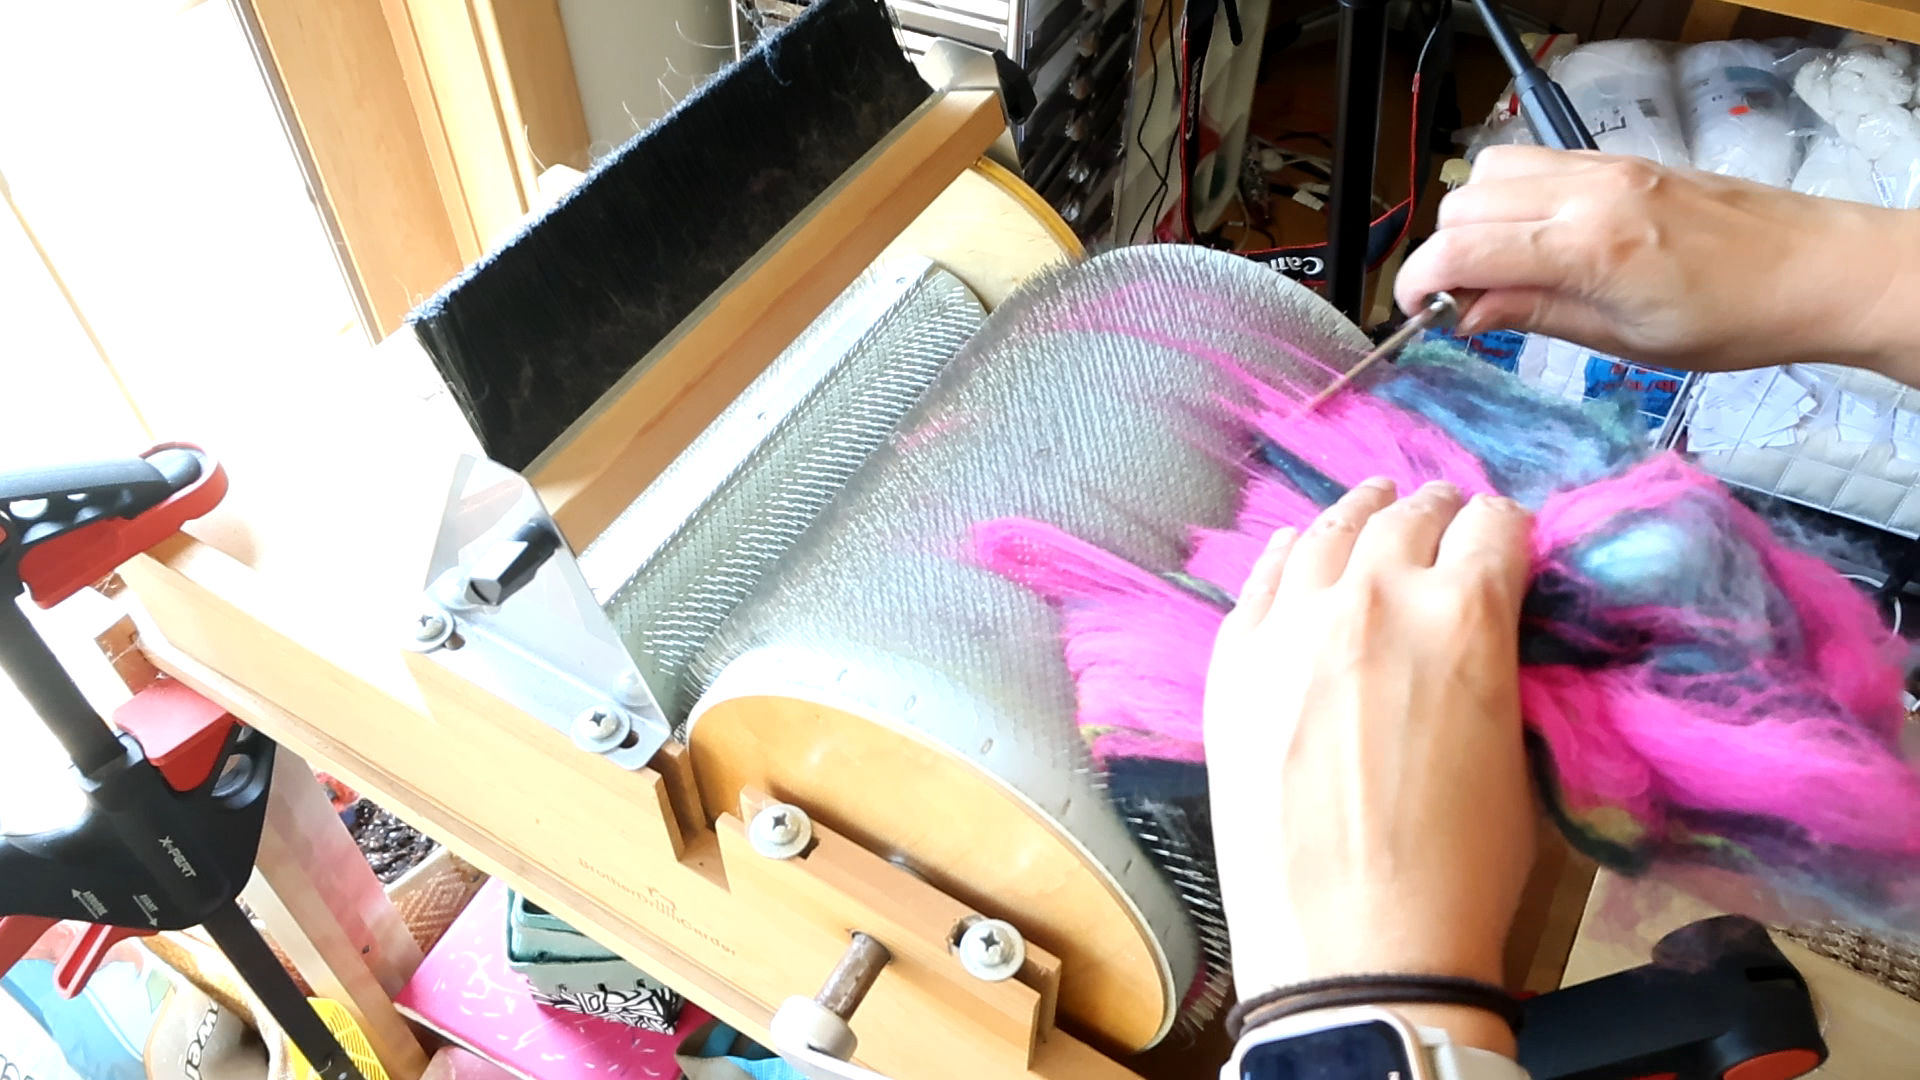
To demonstrate how I make textured chunky batts I set out to blend random bits of fiber left over in the studio.As the fiber chosen is all very random, the batt colors are…interesting to say the least.
The subsequent batts are a blend of many colors of hand-dyed merino roving, angora rabbit fiber, silk and Angelina fibers.
Should you purchase a Drum Carder?
Do you need a drum carder? I’m still an advocate for a hackle over a drum carder, particularly in terms of affordability for blending fiber. However, if you ever get your hands on one or have the opportunity to use one at your local guild, keep this method in mind if you want to create a textured batt. Just be sure to go slowly and not force the fiber on, as you might bend the teeth; however, all drum carder teeth will wear out eventually.
If you’ve ever tried this technique or a similar one, please drop me a line here or on YouTube and share your thoughts. I’m sure I’m not the only person who’s thought of loading fiber on the drum directly. 🙂
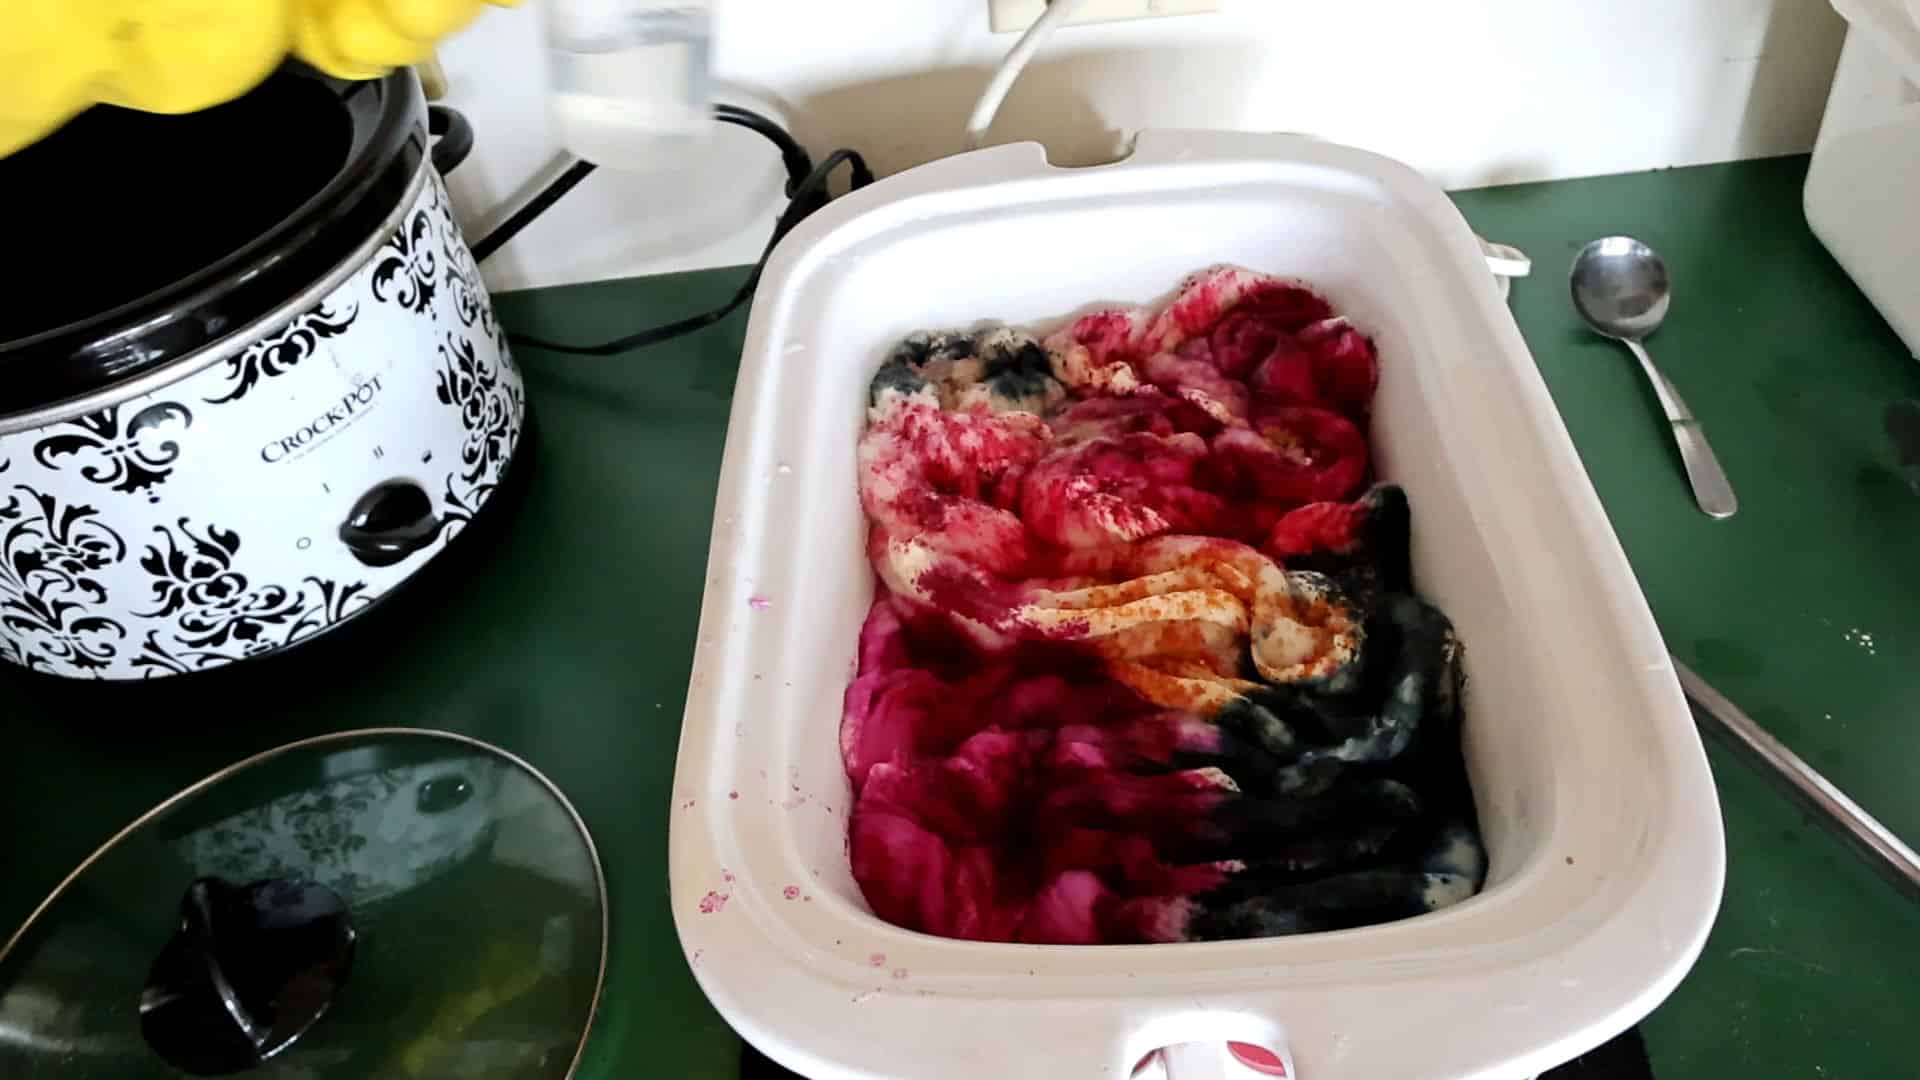
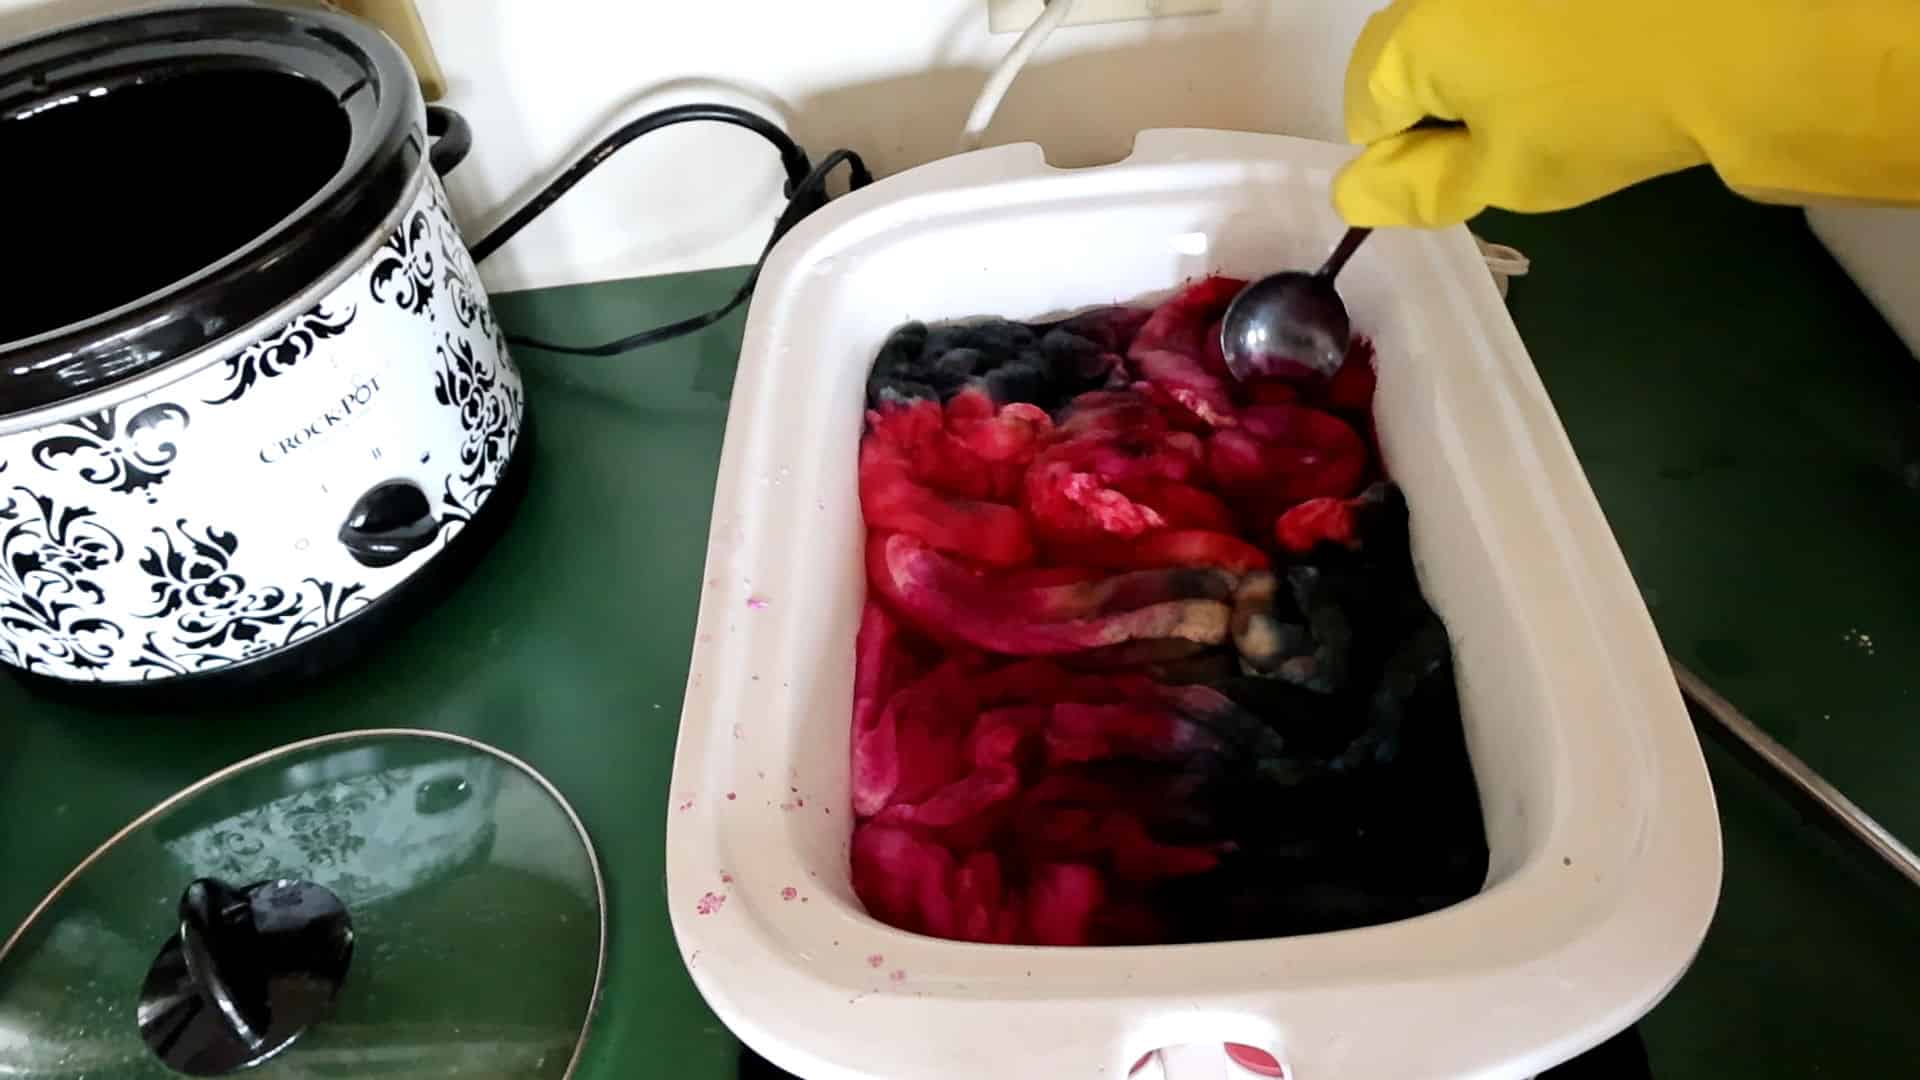
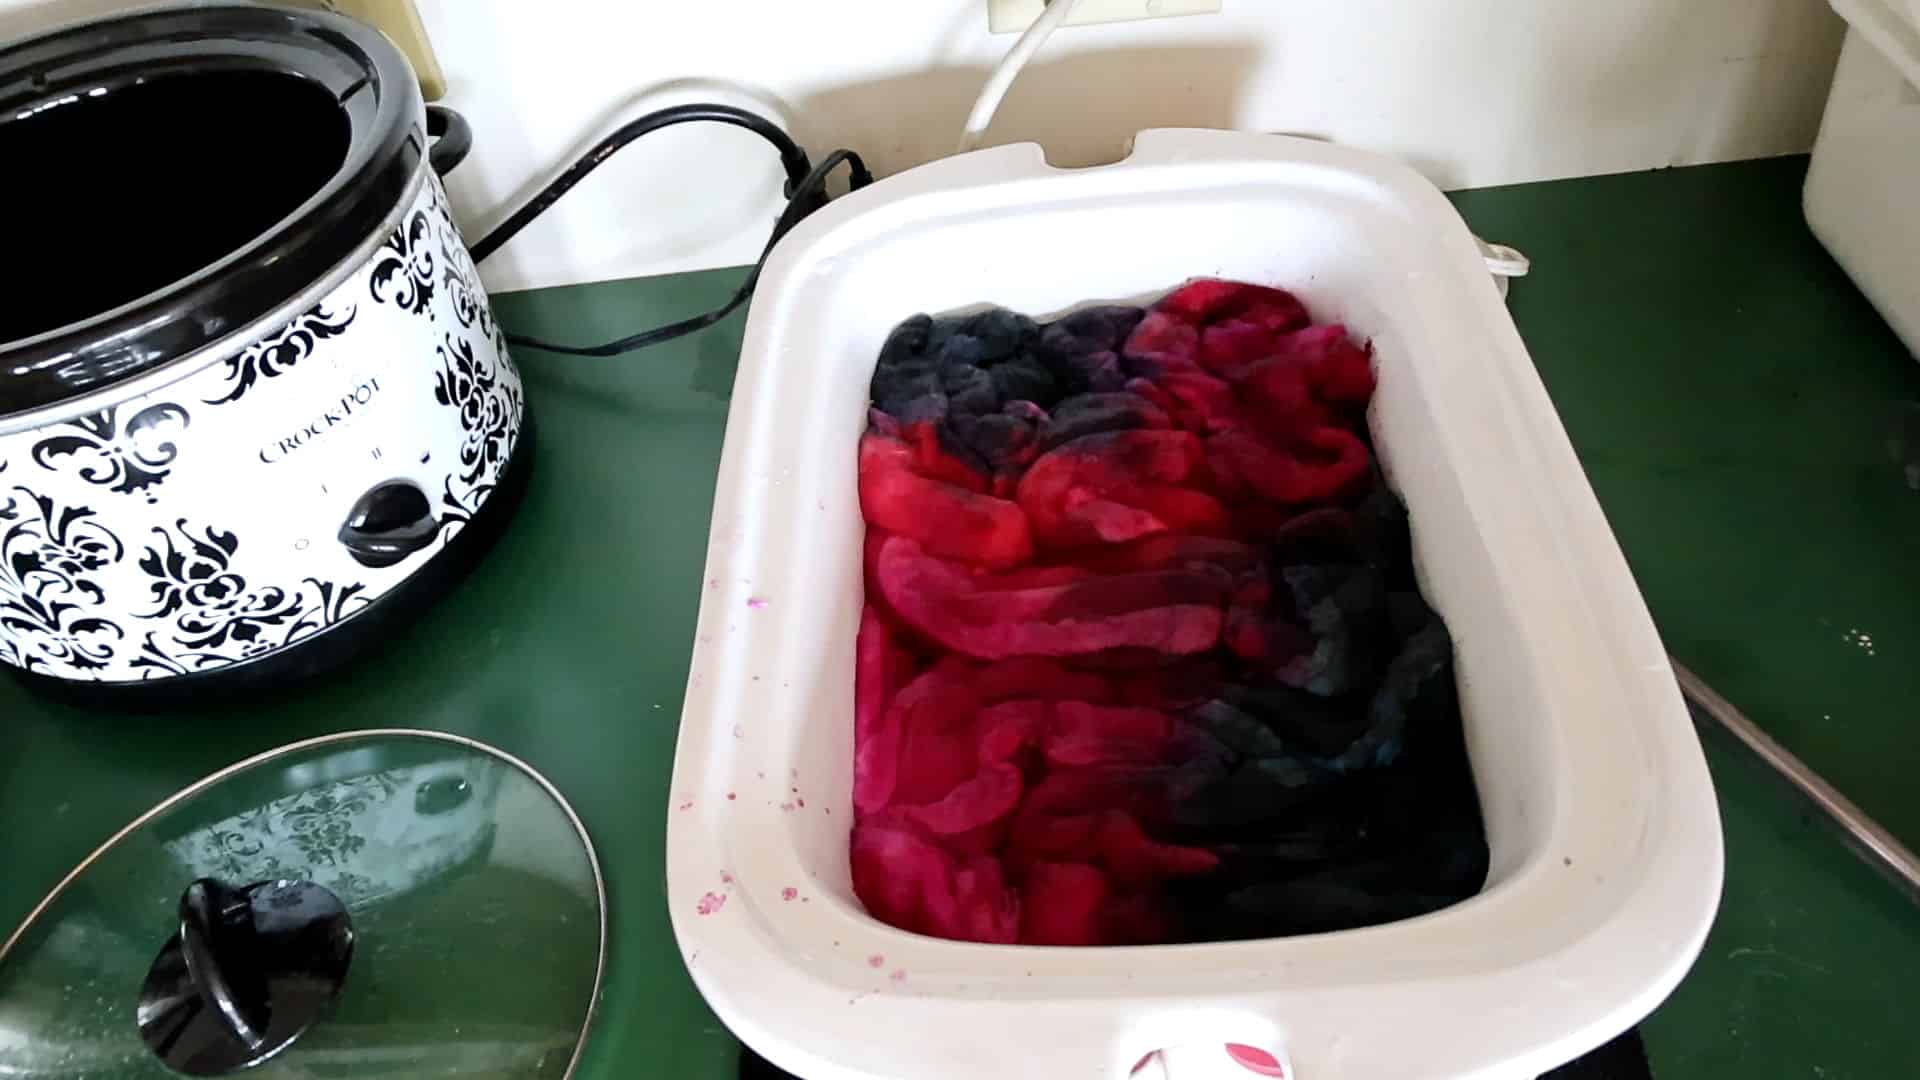
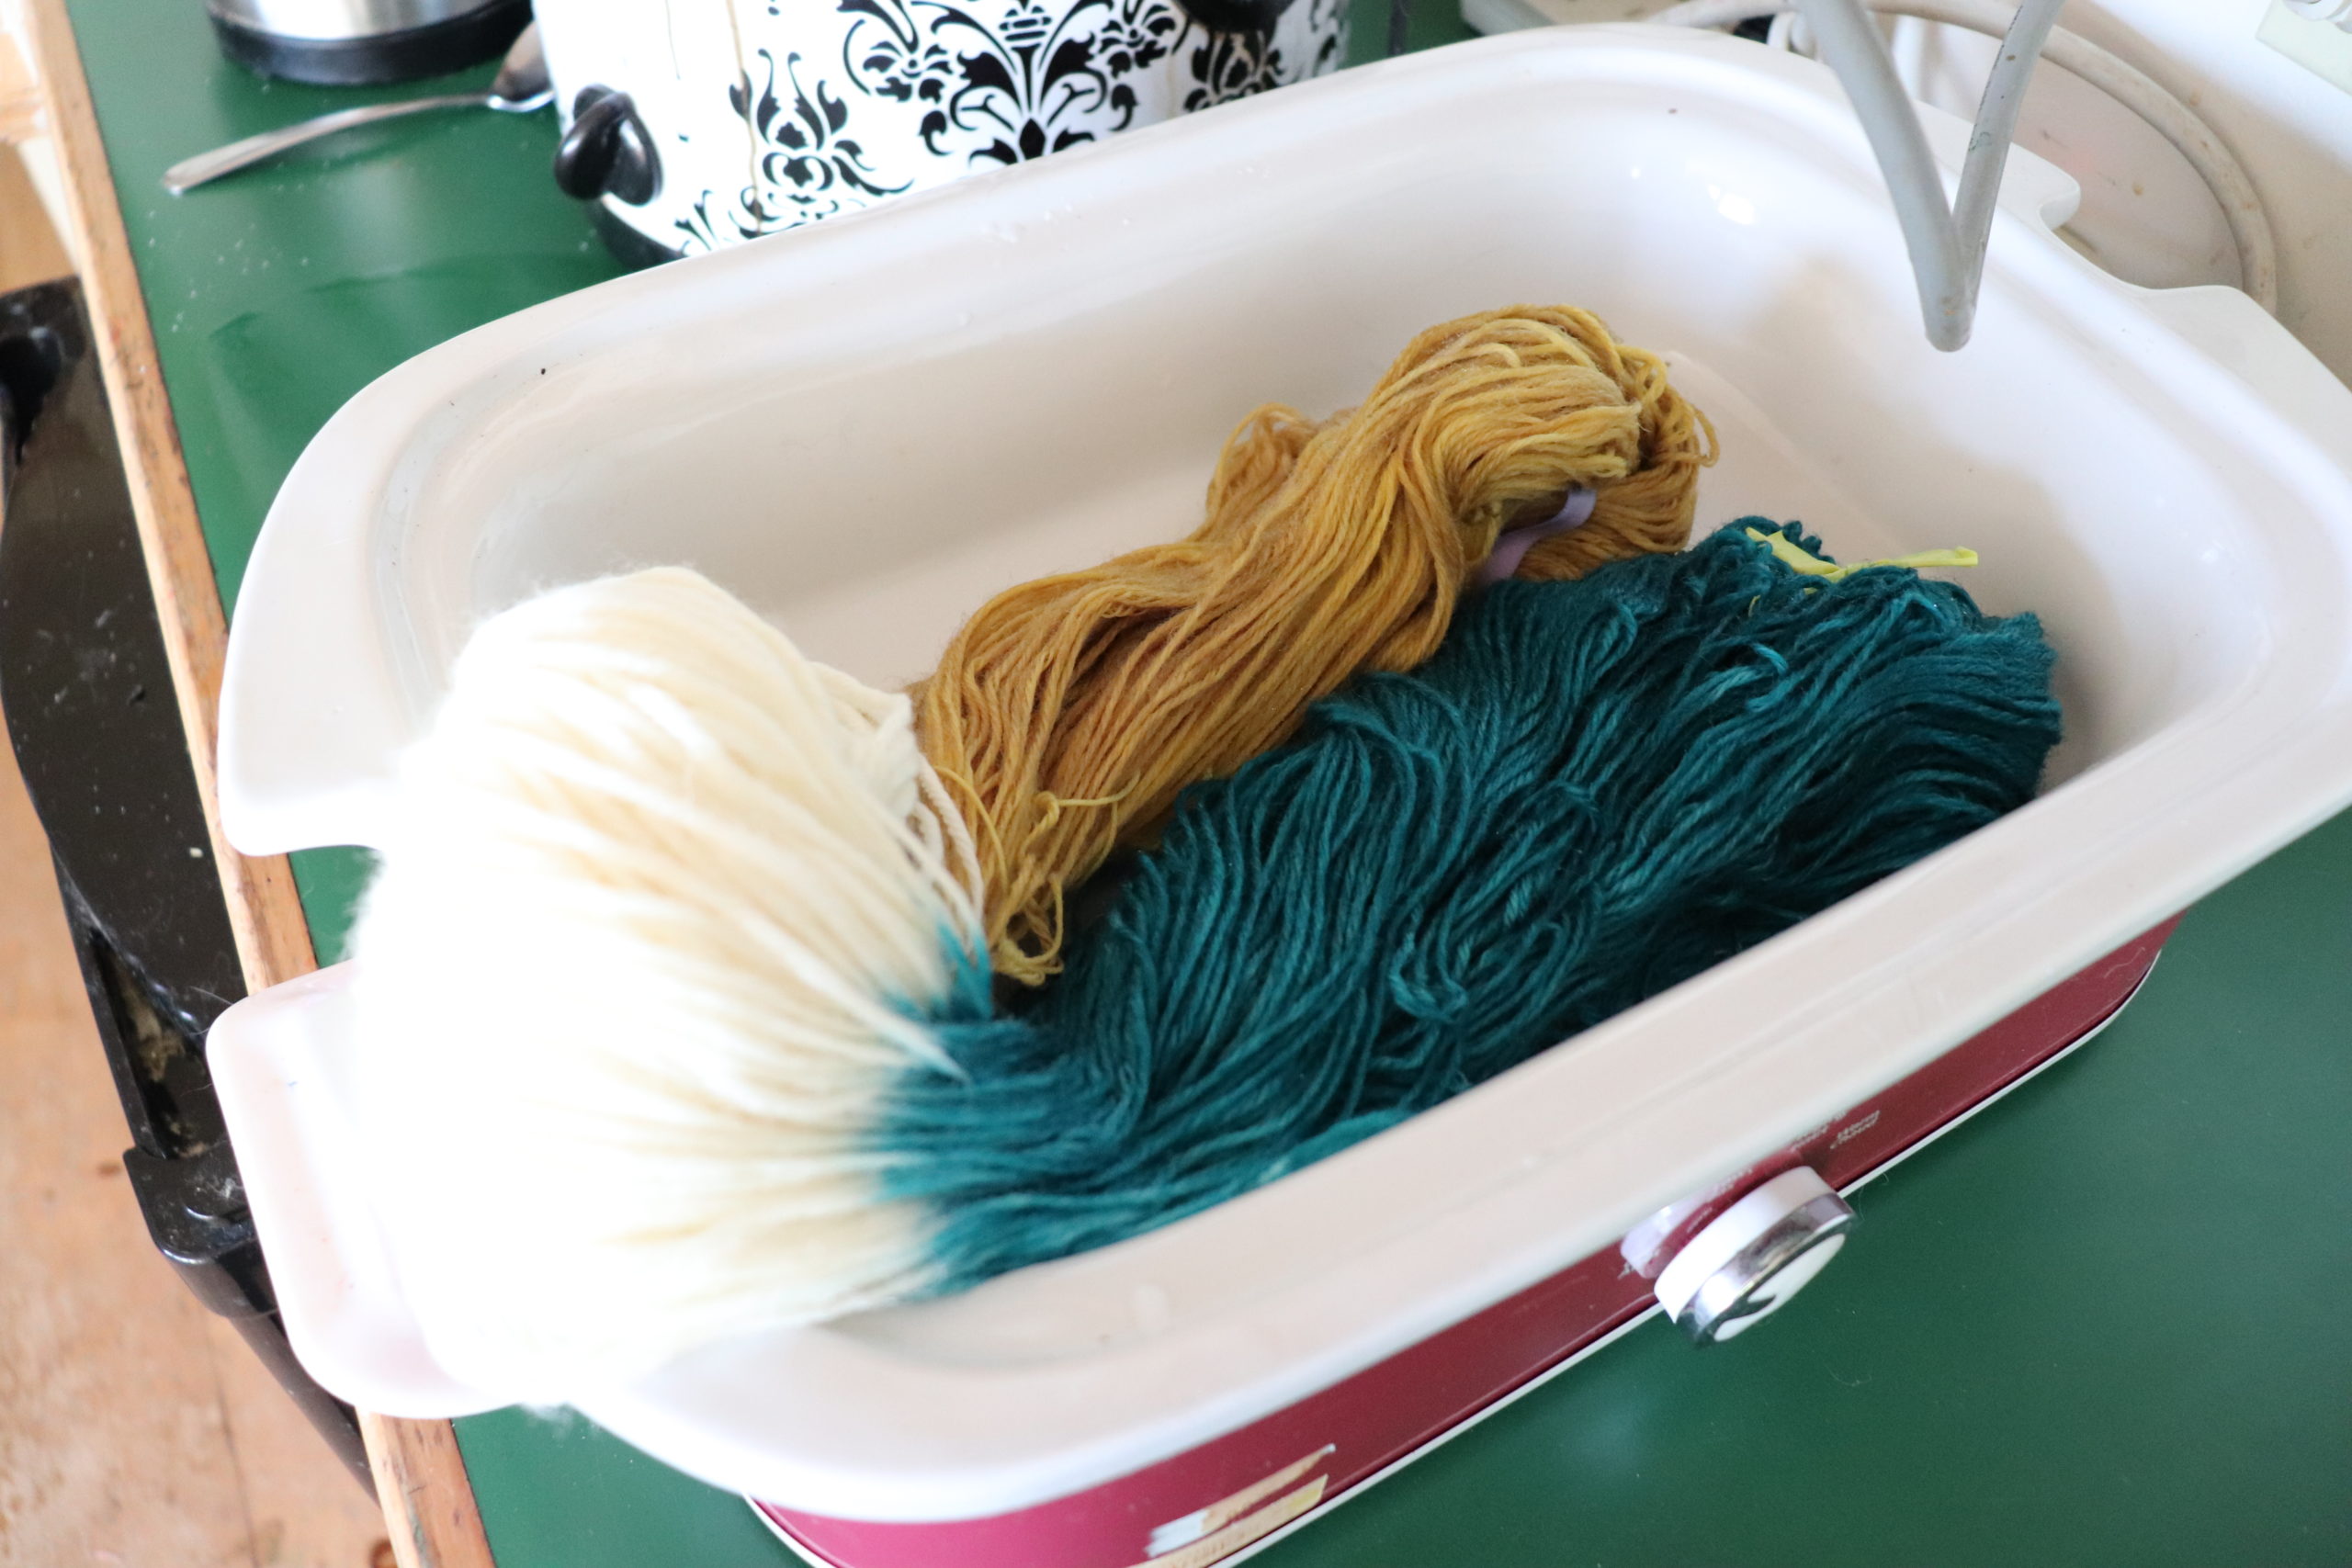
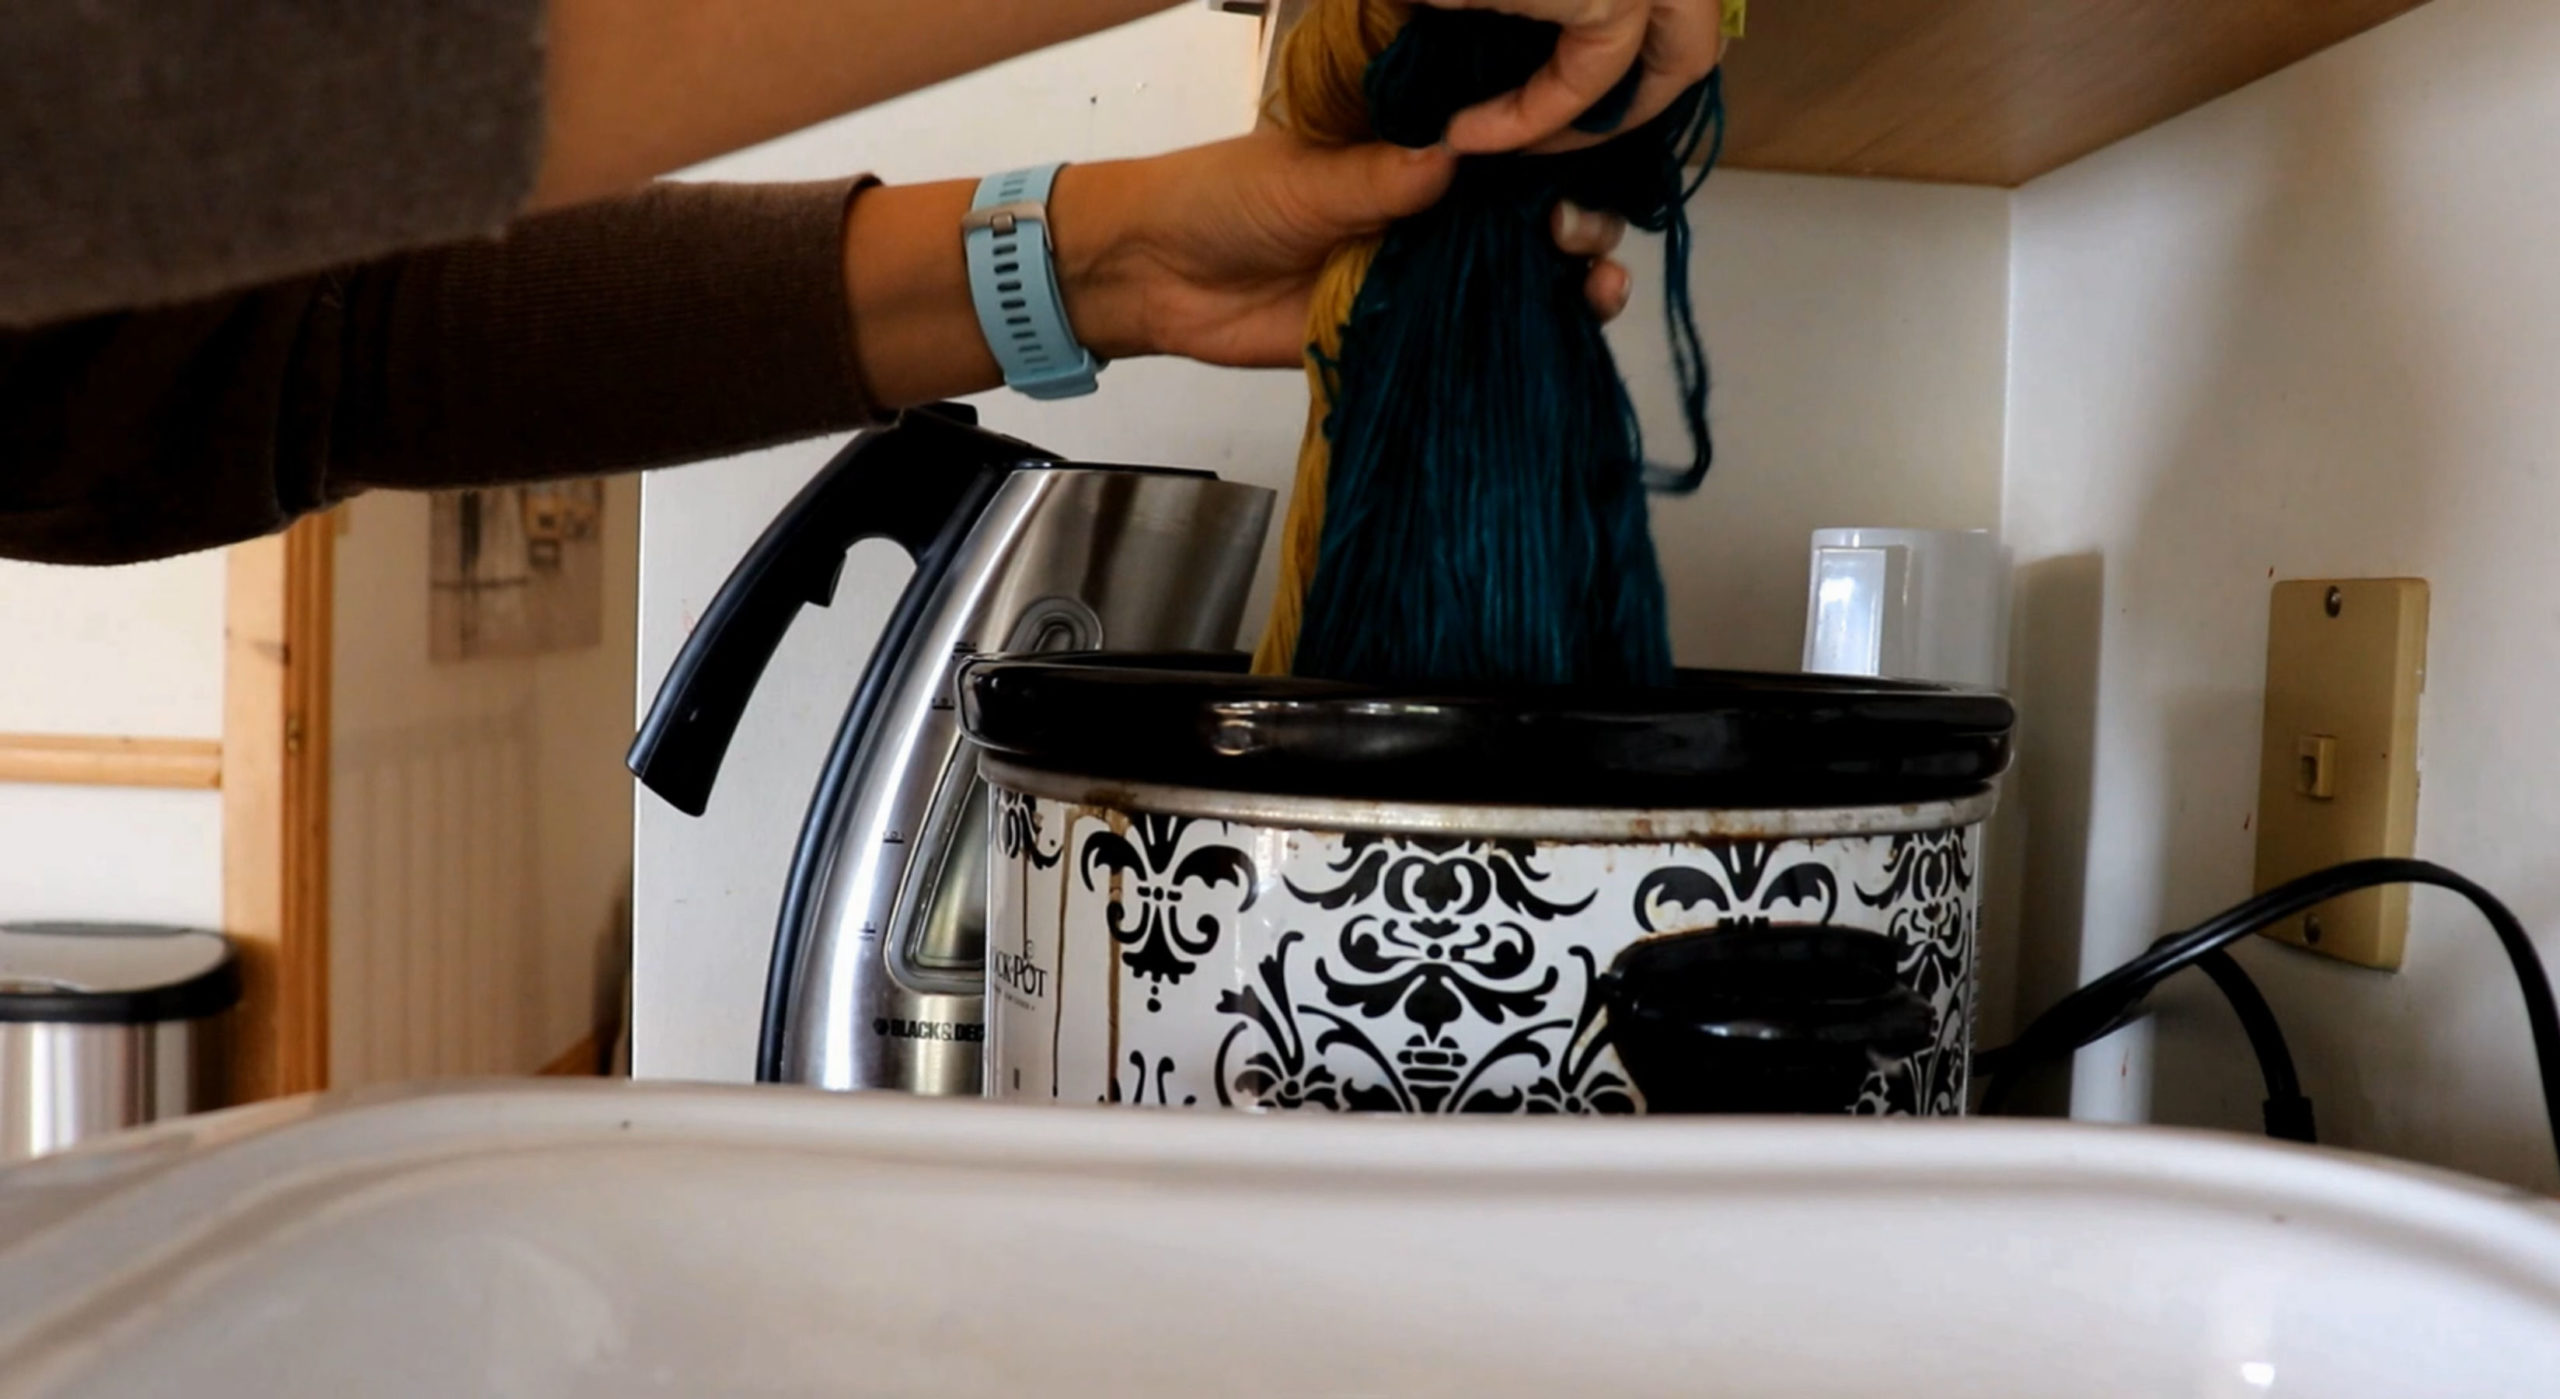
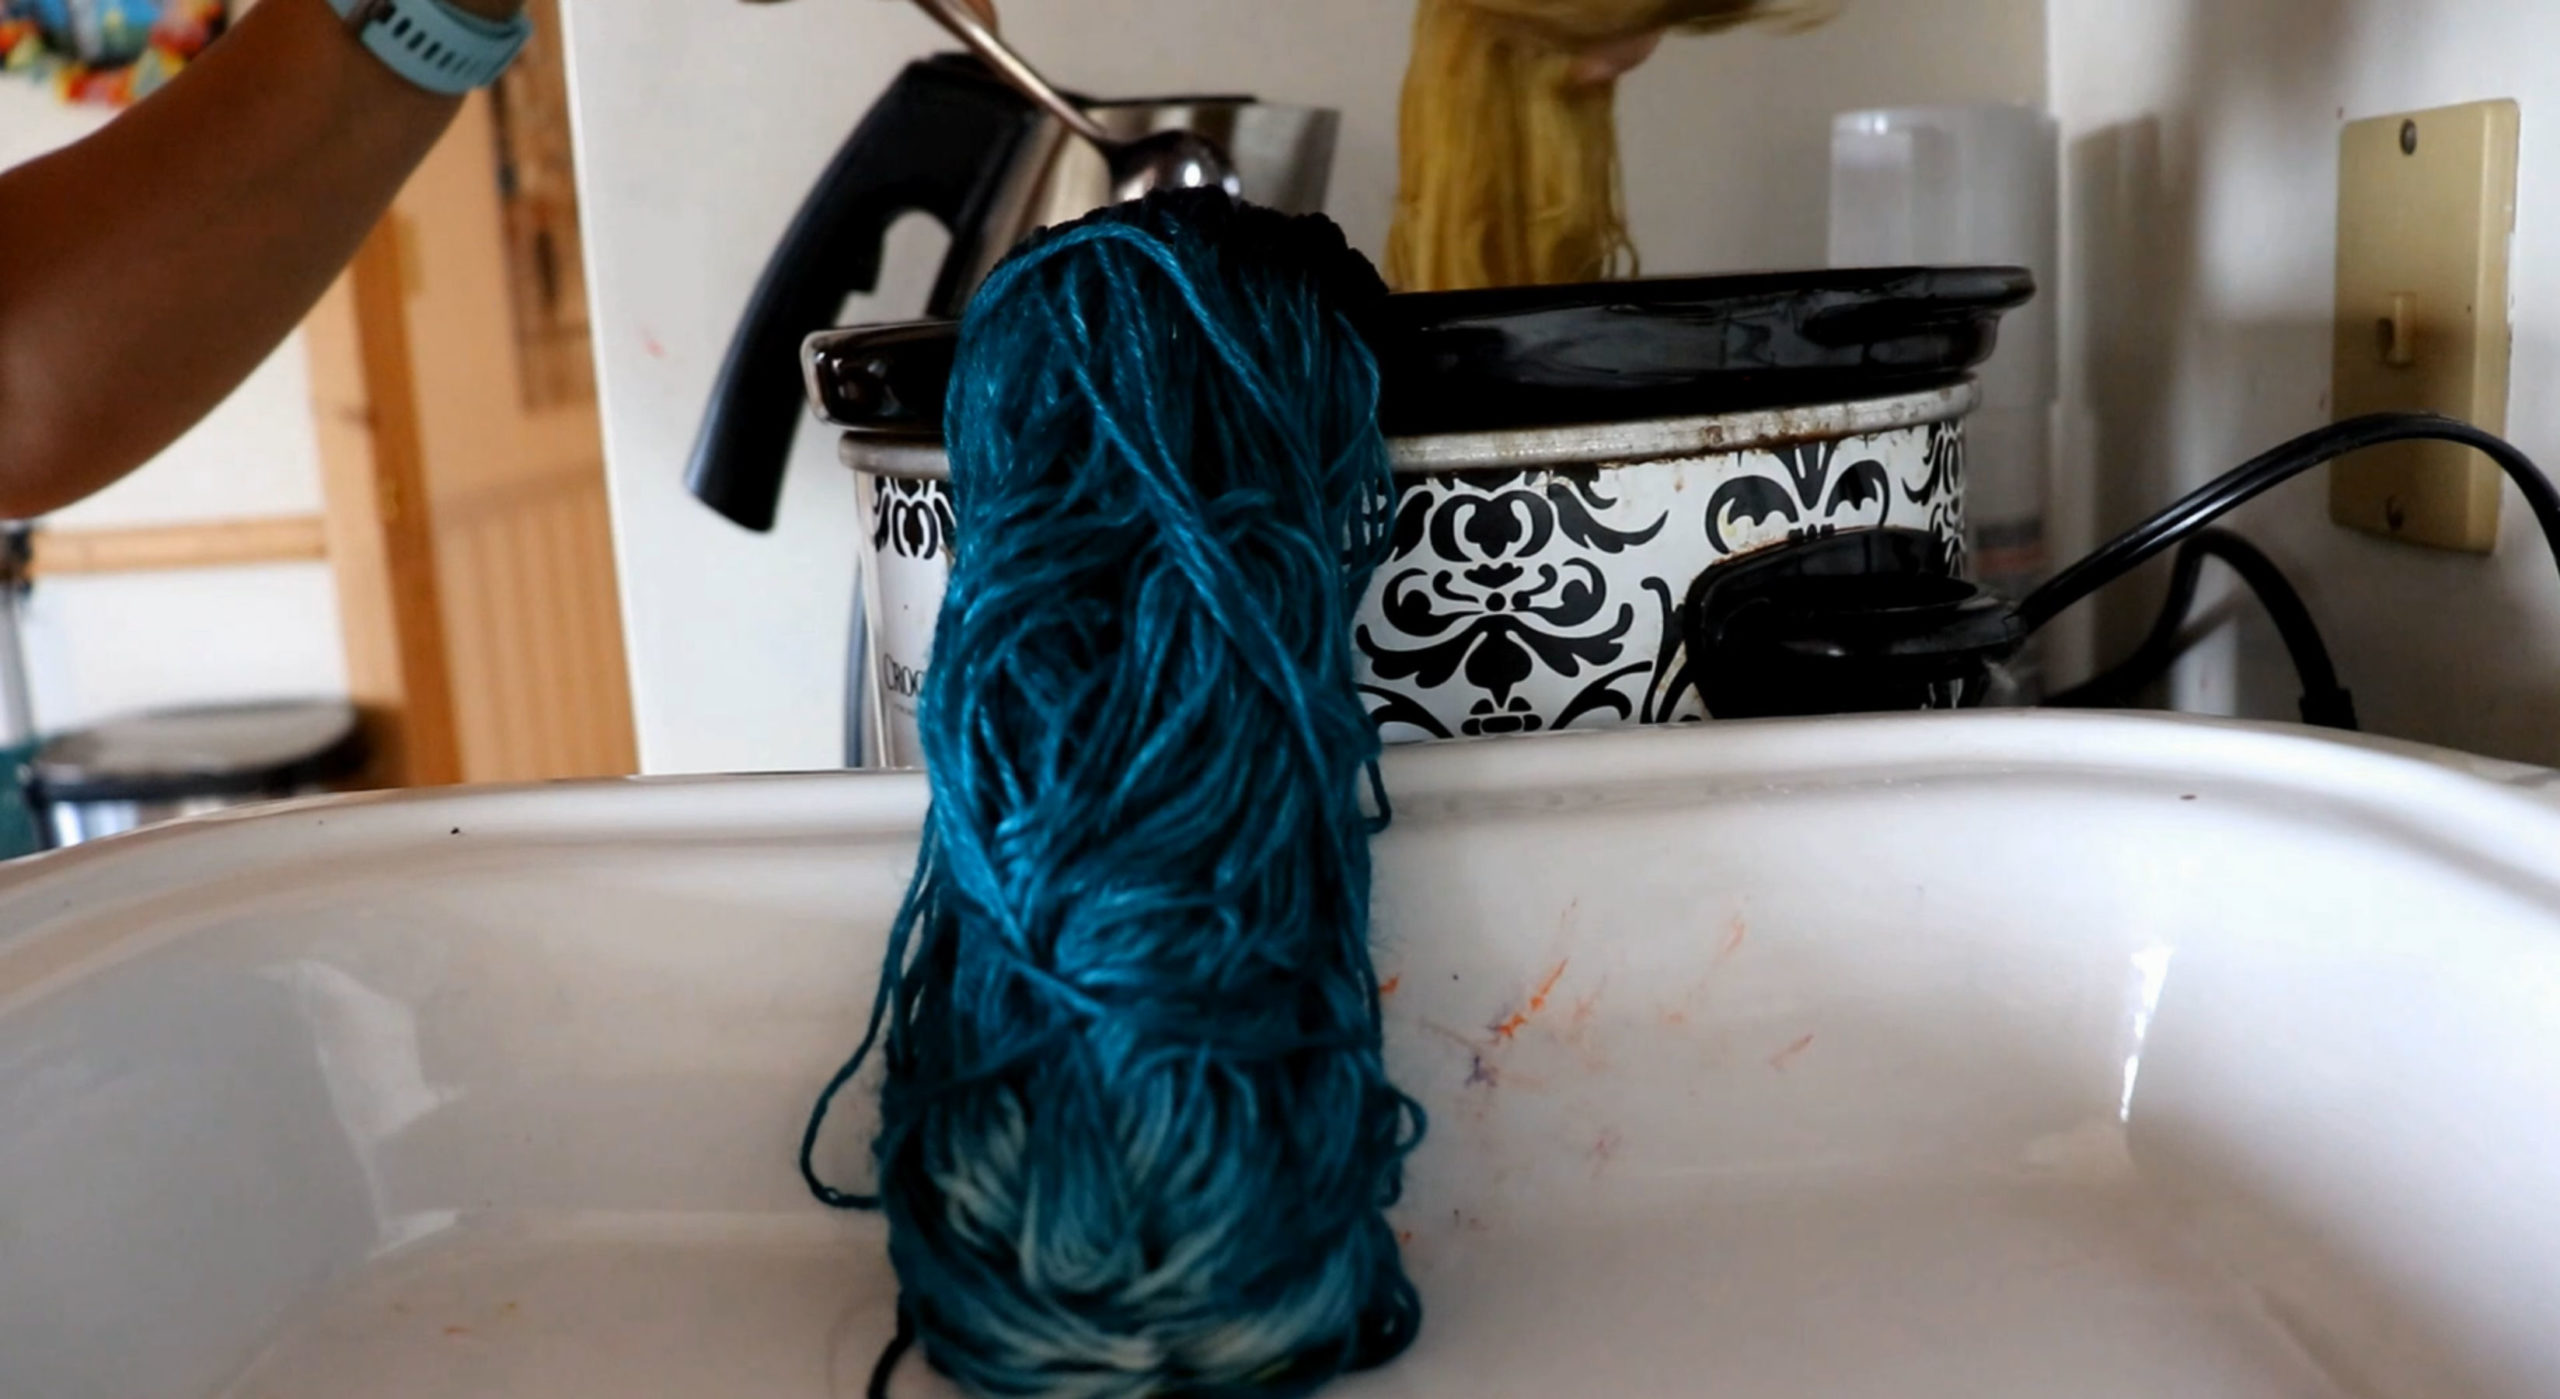
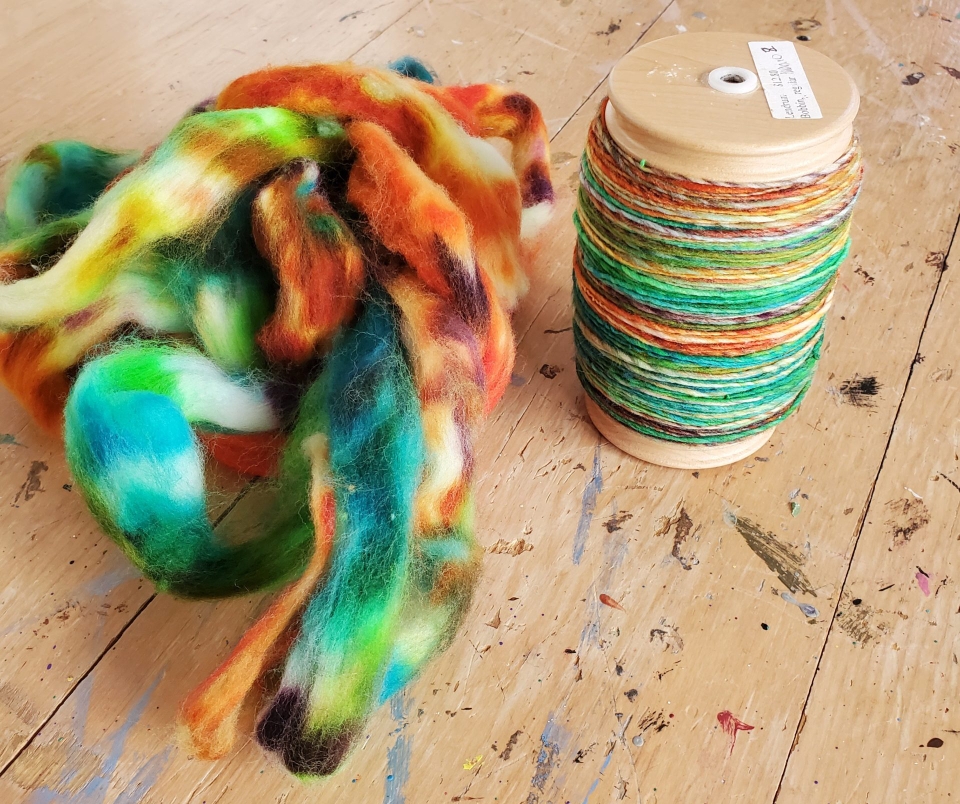
A few months ago, I posted about dyeing roving in a crockpot, which is my favorite method for dyeing fiber for spinning. I used colors that I had just gotten in stock as examples, and the resulting color was not a combo I would typically dye.
The goal of that video was to show how I dye roving in a crockpot one color at a time, so there was no thought into the colors I was putting together. I needed samples of each color for my dye binder, so I decided to dye the roving at the same time, to create a video of the process.
You Can Watch the Dyeing Roving Video Here:
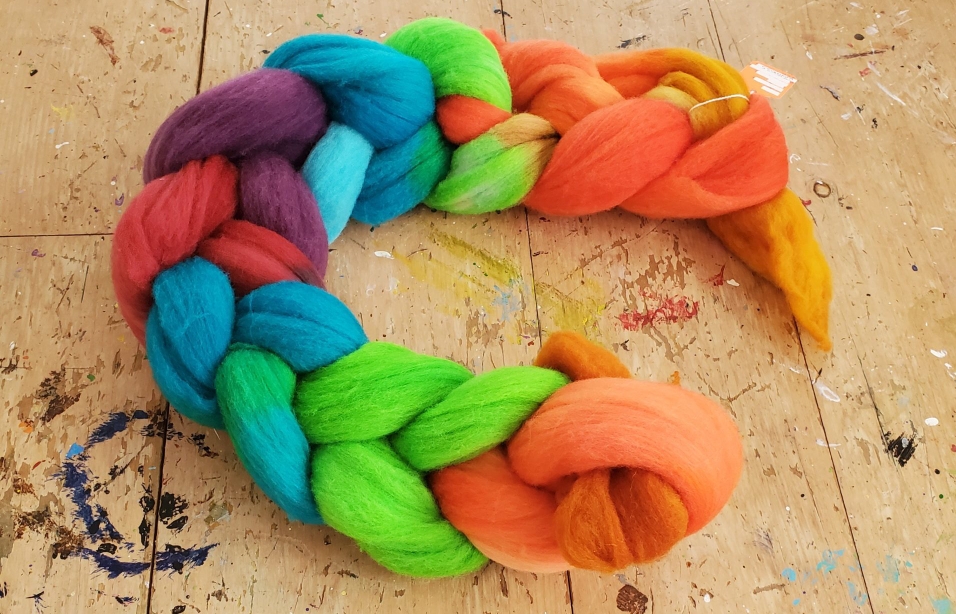
Now I have a roving made out of several primary-like colors, but I have no idea how to spin it. I was convinced that no matter how I spun this, it would be a mess of color and not necessarily desirable. Okay, I’ll say it. It was going to be ugly! And I’ll have to over-dye it.
A Creative Epiphany
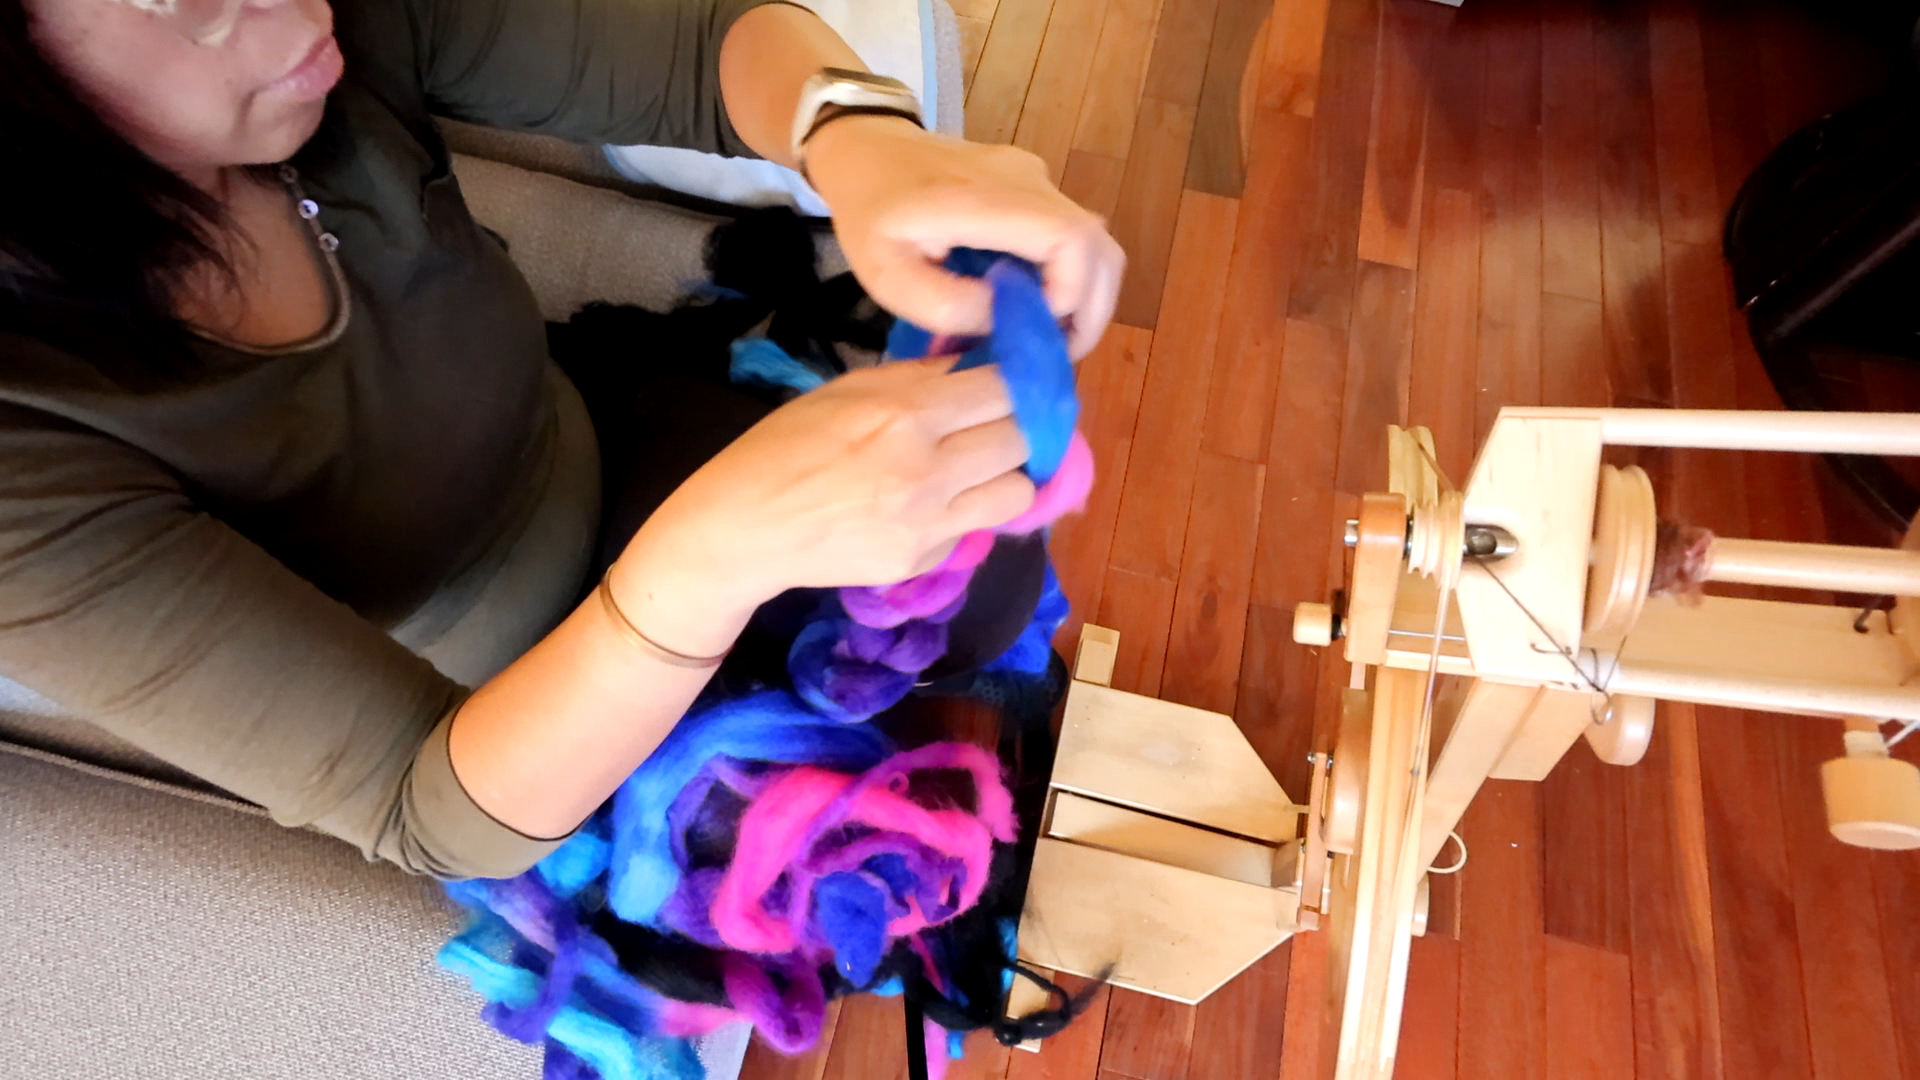
One day, while working in the garden, I had an idea pop into my head about how I could try to spin it. Even though I didn’t have a solid plan on how I would eventually ply it, and was not very confident that it would even look nice, I decided to be vulnerable and record the process anyway. I figure my failure would lead to others’ success. Learn from my mistakes, as you will.
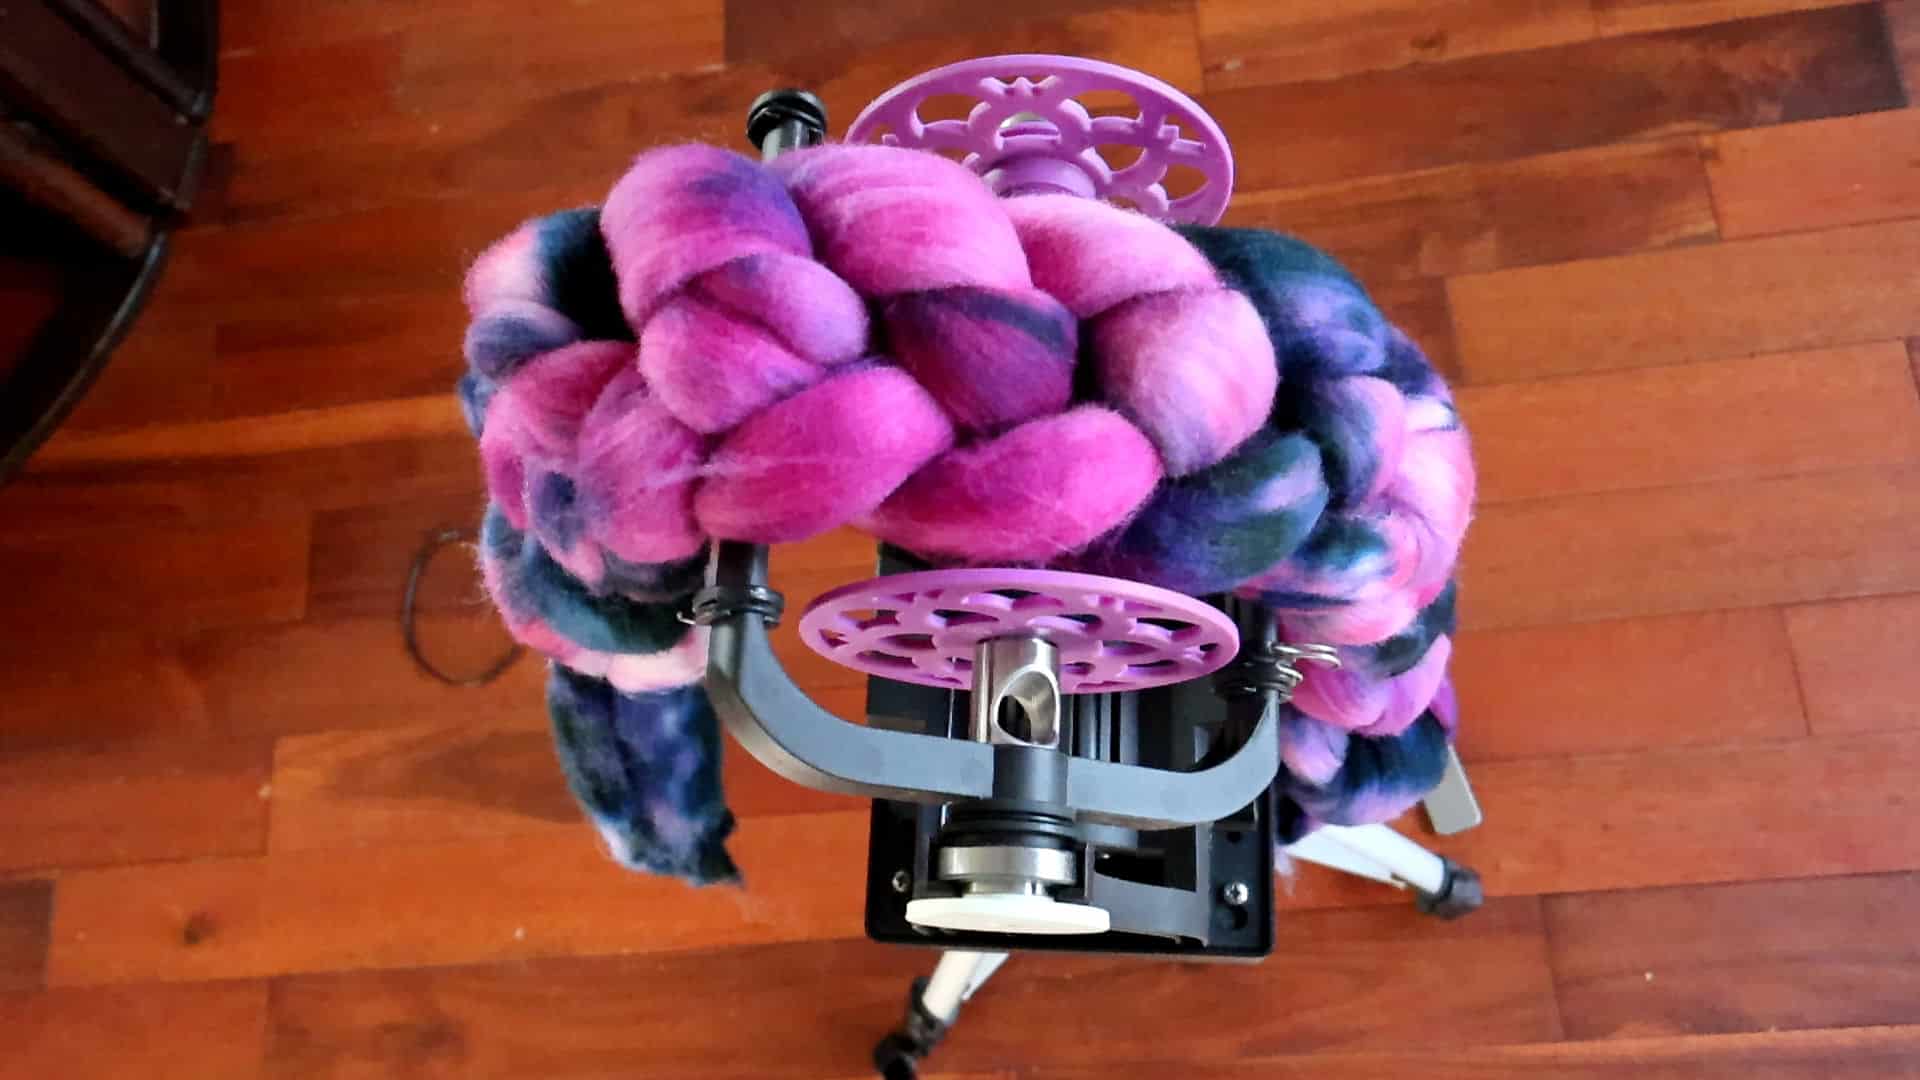
This project required the use of the Lendrum fast flyer once again, and I decided to go for it and use the smallest whorl. I can’t express how much I love this fast flyer for spinning more consistent thin singles!
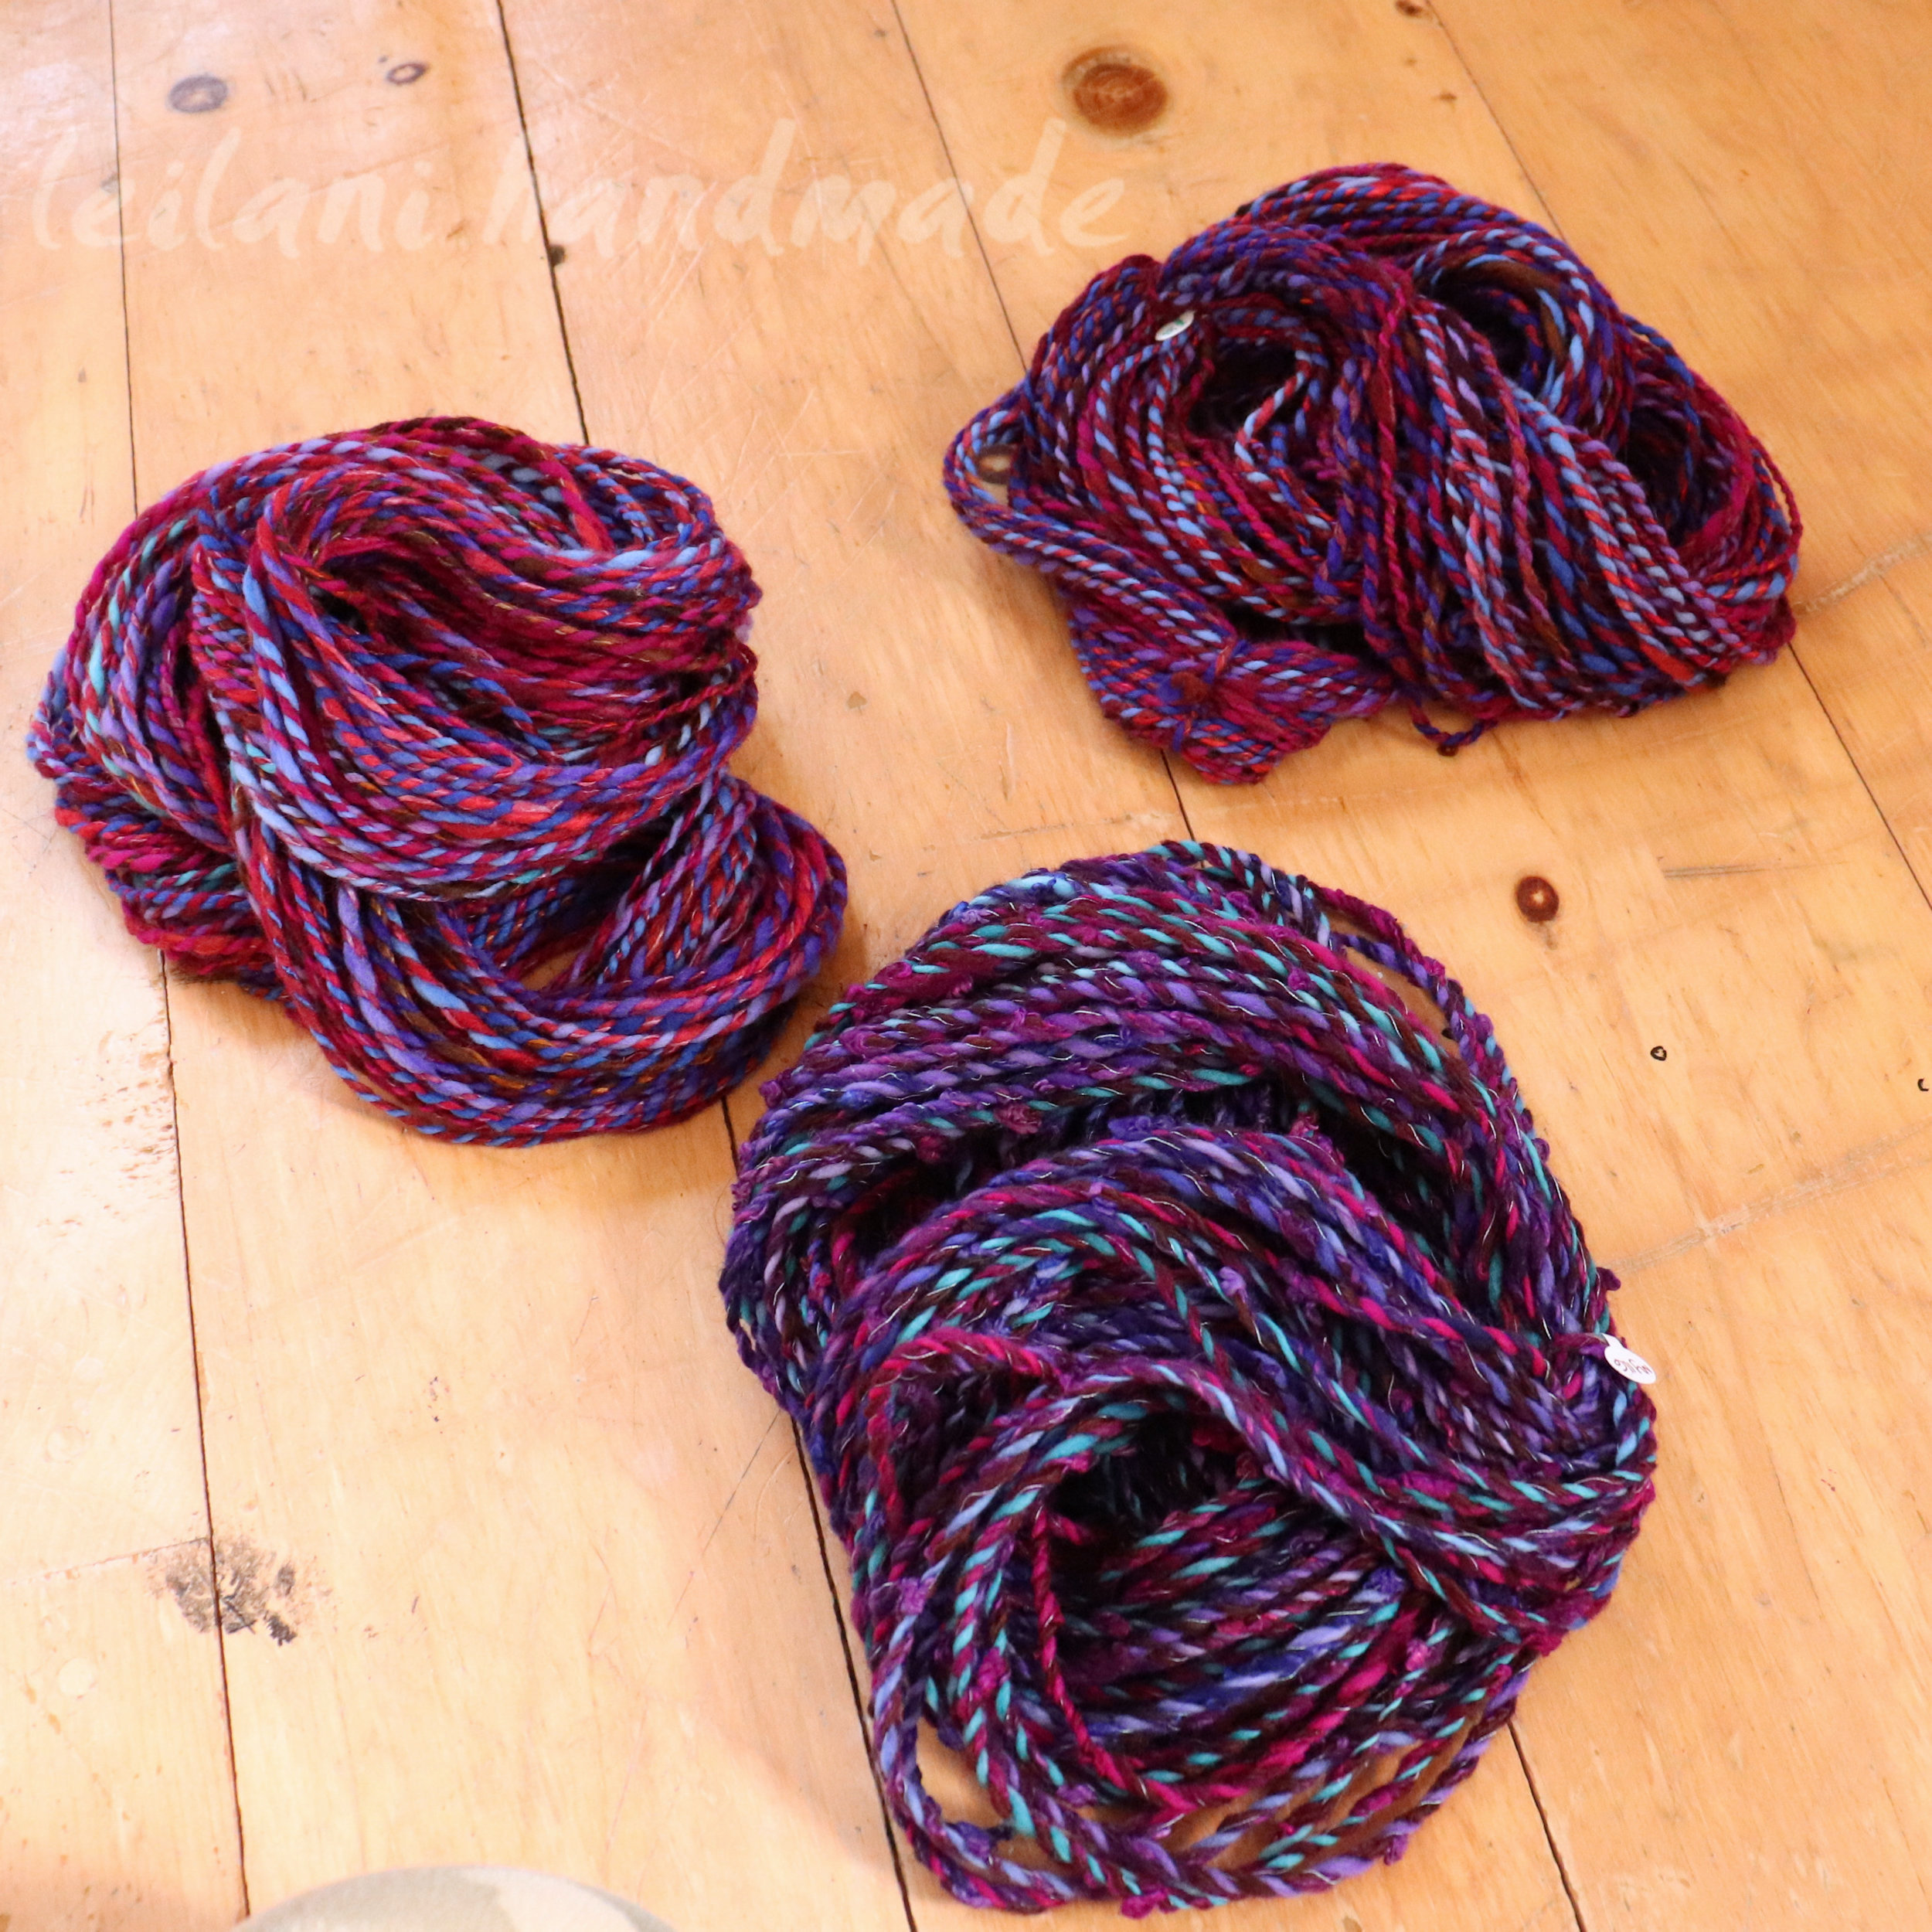
Another aspect that made spinning this yarn easier was that I decided to strip the roving into very thin strips. This was because I wanted the color to be in shorter intervals throughout. The first bobbin looked really good, so I decided to chain ply it. However, I reminded myself that the whole point of this project was to experiment and see what I would get if I plied this roving together without rhyme or reason, color-wise.
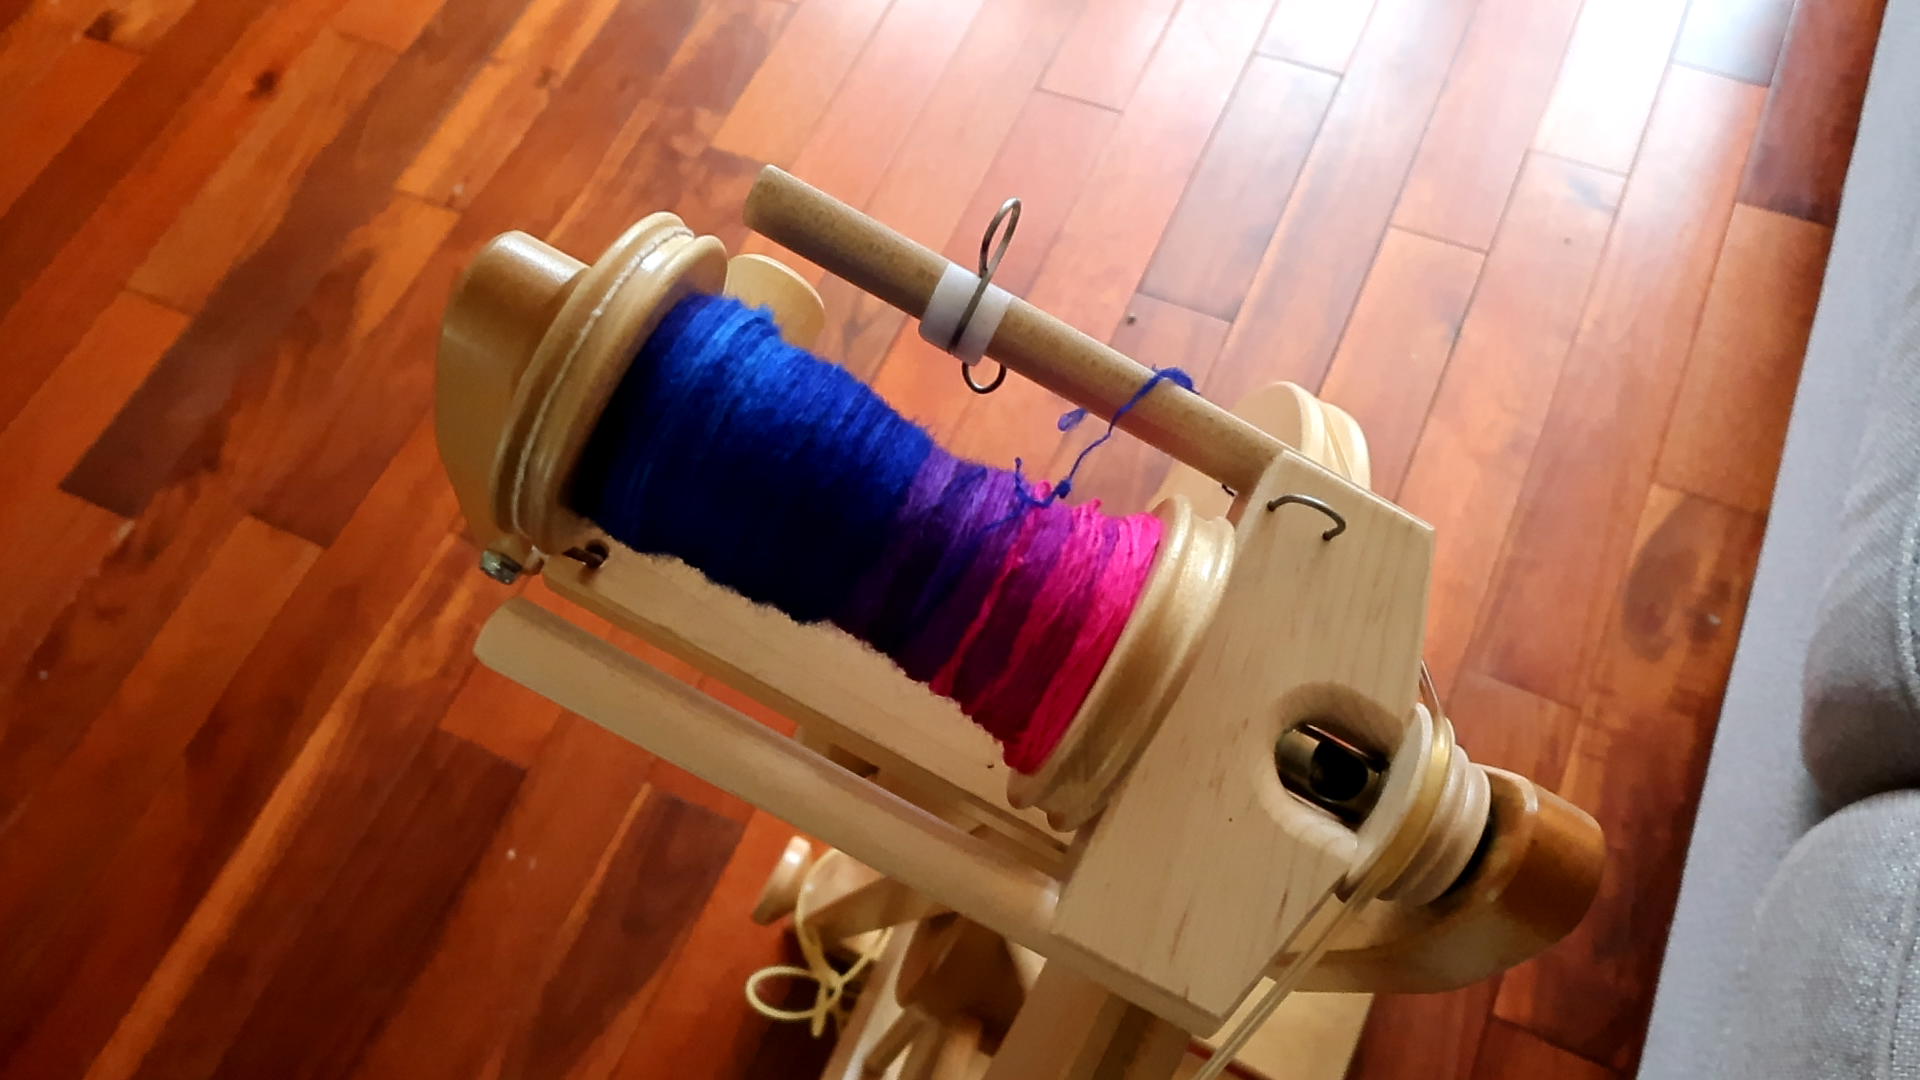
I stripped this roving into as thin a piece as possible. Sometimes that meant one end would be thicker than the rest, sometimes that meant I wouldn’t get a full strip with all the colors. I purposely mixed it up, sometimes even turning the strips of roving upside down. I intentionally wanted to jumble up the colors as much as possible.
Even then, I was surprised at how much of the yarn is two plies of the same color, with one opposing color. Even in some sections, there would be a total solid color. It was fascinating to watch the colors come together as I plied this yarn.
Apprehensive to Share the Outcome
To say I was a bit nervous and feeling vulnerable sharing this process in a vlog is an understatement! I was prepared to create a second video where I would overdye the result. I was convinced this would be the most hideous 3-ply yarn I had ever seen.
To see what this roving looks like now, all spun up, check out the video above. 😉
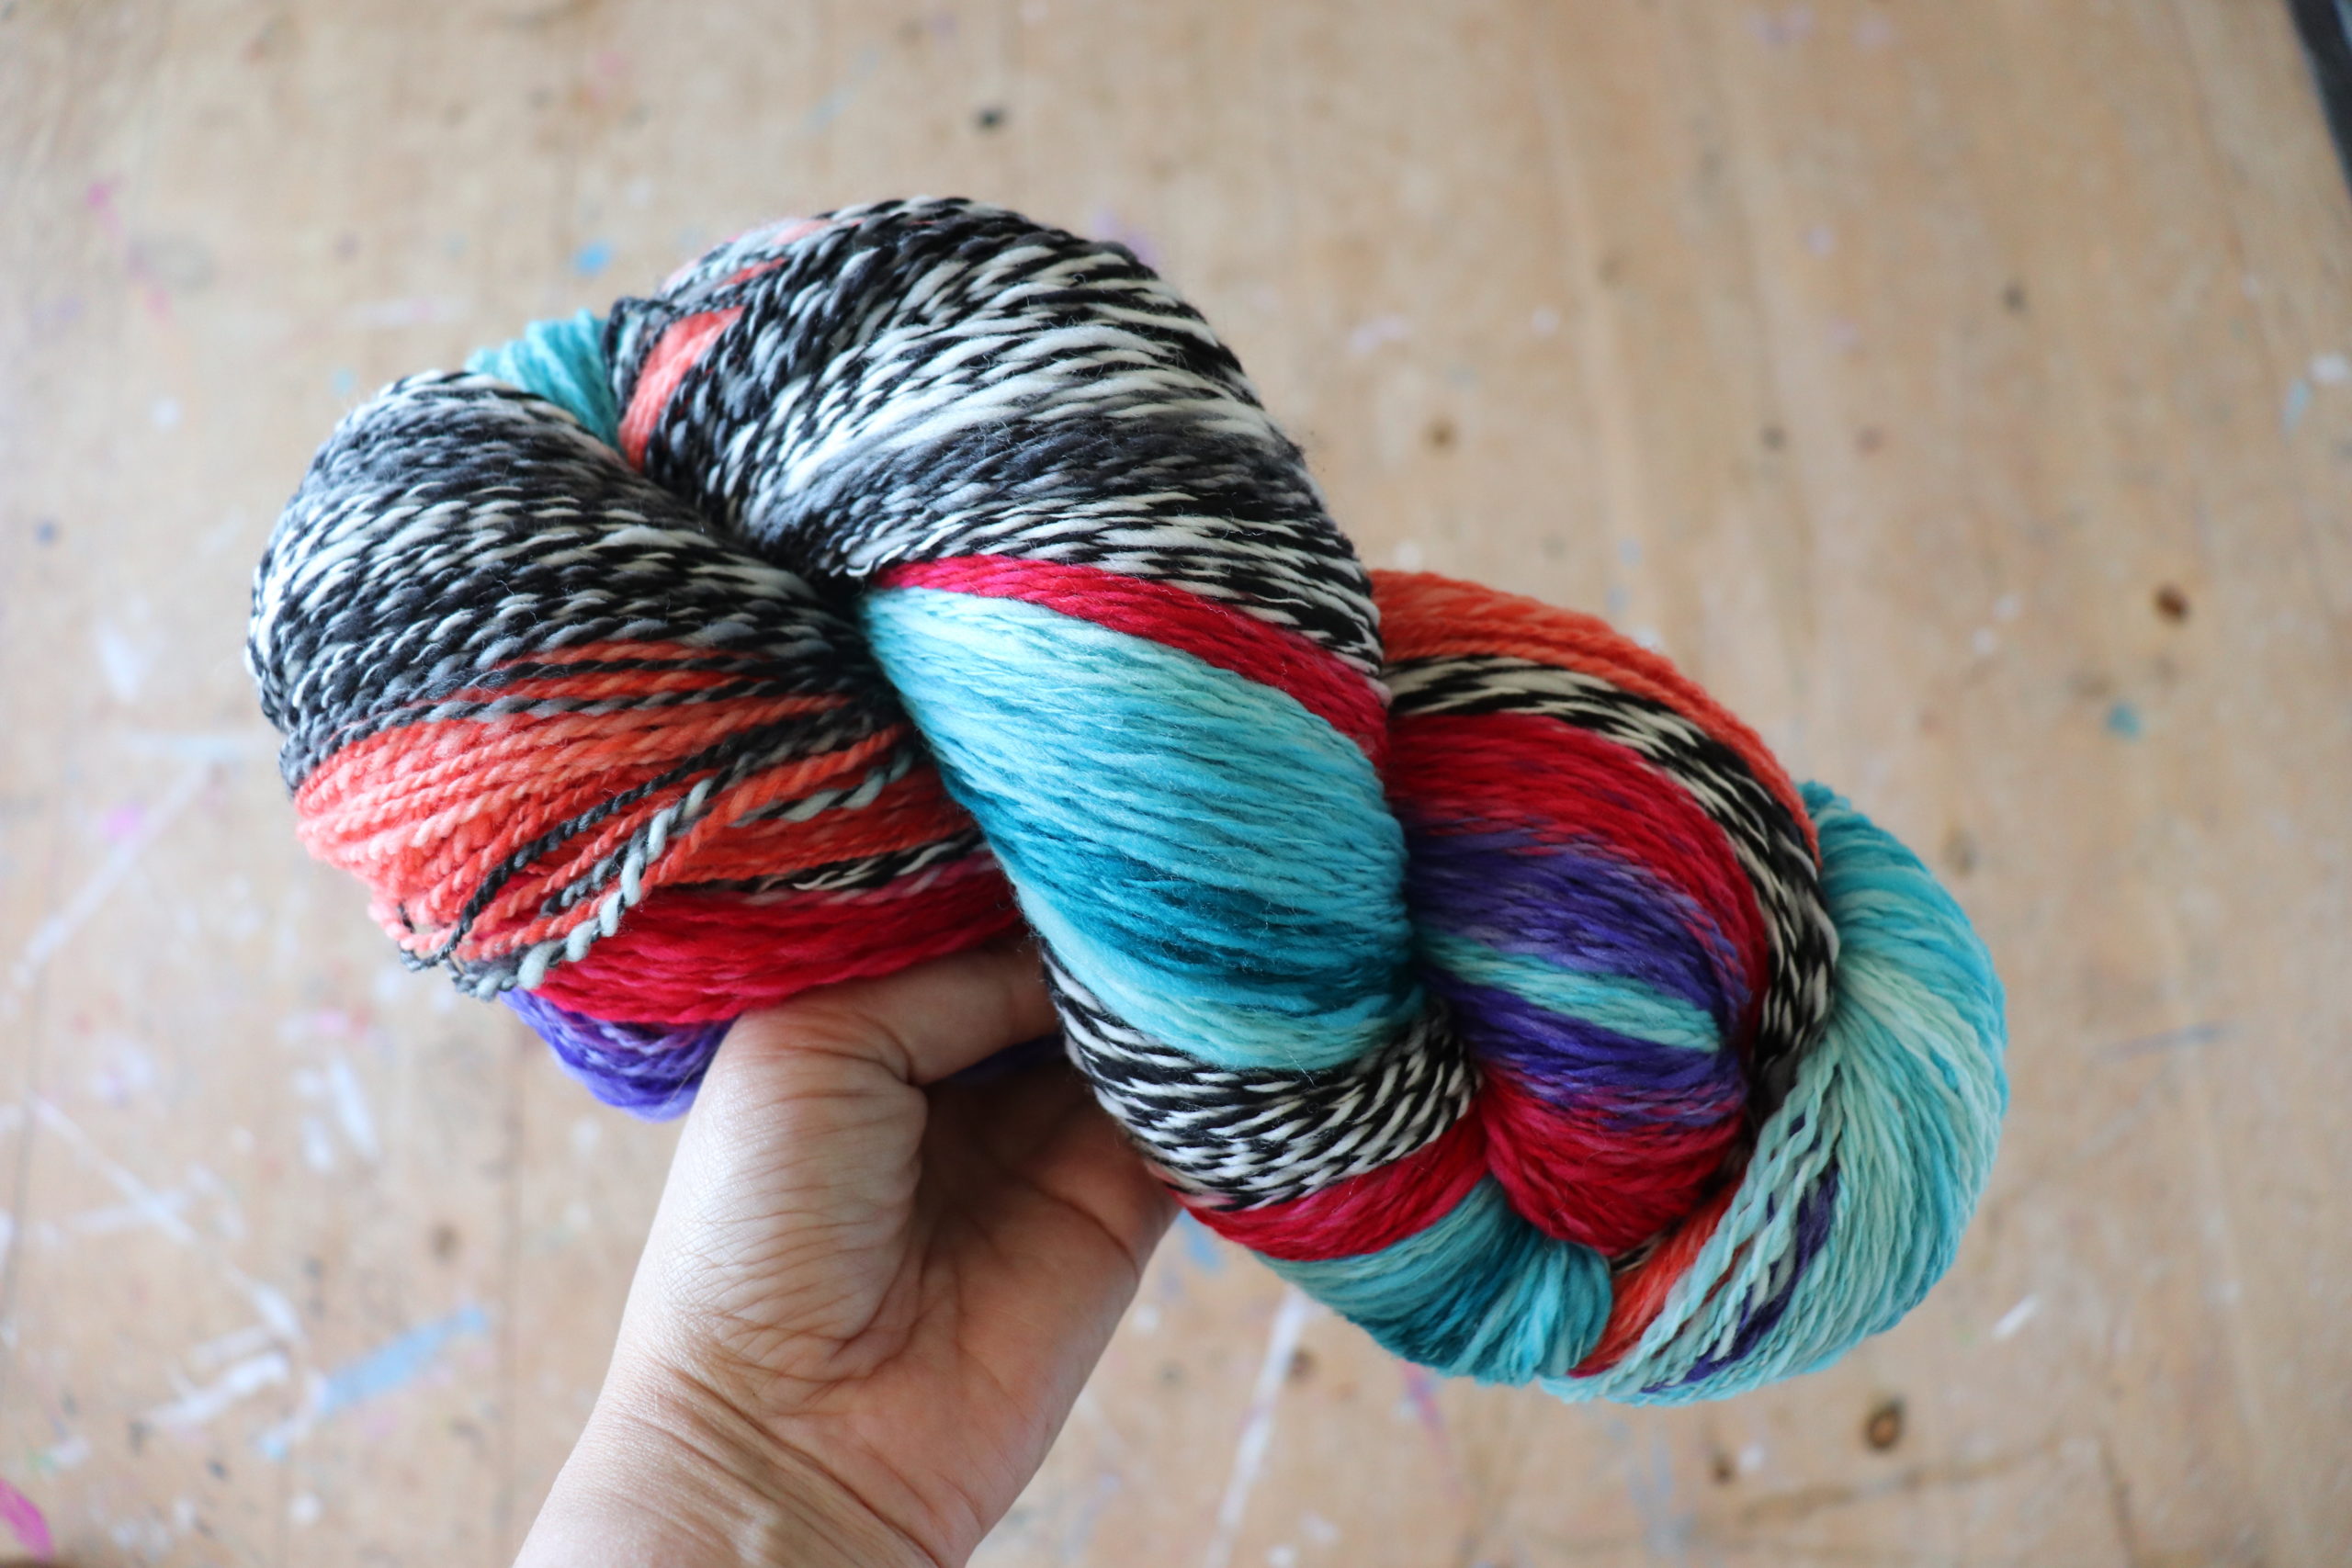
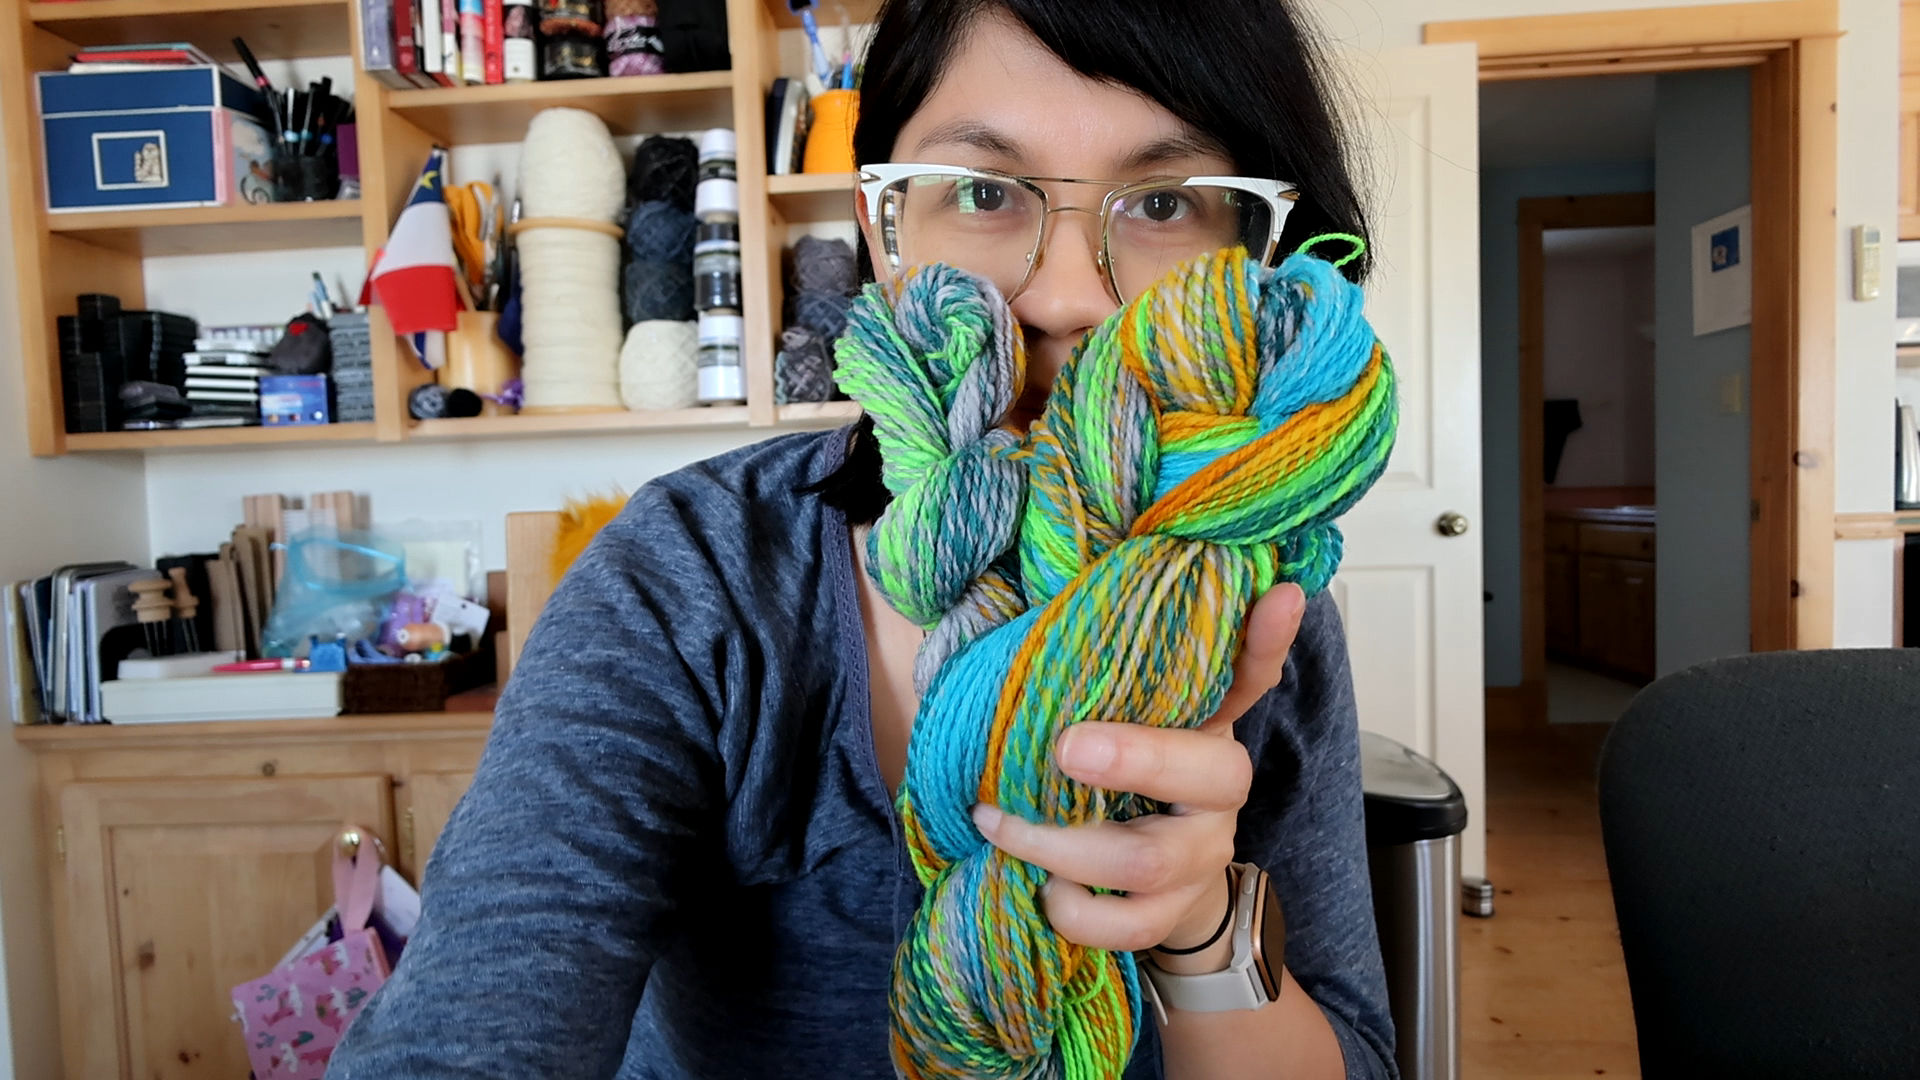
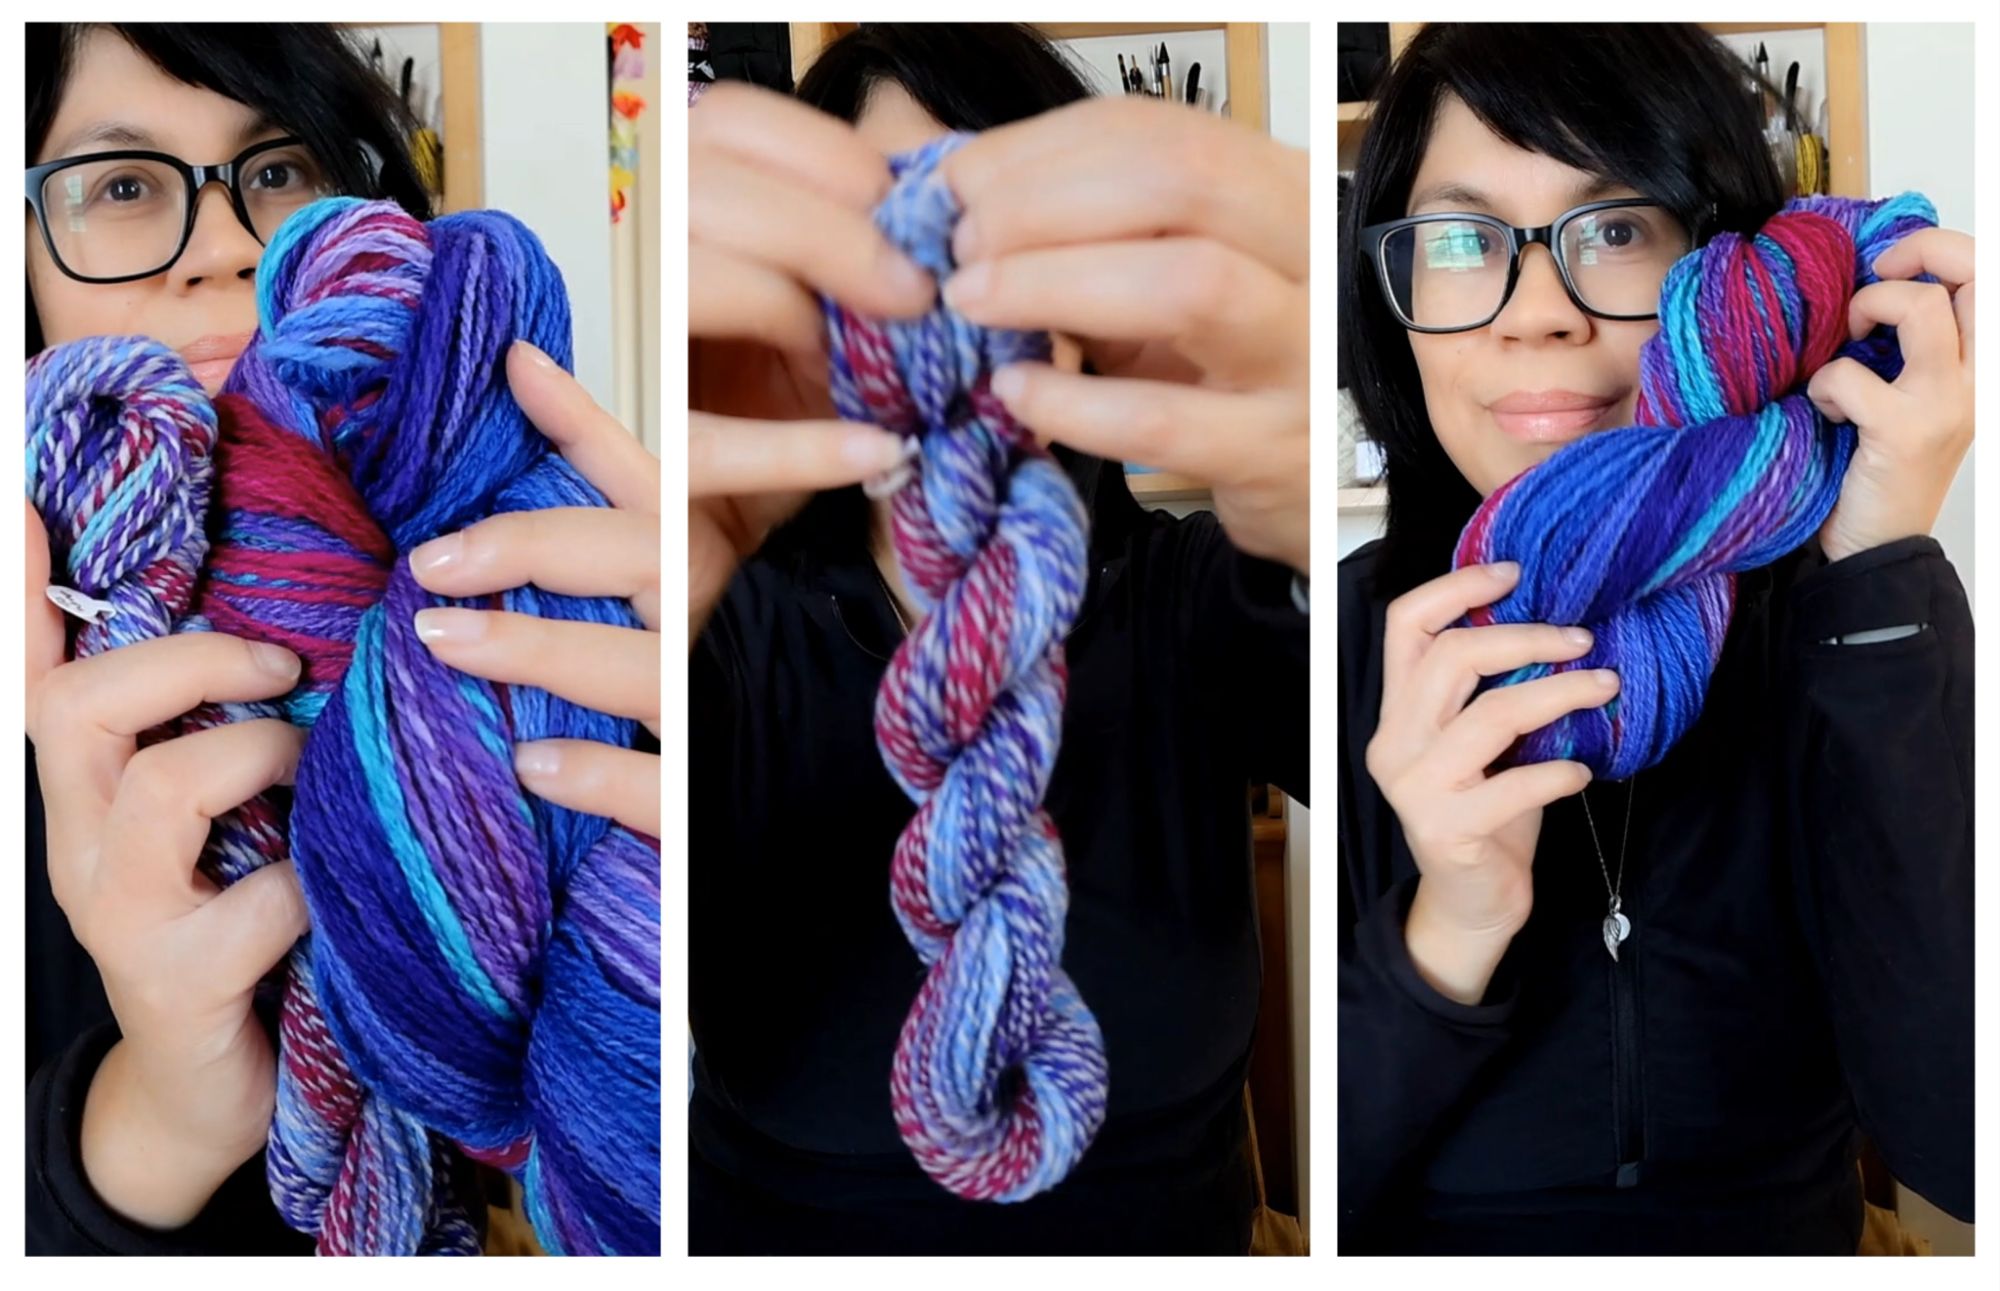
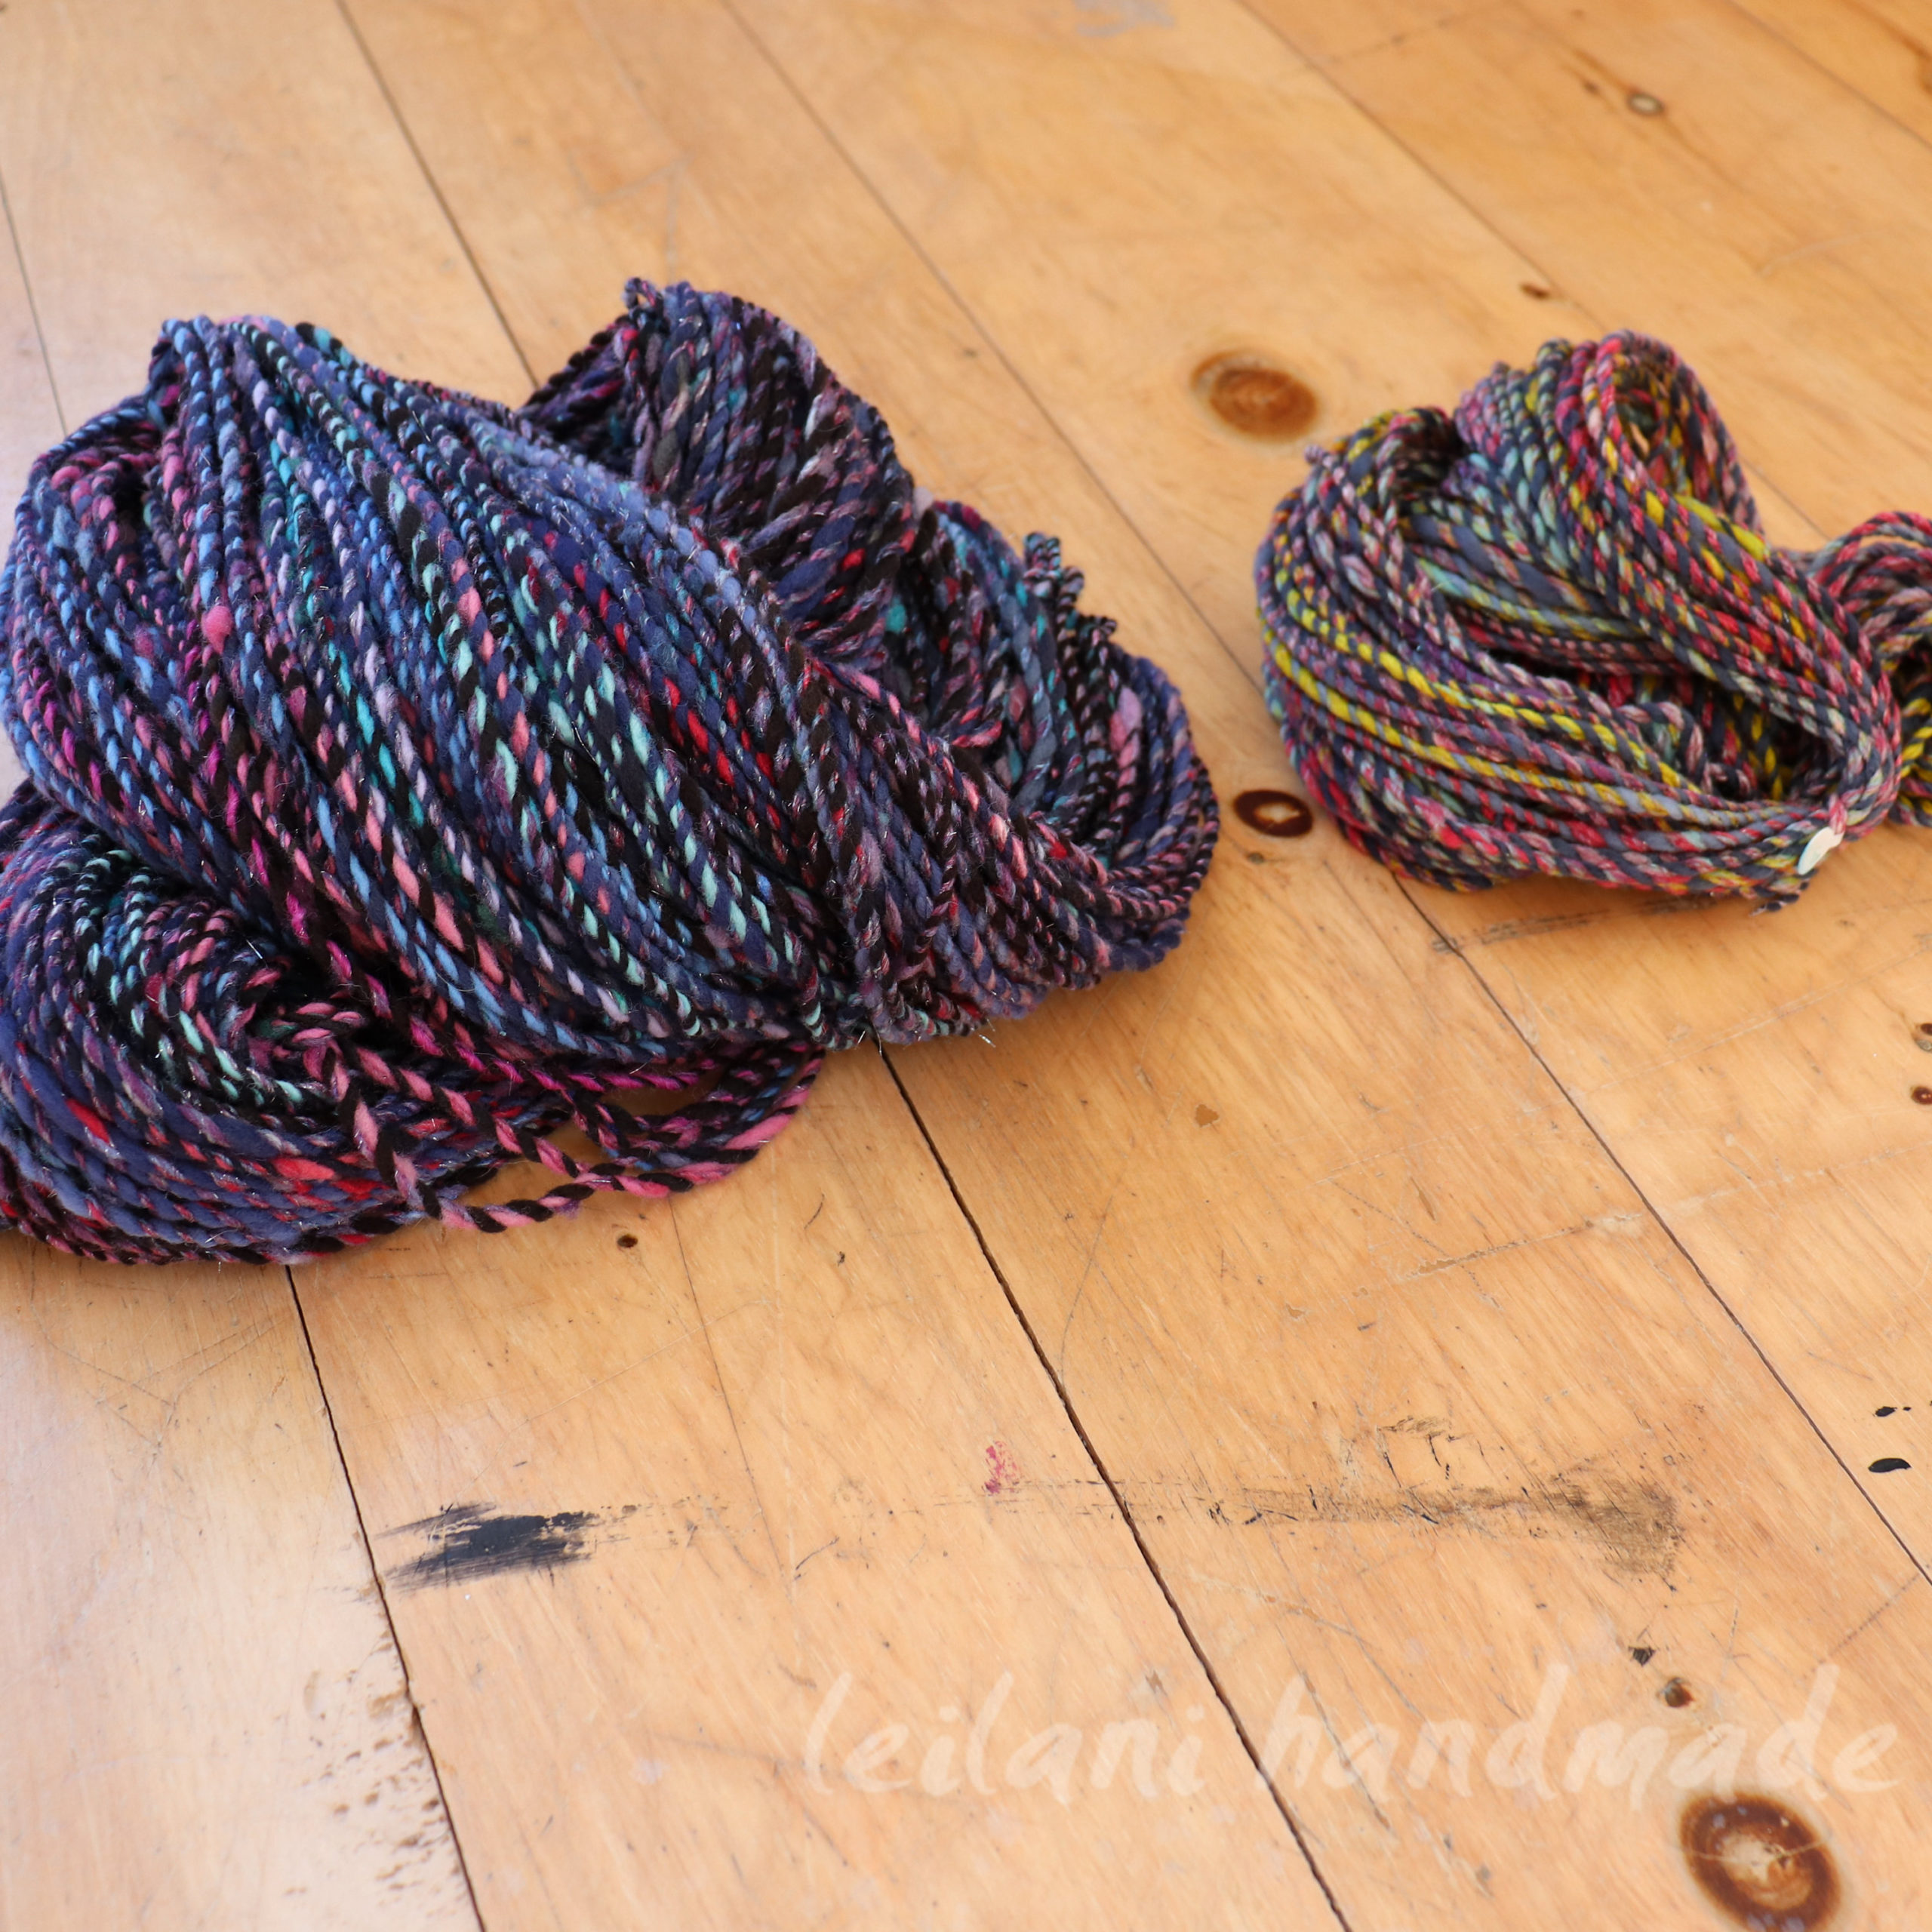
The end result? Let’s just say I should have never pre-judged this yarn. The final handspun yarn is nothing like I thought it would be!
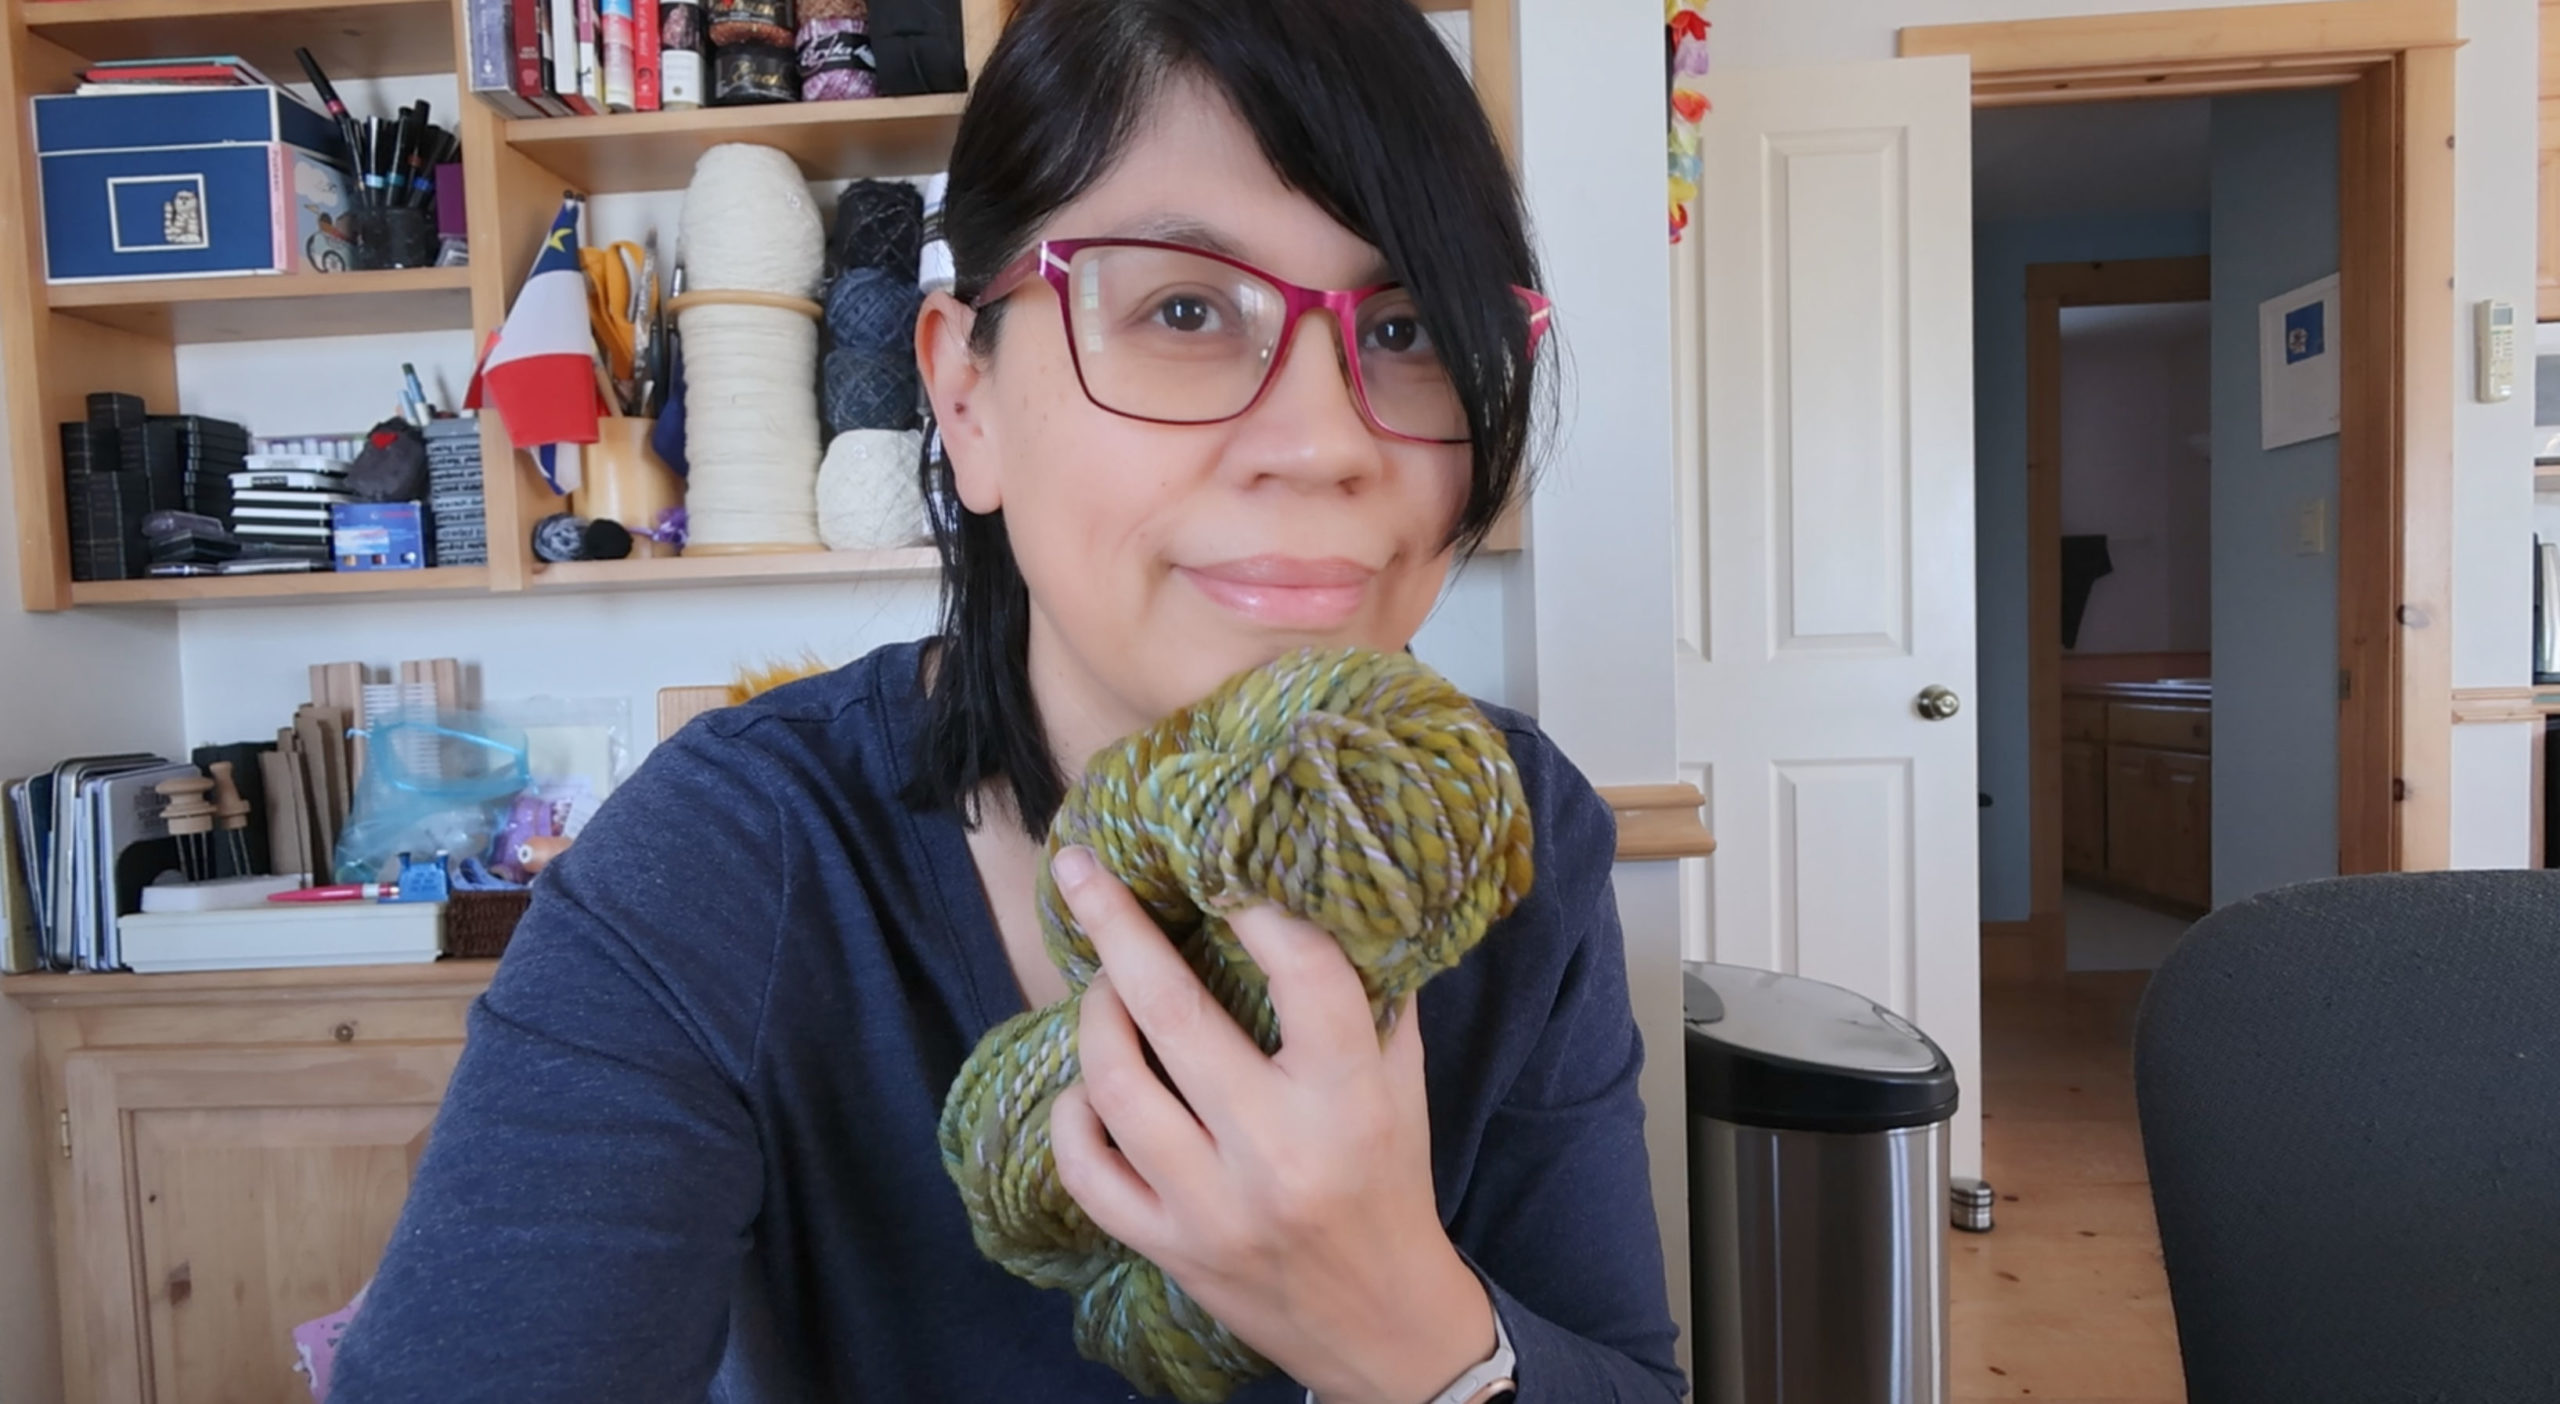
It will be fun to decide what to make with all 800+ yards of this sport-weight yarn, but for now, it’s hanging in the studio. I’m blown away at how much yardage I have in this colorful skein, and how quickly it spun up in the grand scheme of things. I should have purchased the fast flyer attachment for my wheel a long time ago! I might have spun thinner yarns more often (I’m more of a worsted-weight & bulky yarn spinner). This project opened up so many possibilities for my yarn design creativity.
When I was very young and learning to read, my favorite book was called “The Biggest Sandwich Ever,” in which a man enters a park and starts assembling a gigantic sandwich with everything you could ever imagine on it. I loved how this book rhymed, but most of all, I loved all the different types of food that were piled onto this humongous sandwich.
It’s no surprise that, as an adult, I’ve become a total foodie who loves cuisine from all over the world. I find this food theme even enters my jewelry and fiber arts endeavours, with many of my projects referring to or named after food. Everything reminds me of food! 🙂
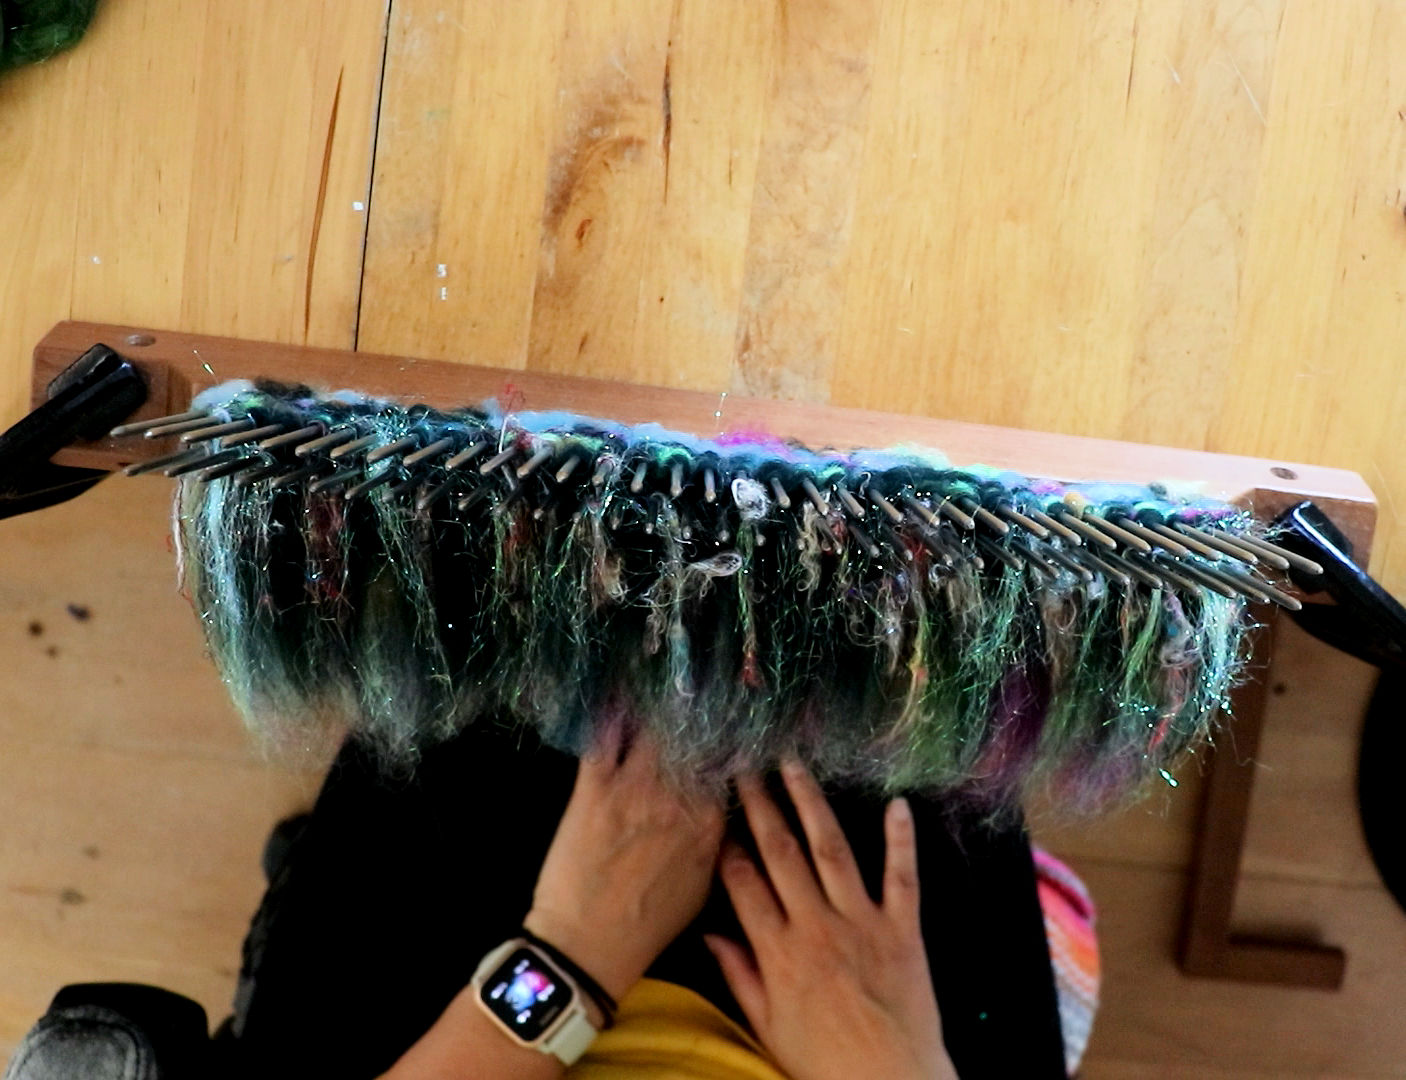
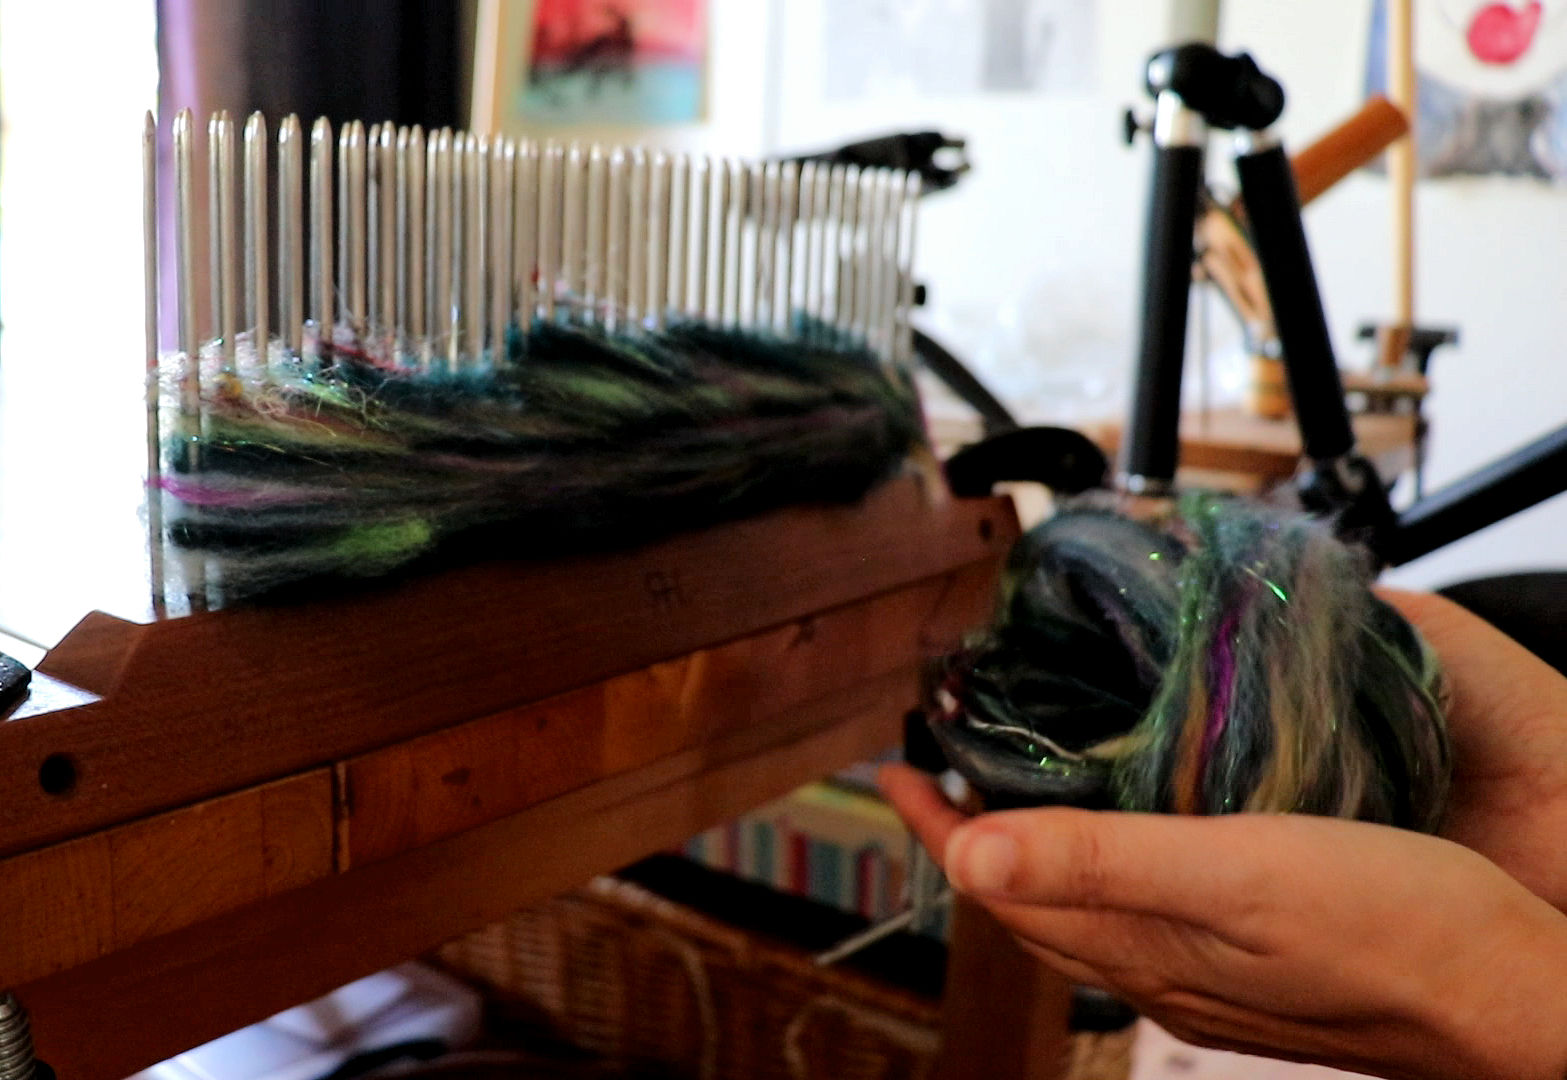
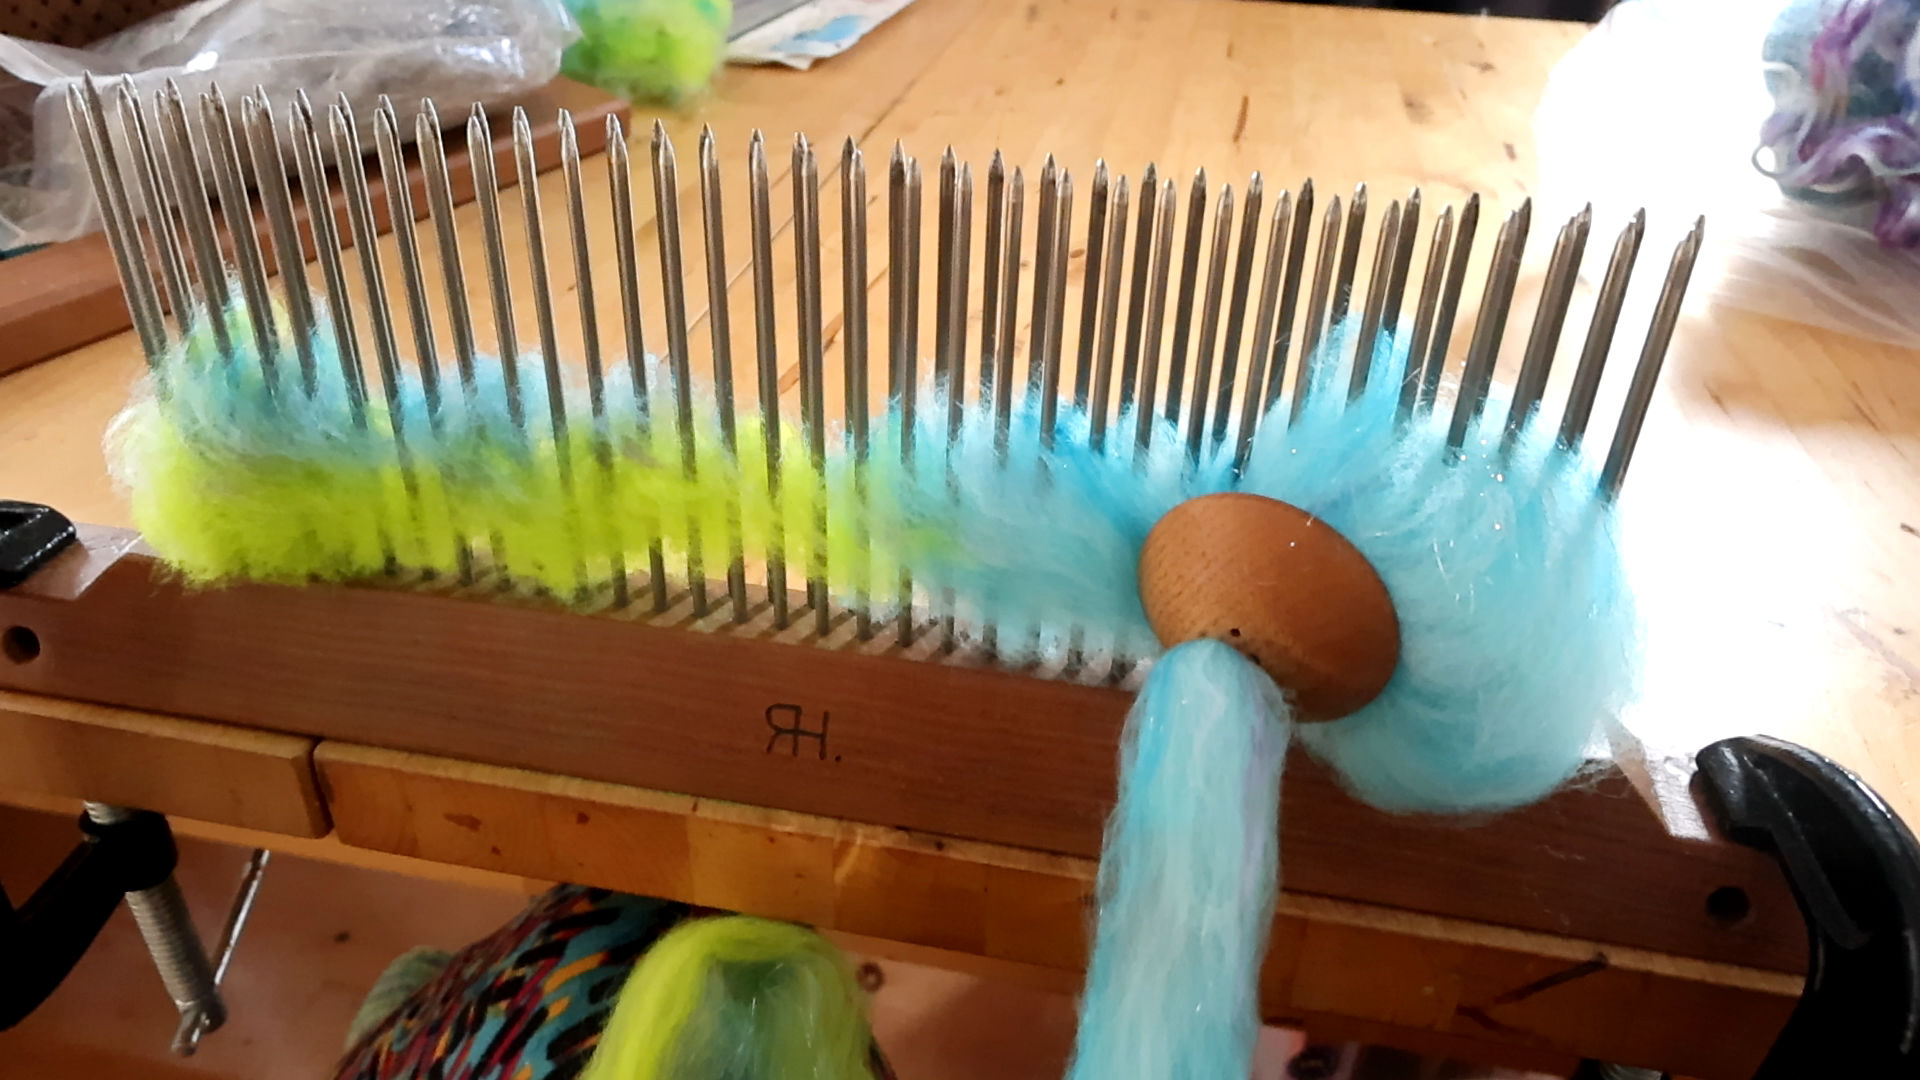
I have nicknamed this hackle blending technique “sandwiching” because I layer many different types of fibers for spinning on top of each other, and repeat the process, “sandwiching” the fibers together before pulling them off with a diz.
Above: a mixture of Merino, Silk, Angora, and Angelina fibers forms this mini roving, pulled off my hackle with a diz and ready for some fun hand spinning!
Why Blended Textured Fibers
I love playing with color and creating unique handspun yarn. I get satisfaction in watching all the colors come together when spinning or plying yarn.
I know some people dislike texture in their yarn, and you can still do this sandwiching technique with just wool top of different colors to create a uniquely blended top, colorwise. Life’s too short for spinning boring fiber. 😉
Another reason to blend fibers is to create different strengths or structure in your yarn. Blending dyed nylon for a stronger sock yarn, for example, or adding in bamboo or cotton for its absorbent or anti-microbial properties. Adding in a luxury fiber, such as silk, to your project is always divine!
For me, textured blending is all about the uniqueness of my handspun. The unpredictability and unreplicability of the fiber are what make it enjoyable and motivating to spin. Although all handspun yarn is art yarn, spinning textured blended fiber embodies that definition in its entirety.
Hackle vs. Drum Carder
You can achieve similar results with a drum carder. With a drum carder, you will pull off a batt, whereas a hackle is used to create roving. I do find that the fibers on a drum carder can blend more effectively than on a hackle. I have a trick to this that I will share in an upcoming video & post, because when I am making textured fiber for spinning, I don’t want the fiber to be overly blended.
Watch: Sandwich Blending Fiber on a Hackle
Tips for Successful Fiber Blending on a Hackle
Don’t Overload the Hackle
It’s tempting to fill a hackle as full as possible, but from my experience, all this does is compact the fibers, making it harder to pull off with the diz. This results in a significant amount of leftover fiber, which you will need to either re-run through the hackle or remove in what I refer to as a “mini-batt” (demonstrated in the video). Because I want to preserve the chunky blending and have every roving match, I don’t run it back through the hackle.
Pull Roving with a Firm but Gentle Pressure
You will want to be firm and steady when pulling the fiber through the diz, BUT not aggressively. Pulling too hard only results in the fiber breaking on the roving prematurely. It also feels like you are fighting the fiber; much more resistance is created, and thus it becomes harder to pull. Not to mention this is very hard on the body.
In the video, you will see me alternate hands while pulling off the roving. Usually, I would guide the diz with one hand and pull with the other, but I have a bad shoulder and neck issues from being hit by a car years ago, so I find the repetitive motion of fiber prep and spinning exacerbates that injury.
Slow and steady is always the way to go when pulling a roving.
Take breaks when needed.
I am guilty of getting so into my hackle blending that I don’t take adequate breaks, resulting in some serious neck, shoulder, and back pain. It’s essential to find balance in tasks that require repetitive motion to keep them enjoyable; otherwise, you may wind up with repetitive strain injury and needing to visit the massage therapist or physiotherapist more often, or even worse, have to quit altogether.
Overall, a hackle is a versatile and generally affordable tool for blending fiber for spinning. See my other hackle post for general hackle use tips, and be sure to check out my YouTube Channel for more spinning and fiber inspiration.
Although I have owned this spinning wheel the longest, I have never used the Lendrum fast flyer. My Lendrum foldable DT is my oldest and dearest spinning wheel. DT stands for “double treadle,” and I loved the idea that it could be folded and stored when I was not using it. Well, almost 14 years later, it has only been folded once, when we moved from the Greater Montreal area back to our home province of Nova Scotia.
I bought my Lendrum sight-unseen only for the fact that it was Canadian-made and readily available. I purchased the plying head for my Lendrum as soon as I got the hang of spinning, but I’ve never bothered with any of the other attachments. I’ve never been a “thin” spinner, nor have I had any desire to be. I love funky chunky art yarns and big bulky squish.
But as my knitting advanced, I desired spinning thinner yarns. Coupled with Gord Lendrum’s announcement of retirement, it was time to purchase the fast flyer for my wheel before it was too late.
Installing the Lendrum Fast Flyer
The fast flyer is super easy to install, and luckily uses the same drive band and bobbins as the regular flyer (the plying head uses a different drive band and bobbins. The drive band can be a pain to swap out, so I leave it coiled up attached to the bottom of my wheel – you can see it in the photo above).
All you have to do is swap the regular flyer for the fast flyer and reattach the drive band.
I decided to document my first thoughts on using the fast flyer via video. Is it worth it? Is it easy to use?
You can watch my process spinning using the Lendrum fast flyer in the video below:
I decided to attempt a “sock” yarn. Sock yarns are usually fingering-weight, and I was not expecting to achieve a yarn that thin, not for my first time using the fast flyer and not for a handspun 3-ply, which I wanted for durability.
I decided to use superwash BFL once again for this project. Although superwash fibers aren’t my favorite, I’ve already dyed several braids of this fiber when I first got it in stock, so I want to use them up. Superwash is great for socks since it doesn’t felt, so if the socks accidentally get thrown in the wash, I don’t have to worry about felting or shrinkage.
I also want to get comfortable spinning superwash fibers because I know some people who can’t wear wool can successfully wear superwash.
Overall Thoughts of the Lendrum Fast Flyer
Bottom line, I really enjoyed using the fast flyer and am intrigued to keep using it. I only tried the largest whorl, so I think next time I’m going to go down to the smallest one and compare. It made achieving a thinner singles much easier – and faster! It certainly lives up to its name. I could get a steady and fast treadle on and was amazed at how quickly the bobbin was filling. The singles themselves quickly became consistently thinner, which I was thrilled about.
Compared to the regular flyer, when I would get treadling faster I would tend to lose control of the singles and it would break. Then I would have to stop, feed the singles through again and reattach the fiber. Before purchasing the Lendrum fast flyer I preferred spinning thinner gauges of singles on my e-spinner. Now that I’ve used the Lendrum fast flyer, it’s my preference for more consistent thin singles that work up quickly.
I also purchased the super fast flyer for my Lendrum spinning wheel, and I will document my thoughts on that once I feel like I’ve totally gotten the hang of this one.
I definitely feel that the Lendrum fast flyer was a good investment that will get lots of use with my Lendrum spinning wheel.
Documenting My Process of Dyeing and Spinning Superwash BFL for the First Time
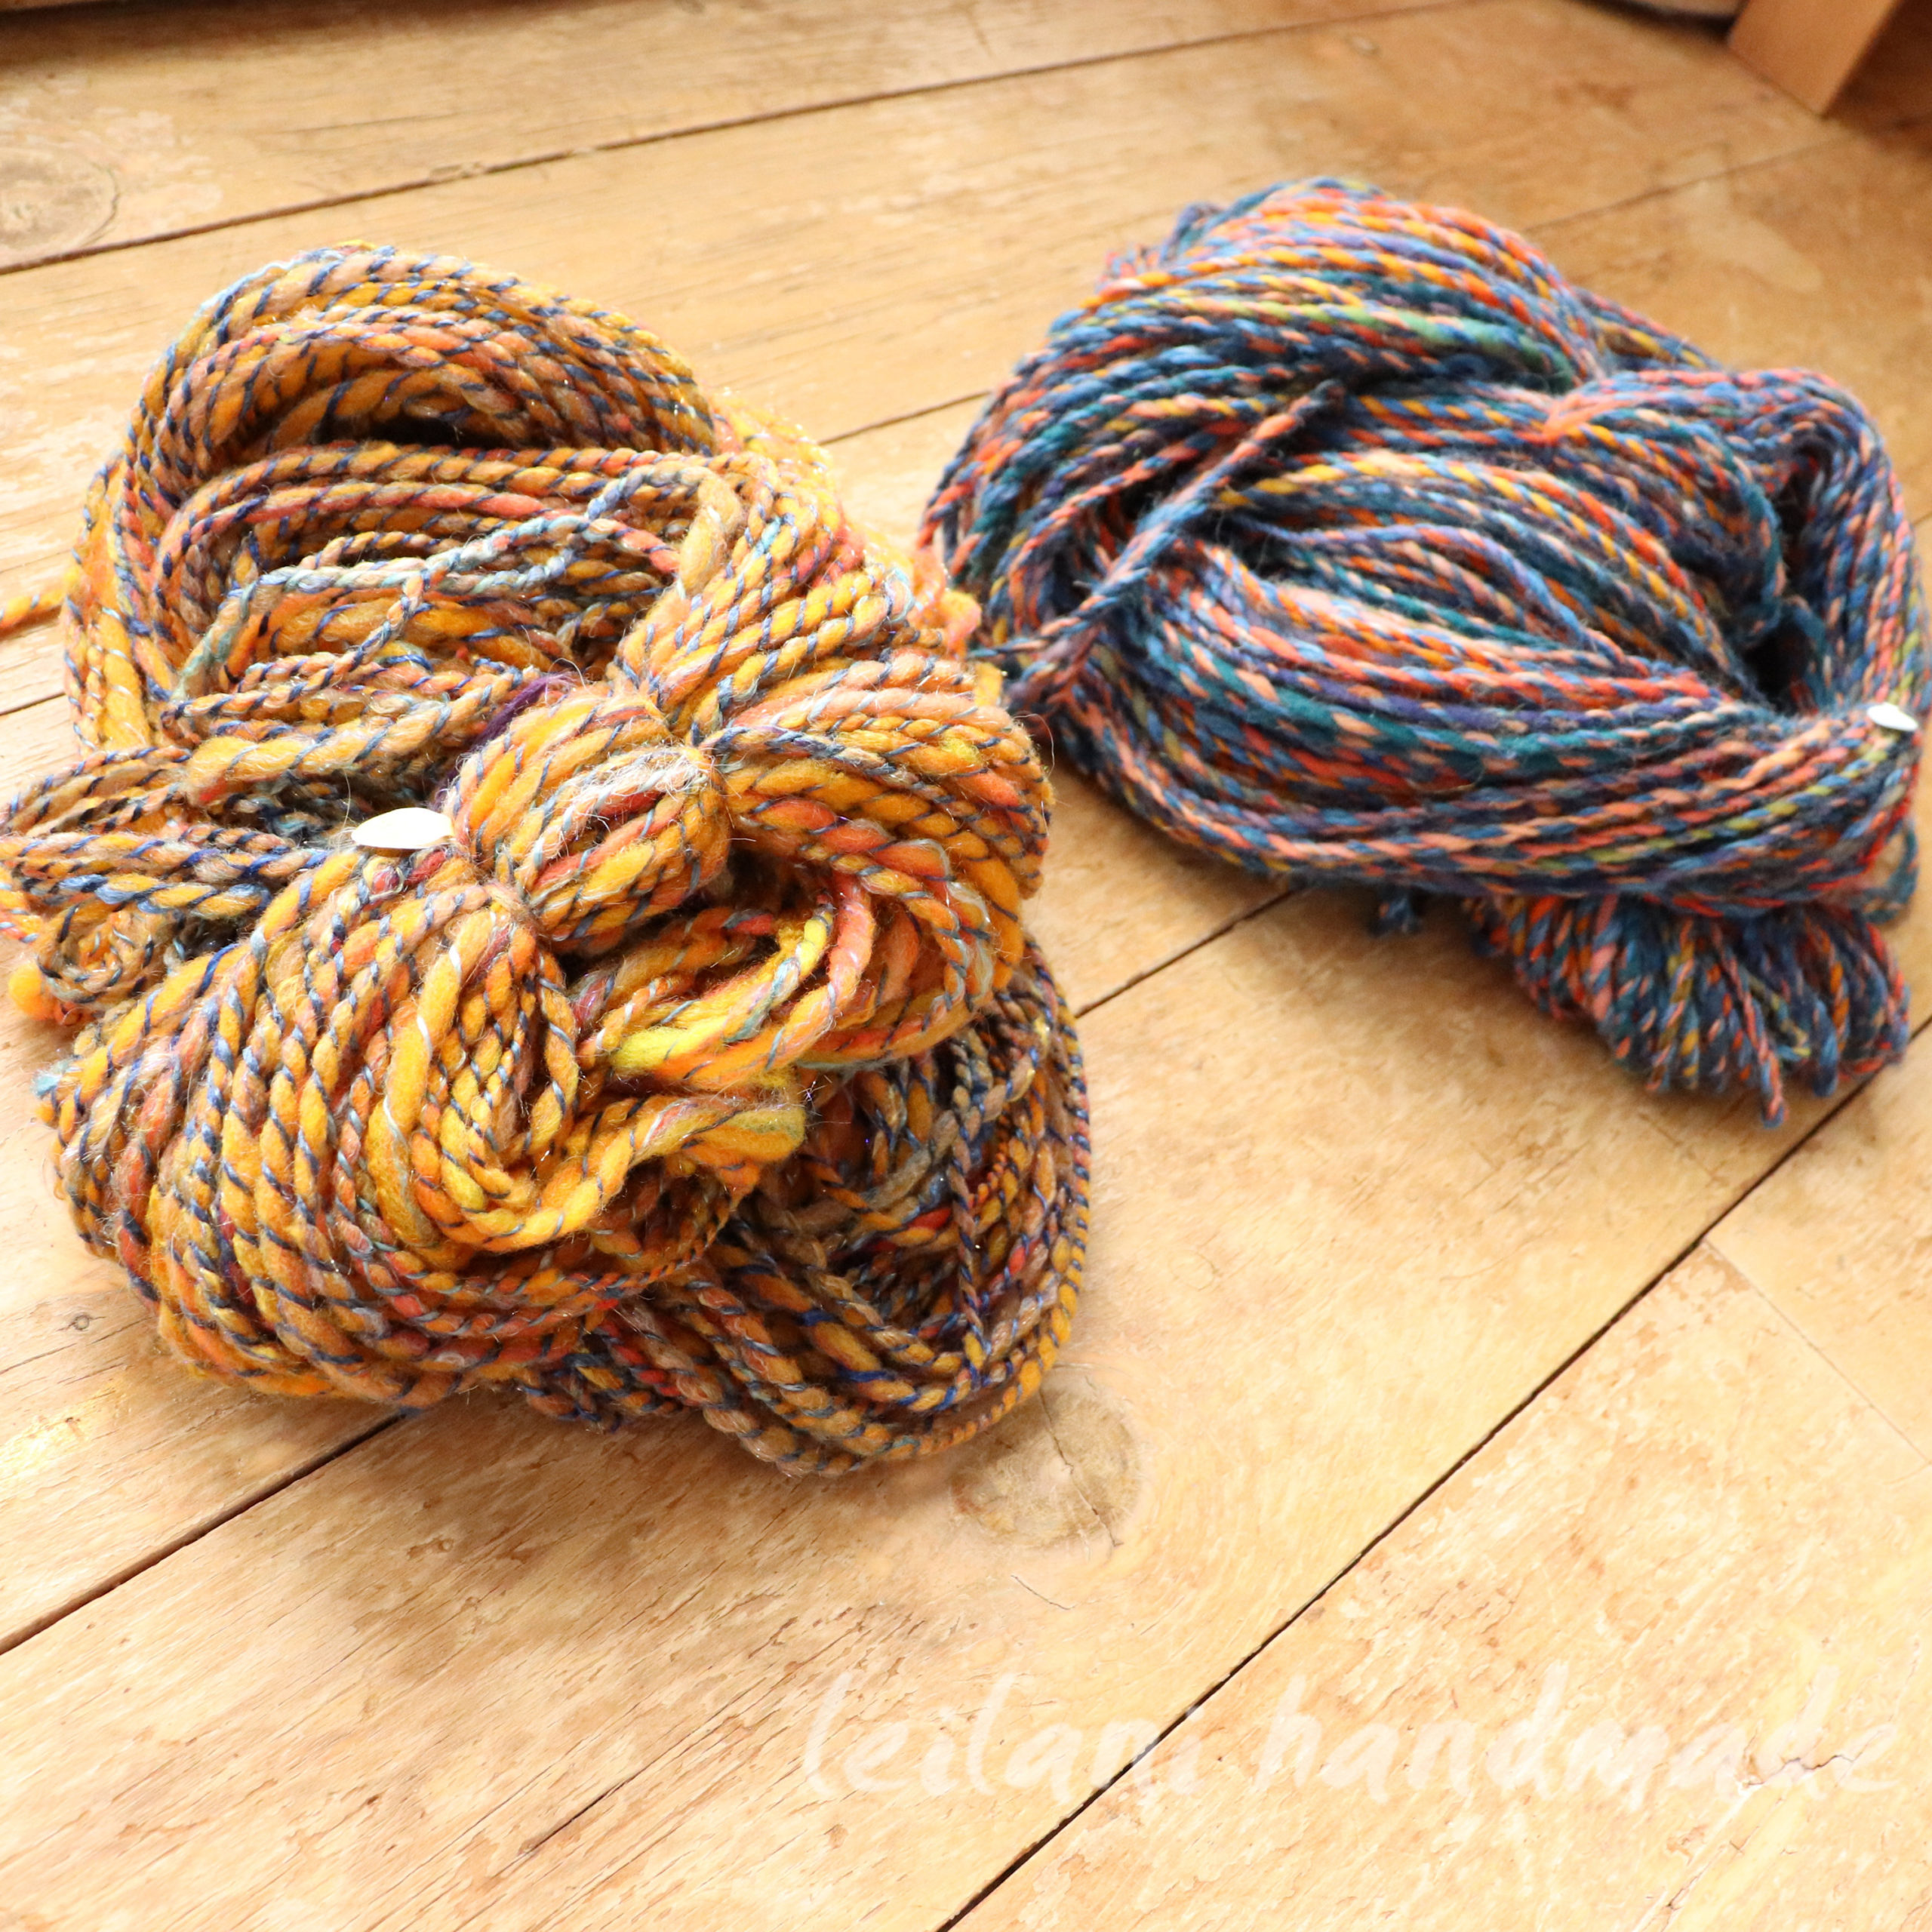
Spinning these two skeins of Superwash BFL had a lot more twists and turns than I was expecting.
I’ve spun BFL (Blue Faced Leicester) wool and enjoyed it. I call it the workhorse of my studio. It tends to be much more affordable than some of the finer fibers, like Merino, and therefore, I can spin a huge batch of it for projects such as experimenting with yarn dyeing.
I picked up the Superwash version on a whim to try it out. I’ve spun Superwash Merino before, but not BFL. I love to knit socks, so I thought I should add Superwash to my repertoire, especially since some of my knits have accidentally made it into the washing machine.
I’m not a big fan of spinning superwash, at least the Merino version, and there are some tricks to knitting superwash yarn to obtain the proper size since it’s so limp and likes to lose shape. But as I do gift knits on occasion and know folks who are allergic to wool but can wear the superwash version, I think there’s merit in giving it a try or at least getting comfortable spinning it when necessary.
A Quick Summary of my Thoughts on Superwash BFL
Superwash BFL surprised me. It wasn’t as bad as I had anticipated, but it certainly fell flat in some areas.
Spinning Superwash BFL
I found that the fiber itself didn’t feel as “fake” or “plastic-y” as with Superwash Merino. Maybe because the fibers are not so dense? Or is it processed less because it’s not as thick as Merino? I can only guess, but I didn’t mind spinning this so much. I enjoyed the colors I dyed it, so that certainly helps! 🙂
The final yarn had much more of a spring to it than I was anticipating.
It’s a fairly bouncy yarn, which I was not expecting at all! I’m sure the fact that I like to put a lot of twist in both my singles and during plying helped with this. I will take mental note to be sure to add lots of twist whenever I spin Superwash BFL.
There is (was) a mild chemical smell.
Oddly when I set the yarn with soapy hot water it emitted a chemical-like smell that lingered after it dried. I was taken aback by this because it didn’t have any type of smell that I can recall when I dyed it. It’s definitely not a acid dye smell, I am used to that, especially with black. Plus, those scents off-gas quite quickly from the set yarn.
Reflecting on it I think it’s a mixture of things, BFL in general has a very distinct sheep, barn-like smell. I figure between that and the processing to take out the crimp, and possibly the acid dye gave it a slightly unpleasant smell.
I’m happy to report that since filming this video, the chemical smell has dissipated.
Watch The Process of Creating This Superwash BFL Yarn
Dyeing Extra Superwash BFL Roving to Finish Yarn
I had a fair amount of one singles left from skein #2 of this project, so I decided to dye a bit more roving to finish the project. The original roving would have been dyed using my crockpot method, where I add powdered dye straight to the hot water before dipping in the fiber.
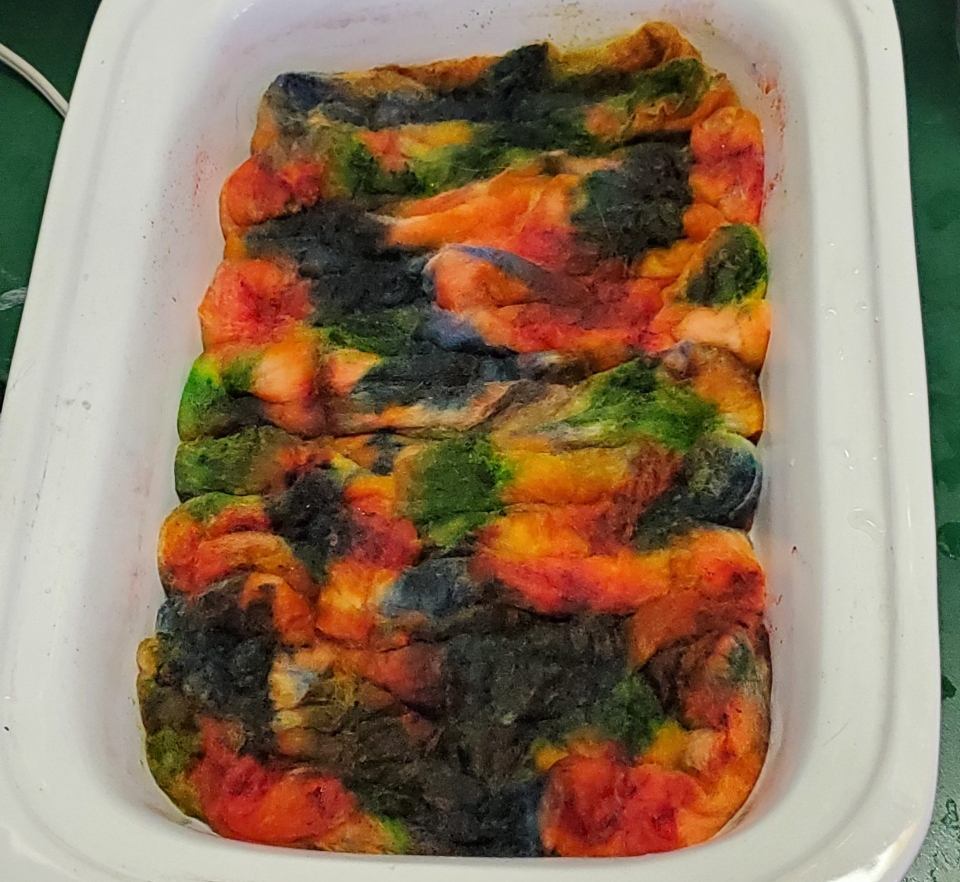
For this small amount of roving, I decided to inject the color using syringes, and set it with my rectangular crockpot. This method uses very little water and is great for small amounts of roving. Not to mention it’s a lot of fun! 🙂 I highly recommend this method if you want to get comfortable with dyeing before dyeing larger amounts.
I have yet to knit up this Yarn
The verdict is still out regarding the performance of this superwash yarn as I’ve yet to knit it up. Lately I have been dedicating my time to spinning and dyeing as time for me is limited and I have to pick and choose the projects I do. I will no doubt have a backlog of yarn yet again. I’ll be sure to post my experience when I do get around to creating with this yarn.
Have you ever spun Superwash BFL, or knit with it? I’d love to hear your experience with it. 🙂
Until next time,
I am a jewelry artist, spinner, and indie dyer in Nova Scotia, Canada, self-taught in all areas. I hope these posts help encourage and inspire you along your creative journey, no matter if you approach your craft my way or not.
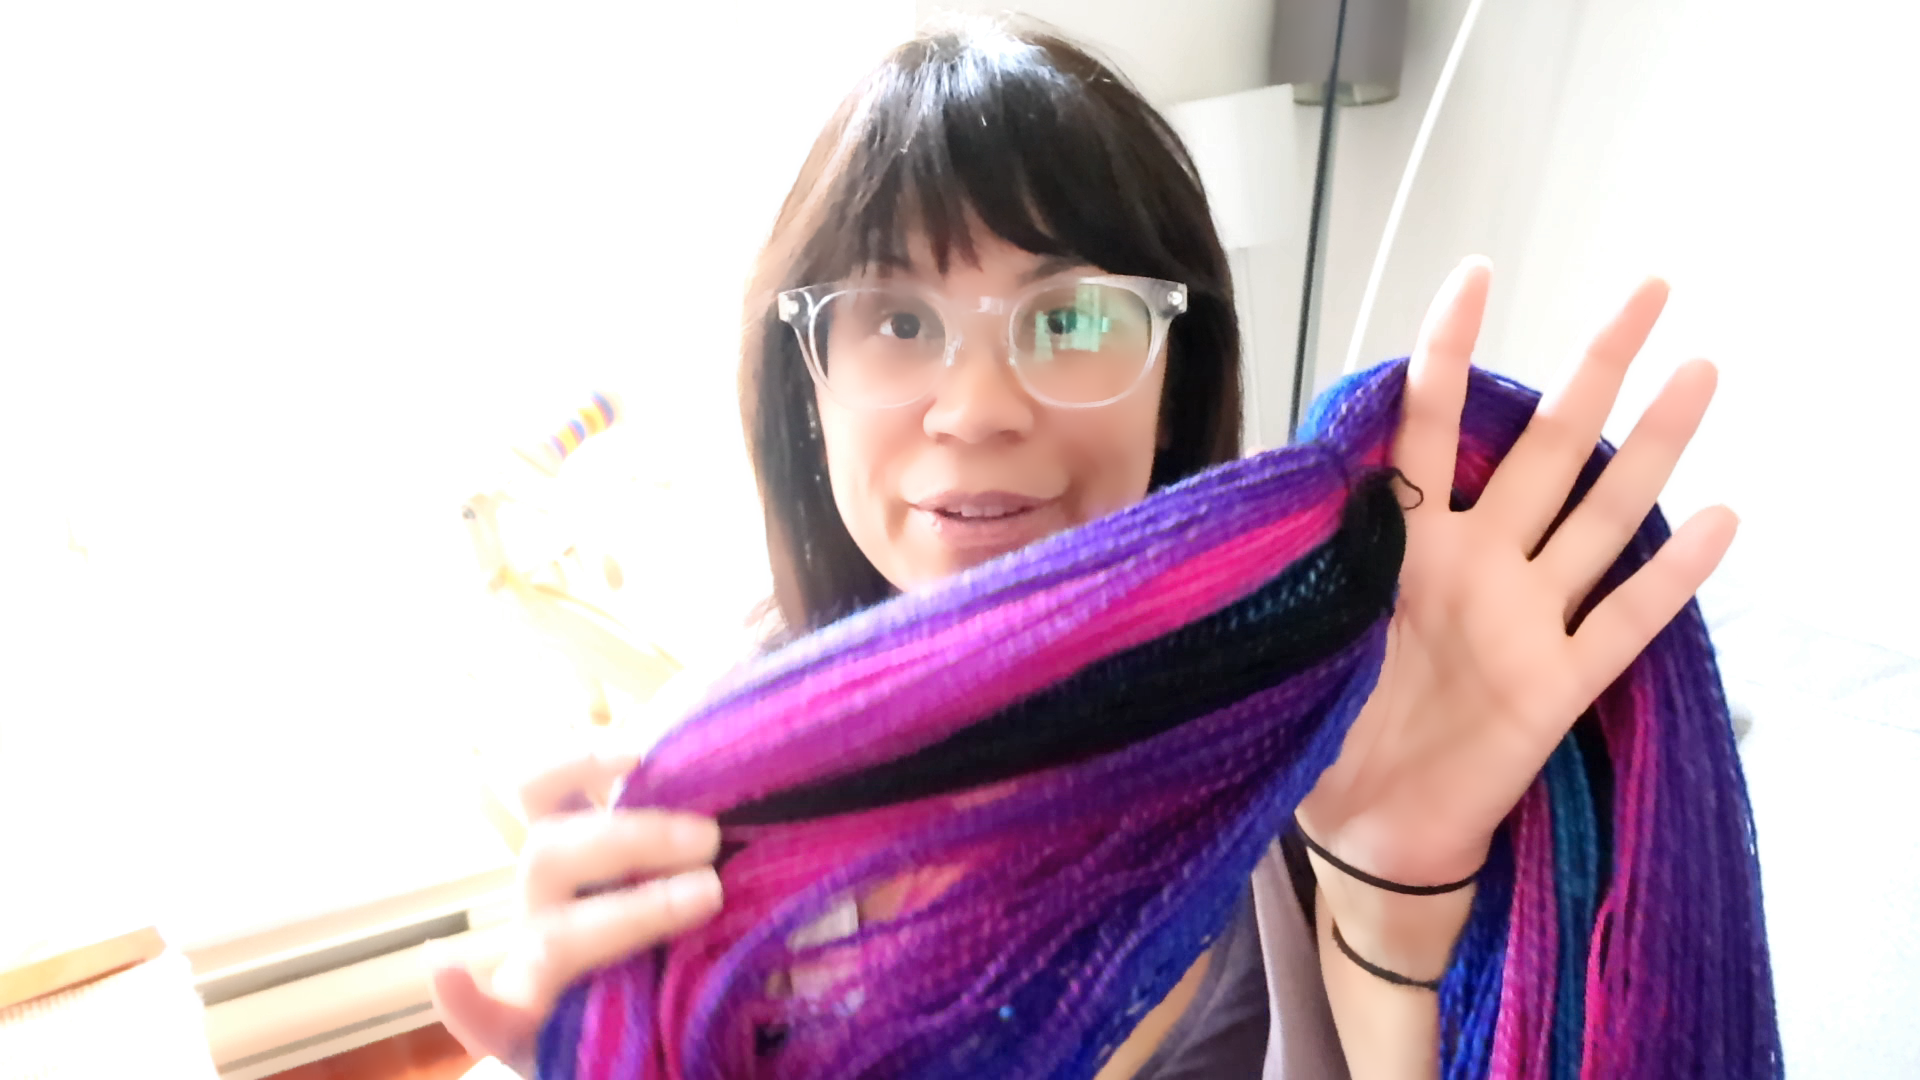
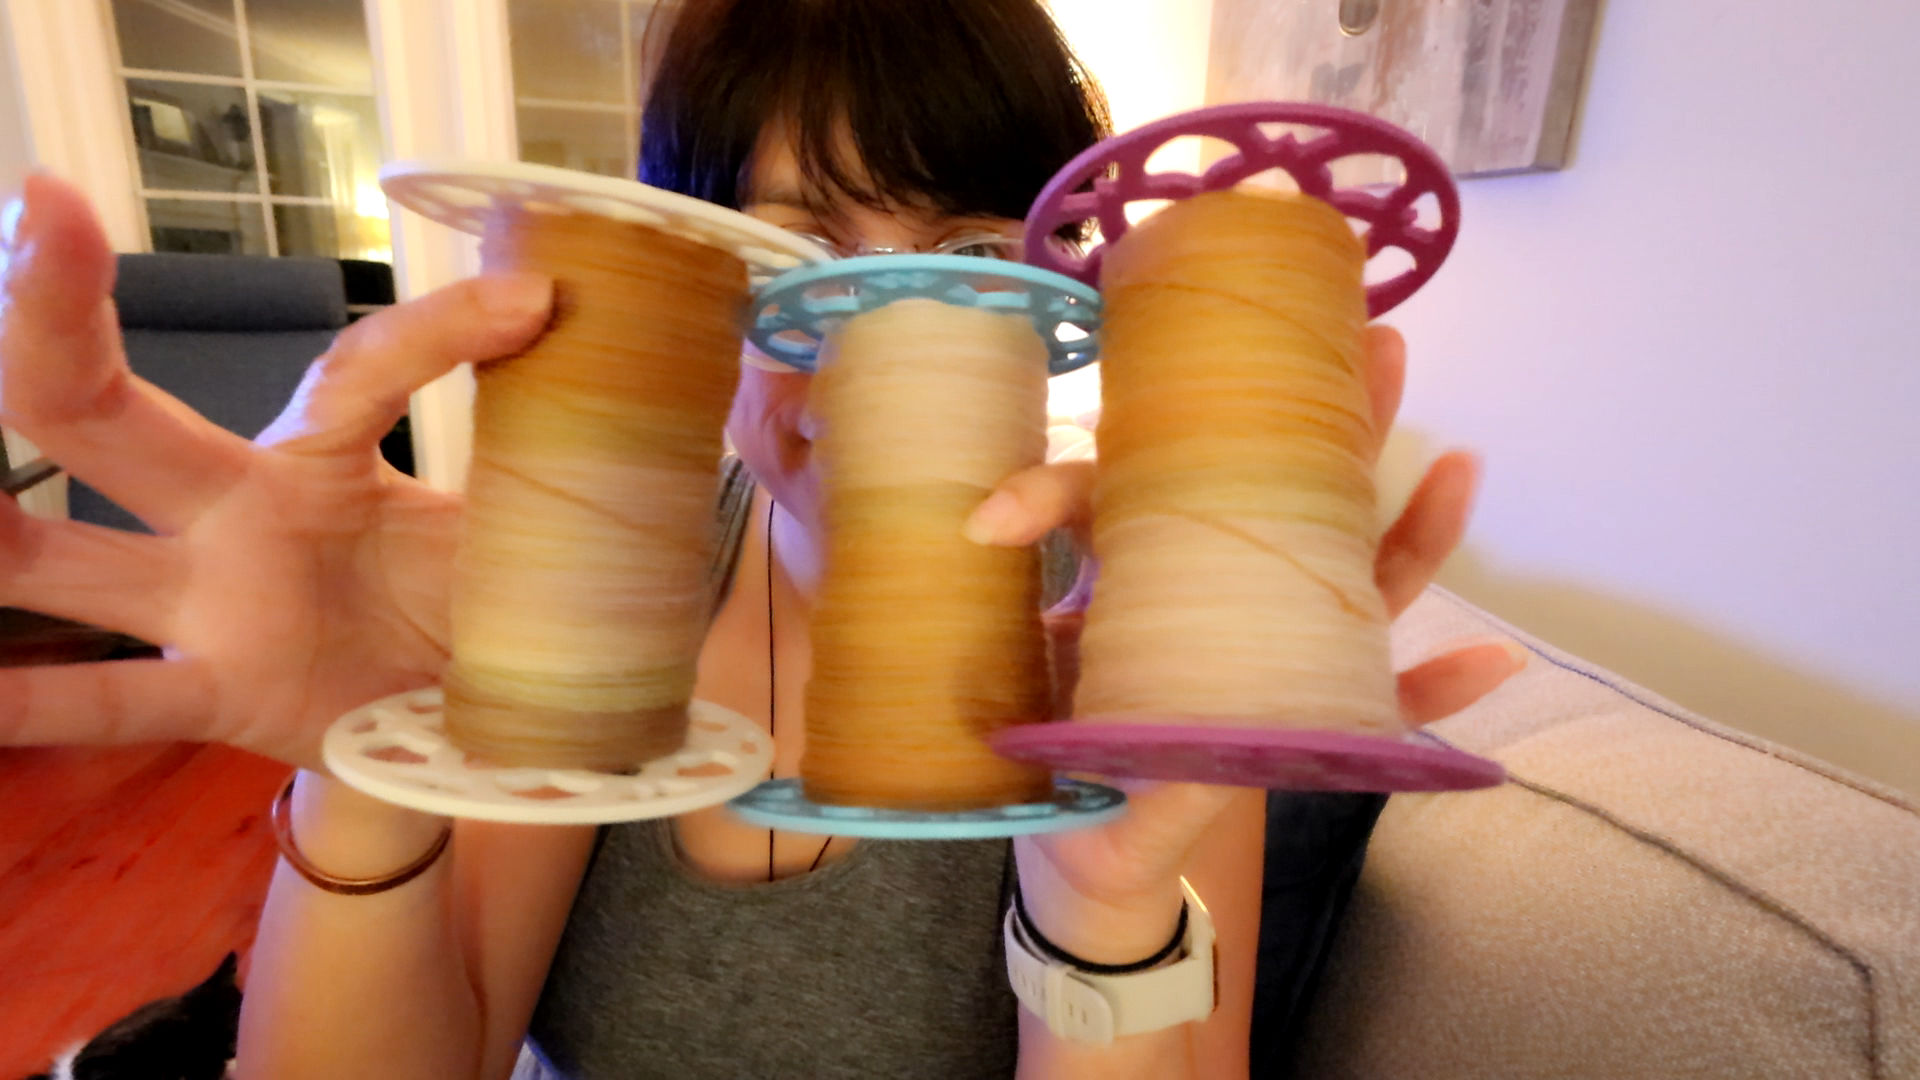
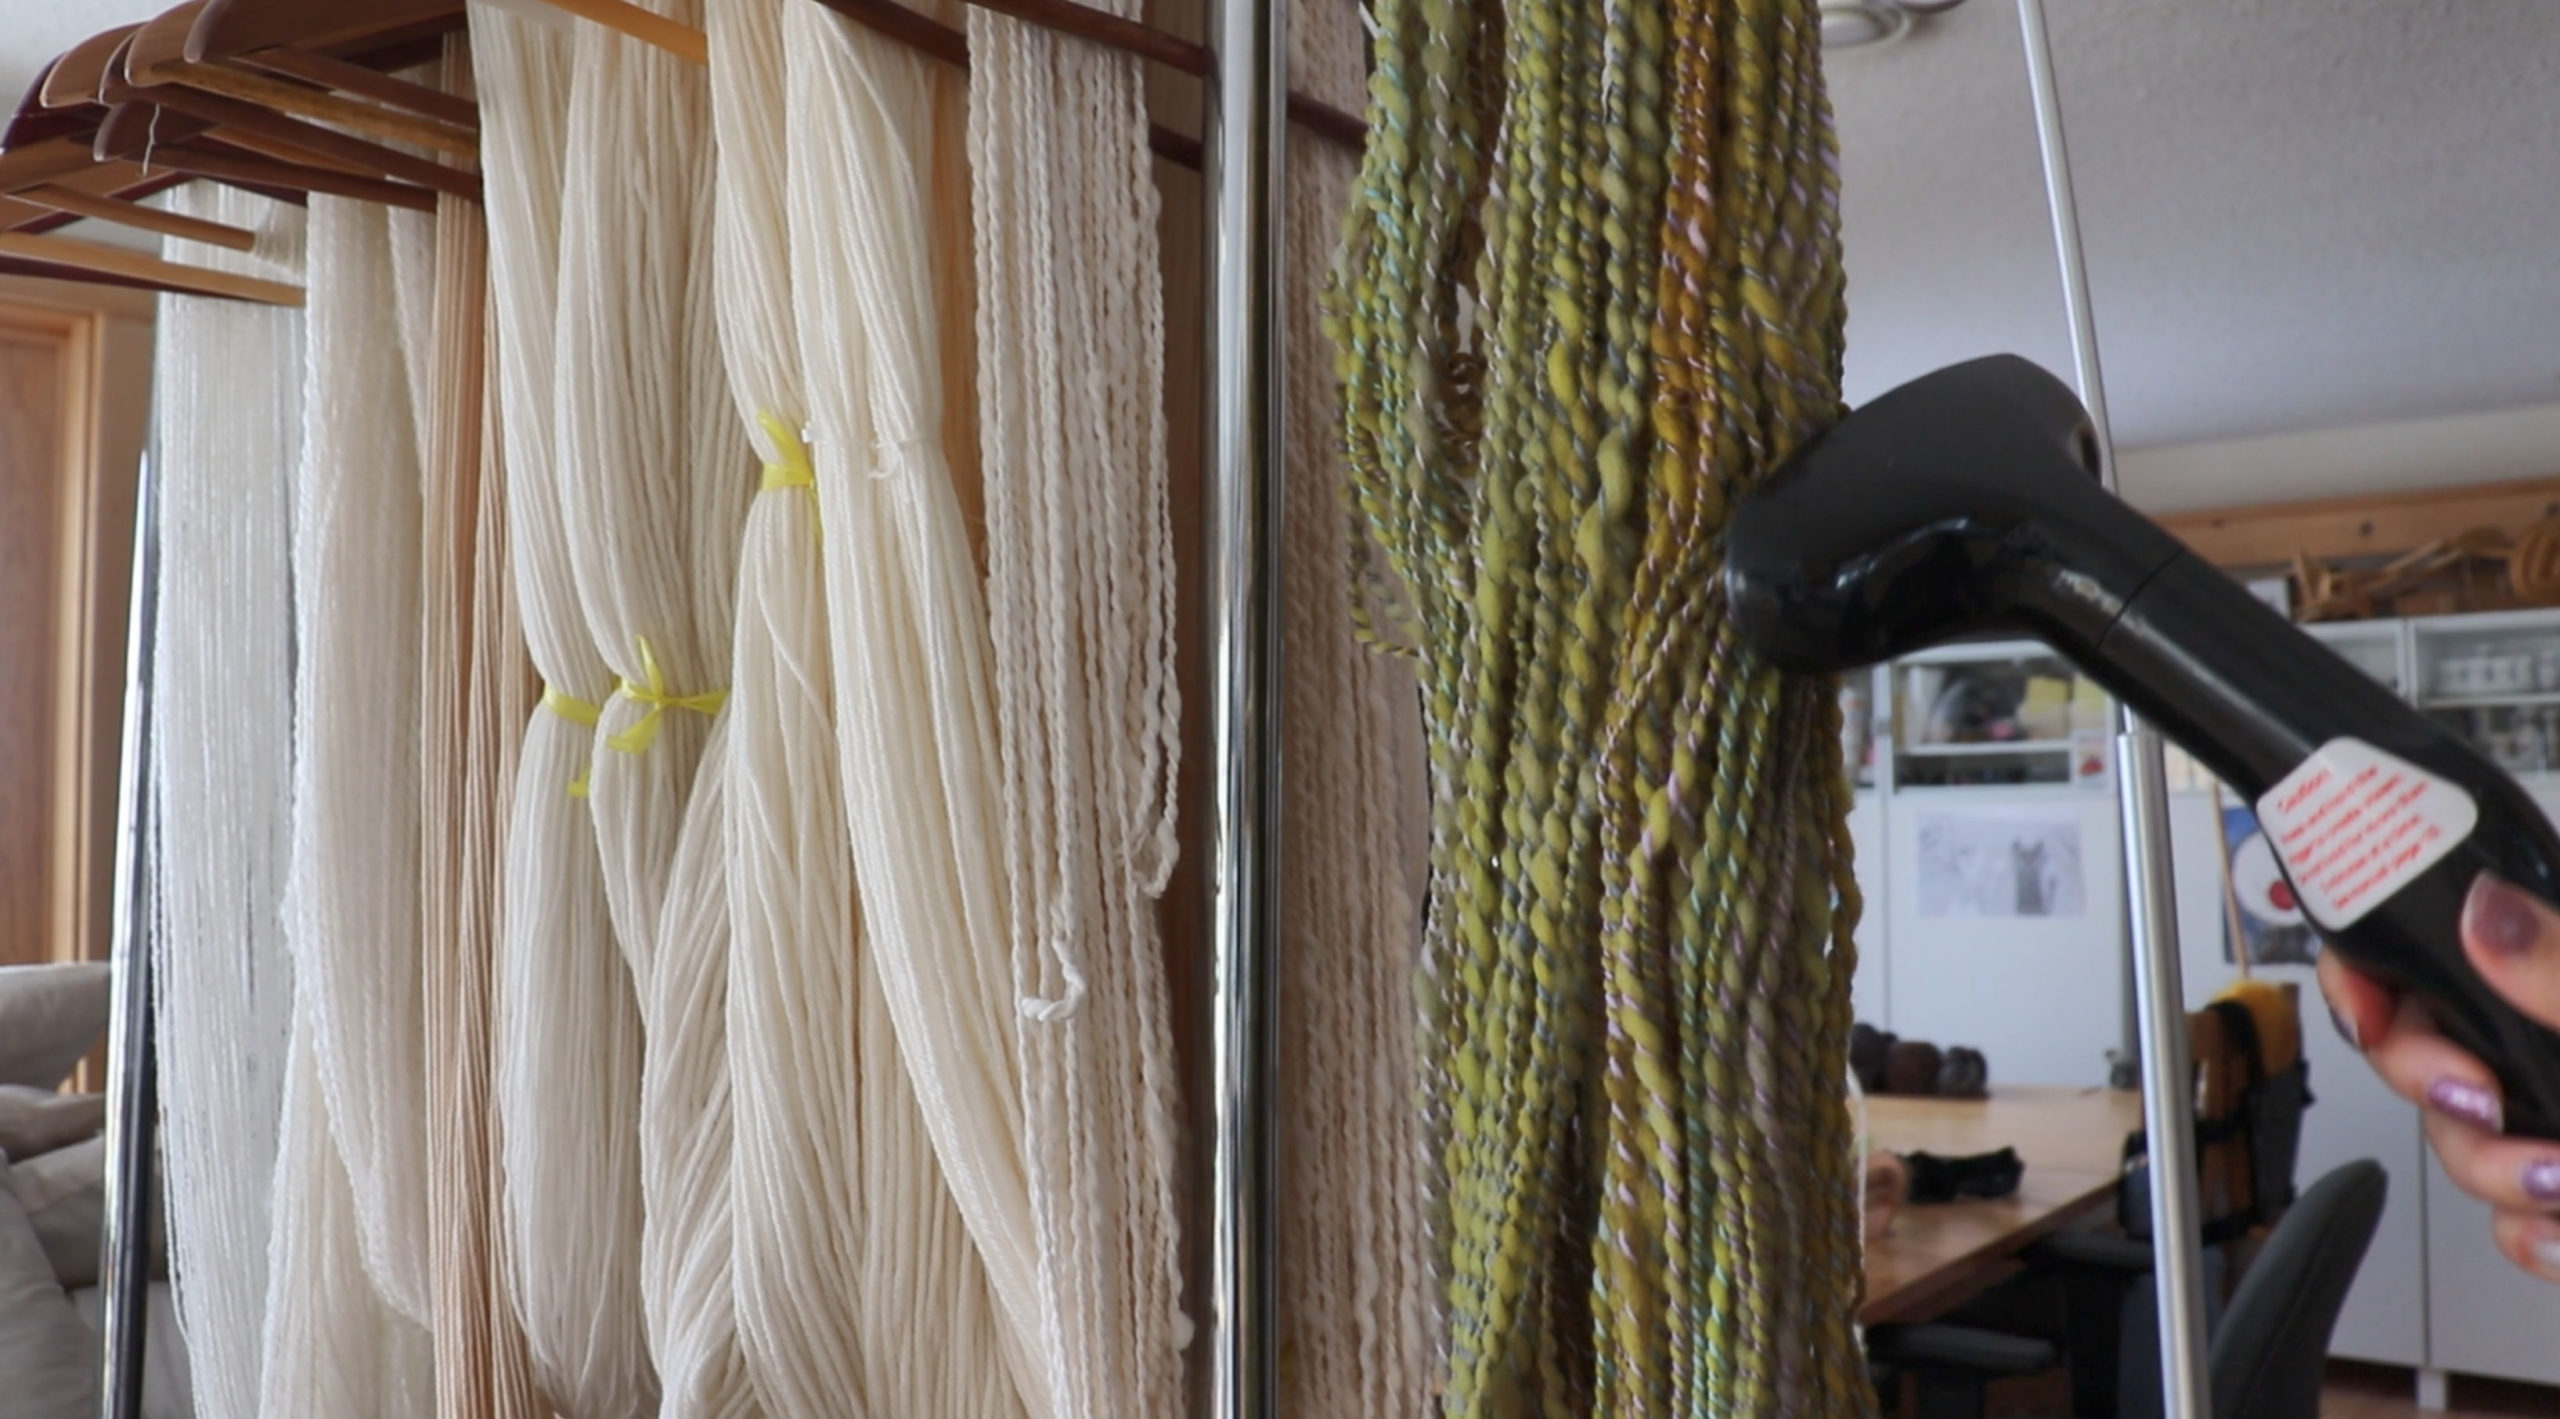
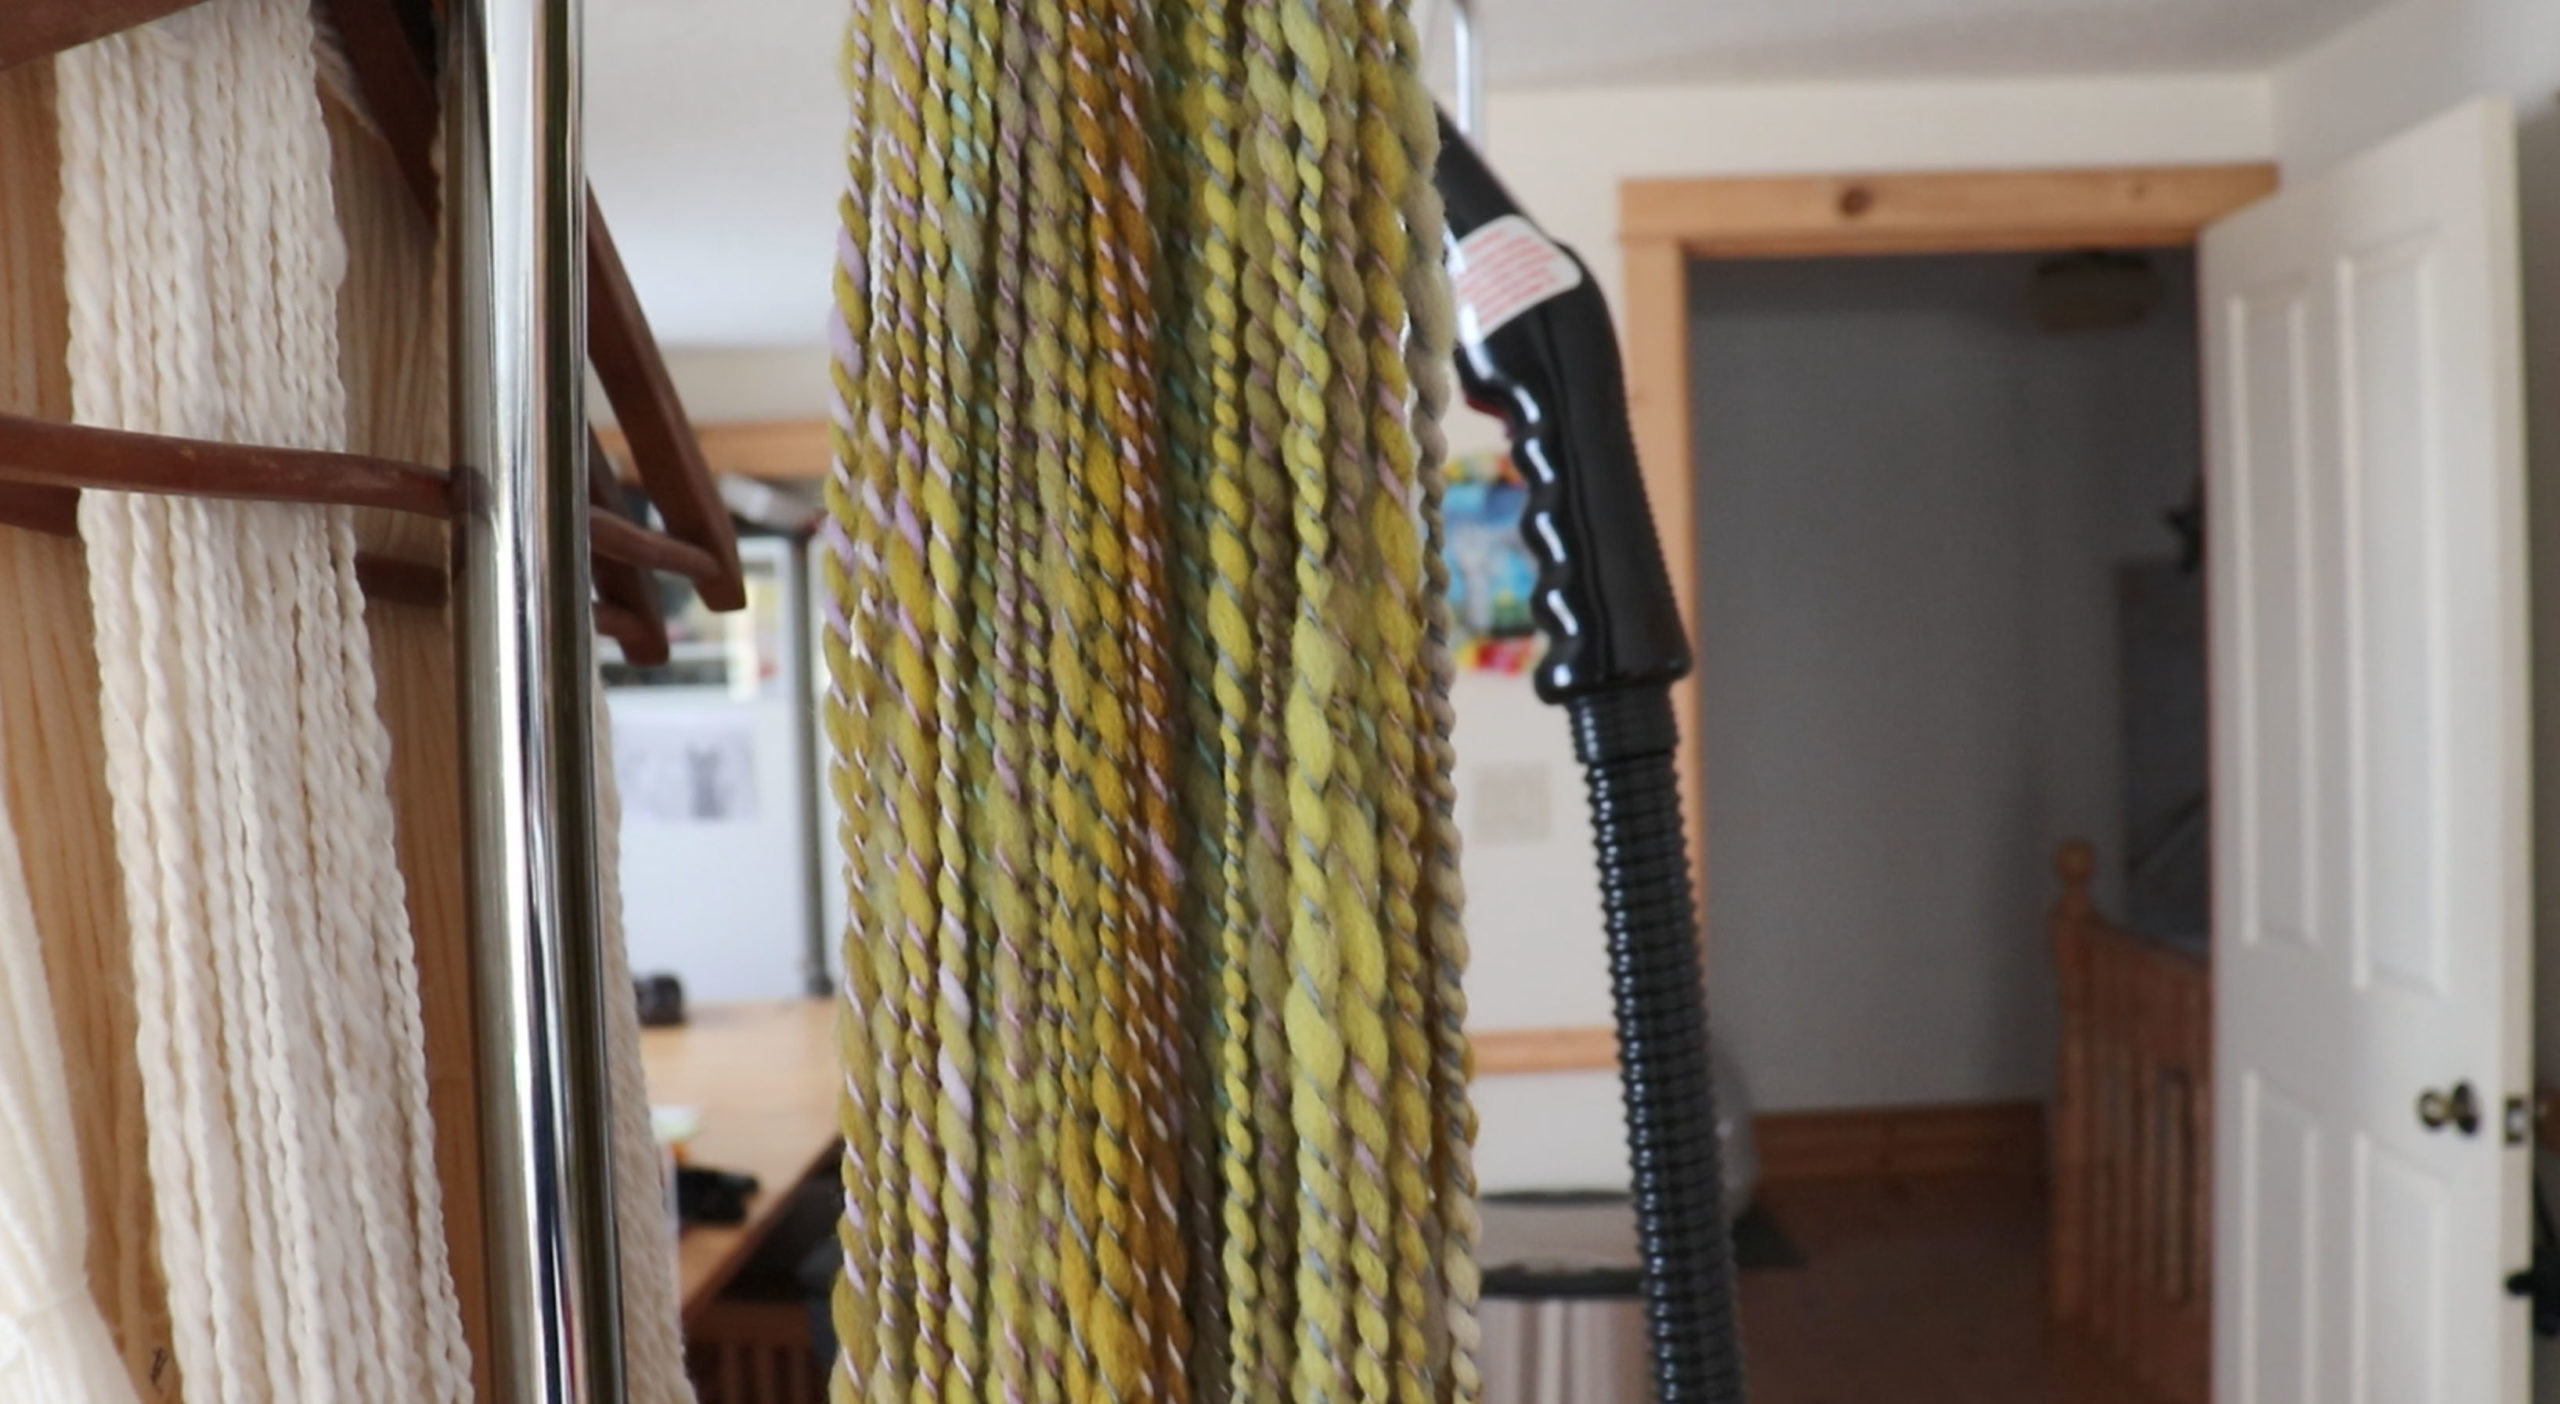
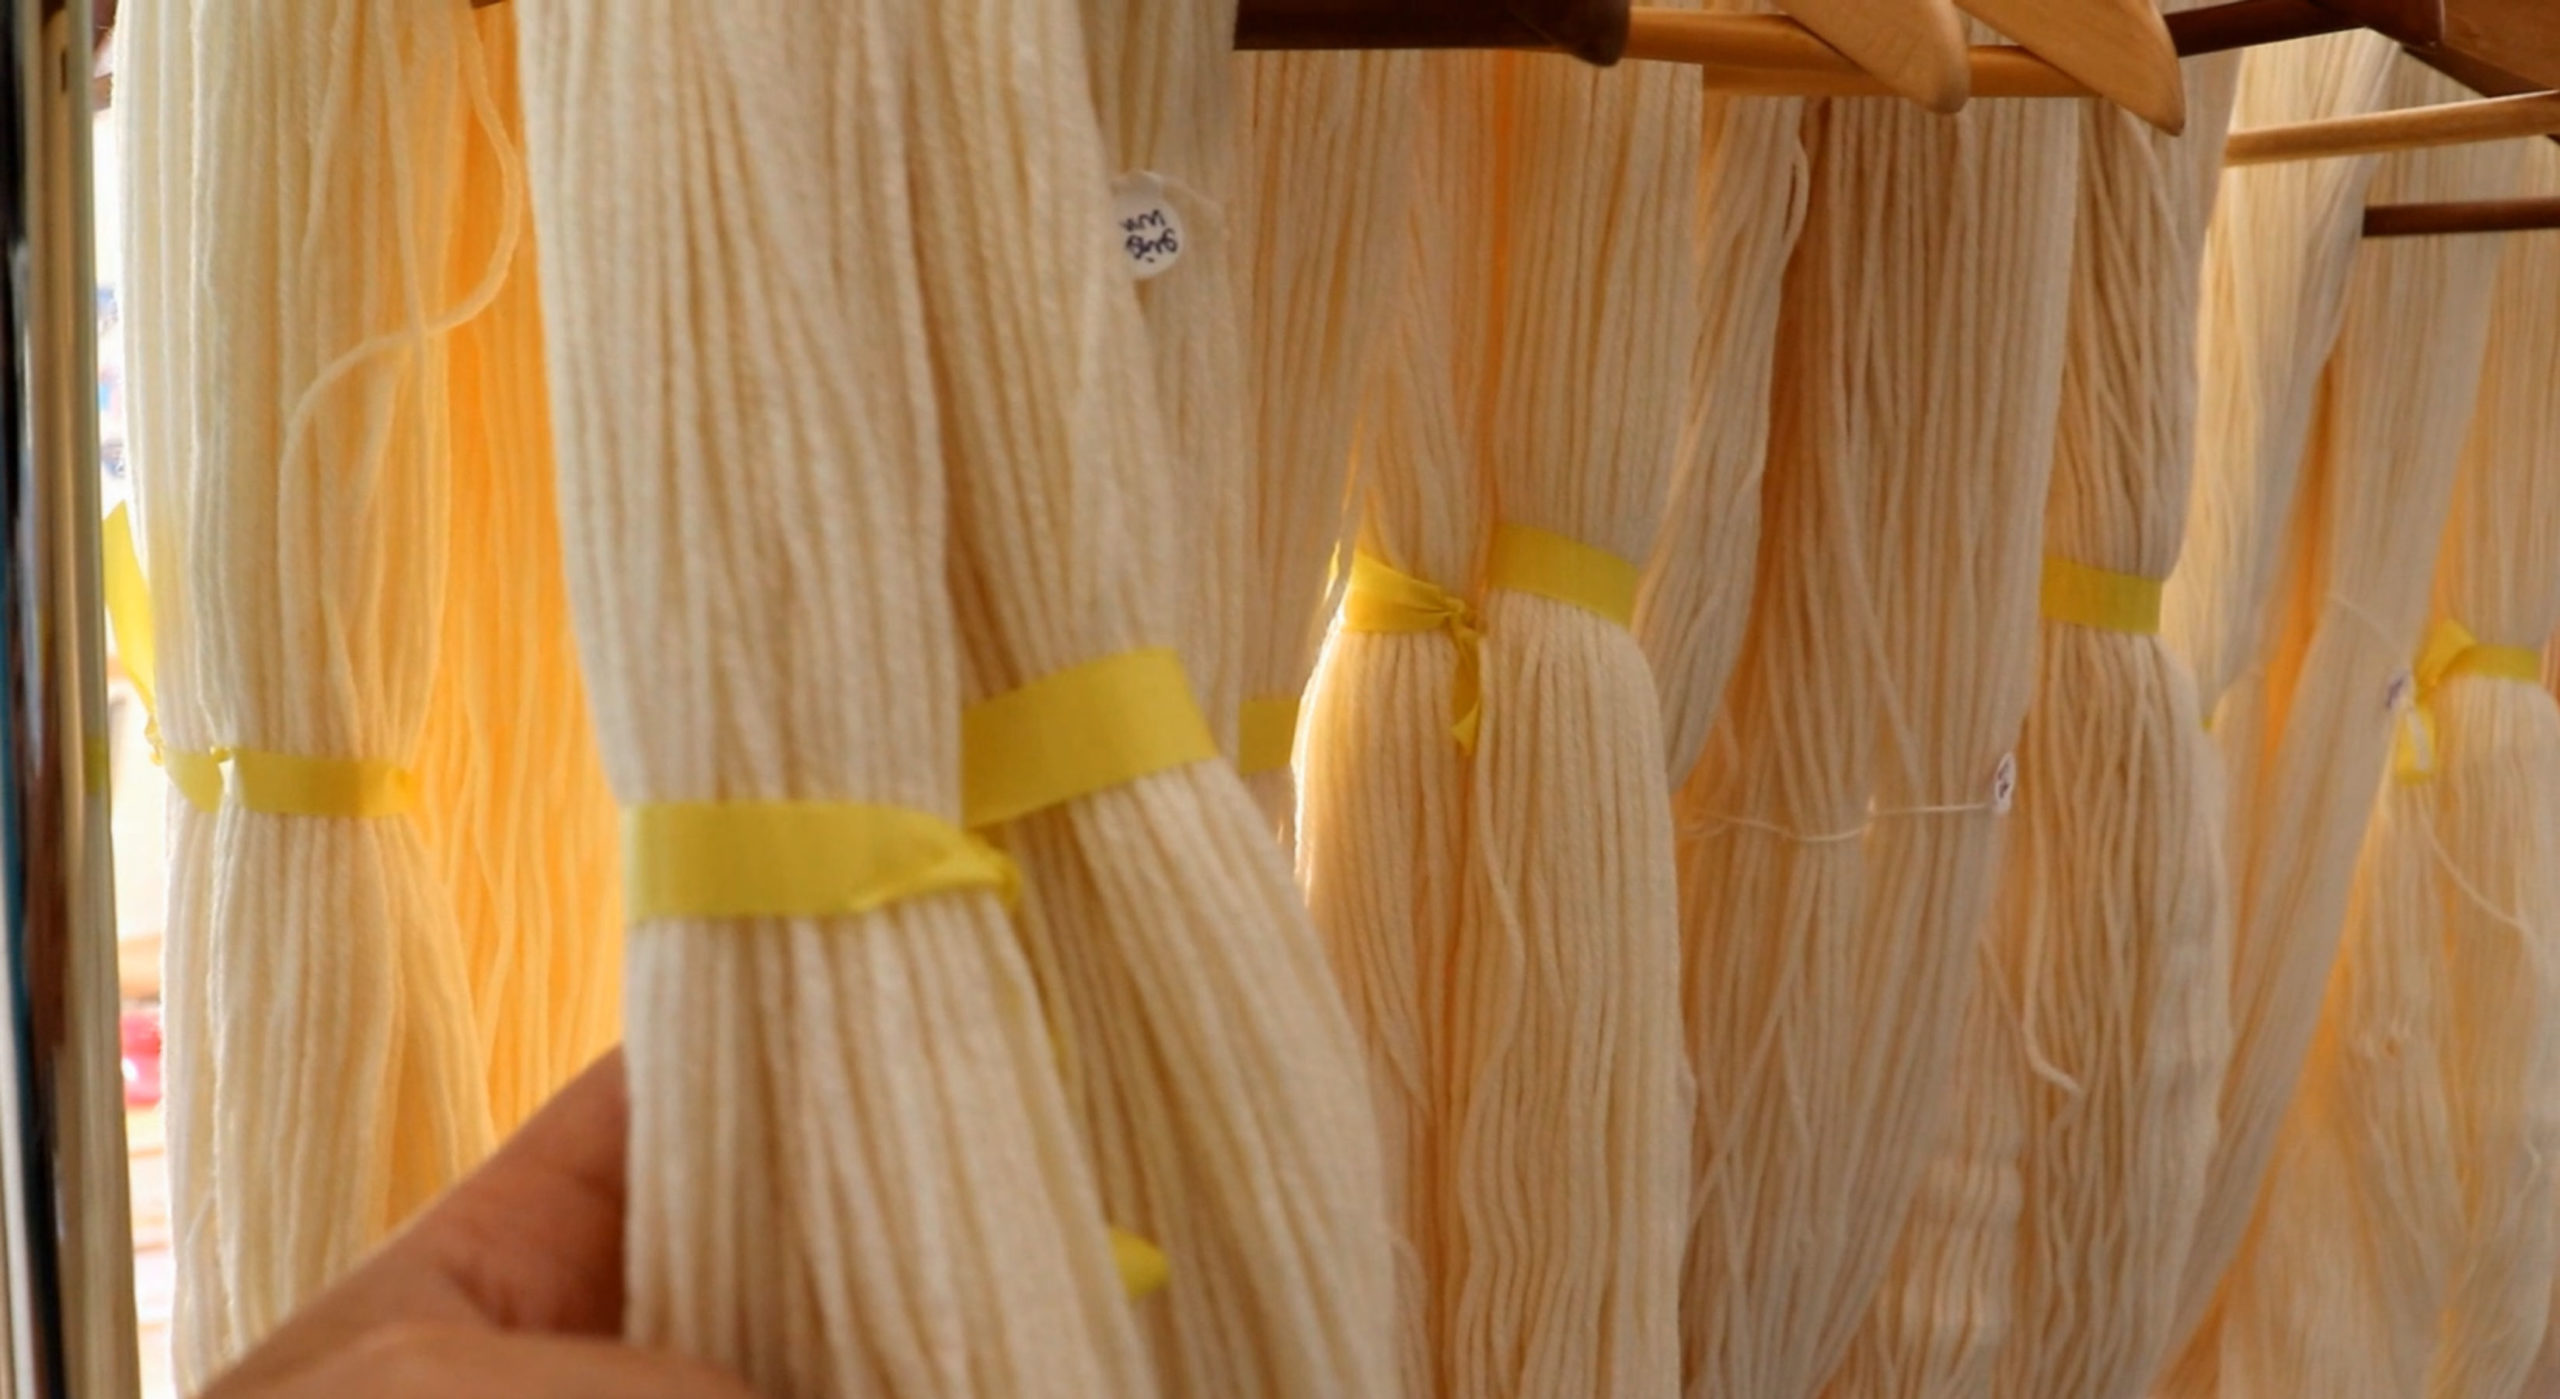
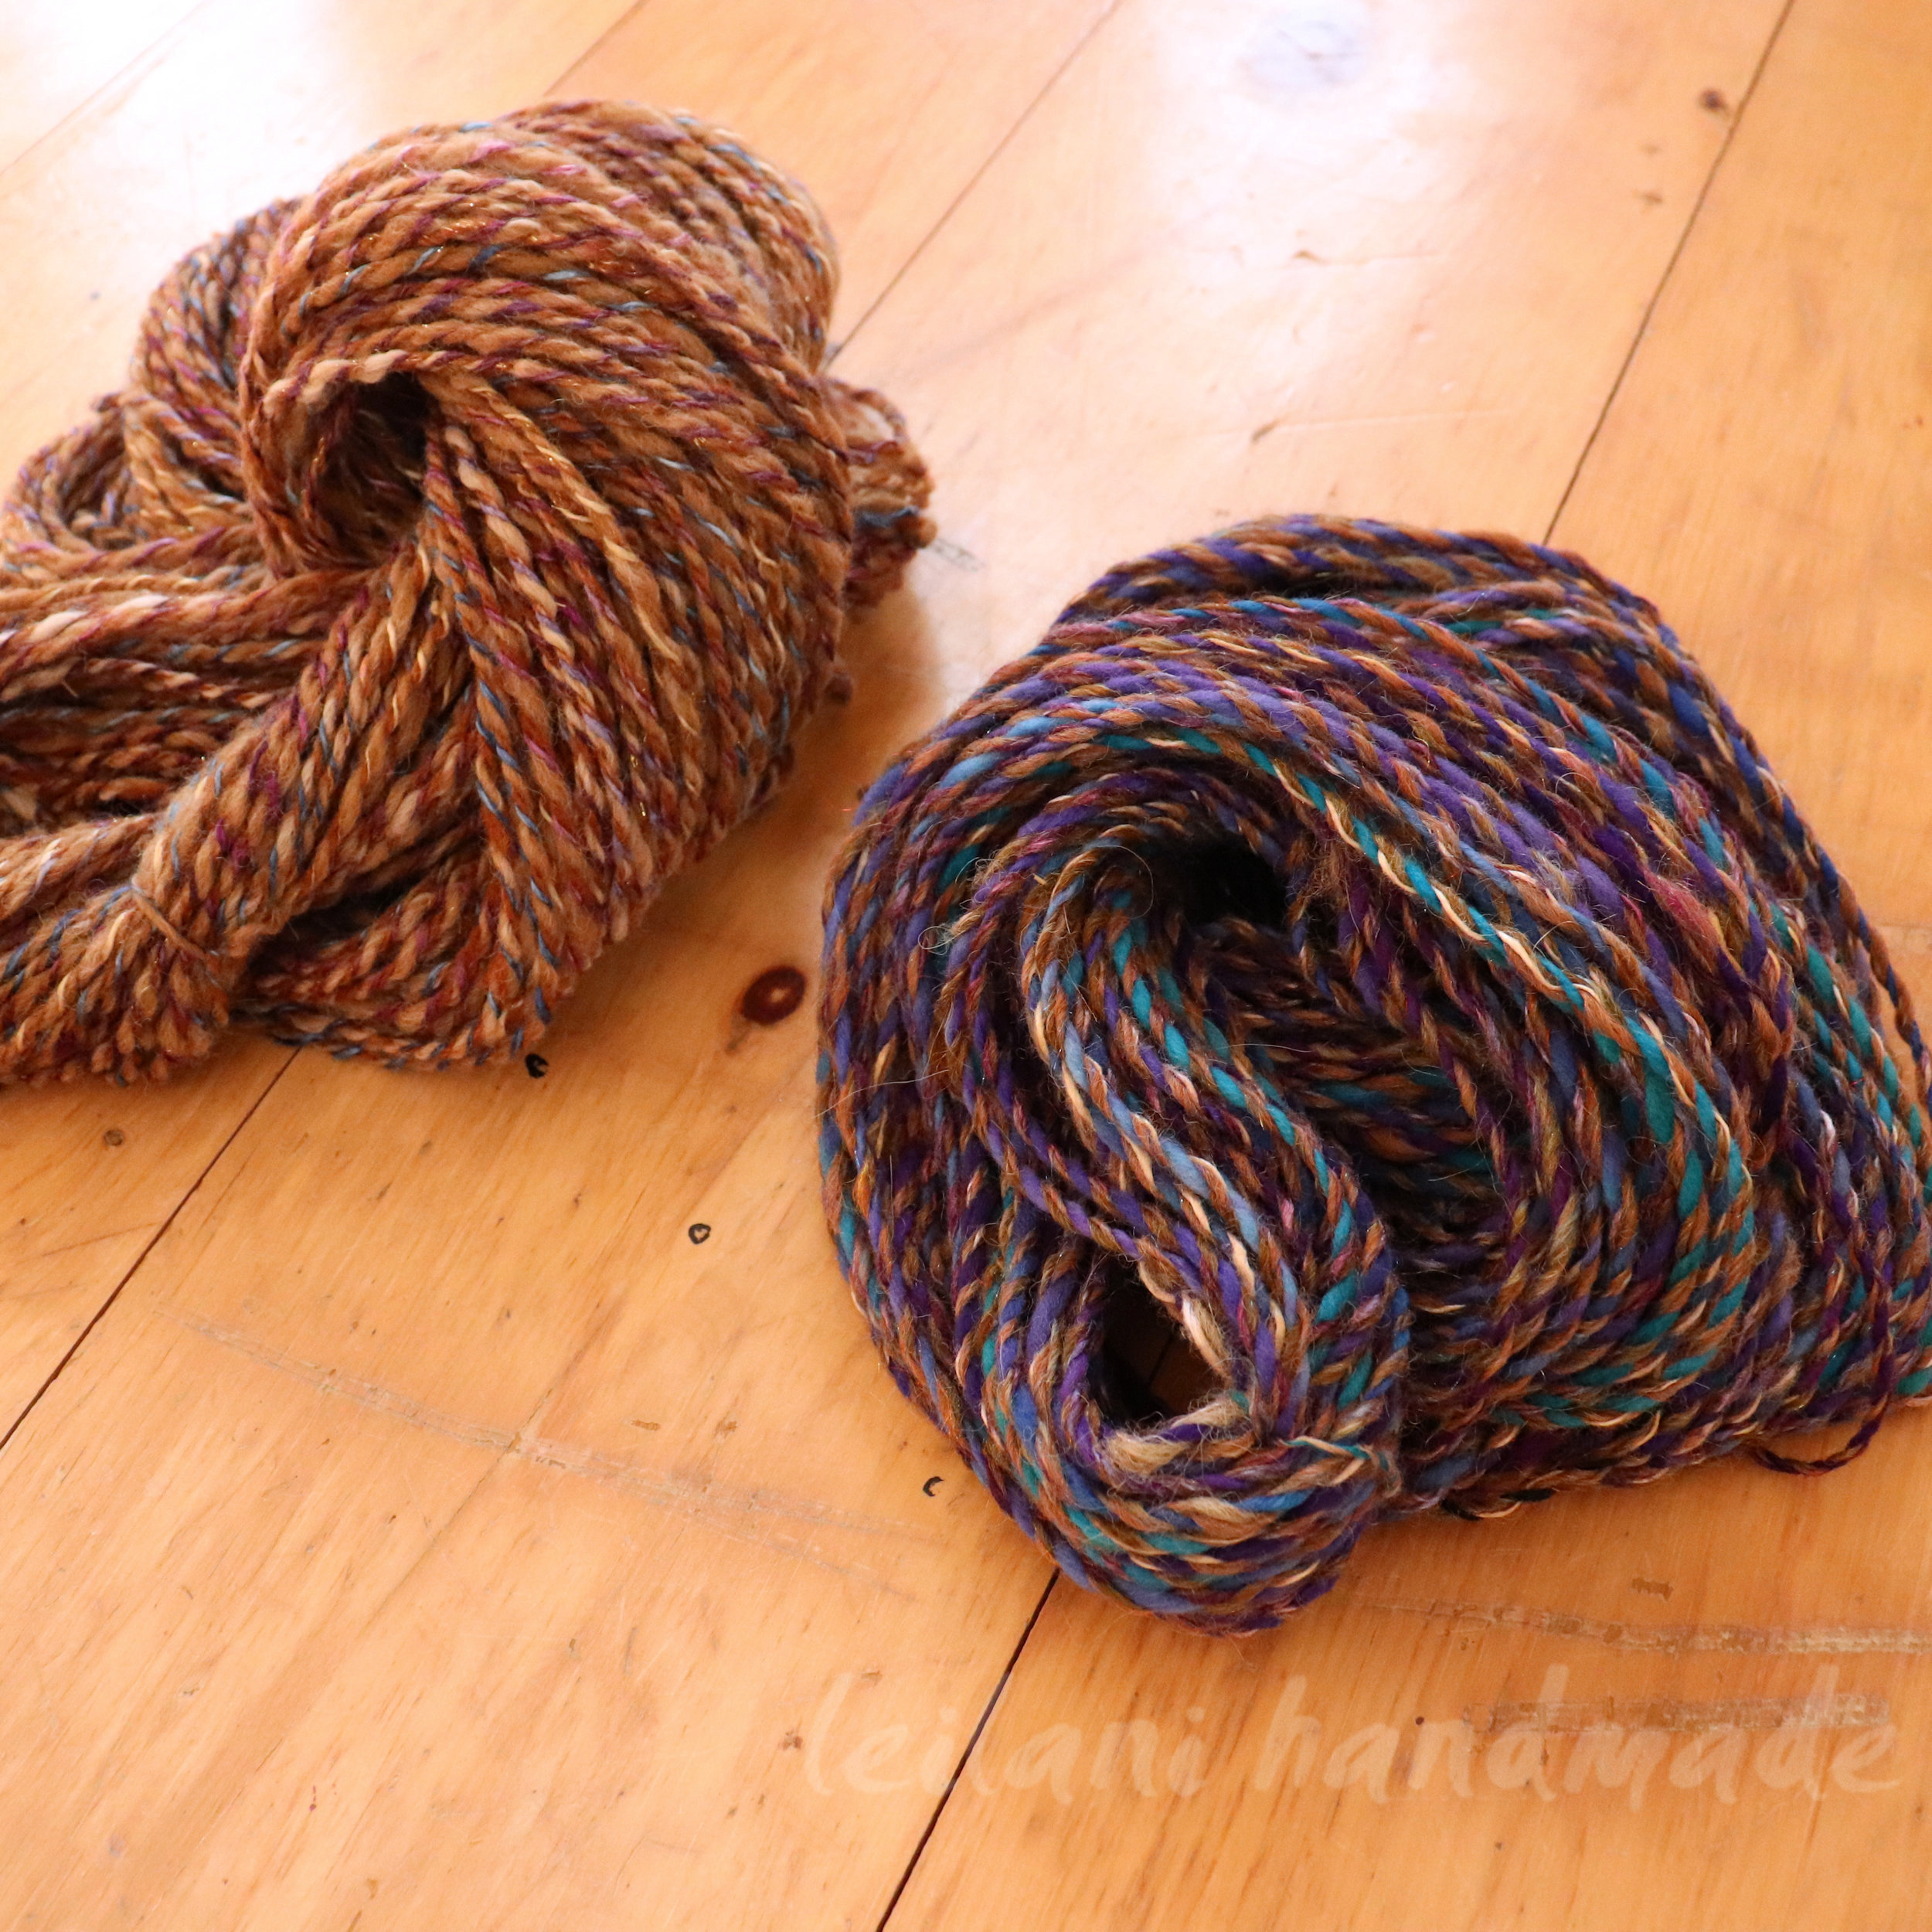
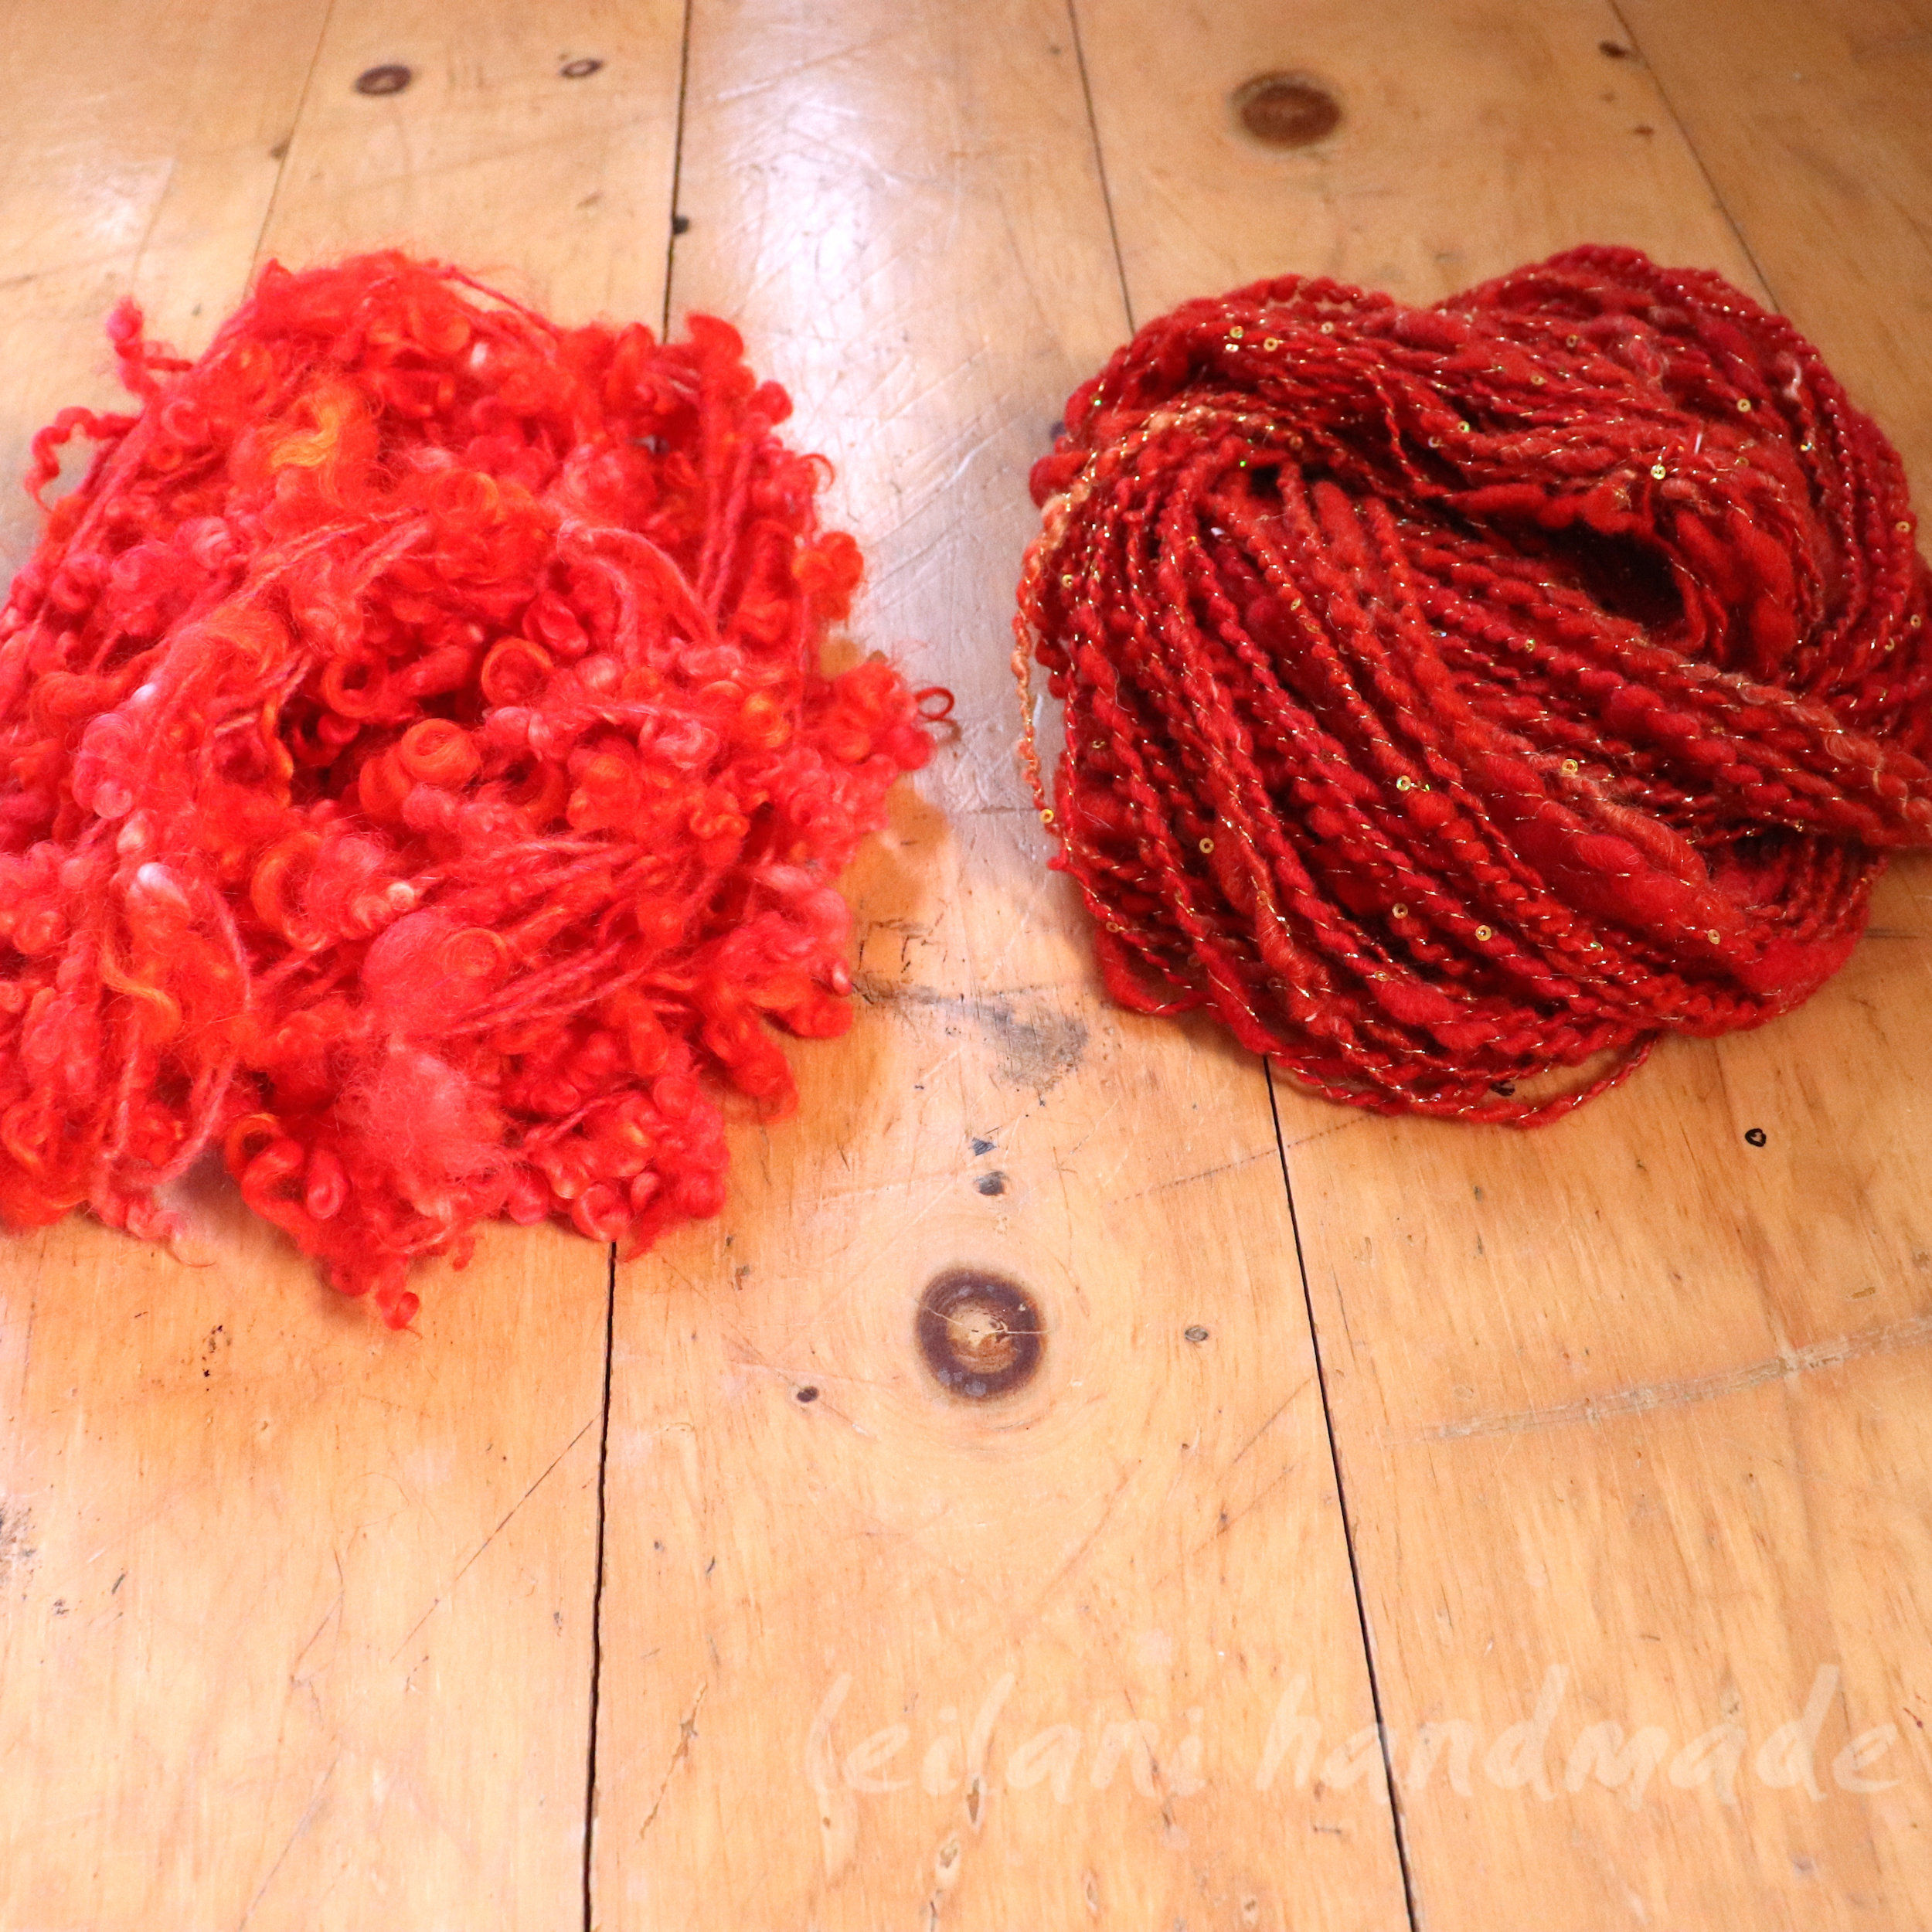
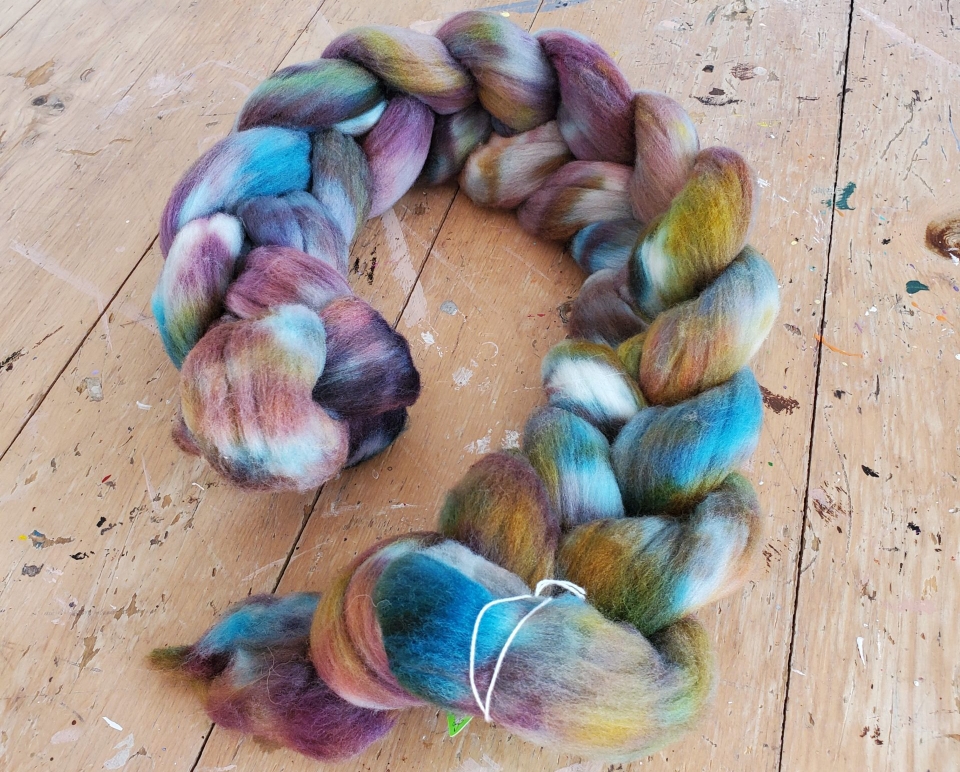
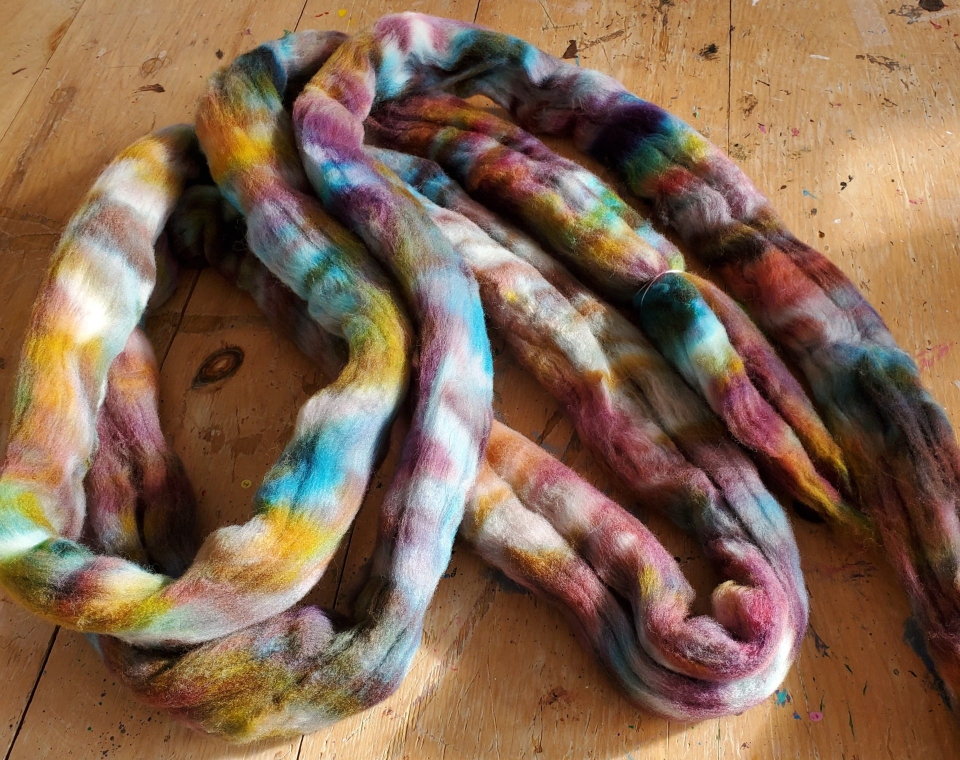
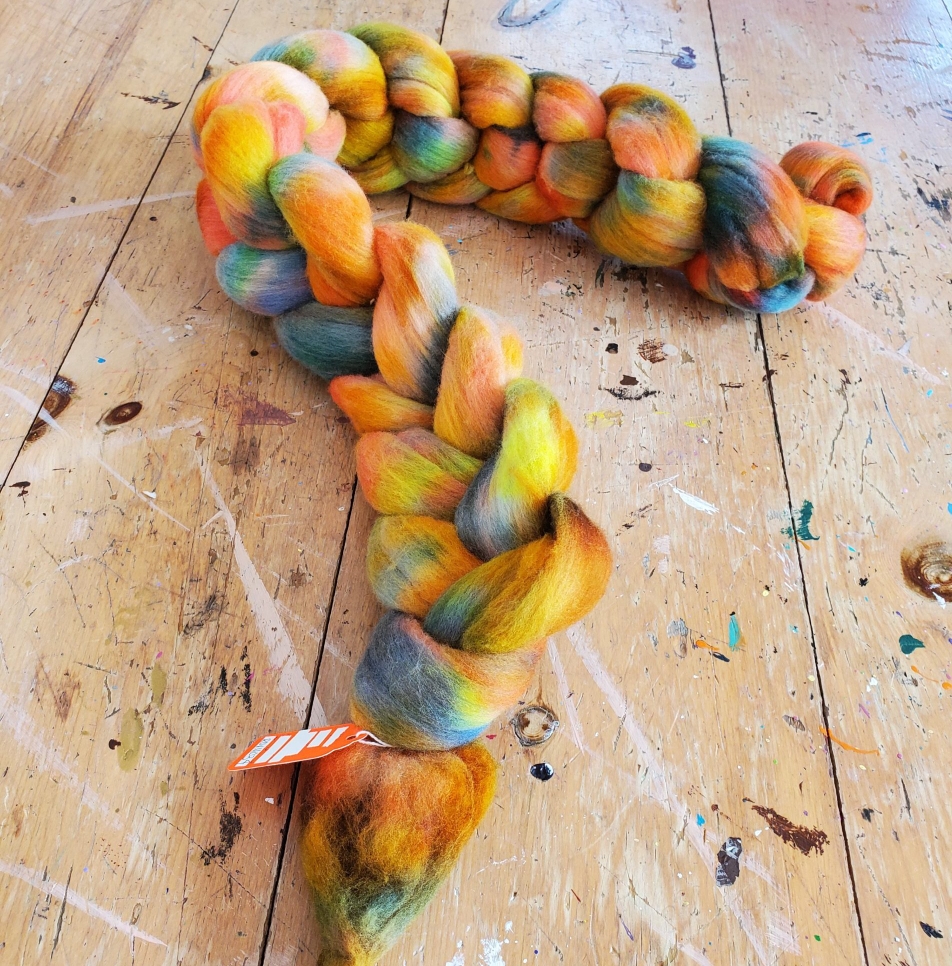
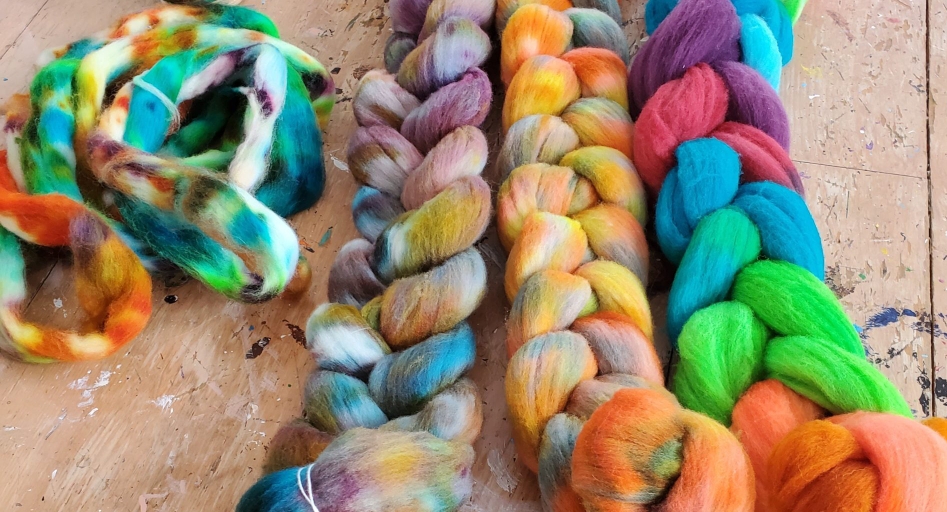
A typical 3-ply Handspun Yarn, but not the colors I would typically dye
Sorry for the blurry image taken from the video. These hand-dyed rovings will be used for creating yarn: a 3-ply handspun.
Once again, I began creating yarn and decided, hey, this may make good content for spinning inspiration—or, more specifically, color inspiration. I’m unsure if I captured enough of the process for this to be useful to others, but we’ll put it out there anyway. I know I’m always looking online for new color inspiration for dyeing my fiber for spinning, so why not?
This is your typical 3-ply yarn that I have spun many times, but I hand-dyed some non-typical colors using Merino roving. Well, non-typical for me, anyway! I wanted to go outside my comfort zone of vibrant, deep-saturated colors and use more neutral tones and less saturation.
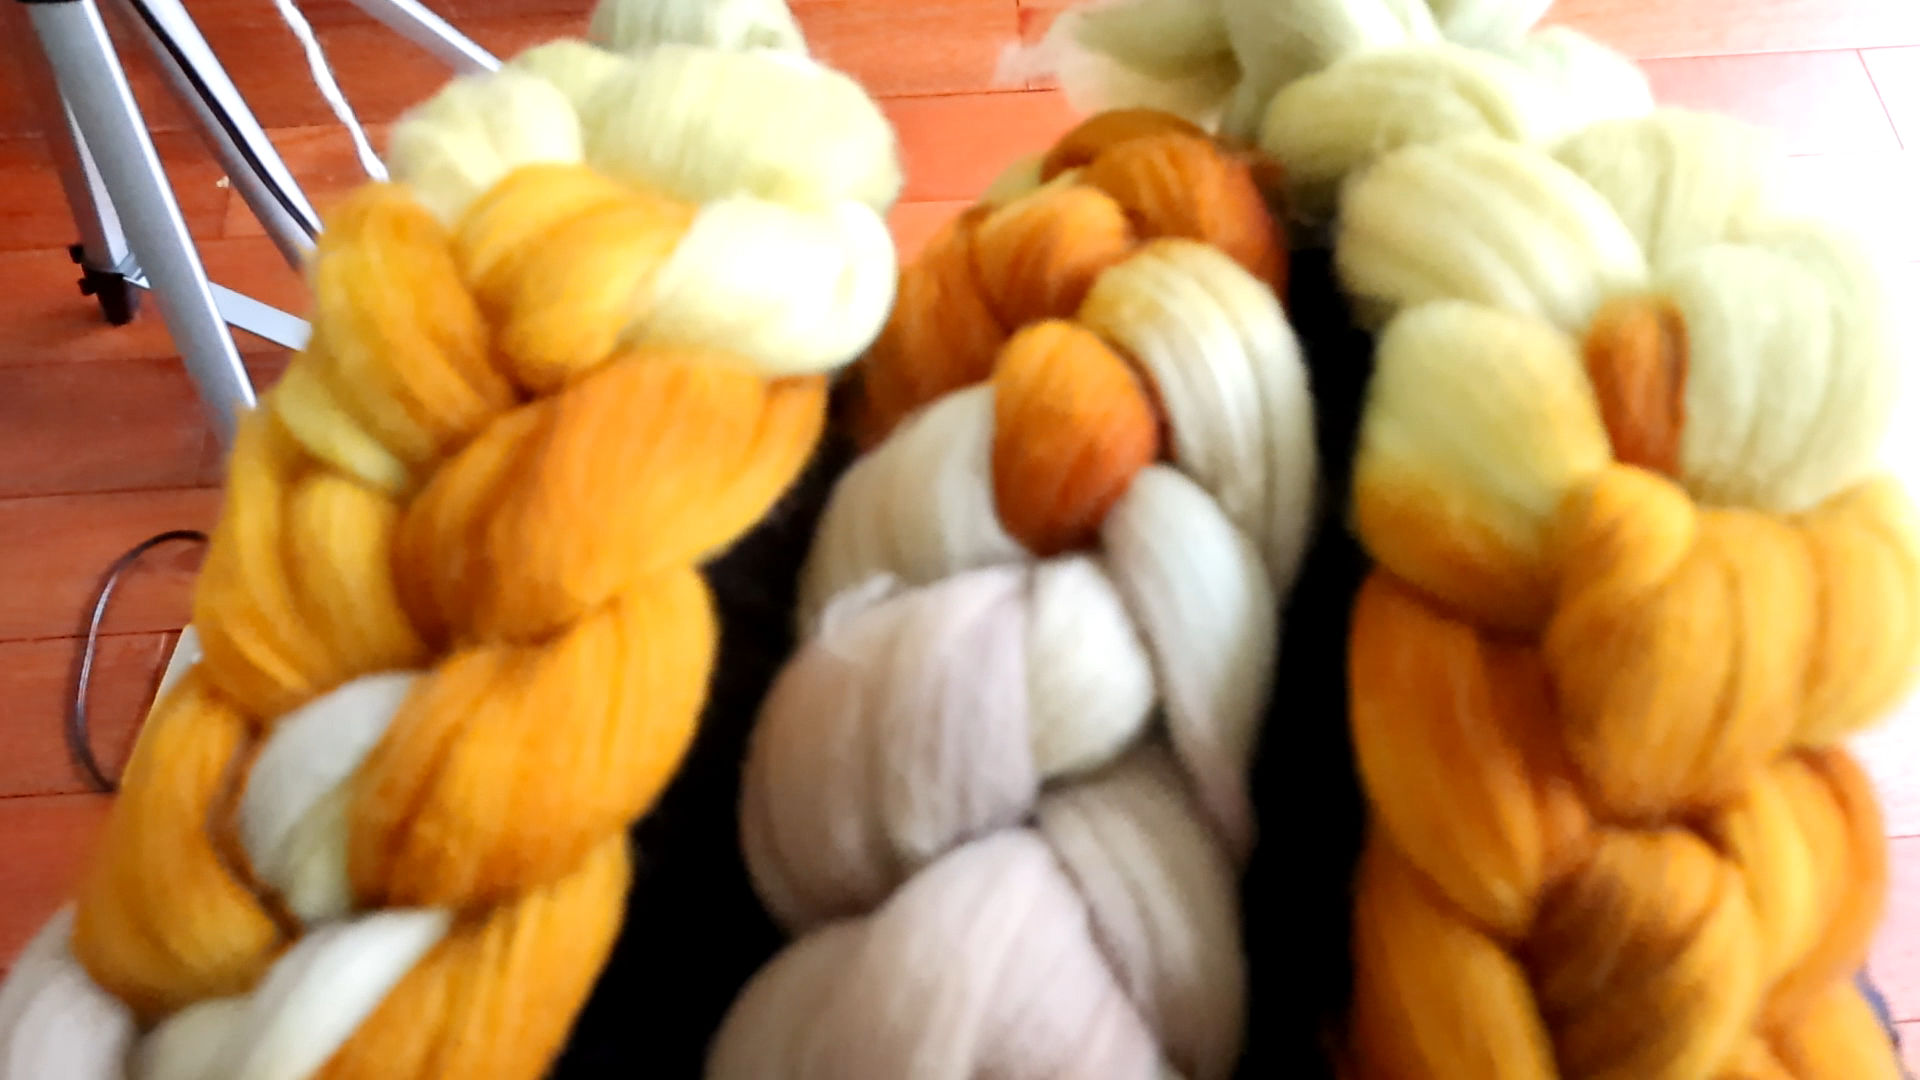
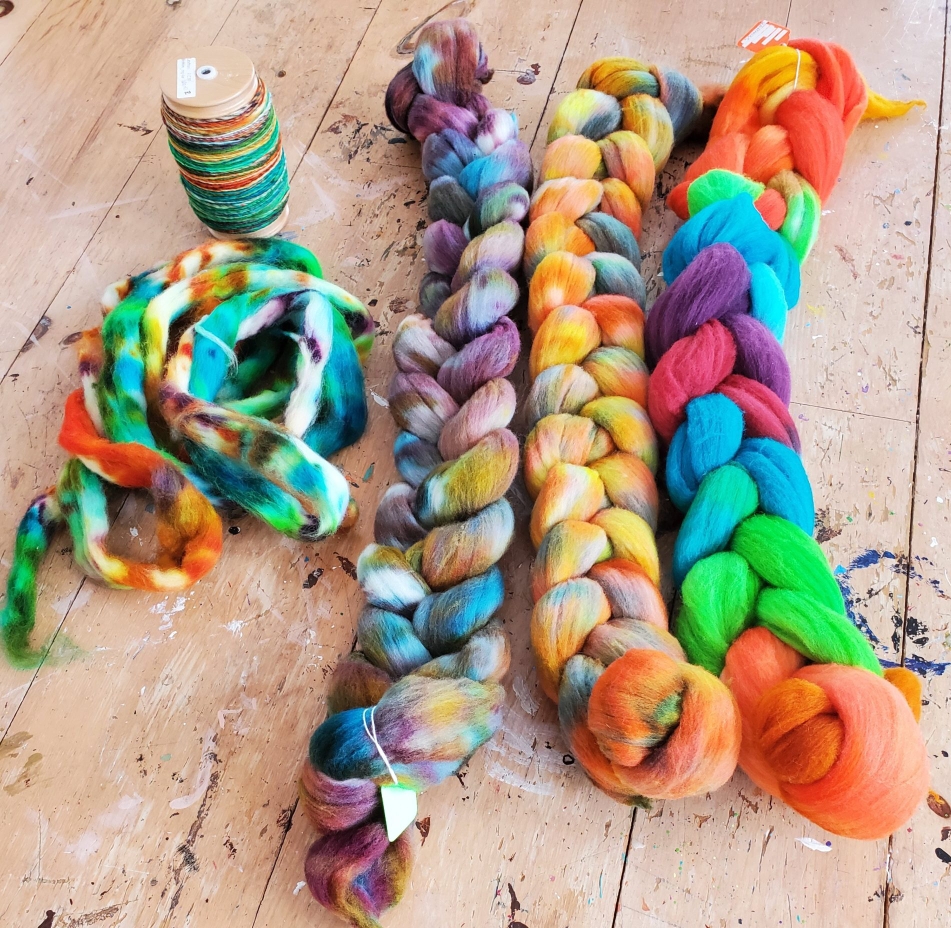
A couple of years ago, I got into a dyeing tangent, dyeing pairs of rovings the same color. I think I was in the mindset that I wanted to have a decent amount of potential yarn to spin, and if I didn’t use it all, I would sell the braids. I invested in large quantities of roving (commercial top) years ago, mostly targhee and merino, and with the way the price of everything is going today, I am glad I did.
So, this roving challenged me to try out colors that were totally out of my norm. Compared to the usual vibrant roving I prefer to dye and work with, I would call this boring. I have spun more calm, muted colors before, but I can’t say I’ve ever set out to dye a roving with such a neutral palette.
Even then, you could argue that the Aztec Gold is certainly not muted, even with my best intentions dye-wise. Ultimately, I was delighted with the result, and I’ll have to make a note to dye more calm, neutral colors in the future.
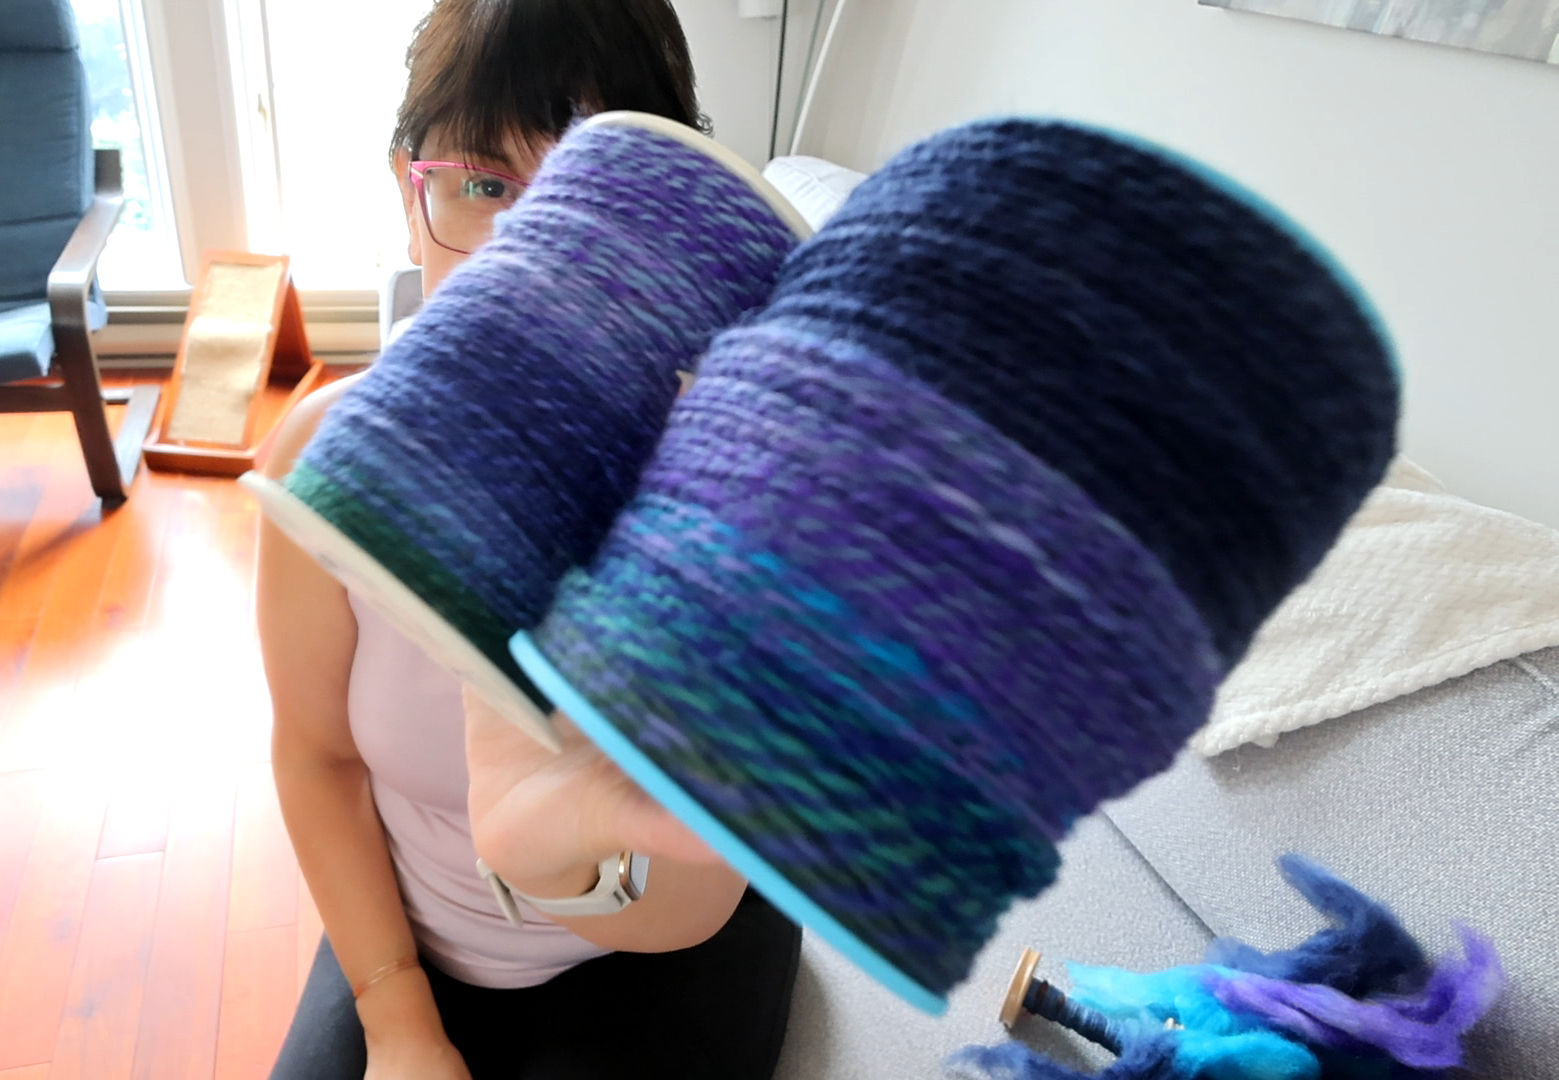
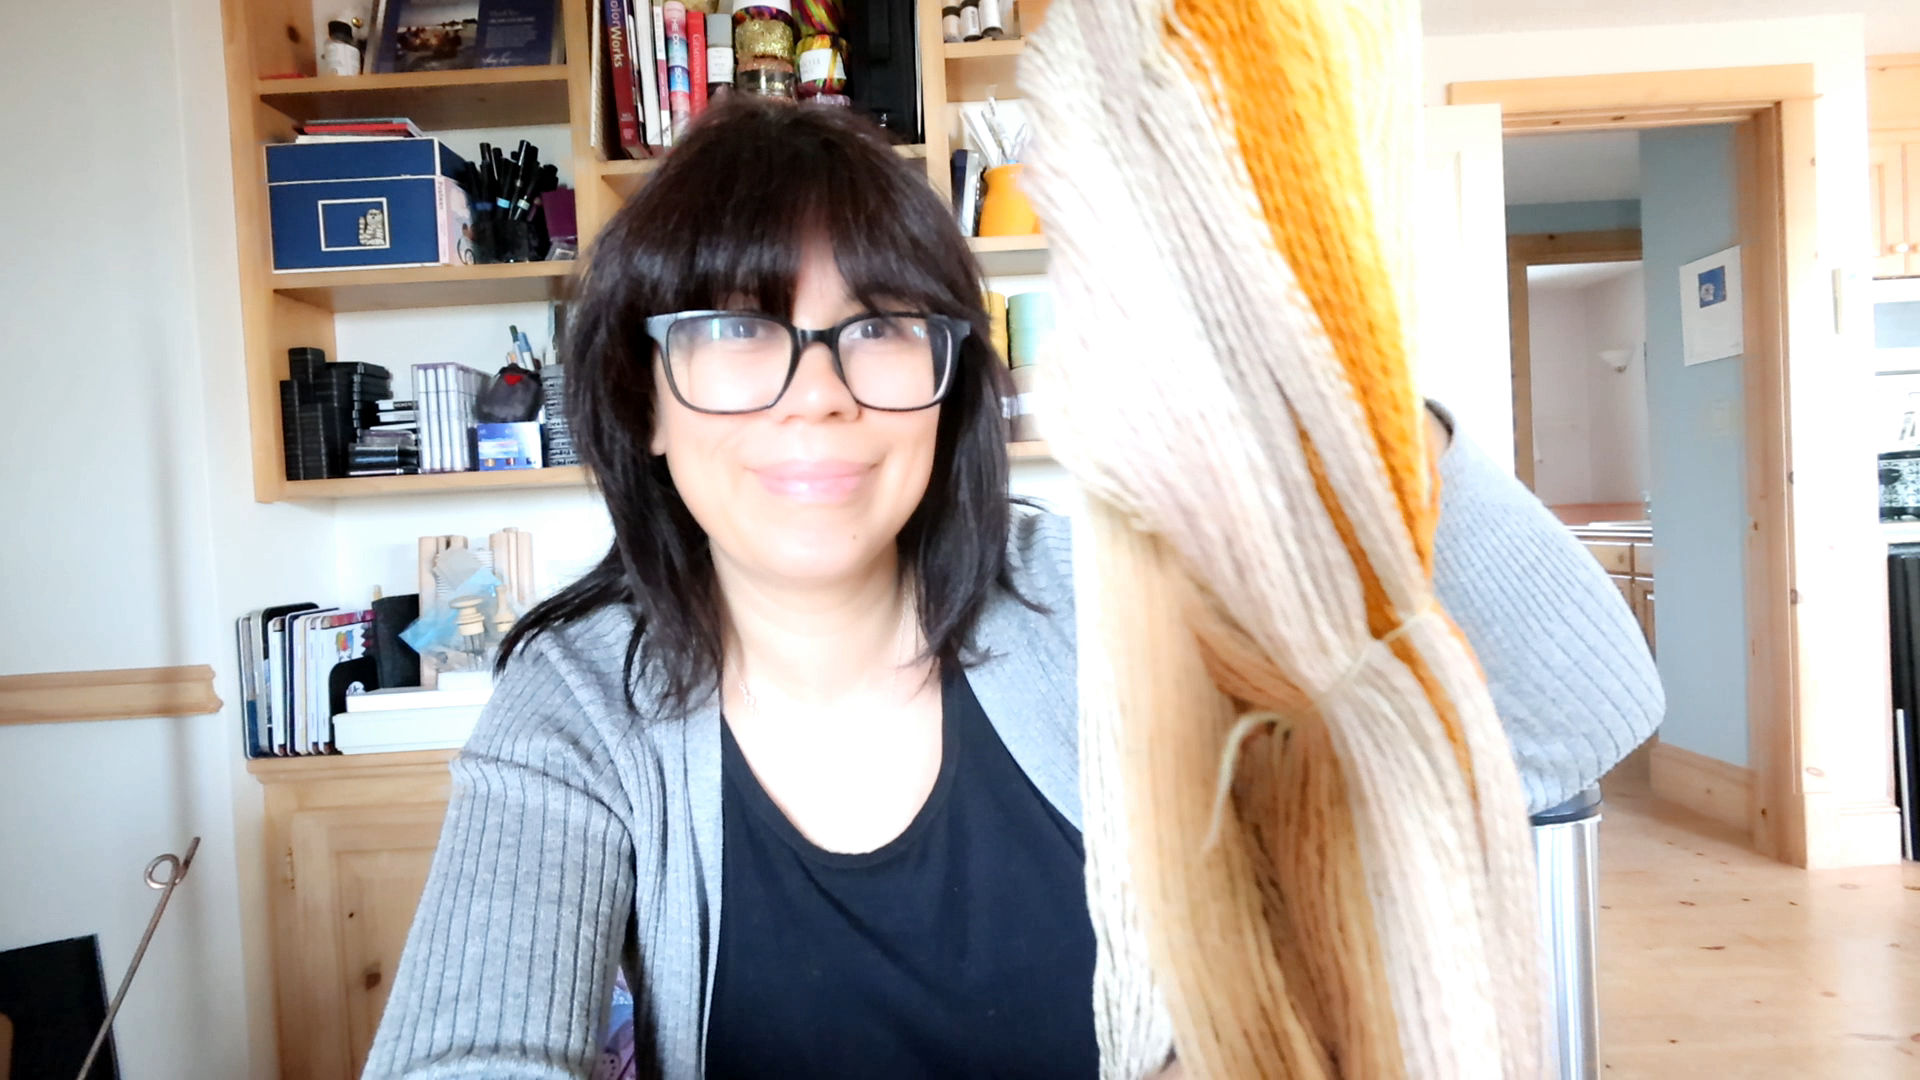
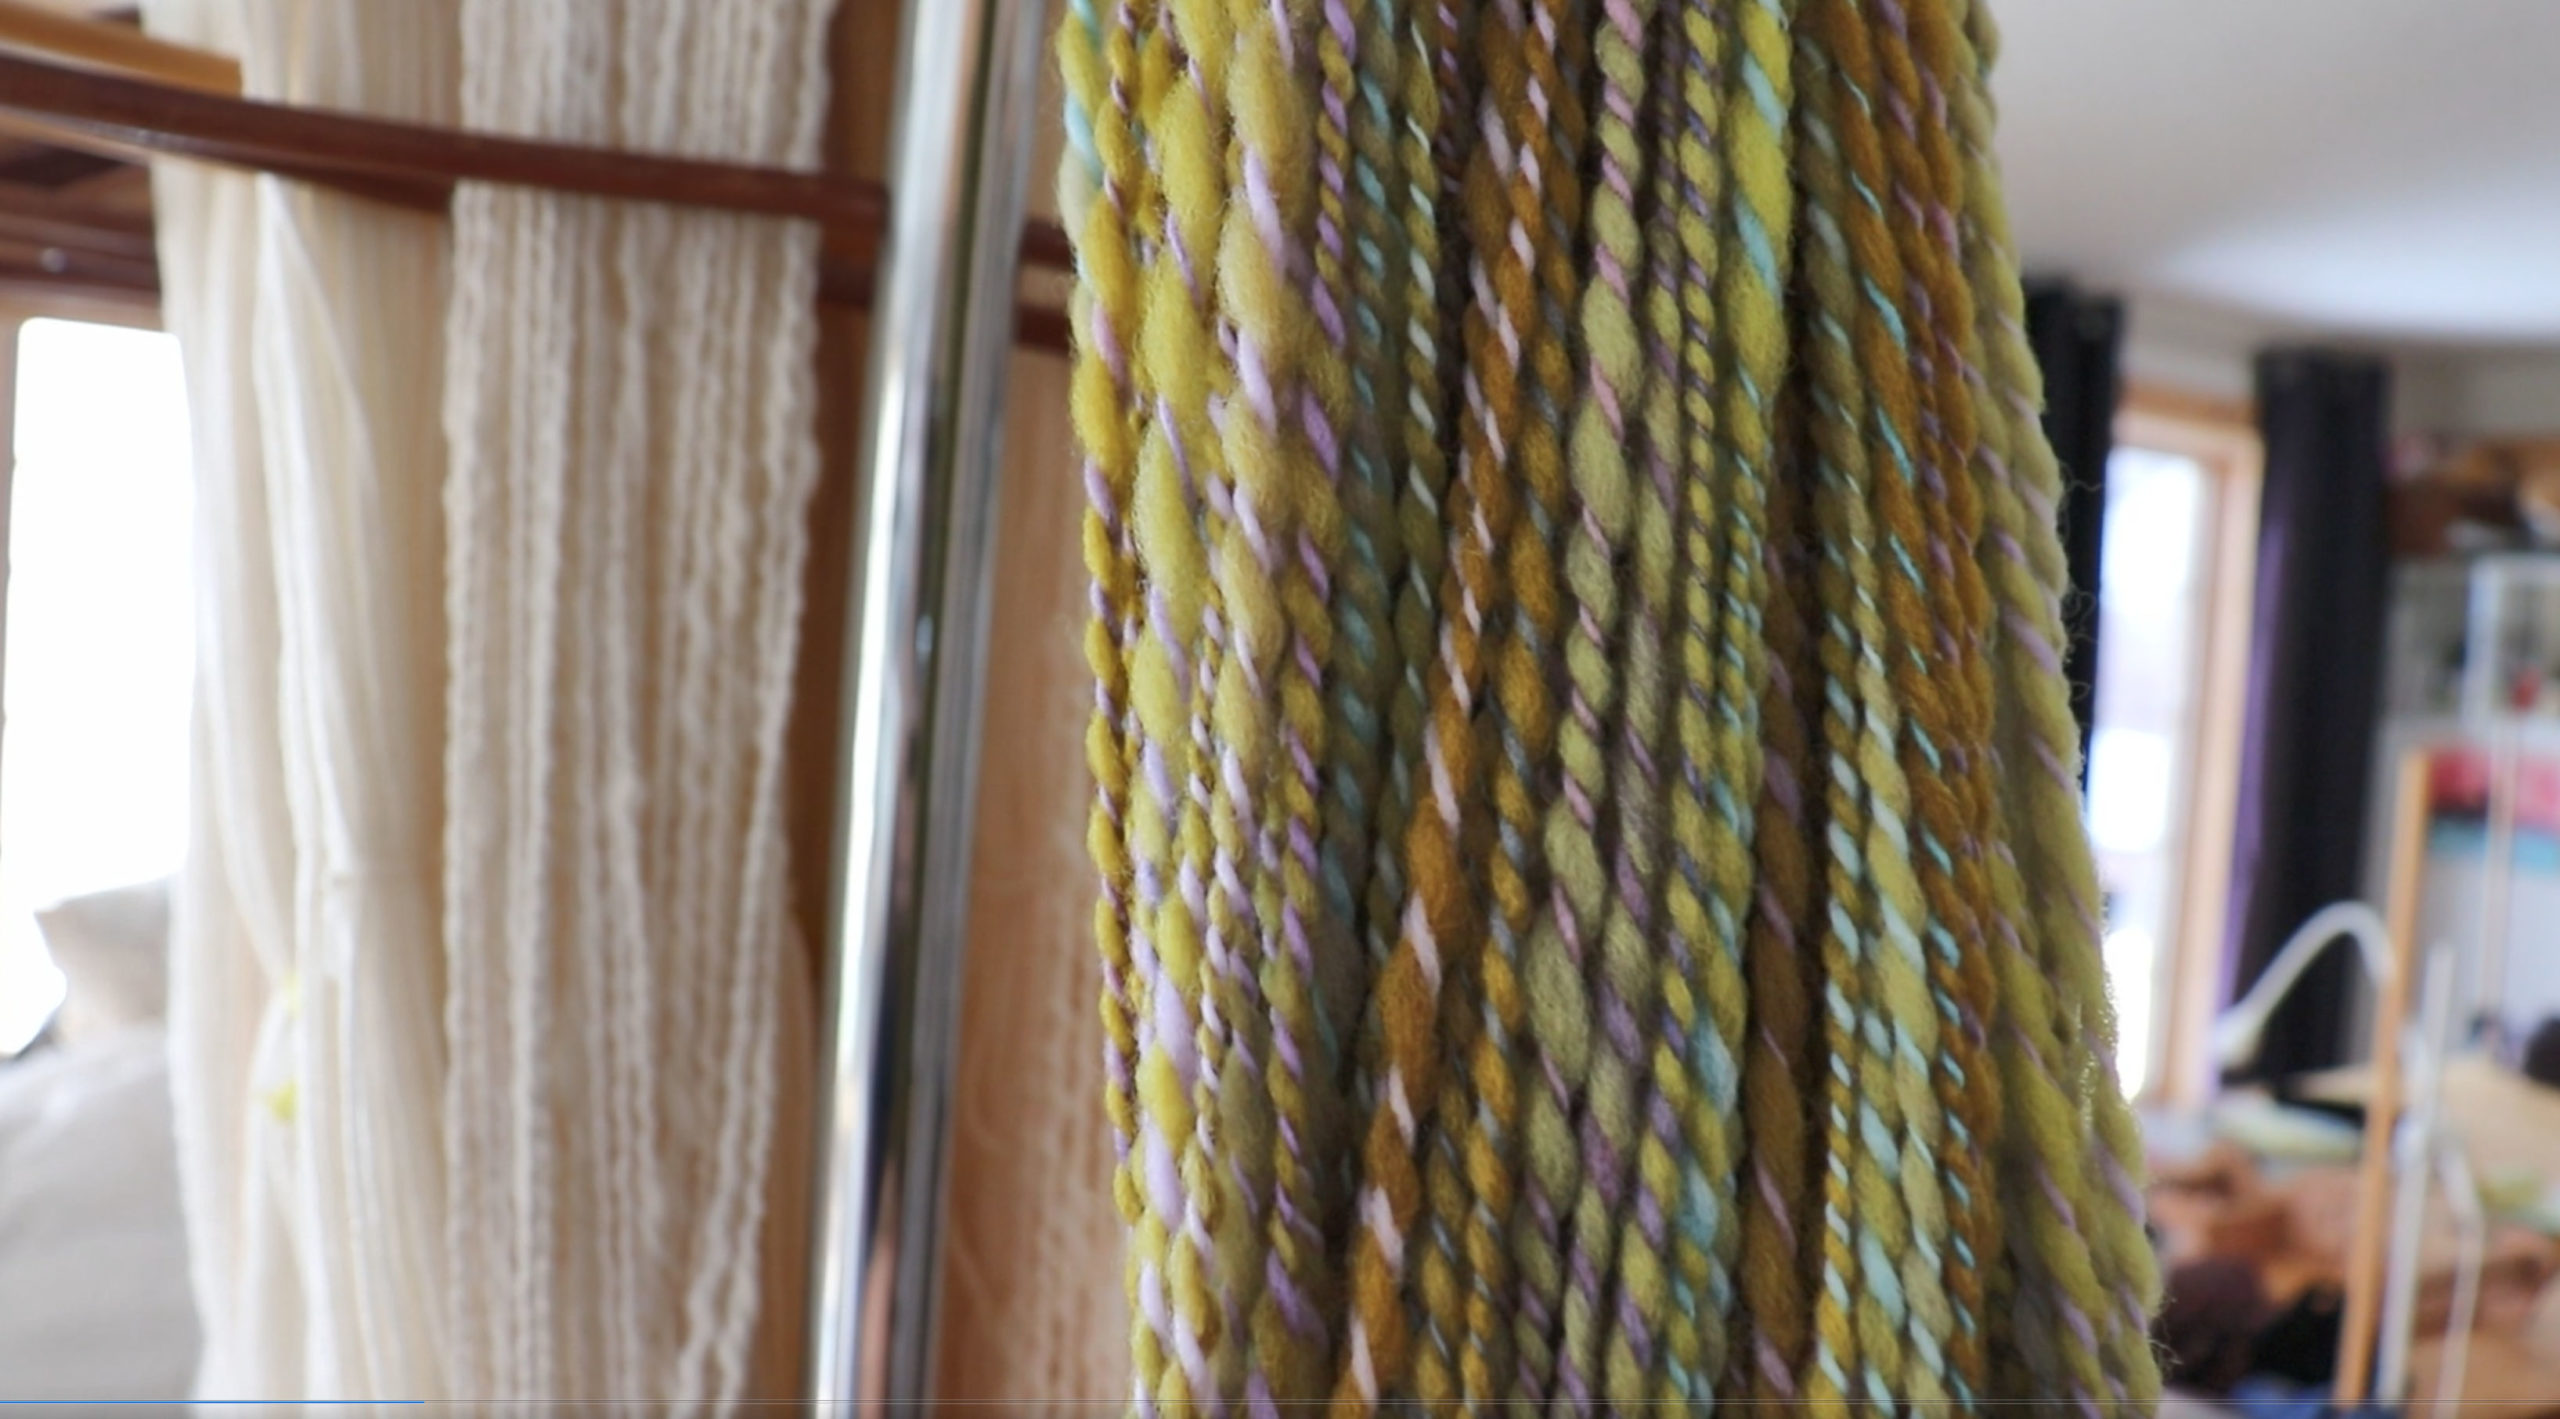
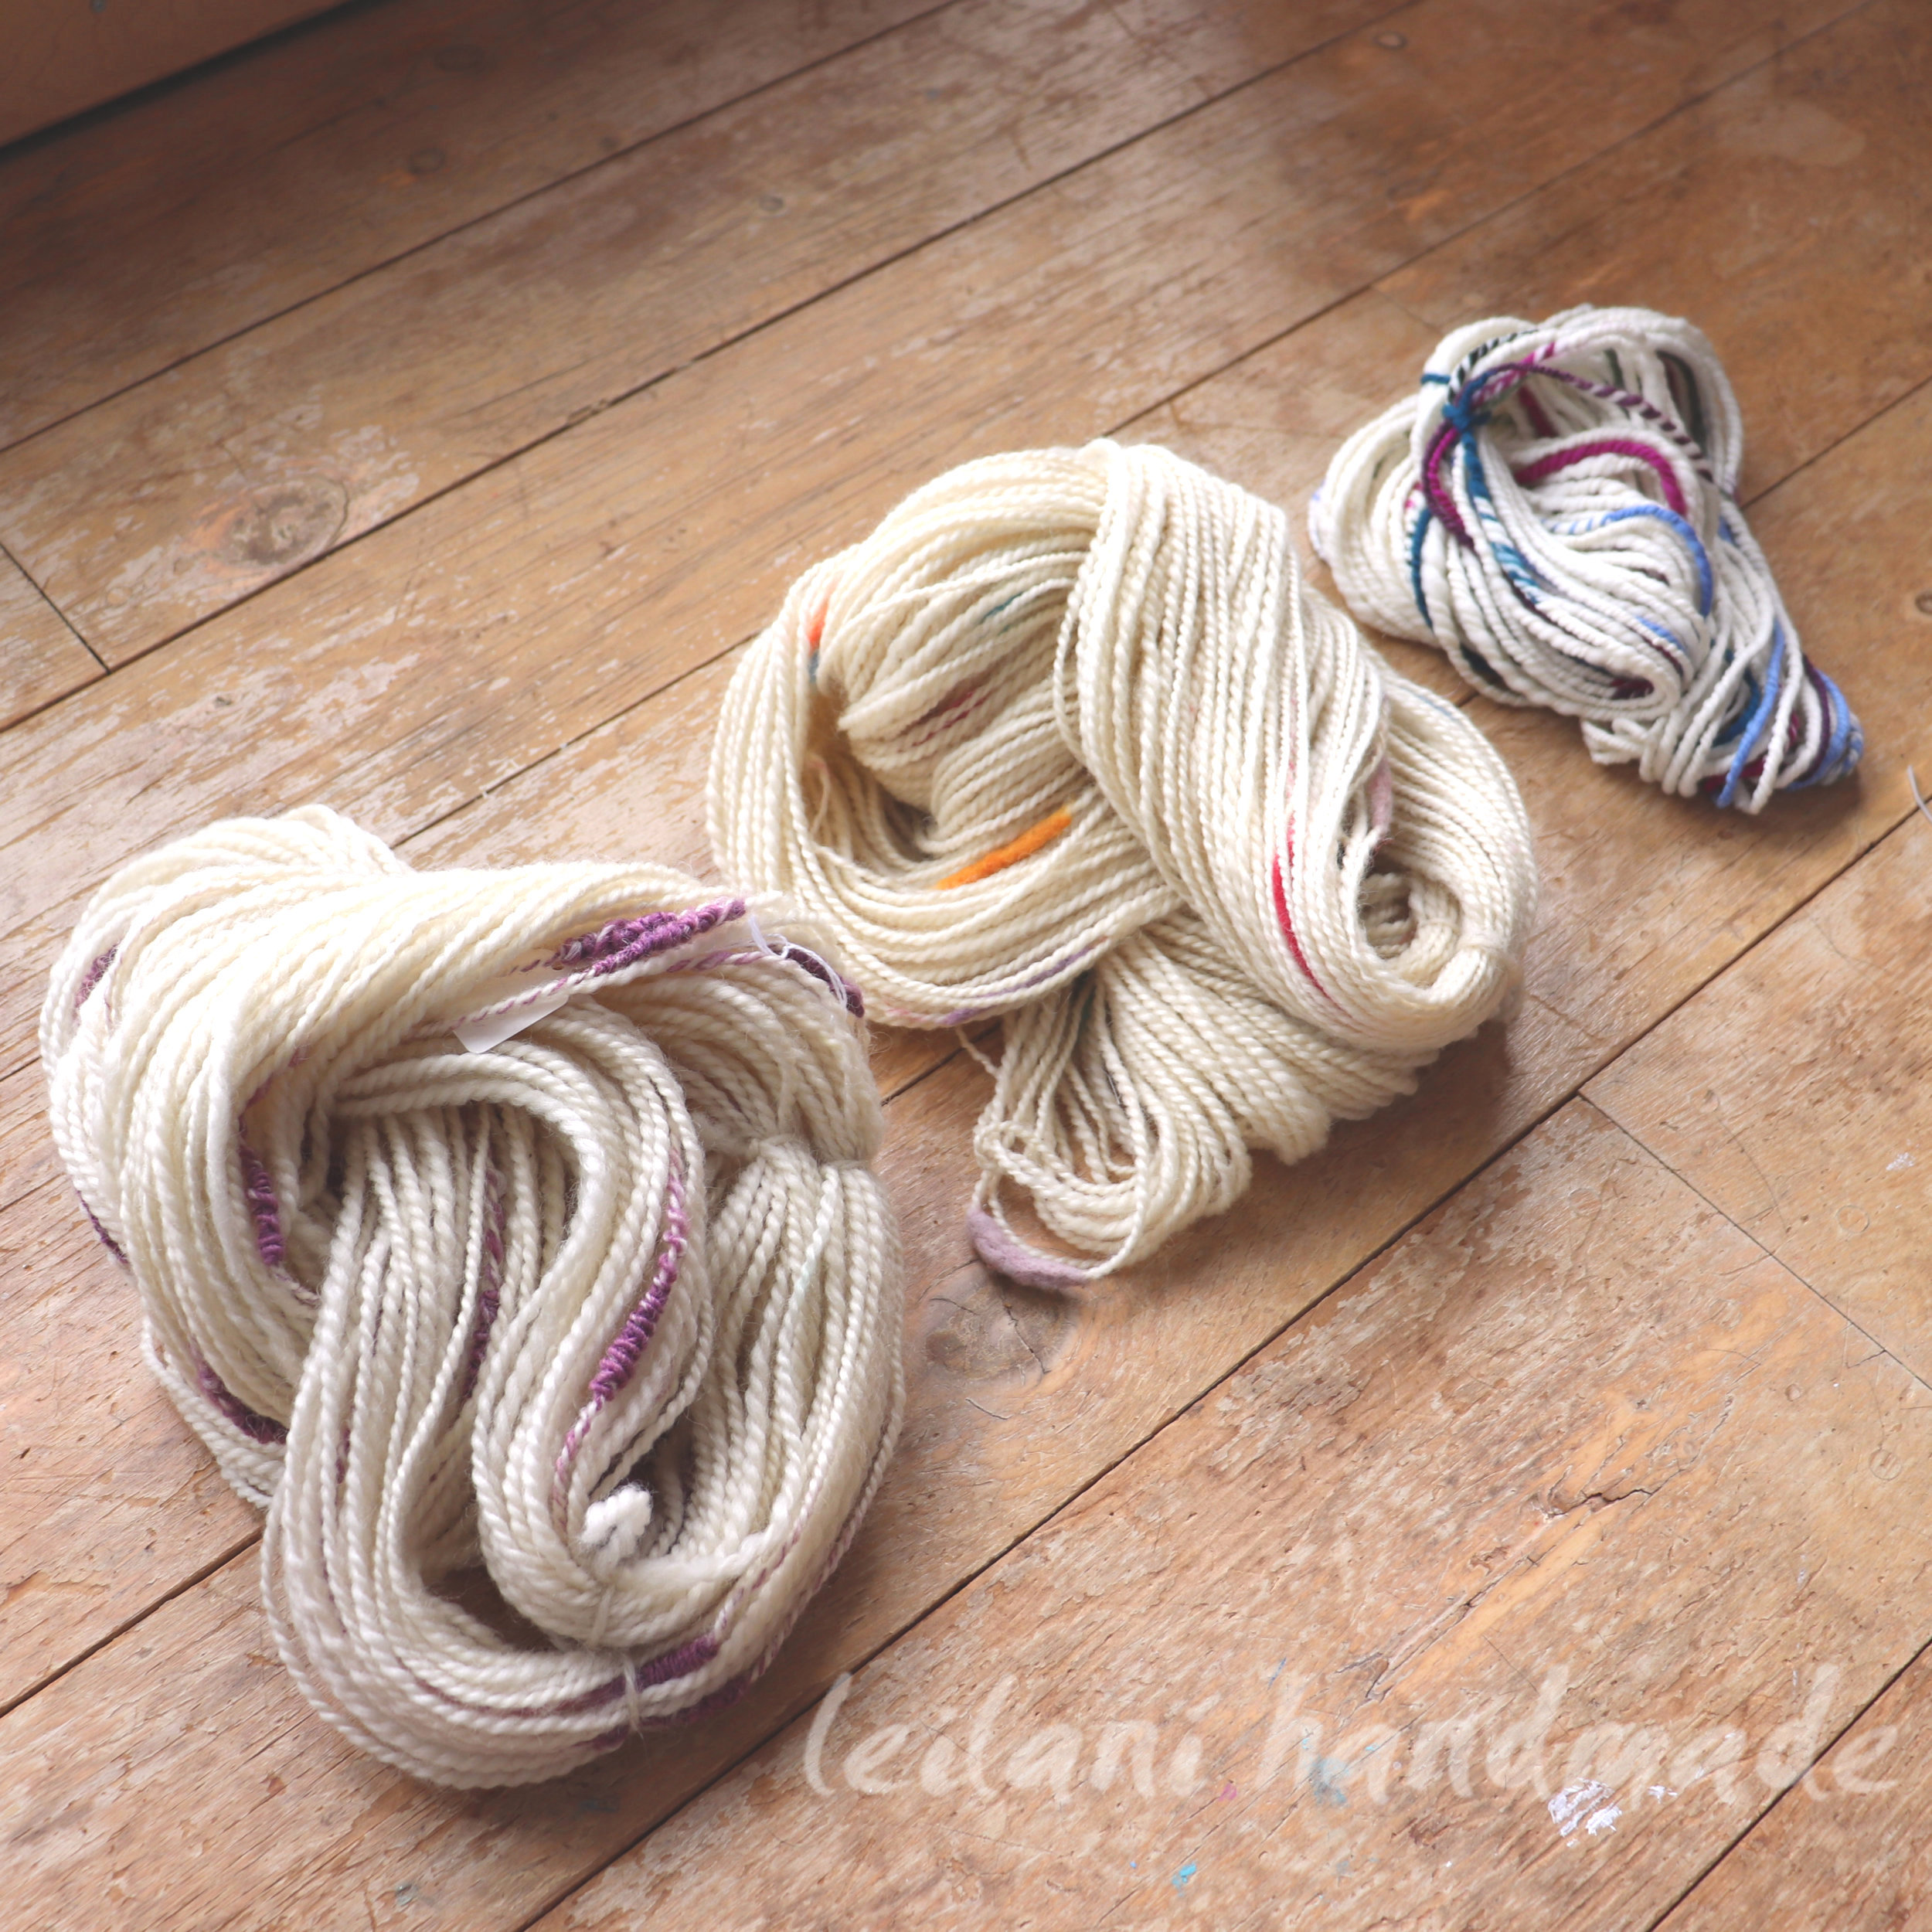
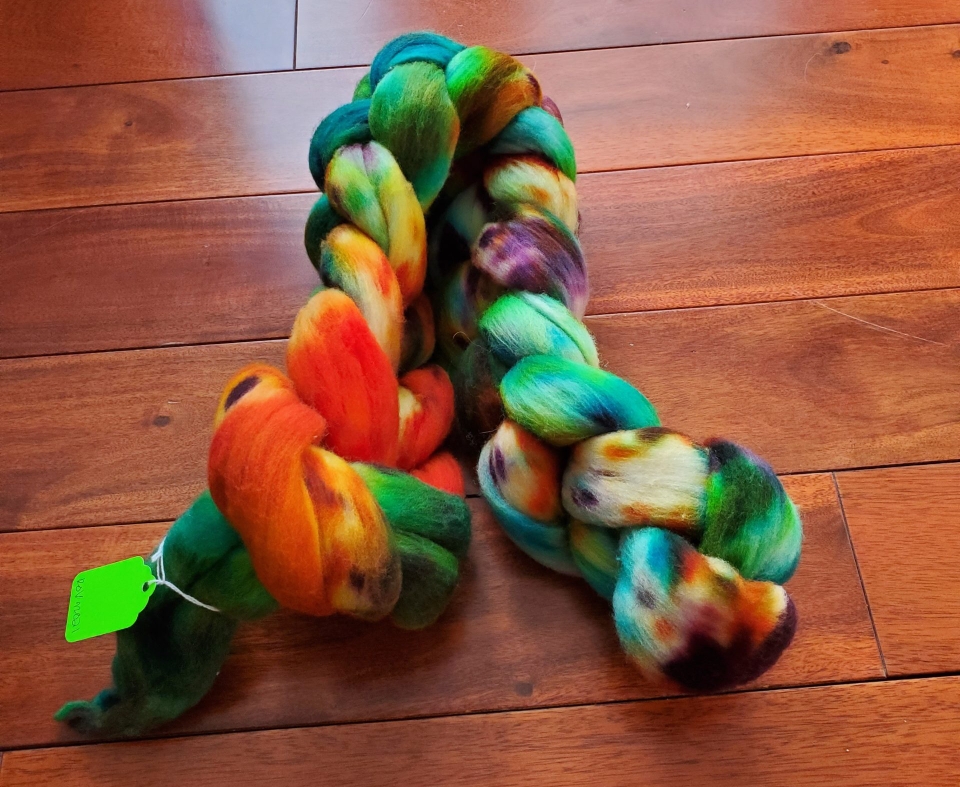
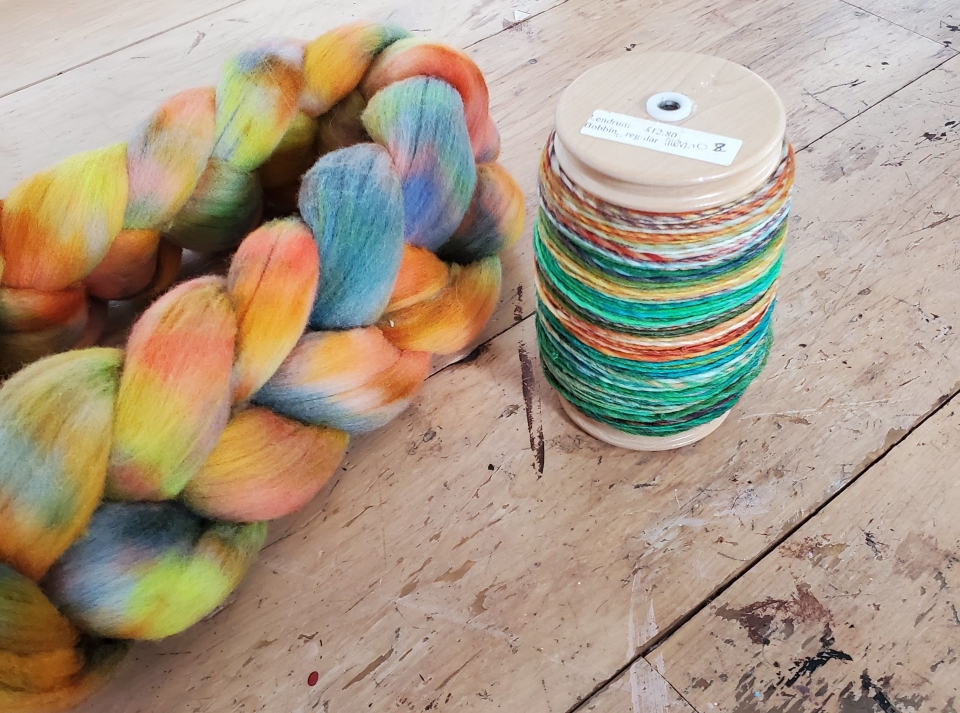
The 3 singles are ready to be plied for this spinning inspiration video. This yarn’s solid yet soothing tans and neutrals are so satisfying.
Splitting 2 Rovings into 3
Color is one of many factors when creating yarn. How you will spin that colored fiber is also a big one. I wanted to make a 3-ply yarn since I had two 4-oz braids to work with. I’m so bored with 2-ply handspun and have so much of it spun to go through. I’ve been opting to spin thinner with my e-spinner, making it well-suited to make a 3-ply that will not end up bulky (too many of those, too!). Don’t get me wrong, I still spin 2-ply when I deem fit, but if I can add more 3-ply to my stash, that’s what I want to do.
To make the third singles match the other two, I took a bit of roving one and a bit of roving two by carefully splitting both down the center but off-center so that the third “roving” would be about the same weight as the two remaining. I do this by feel, and sometimes I win the guesstimate lottery, and sometimes I lose. This time, I was off only by a fraction of an ounce, so much like playing yarn chicken and winning, I was pretty happy with that.
Even though I now have two pieces of roving making up my third, I just hold them together and spin like color with like color. It works pretty well if you remember to consistently spin across the two as you hold them. If you start spinning in one area downwards and not across, you can run into the next color and not get a solid block of color. That’s great if you want that effect, but my goal was to spin a self-striping yarn with blocks of color.
Creating yarn has become one of my passions. I love choosing the colors and then deciding how to spin it.
How I Dyed This Roving
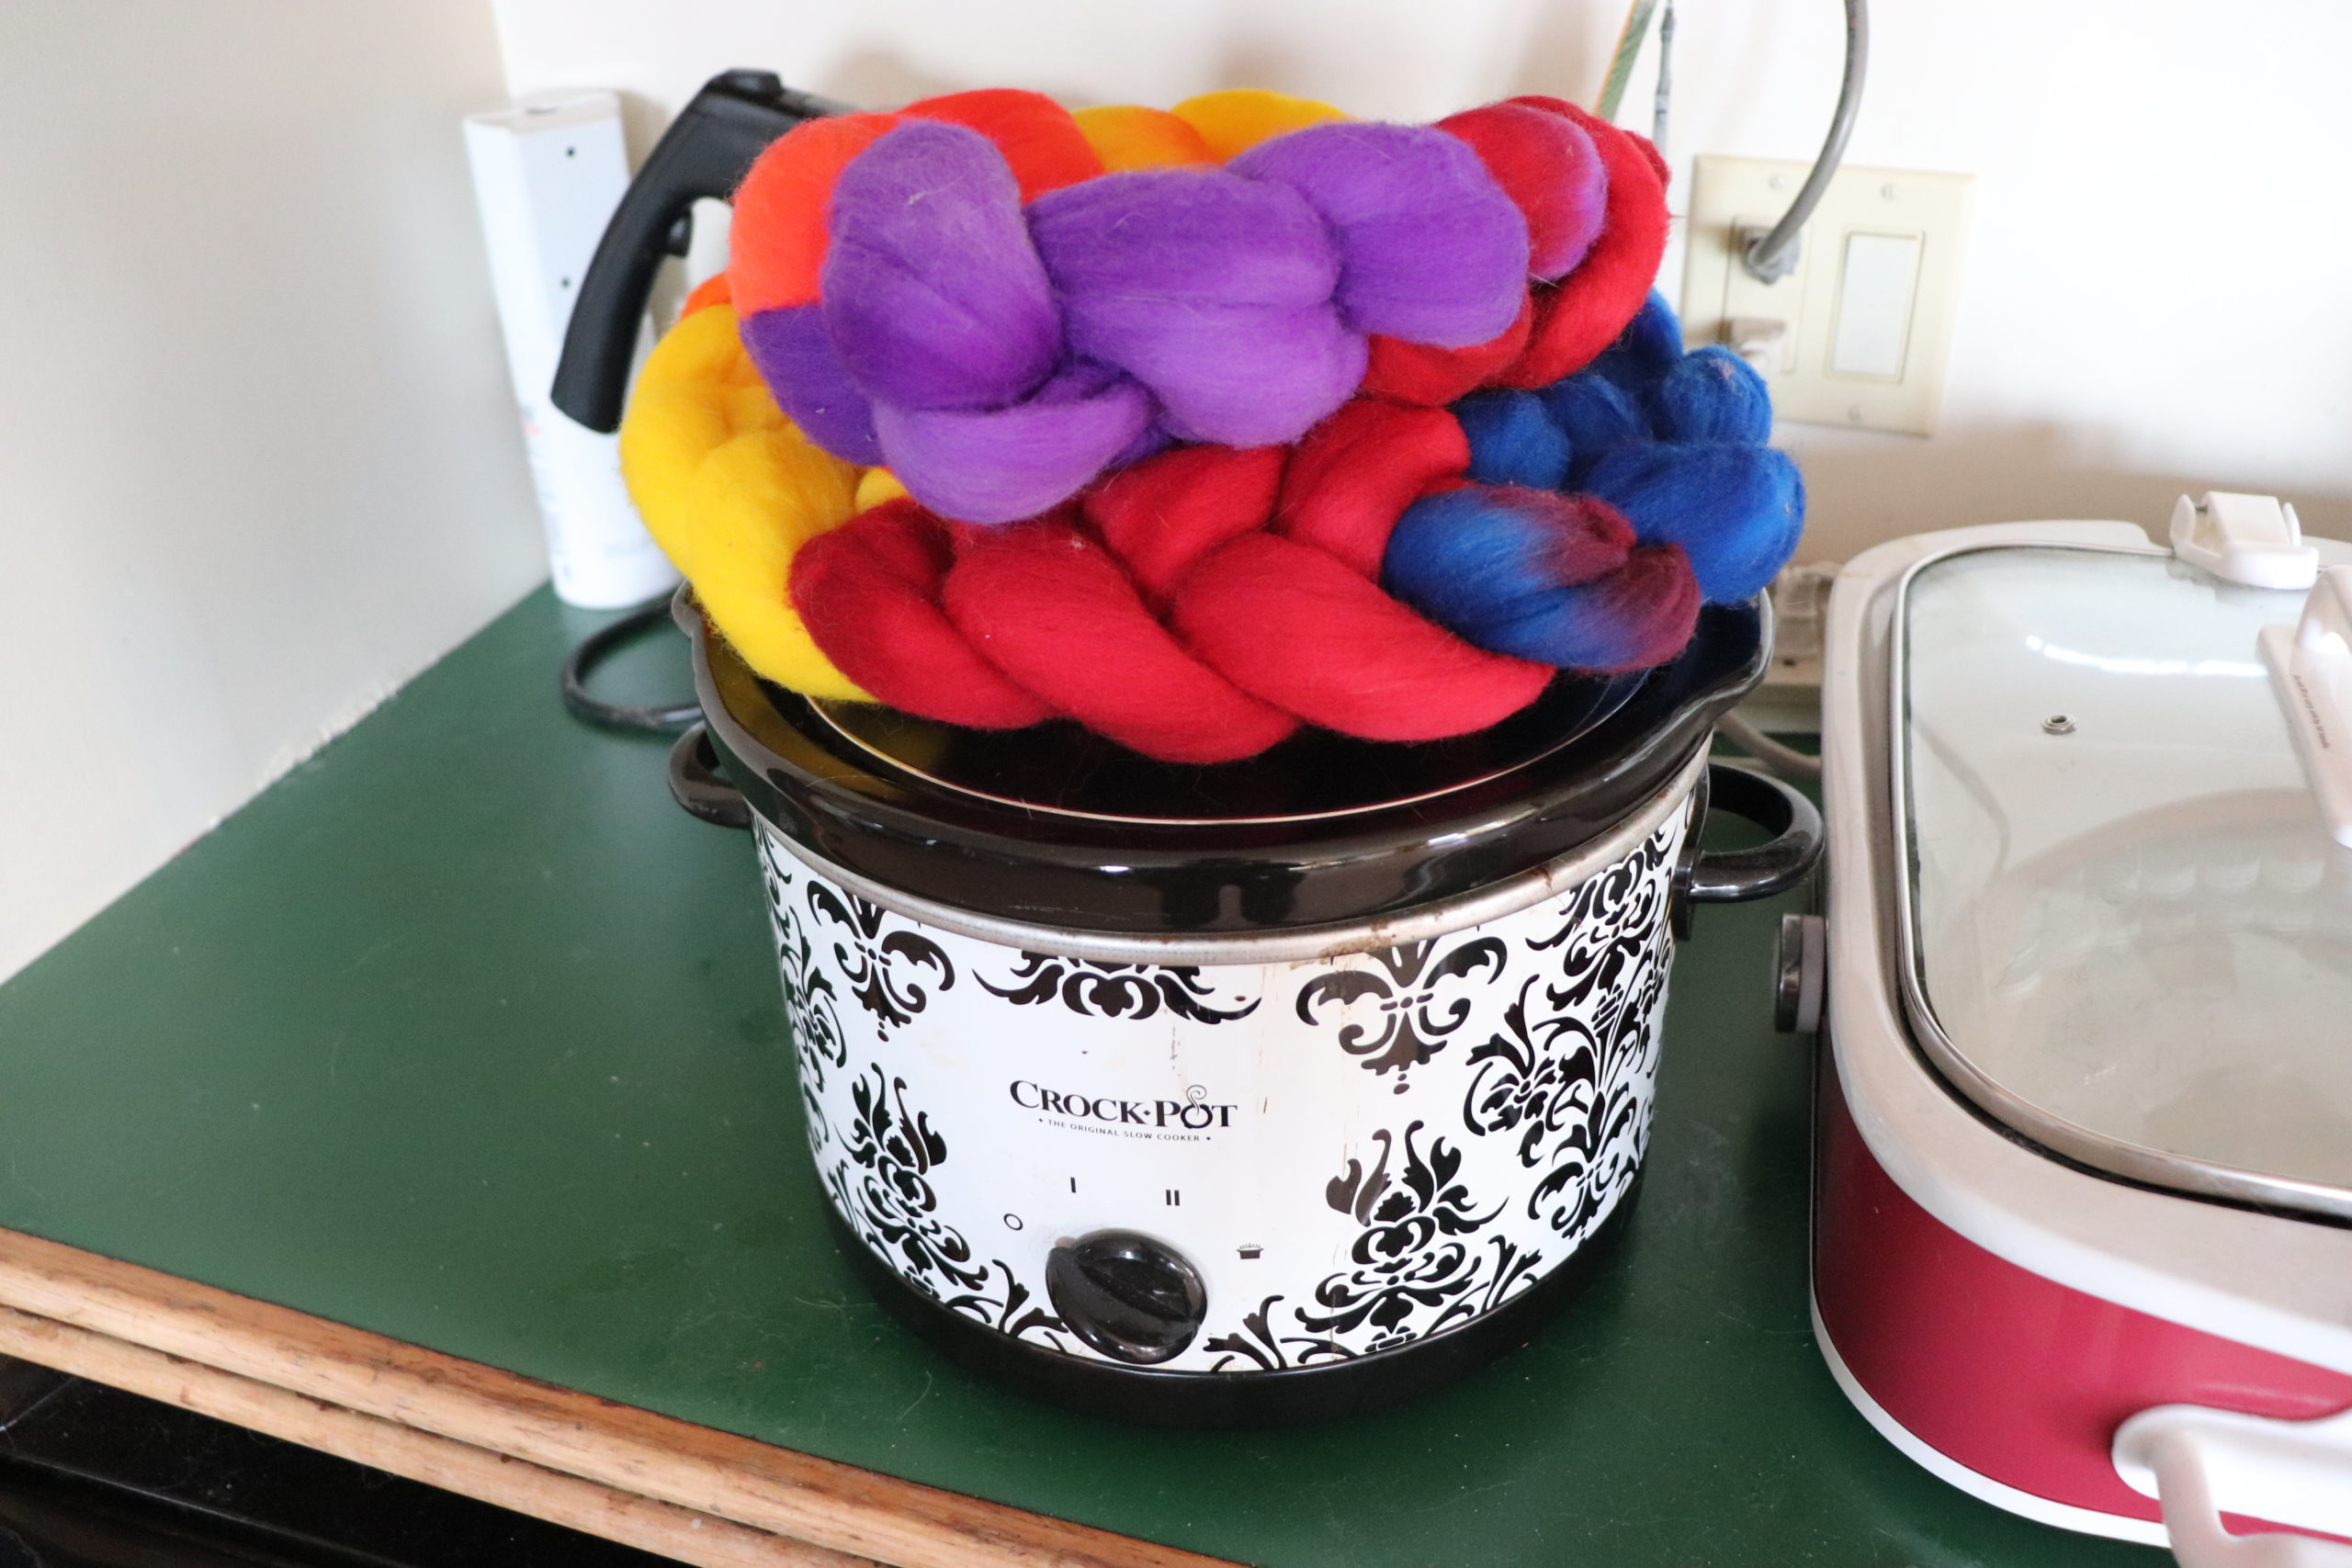
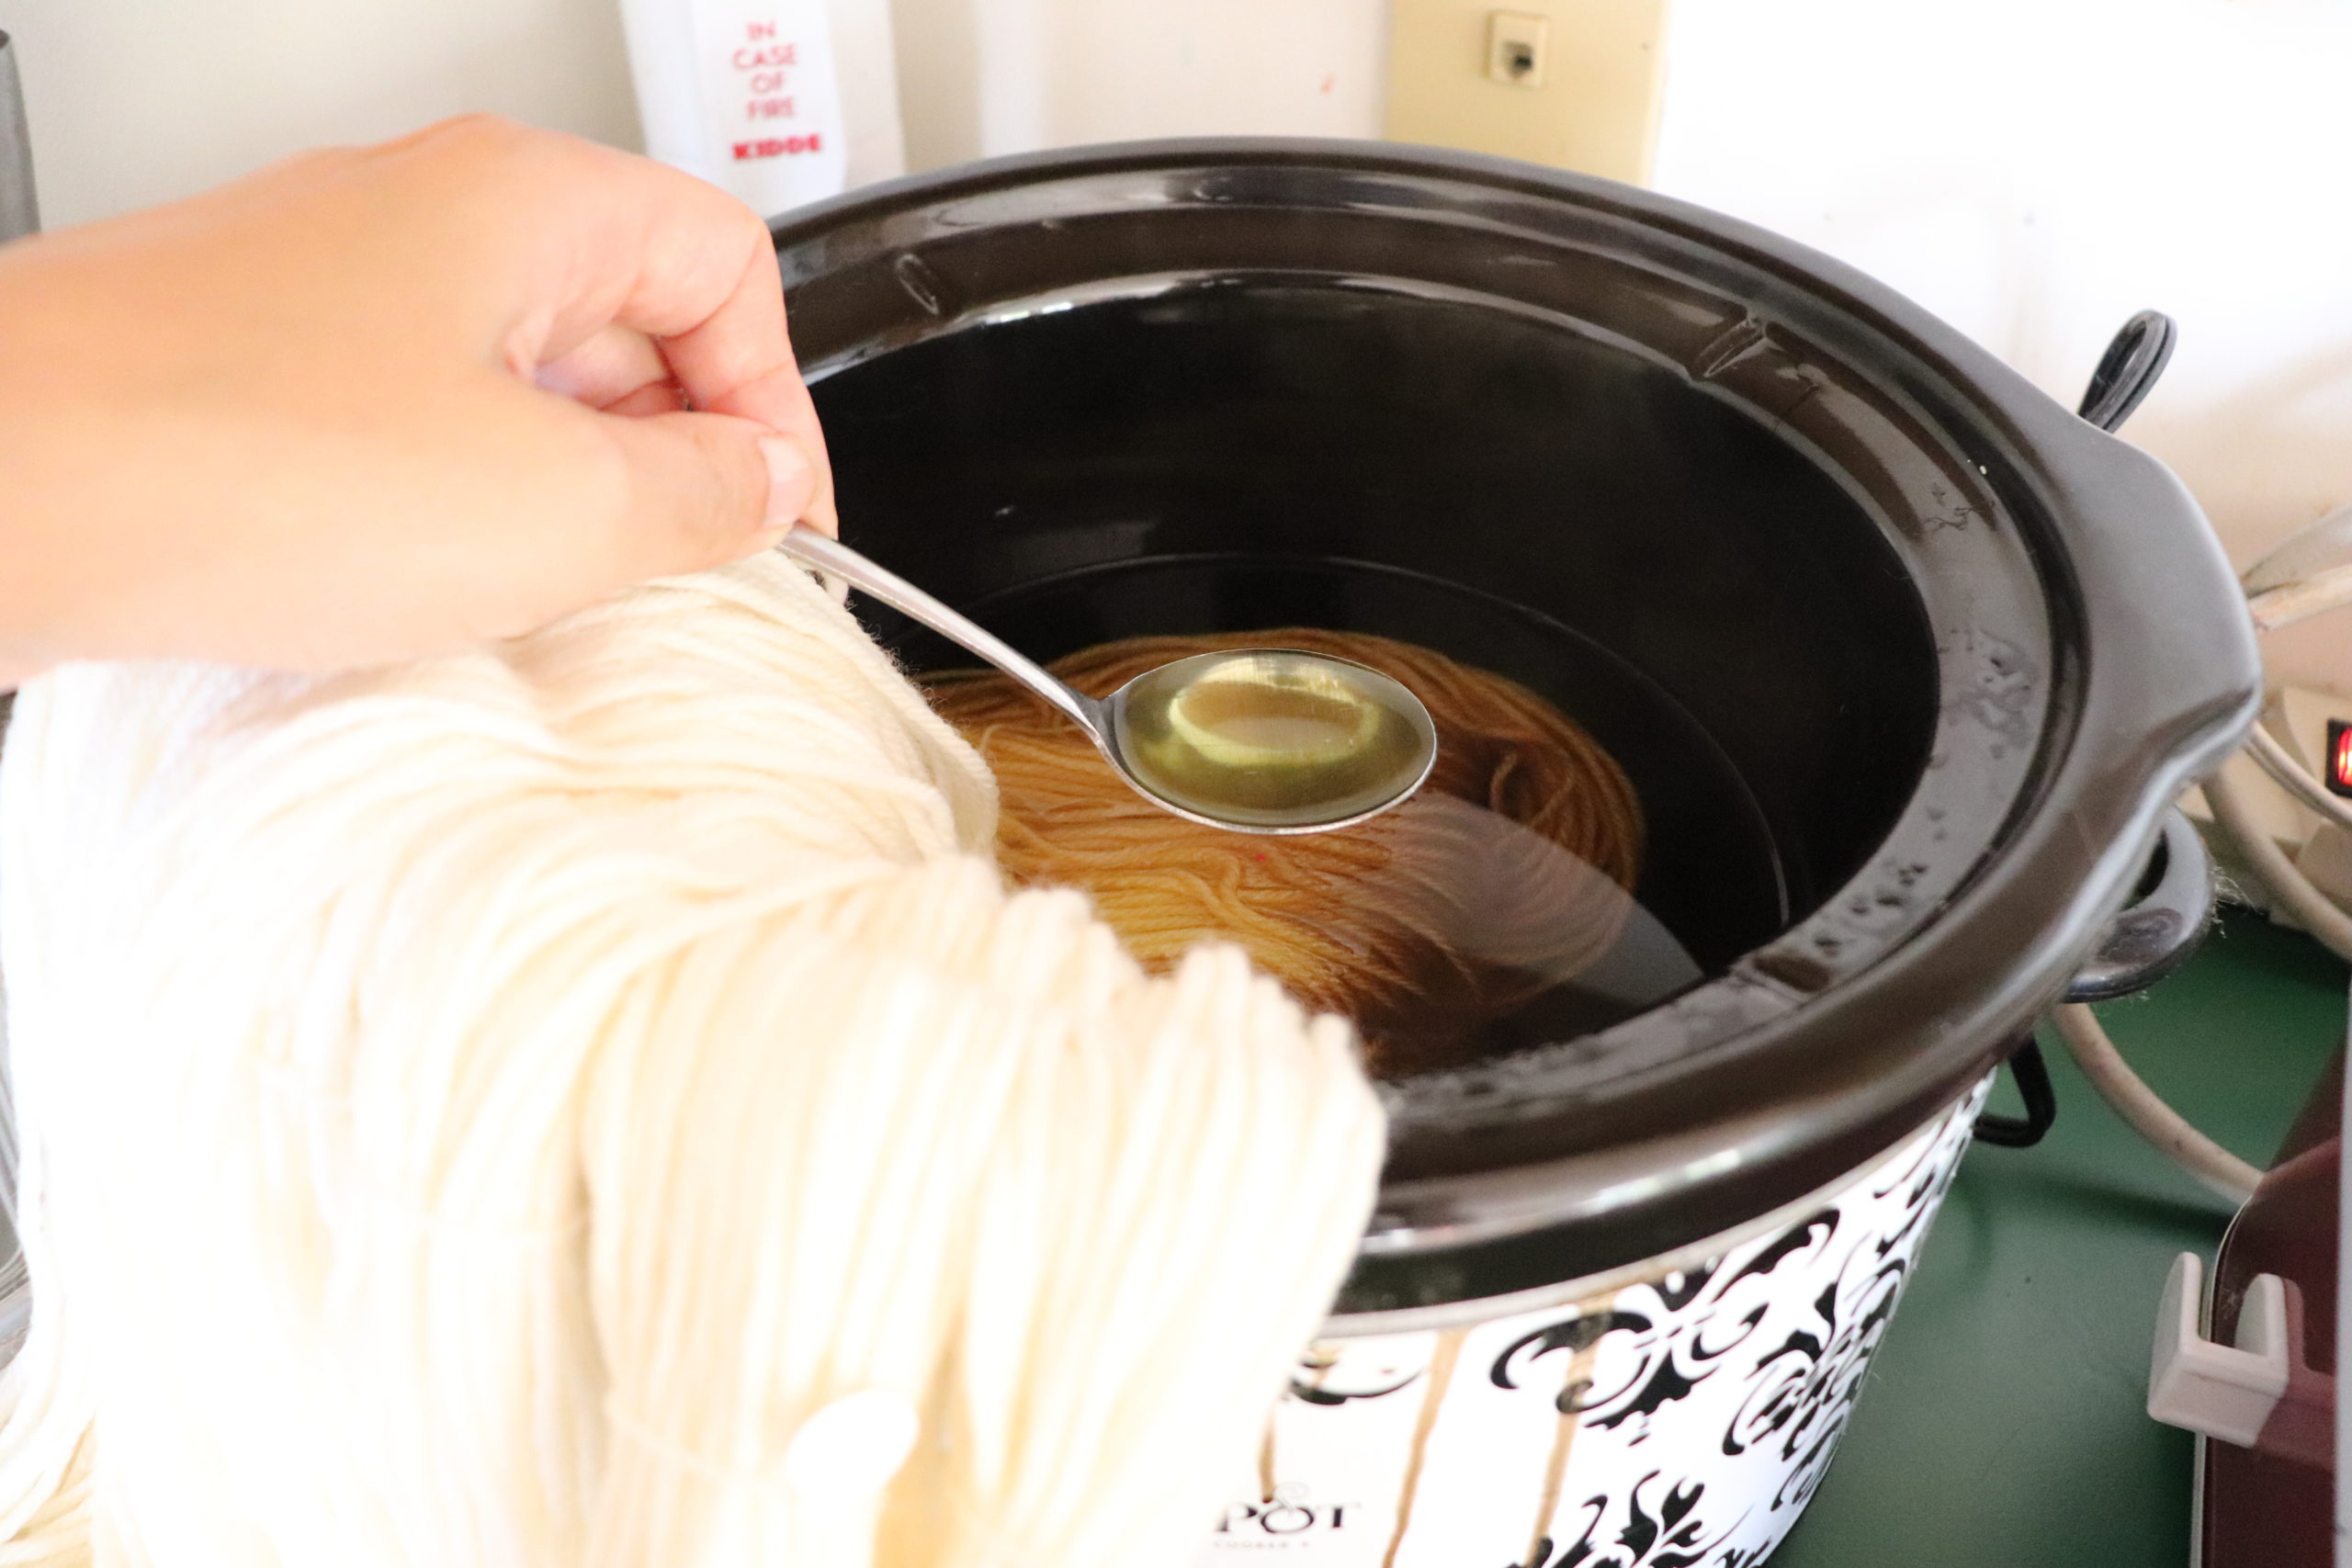
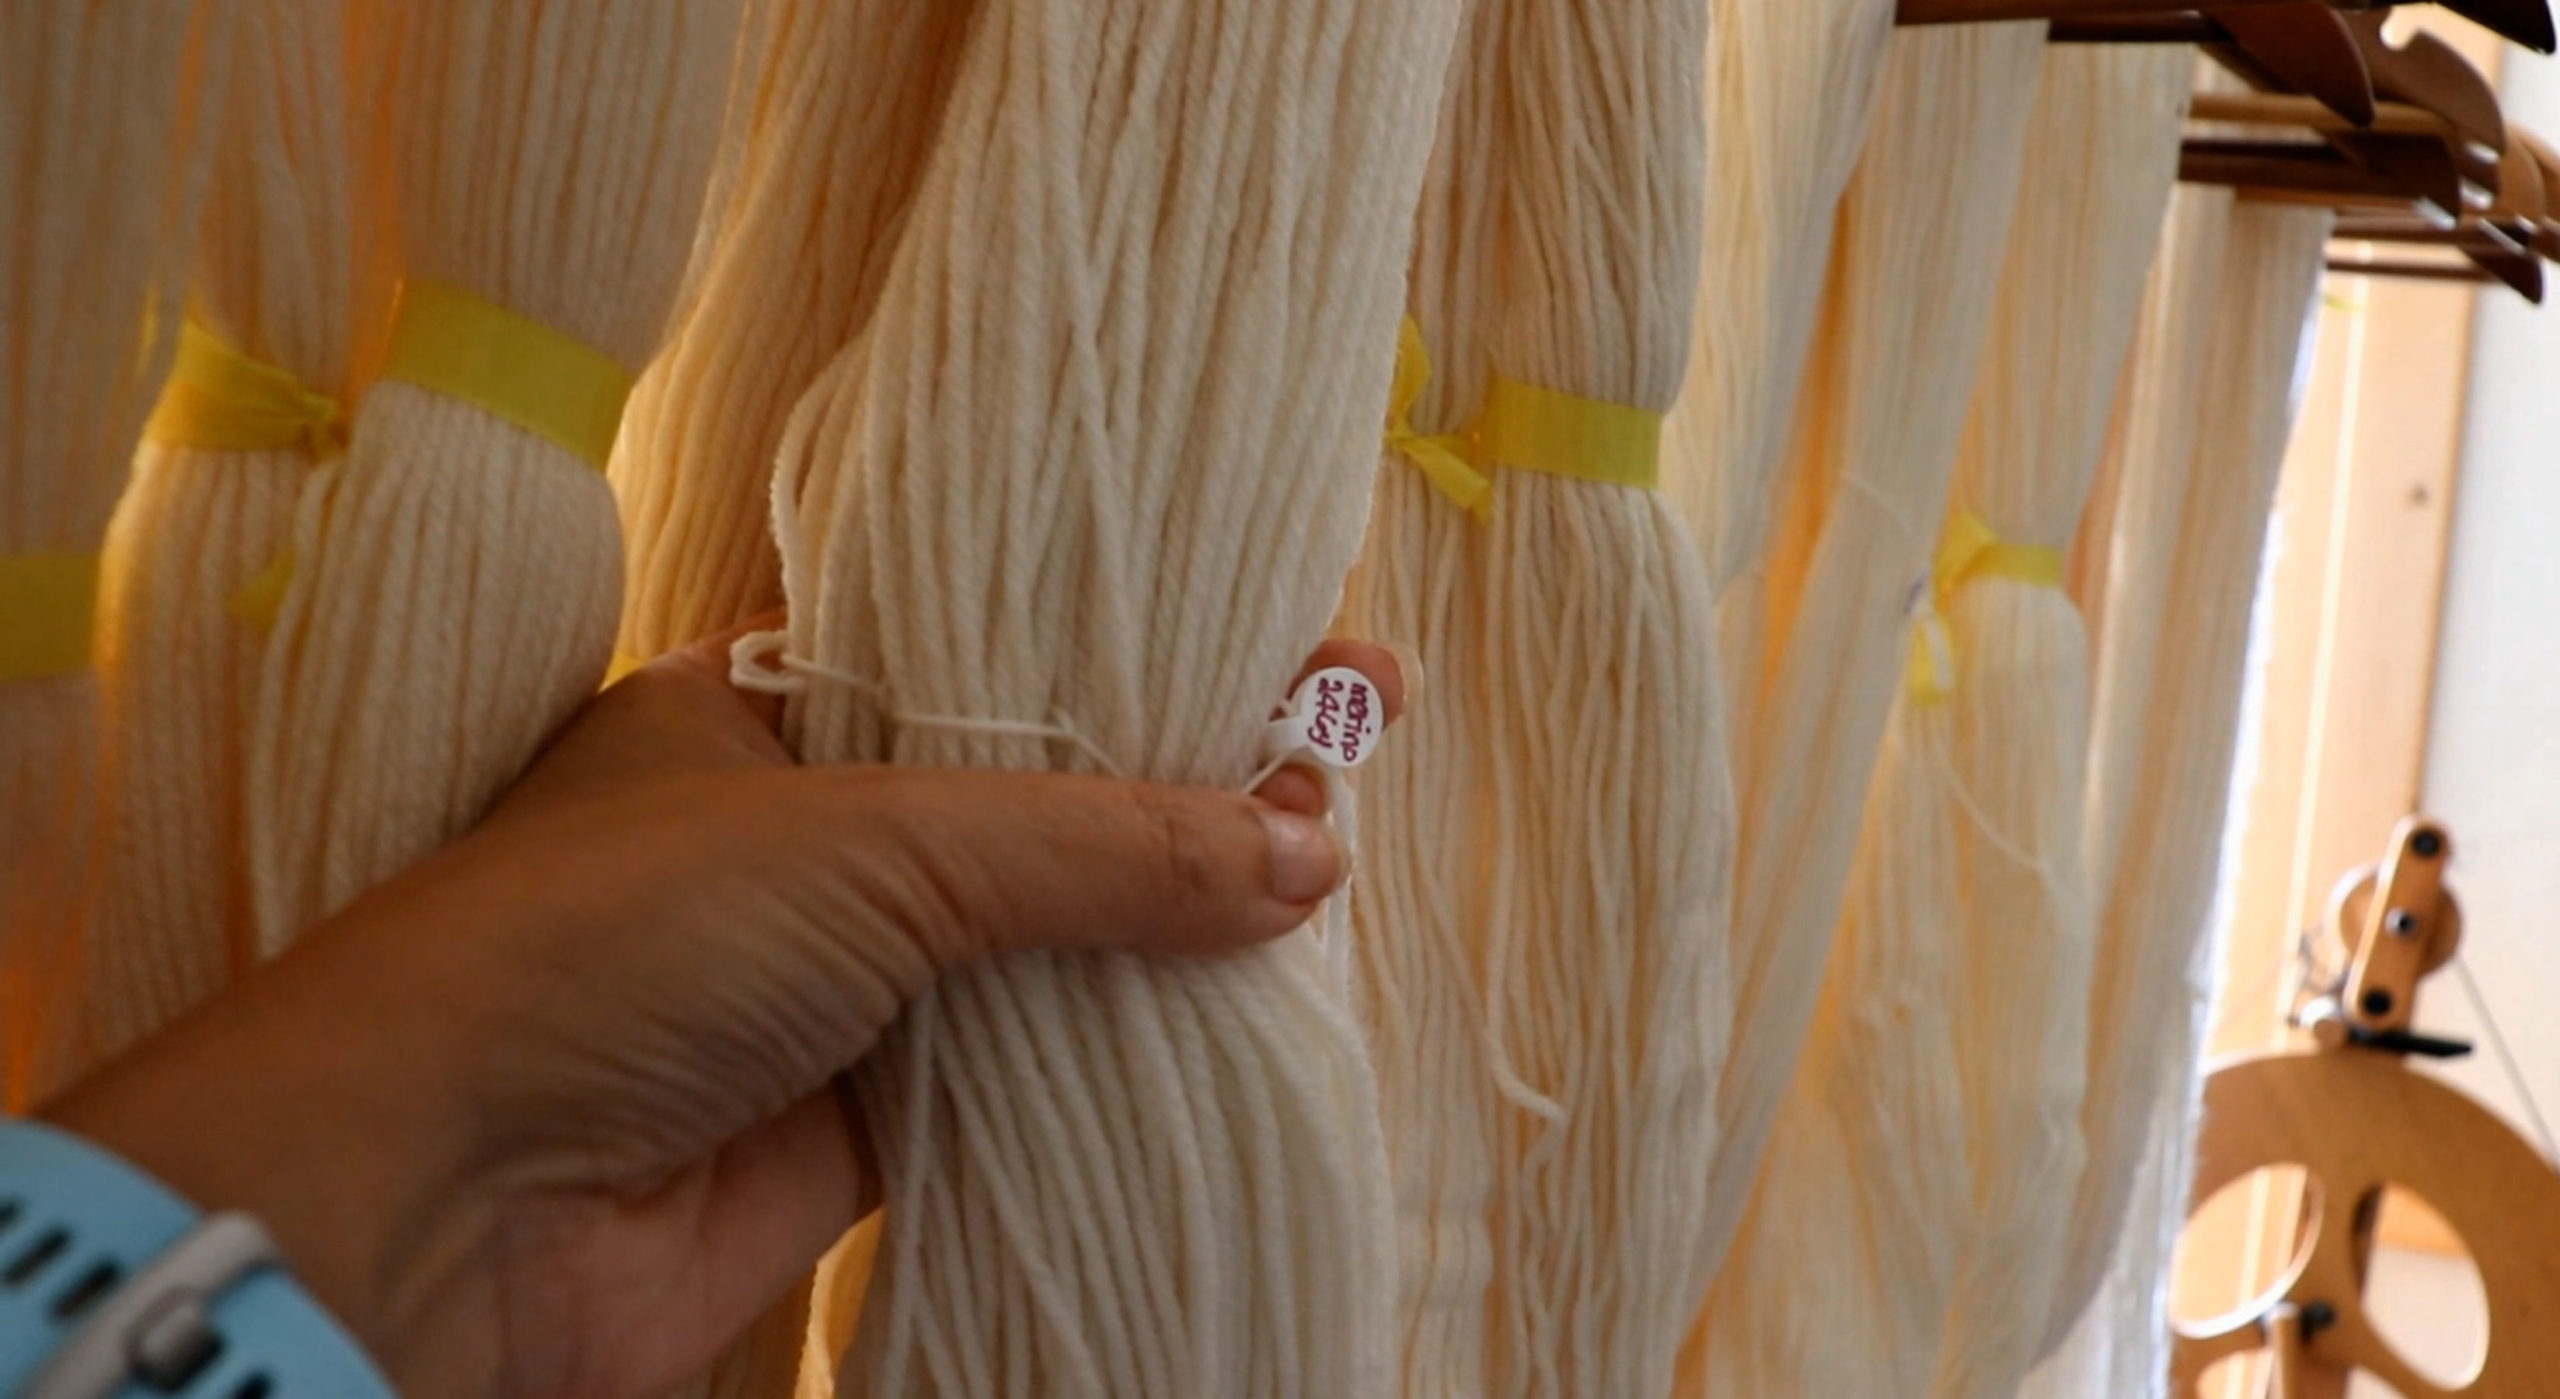
I dyed this roving in a crockpot, section by section. I weighed out 4oz of Merino top roving, twice. Then, I loosely tied the fiber together, keeping it unbraided. I like to tie the roving together so that it enters the dye in the same place at the same time and will uptake the dye at the same rate. It’s the best chance to get a close to identical color match.
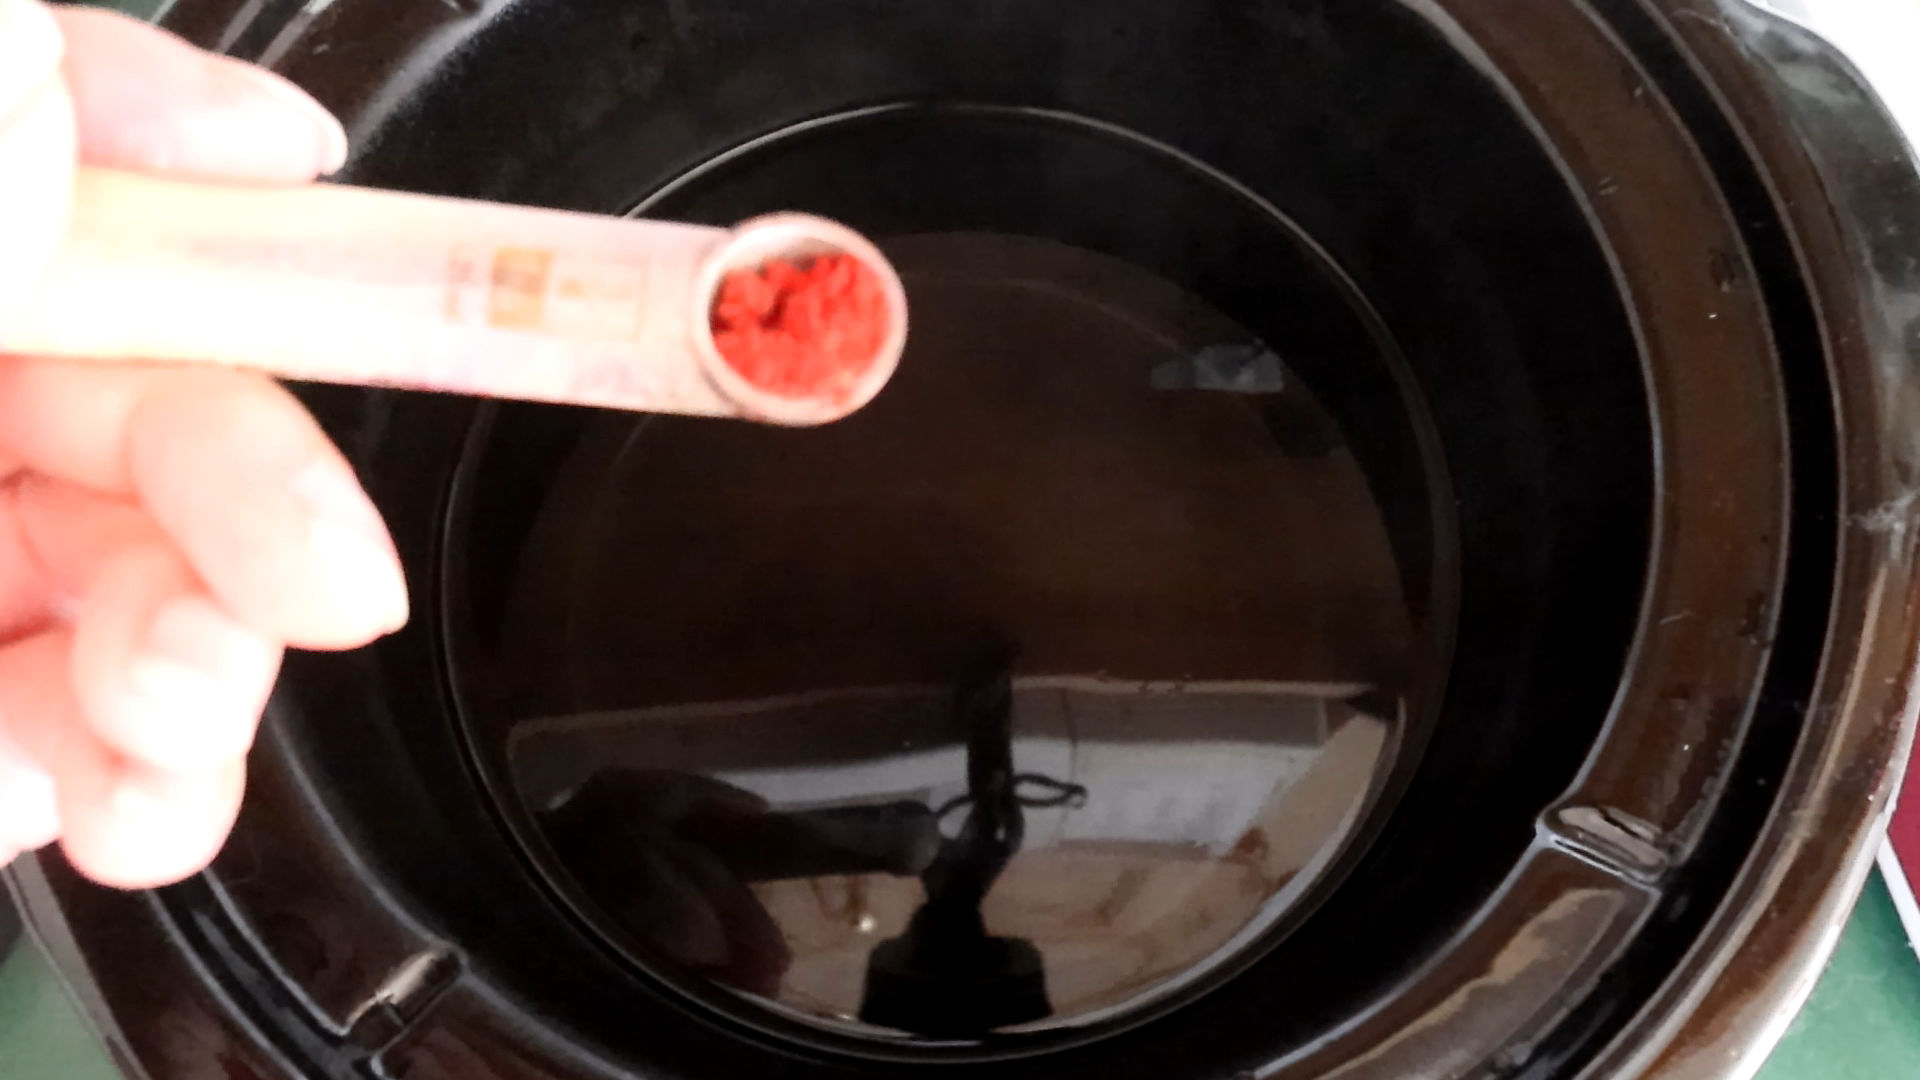
Most of the colors used in this dye combination were Country Classics. Country Classics is an all-in-one dye that requires no mordant. I add the amount of dye to the hot water in the crockpot, dip the desired fiber length in, and let it sit until all the dye is absorbed. If the dye is sluggish to uptake, I add additional boiling water.
Let each color exhaust entirely before adding the next color. I reuse my water as long as it is clear. If some dye remains, you will want to change to fresh hot water. You can add a new color to any non-exhausted dye if you want that effect.
I also measure my powdered dye in small increments and gradually increase it until I get the desired shade. You can always add more dye, but not take away. I like to do this for my notes as well, because if I decide that I want to replicate the dye combo and tweak some of the color I can easily take away or increase the amount of dye to either lighten or darken the shade. This is why you will see 1/3 tsp x3 instead of 1 tsp.
Give your fiber a gentle squeeze to remove some of the water before placing the dyed section into a plastic bin, but don’t try to squeeze all the water out to avoid felting.
Add hot water as needed in between colors, as some of the water will absorb into the fiber as well as evaporates.
The Dye Formula
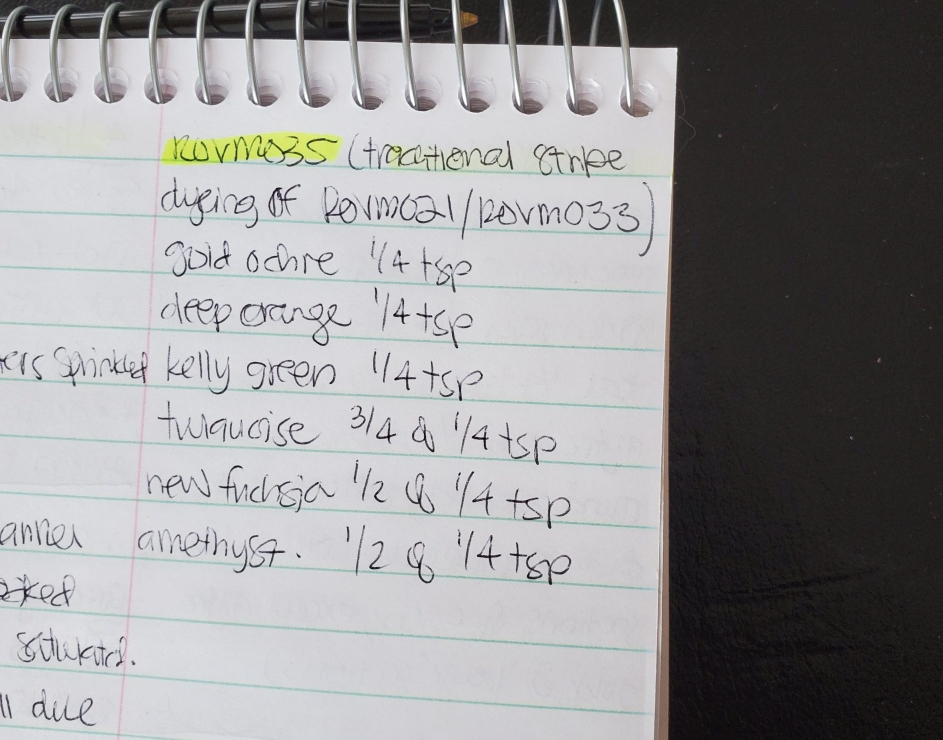
Section 1: Country Classics Tan, 1/3 tsp x3. (1 tsp total). Mix to dissolve, add fiber to crockpot and stop when you see the uptake color lightening in the fiber.
Section 2: Country Classics Bermuda Sand 1/3 tsp x2, slightly overlapping where the color lightened for section 1.
Section 3: Country Classics Clay 1/3 tsp x2, slightly overlapping where the color lightened for section 2.
Section 4: Country Classics Golden Pear 1/3tsp x2 slightly overlapping where the color lightened for section 3.
Section 5: Country Classics Straw 1/3tsp x2, slightly overlapping where the color lightened for section 4.
Section 6: Add citric acid to the hot water. I don’t measure, but approx. 1/2 tbsp. Then add: Jacquard Aztec Gold 1/3 tsp., slightly overlapping where the color lightened for section 5.
After the Completed Dye
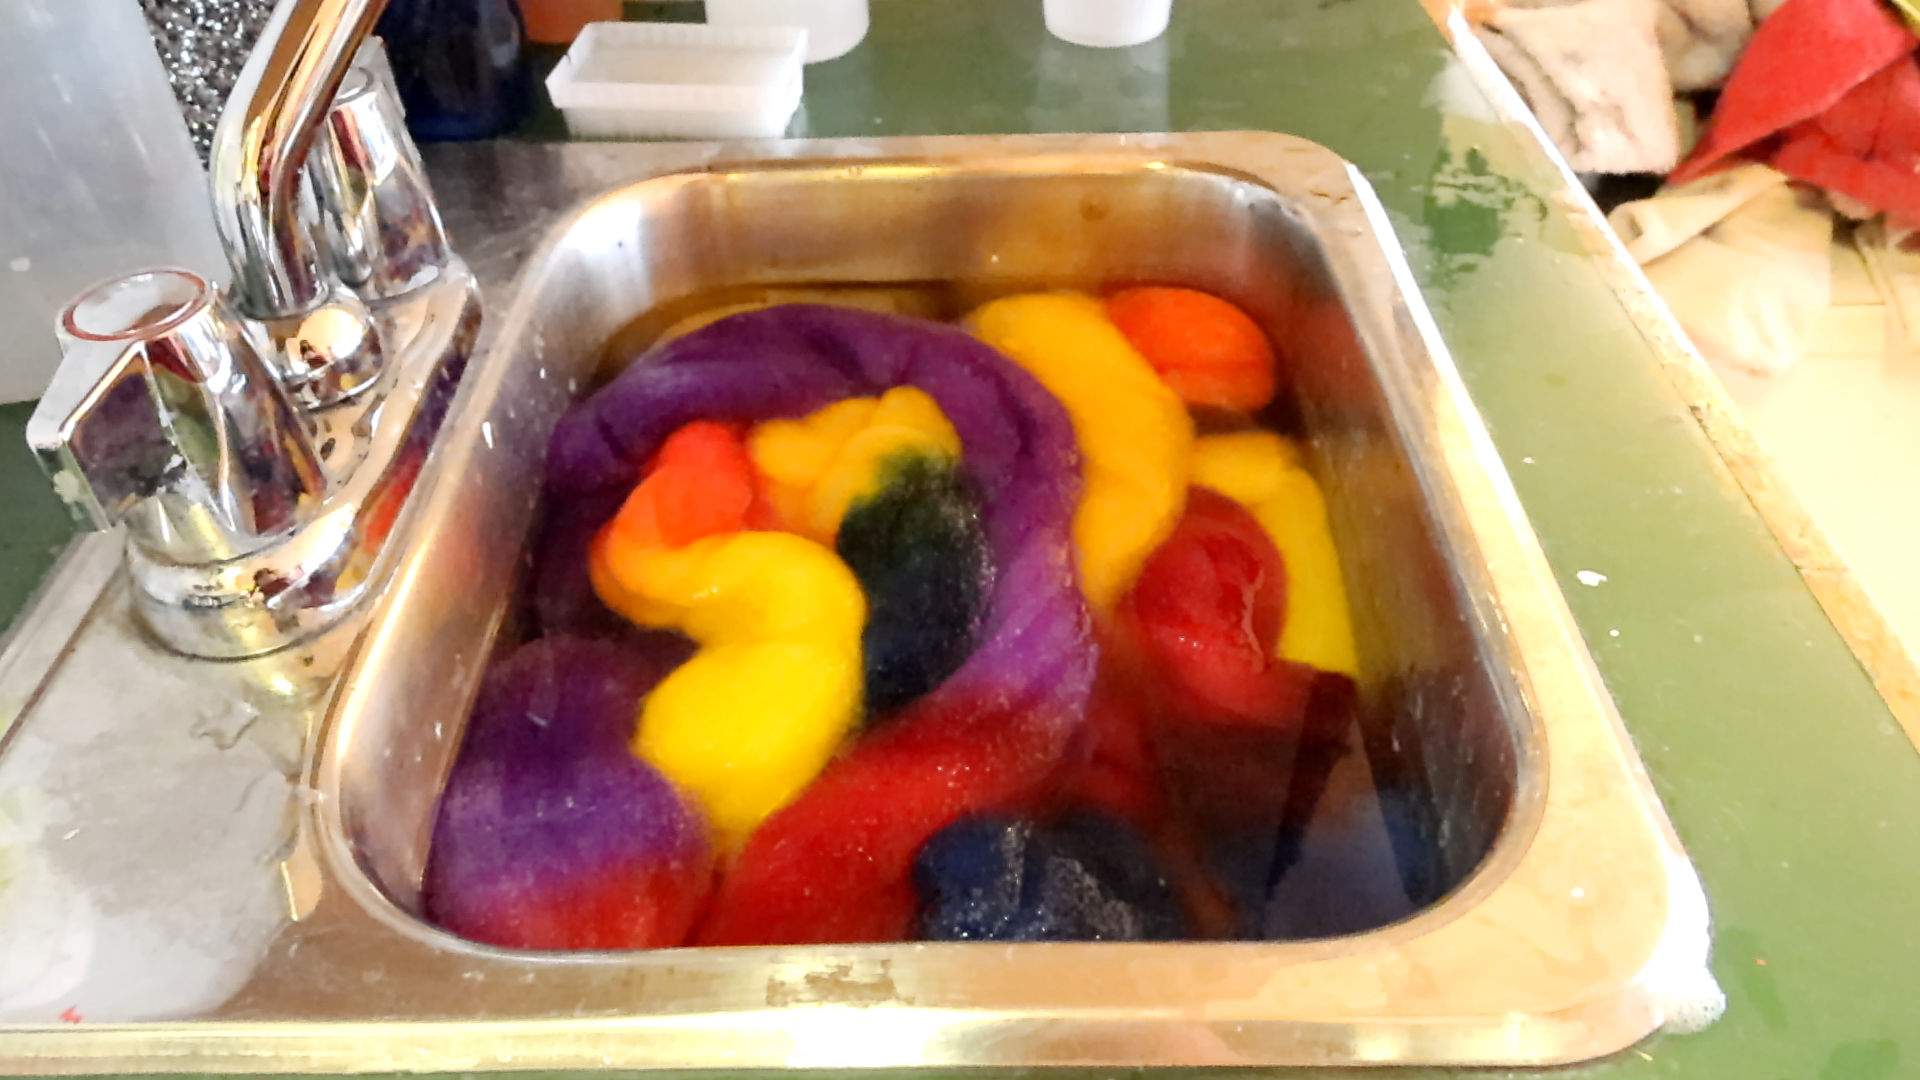
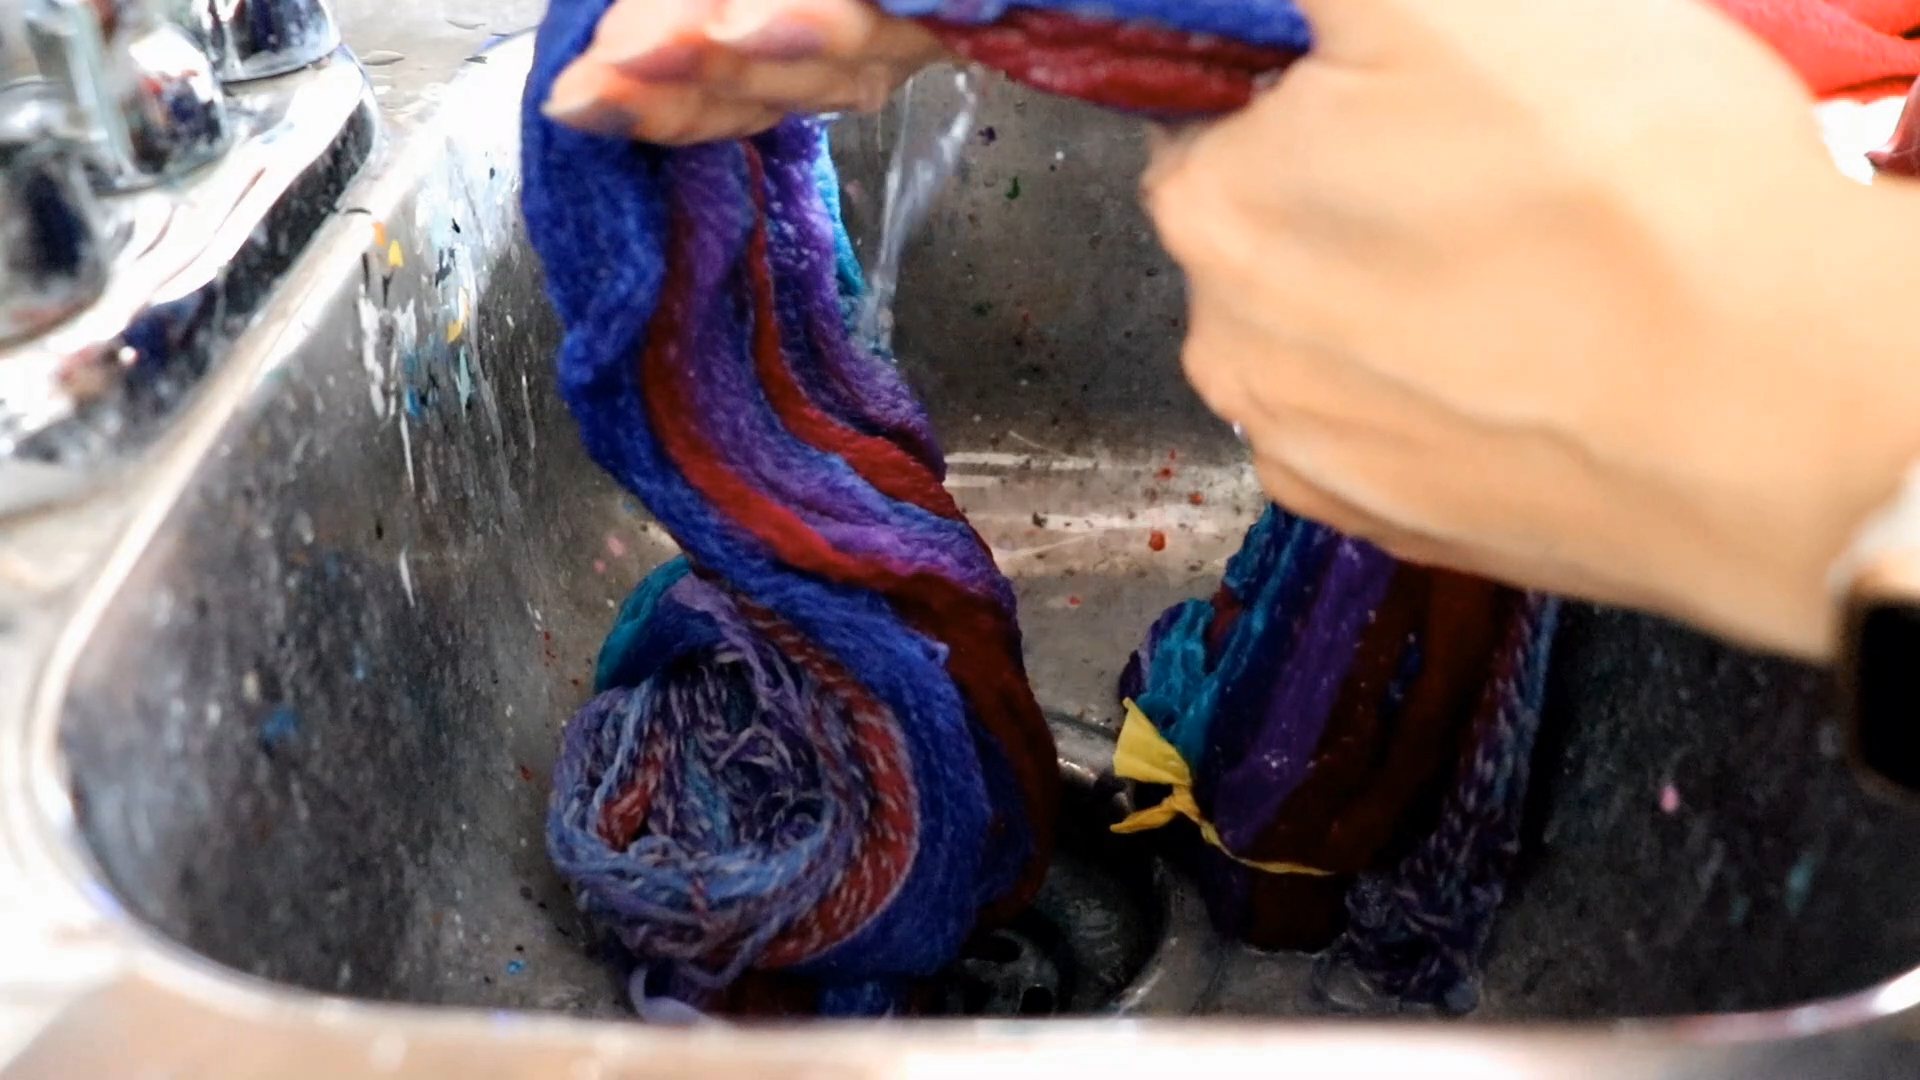
Give the roving a quick soak in the sink with hot tap water and Synthrapol or an equivalent soap like TNA Soap. You can also use blue Dawn dish soap, but use it sparingly, or you’ll be rinsing a lot of suds, and too much manipulation can lead to felting.
You can skip the final soak, as you will be setting your yarn once completed anyway, and that final soak at the completed yarn stage will remove any excess dye. I don’t recommend this for bright or super saturated colors.
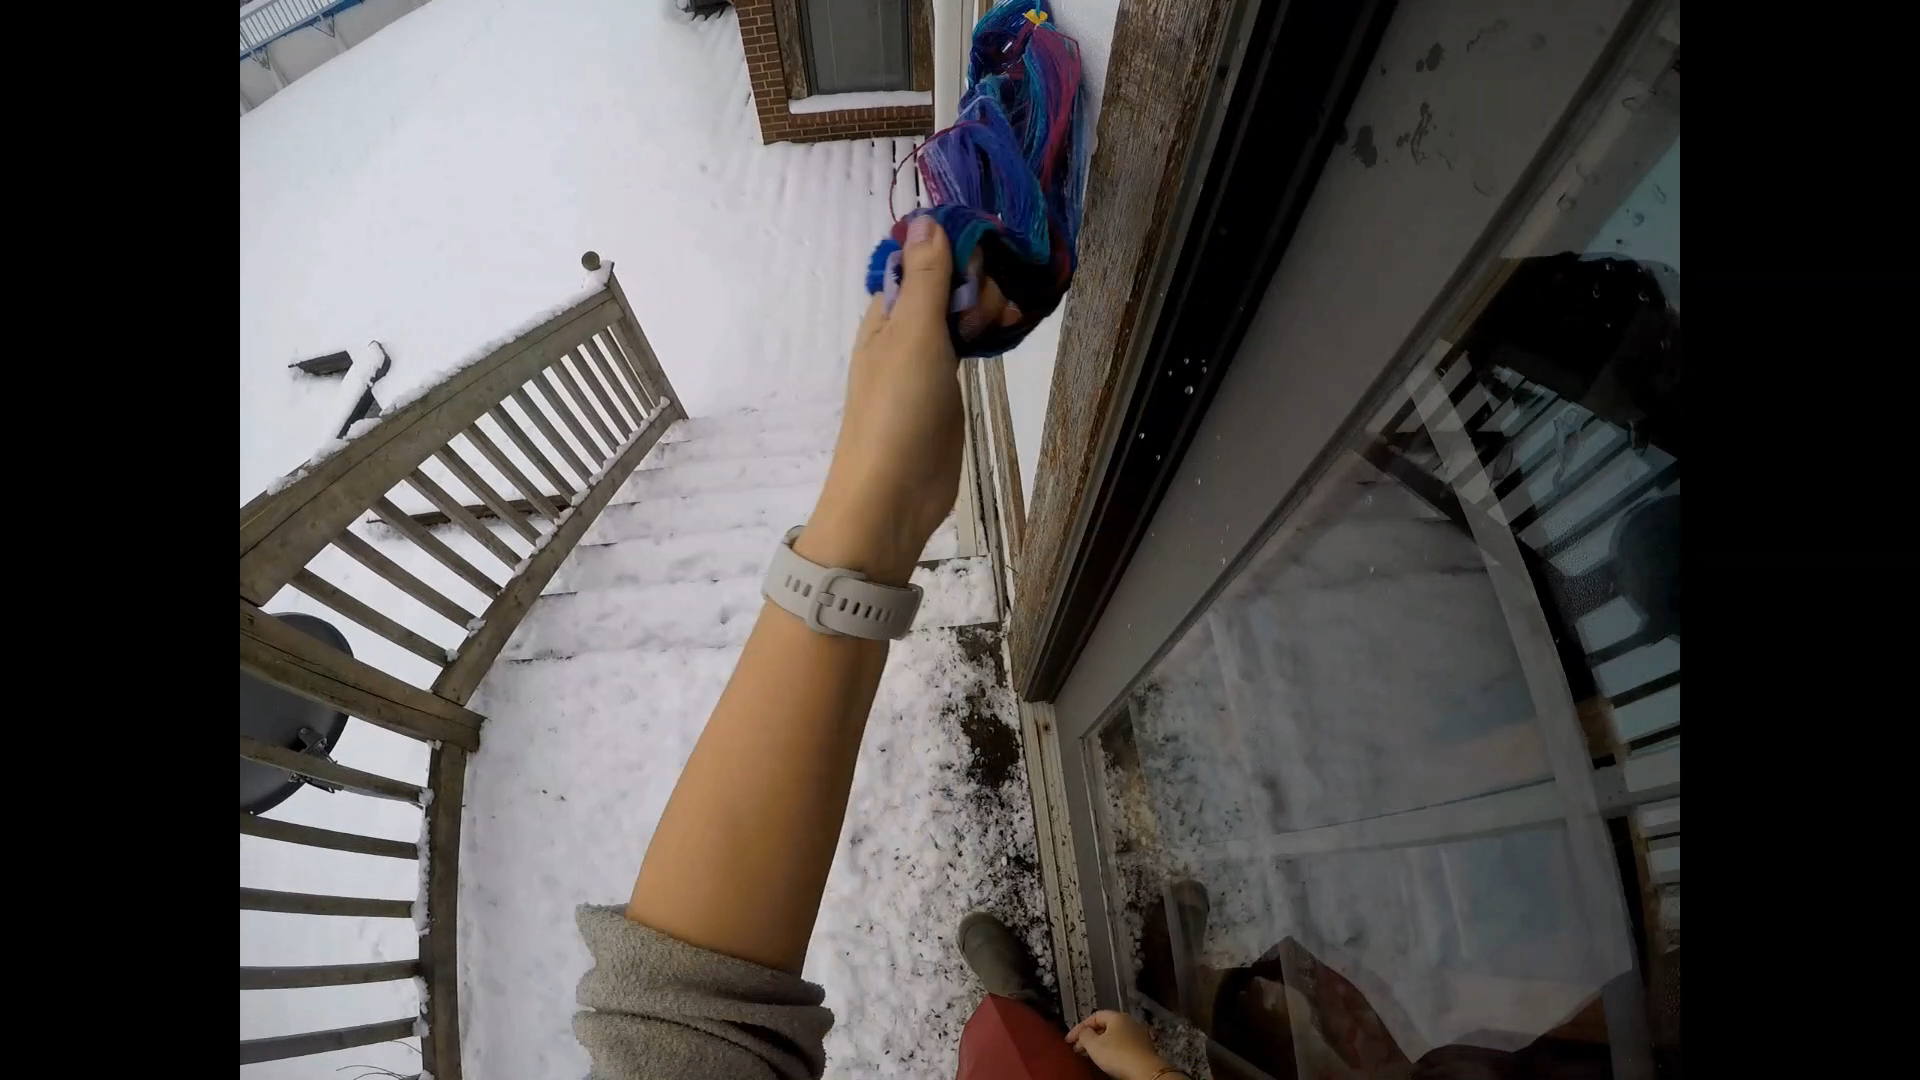
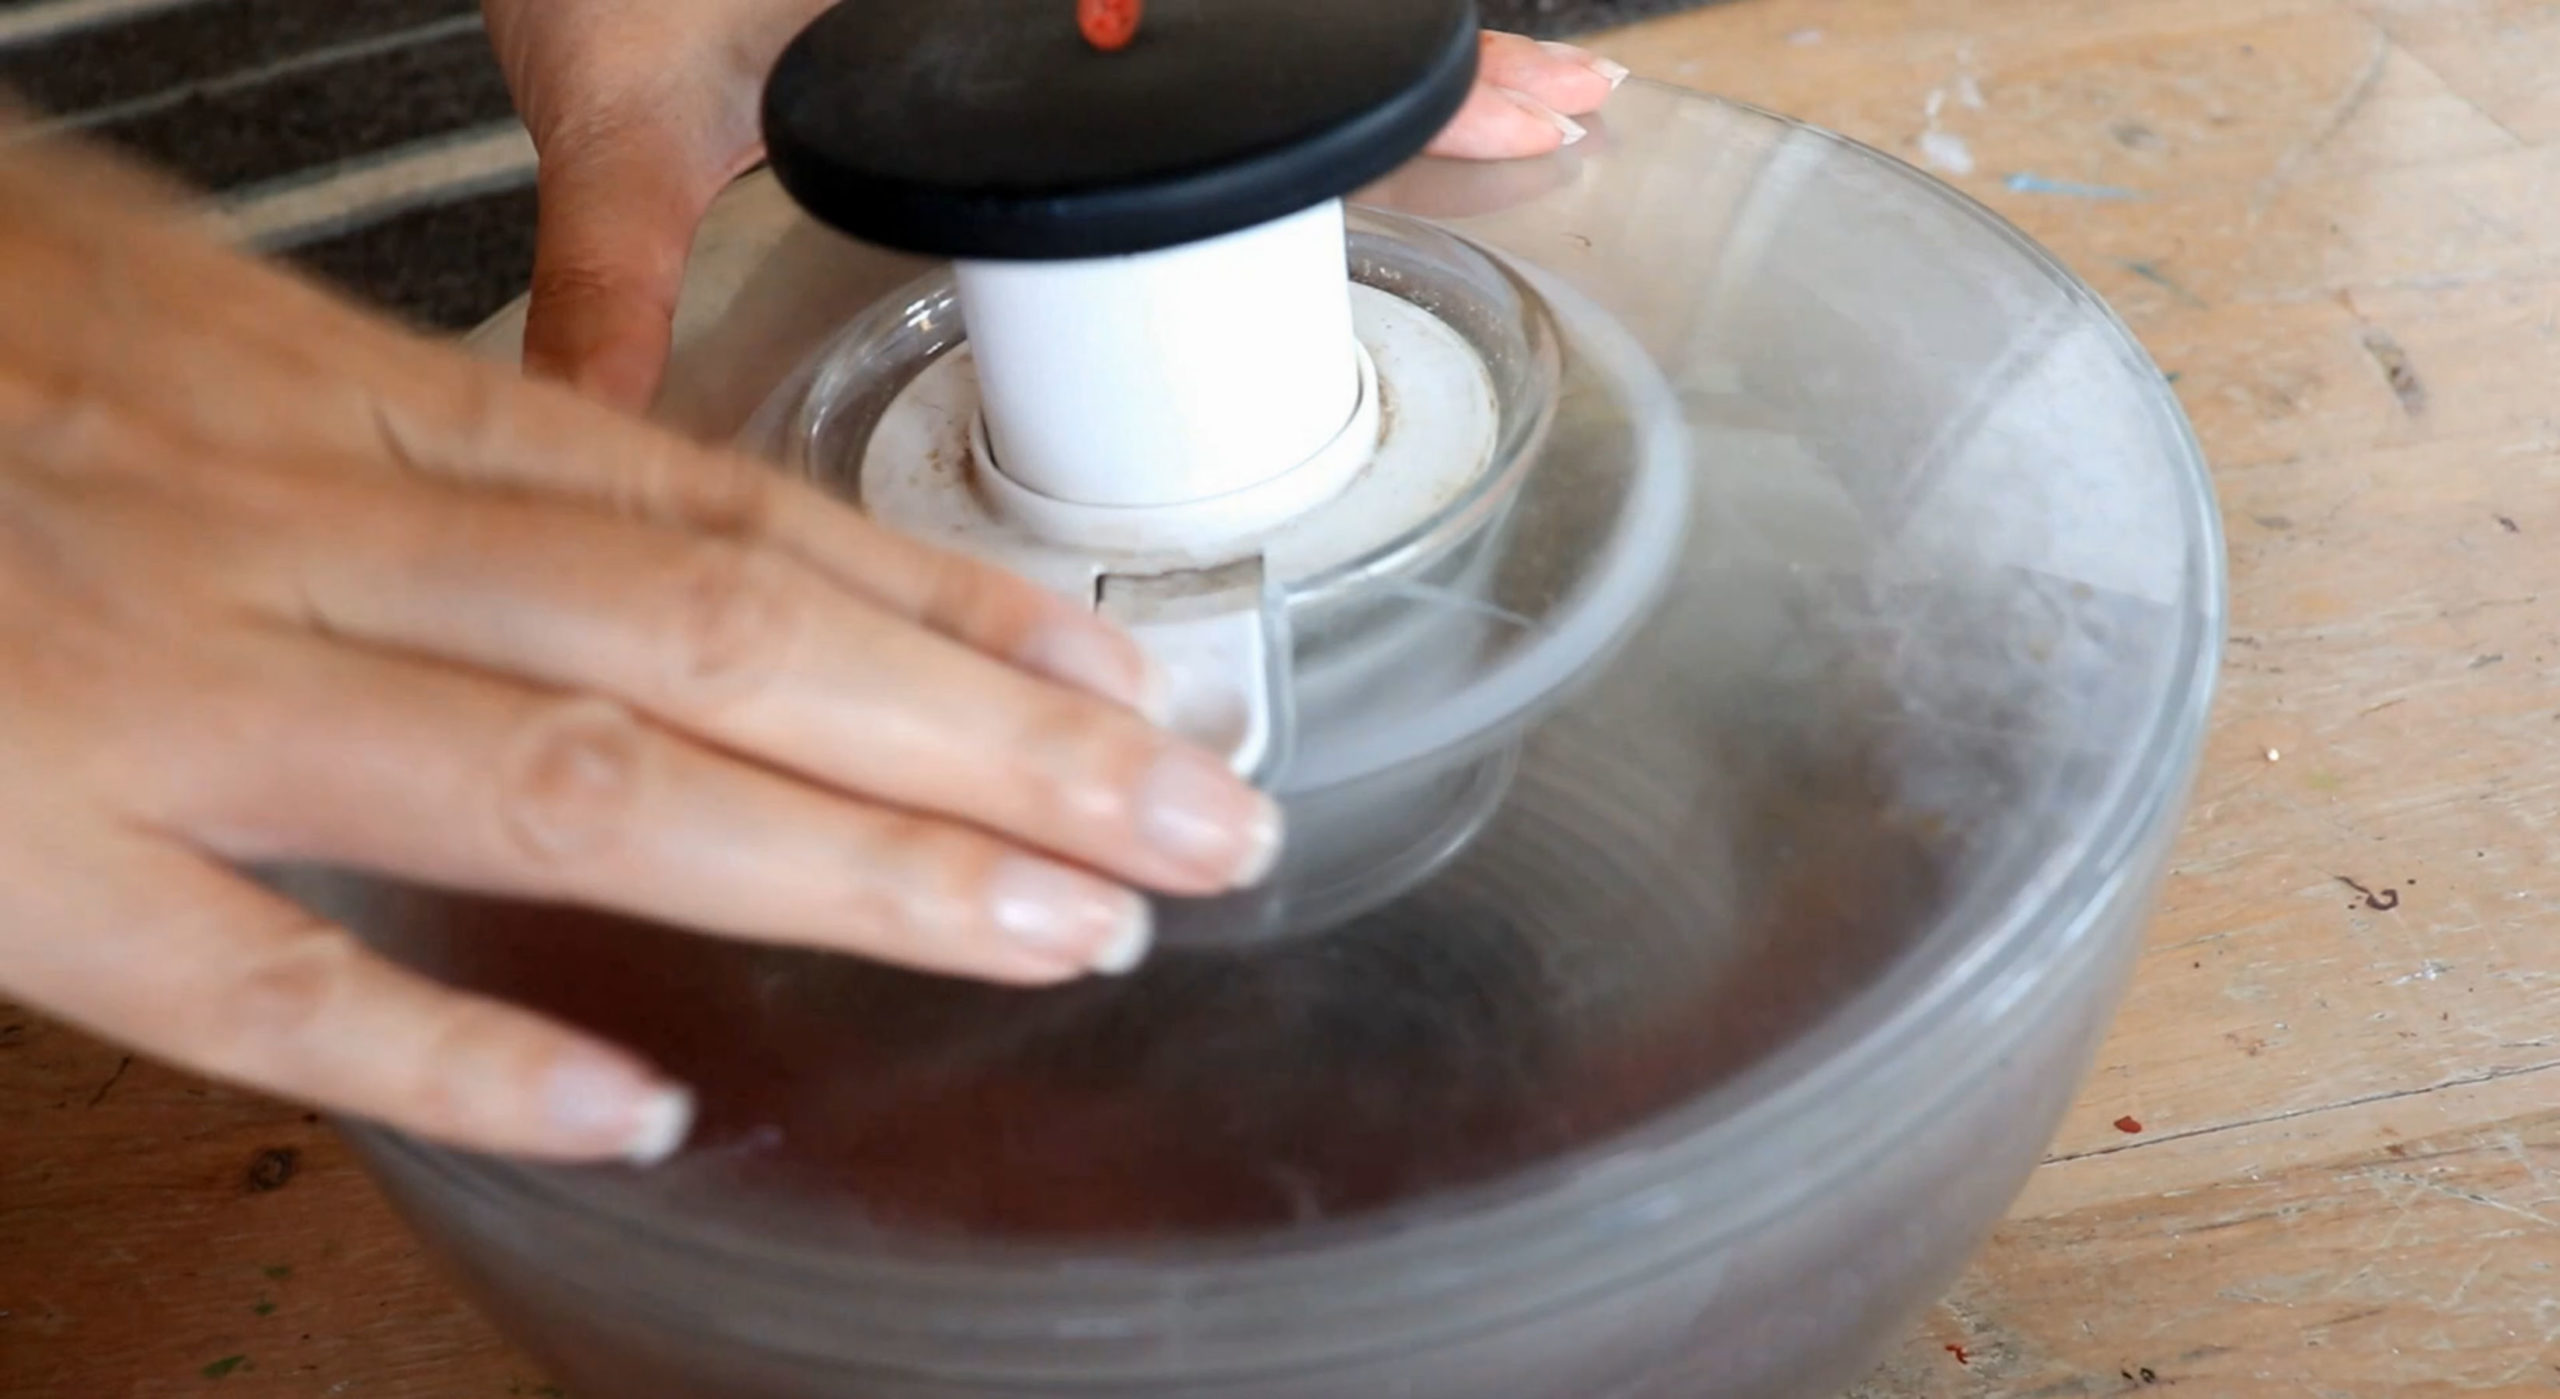
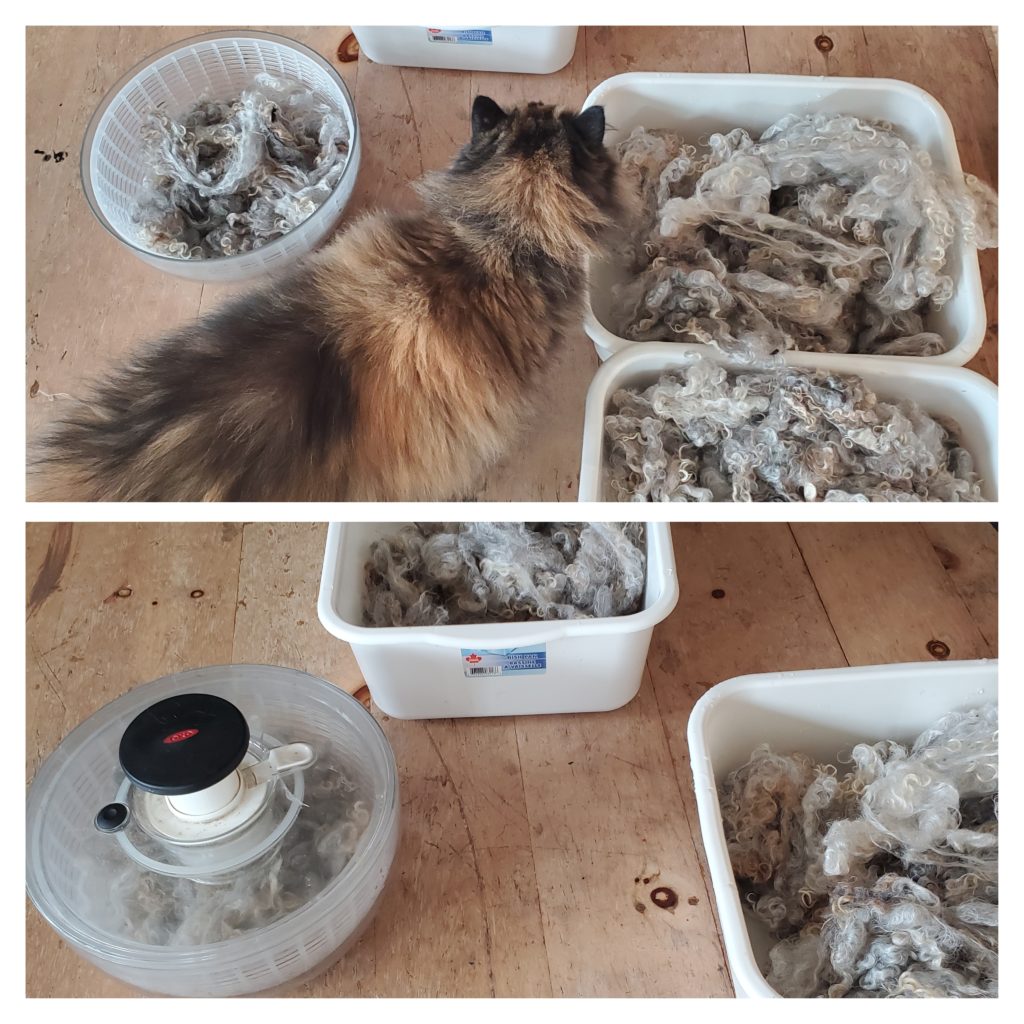
Hang your roving to drip dry, preferably outside, but I have done this indoors with a towel and basin underneath to catch the drips. I don’t like to squeeze the water out to prevent felting. You could also run the fiber through a salad spinner to remove excess water. I’m also not a fan of hanging fiber or yarn to dry in the shower or tub because of poor airflow, but if your bathroom has good air circulation, this would be fine.
For me, roving typically dries entirely overnight or at most within 24 hours.
Watch the Video to see Me Creating Yarn
I hope this bit of spinning inspiration is helpful to you on your fiber arts journey. If I can challenge myself to work outside my comfort zone, so can you! This experiment has made me realize that I can create new color favorites if I only push myself to design yarn from colorways I wouldn’t usually choose.
By the way, I’ve caught up to my backlog of content for videos and blog posts and need to film more, mainly showcasing spinning tools, dyeing-spinning techniques, and creating yarn. Right now, I only have time to do one video a month. I have so many ideas but so little time. I hope you enjoy my YouTube channel regardless, and thank you for subscribing if you do! 🙂
I hope you enjoy creating yarn as much as I do.
Until Next time,
I am a jewelry artist, spinner, and indie dyer in Nova Scotia, Canada, self-taught in all areas. I hope these posts help encourage and inspire you along your creative journey, no matter if you approach your craft my way or not. 🙂 Check out my About Me page for more info and the Fiber Arts/Spinning/Dyeing Category for more content like this.
Why I consider my hackle the most versatile tool in my studio for fiber prep
When I started spinning, like most new spinners, I would purchase pre-dyed wool usually in the form of a roving. When I started processing fleece from raw and subsequently dyeing my own fiber, it was necessary to invest in a blending tool. I enjoyed my combs, especially my St. Blaise Combs, but you can only do small amounts at once, and with a bad shoulder it was really wearing out my body.
So I bought the cheapest drum carder I could find, and as you probably know, a basic drum carder will still cost several hundred dollars. I processed much of my raw fleece via combs and drum carder and blended some fun and colorful batts that way as well. I loved the drum carder for batt making, but I didn’t like it for processing raw wool. I felt that I should have a coarser cloth to do this.
Enter…the Hackle
Somehow, I stumbled upon a hackle, and I can’t remember where. It may have been something I saw online or from my frequent trips to Vermont. I don’t find Canada had/has a big fiber arts scene and I lived in Quebec at the time, so I could get my fiber fix easily south of the border in New England. Either way, I figured it would be a good solution to my dilemma, and thank goodness this happened before I bought a new carding cloth for my drum carder!
I started using my hackle with little knowledge. Like most things I tackle in life, I like to have minimal knowledge at first so I can figure things out on my own. Honestly, I wish I had known about these hackle things years before. I think I would have delayed buying a drum carder (or not bought one at all).
There are two ways I like to use my hackle: for processing raw fiber before spinning, and for color/texture blending fibers before spinning.
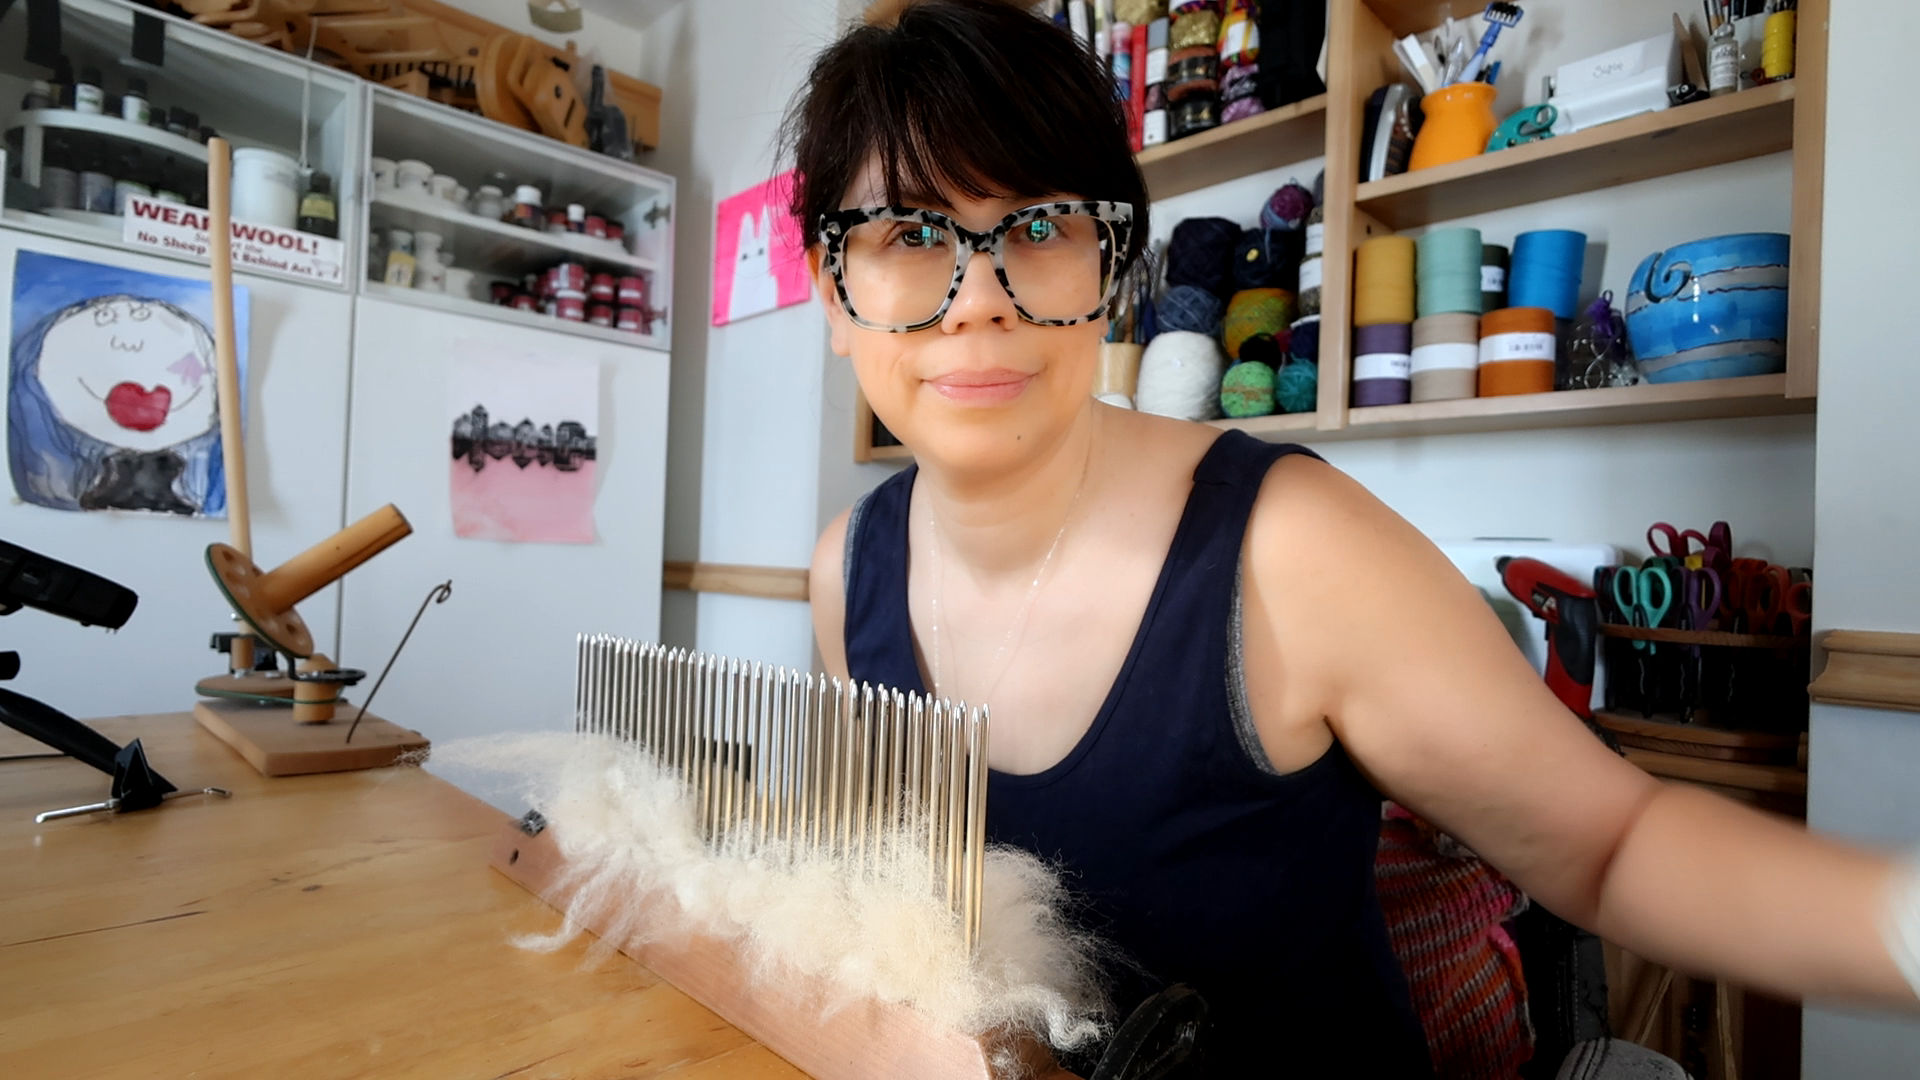
Whether or not a hackle is a good choice for processing raw fleece and fiber would depend on the quality and texture. In the video, I am using raw alpaca fibers that, although unwashed, is fairly clean and not at all heavily compacted. If you have a really dense and dirty fleece then a picker and/or combs would probably be a better option.
For blending fibers, which is what I use my hackle for the most, I’ve never had any negative experiences, to date. Usually I am using roving or top that I have hand dyed so that’s a breeze to use with a hackle. I love the control you get blending on a hackle. I also like a chunkier – or blocks of color – roving, and that is easier to achieve than on a drum carder (from my experience, anyway!). You can always remove and re-blend fibers over and over again if you want your fibers and colors to be blended more evenly throughout.
How To Use a Hackle – Step By Step (My Method)
My disclaimer is, as a self taught spinner and fiber processer, I learned to use my hackle the way I found works for me. I’m not sure if this is the “proper” or traditional way to use one. I’ve always been one to find my own way no matter what I do. Hopefully this video is helpful to get you started using a hackle, but I wouldn’t be surprised if someone disagrees with my method either. 😉
I appreciate that there are many ways to make traditional tools and methods your own in fiber work, and fairly inexpensively, as well! If you’re handy, you could construct a hackle and save even more money. That’s what drew me to the craft of preparing fibers yourself for spinning. So many ways to achieve what you want done for any budget, and the waste can always be repurposed, if only for compost for the garden. 🙂
In the video, I show a simple two-sided color blending, as well as an example of how I would process raw fiber to get it ready for spinning. I’ve taken a mental note to show more ways of blending color on a hackle, so hopefully that will be in a future video. But don’t be scared to experiment and push the envelope of what can be done with this versatile tool.
If you liked this video, be sure to subscribe to my YouTube channel, I am trying to upload one video a month to support the fiber arts and maker community as a whole.
I am a jewelry artist, spinner, and indie dyer in Nova Scotia, Canada, self-taught in all areas. I hope these posts help encourage and inspire you along your creative journey, no matter if you approach your craft my way or not. 🙂 Check out my About Me page for more info and the Fiber Arts/Spinning/Dyeing Category for more content like this.
What is the difference between Designing Yarn and Spinning Yarn?
Using a photo as inspiration for designing yarn
Spinning Yarn vs. Designing Yarn
One of the things we look forward to advancing to once we start making yarn is spinning pretty roving and top, dyed several different exciting and harmonious colors. It may be handpainted or commercially prepared, but soon, our stash is overflowing with different pretty braids to choose from. It’s exhilarating to see the color twist and change before our eyes, and we anticipate using this handspun yarn once completed, whether it stays as a singles yarn or (my preference) a plied yarn of two or more singles.
But what if you wanted to push your creativity and design yarn, not just spin the pretty stuff? Maybe you want a specific color scheme, length, or gauge yarn. Usually, this is due to a specific knitting, crochet, or weaving project we have in mind. Most spinners grasp these concepts right away and work toward them.
But I’m not talking about spinning the yarn you want for a project, necessarily. What about spinning from an inspirational reference: can you interpret yarn from art (or nature or a person)? The only goal is to recreate a skein of yarn based on an inspirational reference point. The project comes after.
I consider myself a spinner and dyer before a knitter, so I enjoy making yarn and then deciding on a project around the finished yarn. If I can’t decide, then I’ll offer the handspun yarn for sale for other fiber enthusiasts to enjoy.
Being a jewelry maker first (before a fiber artist), I transfer many of my experiences from that craft over to how I spin yarn. I have always liked to use real-world or printed artistic references in the jewelry I design, which I consider a wearable art form. Why not do the same for handspun yarn?
Inspiration for Spinners
One thing I enjoy doing is creating yarn based on a photo. When I started this project, I had no intention of turning it into a video or blog post because I dyed the fiber 2 or 3 years ago. So, I set out to finally finish the intended project this past summer.
But after I spun the singles, I felt like this may be a good inspiration for other spinners, particularly new ones, so I decided to do a video. I know that when I am in a creative slump or looking to expand my skills, it’s always nice to see what others are doing to help boost my confidence and spark my creativity.
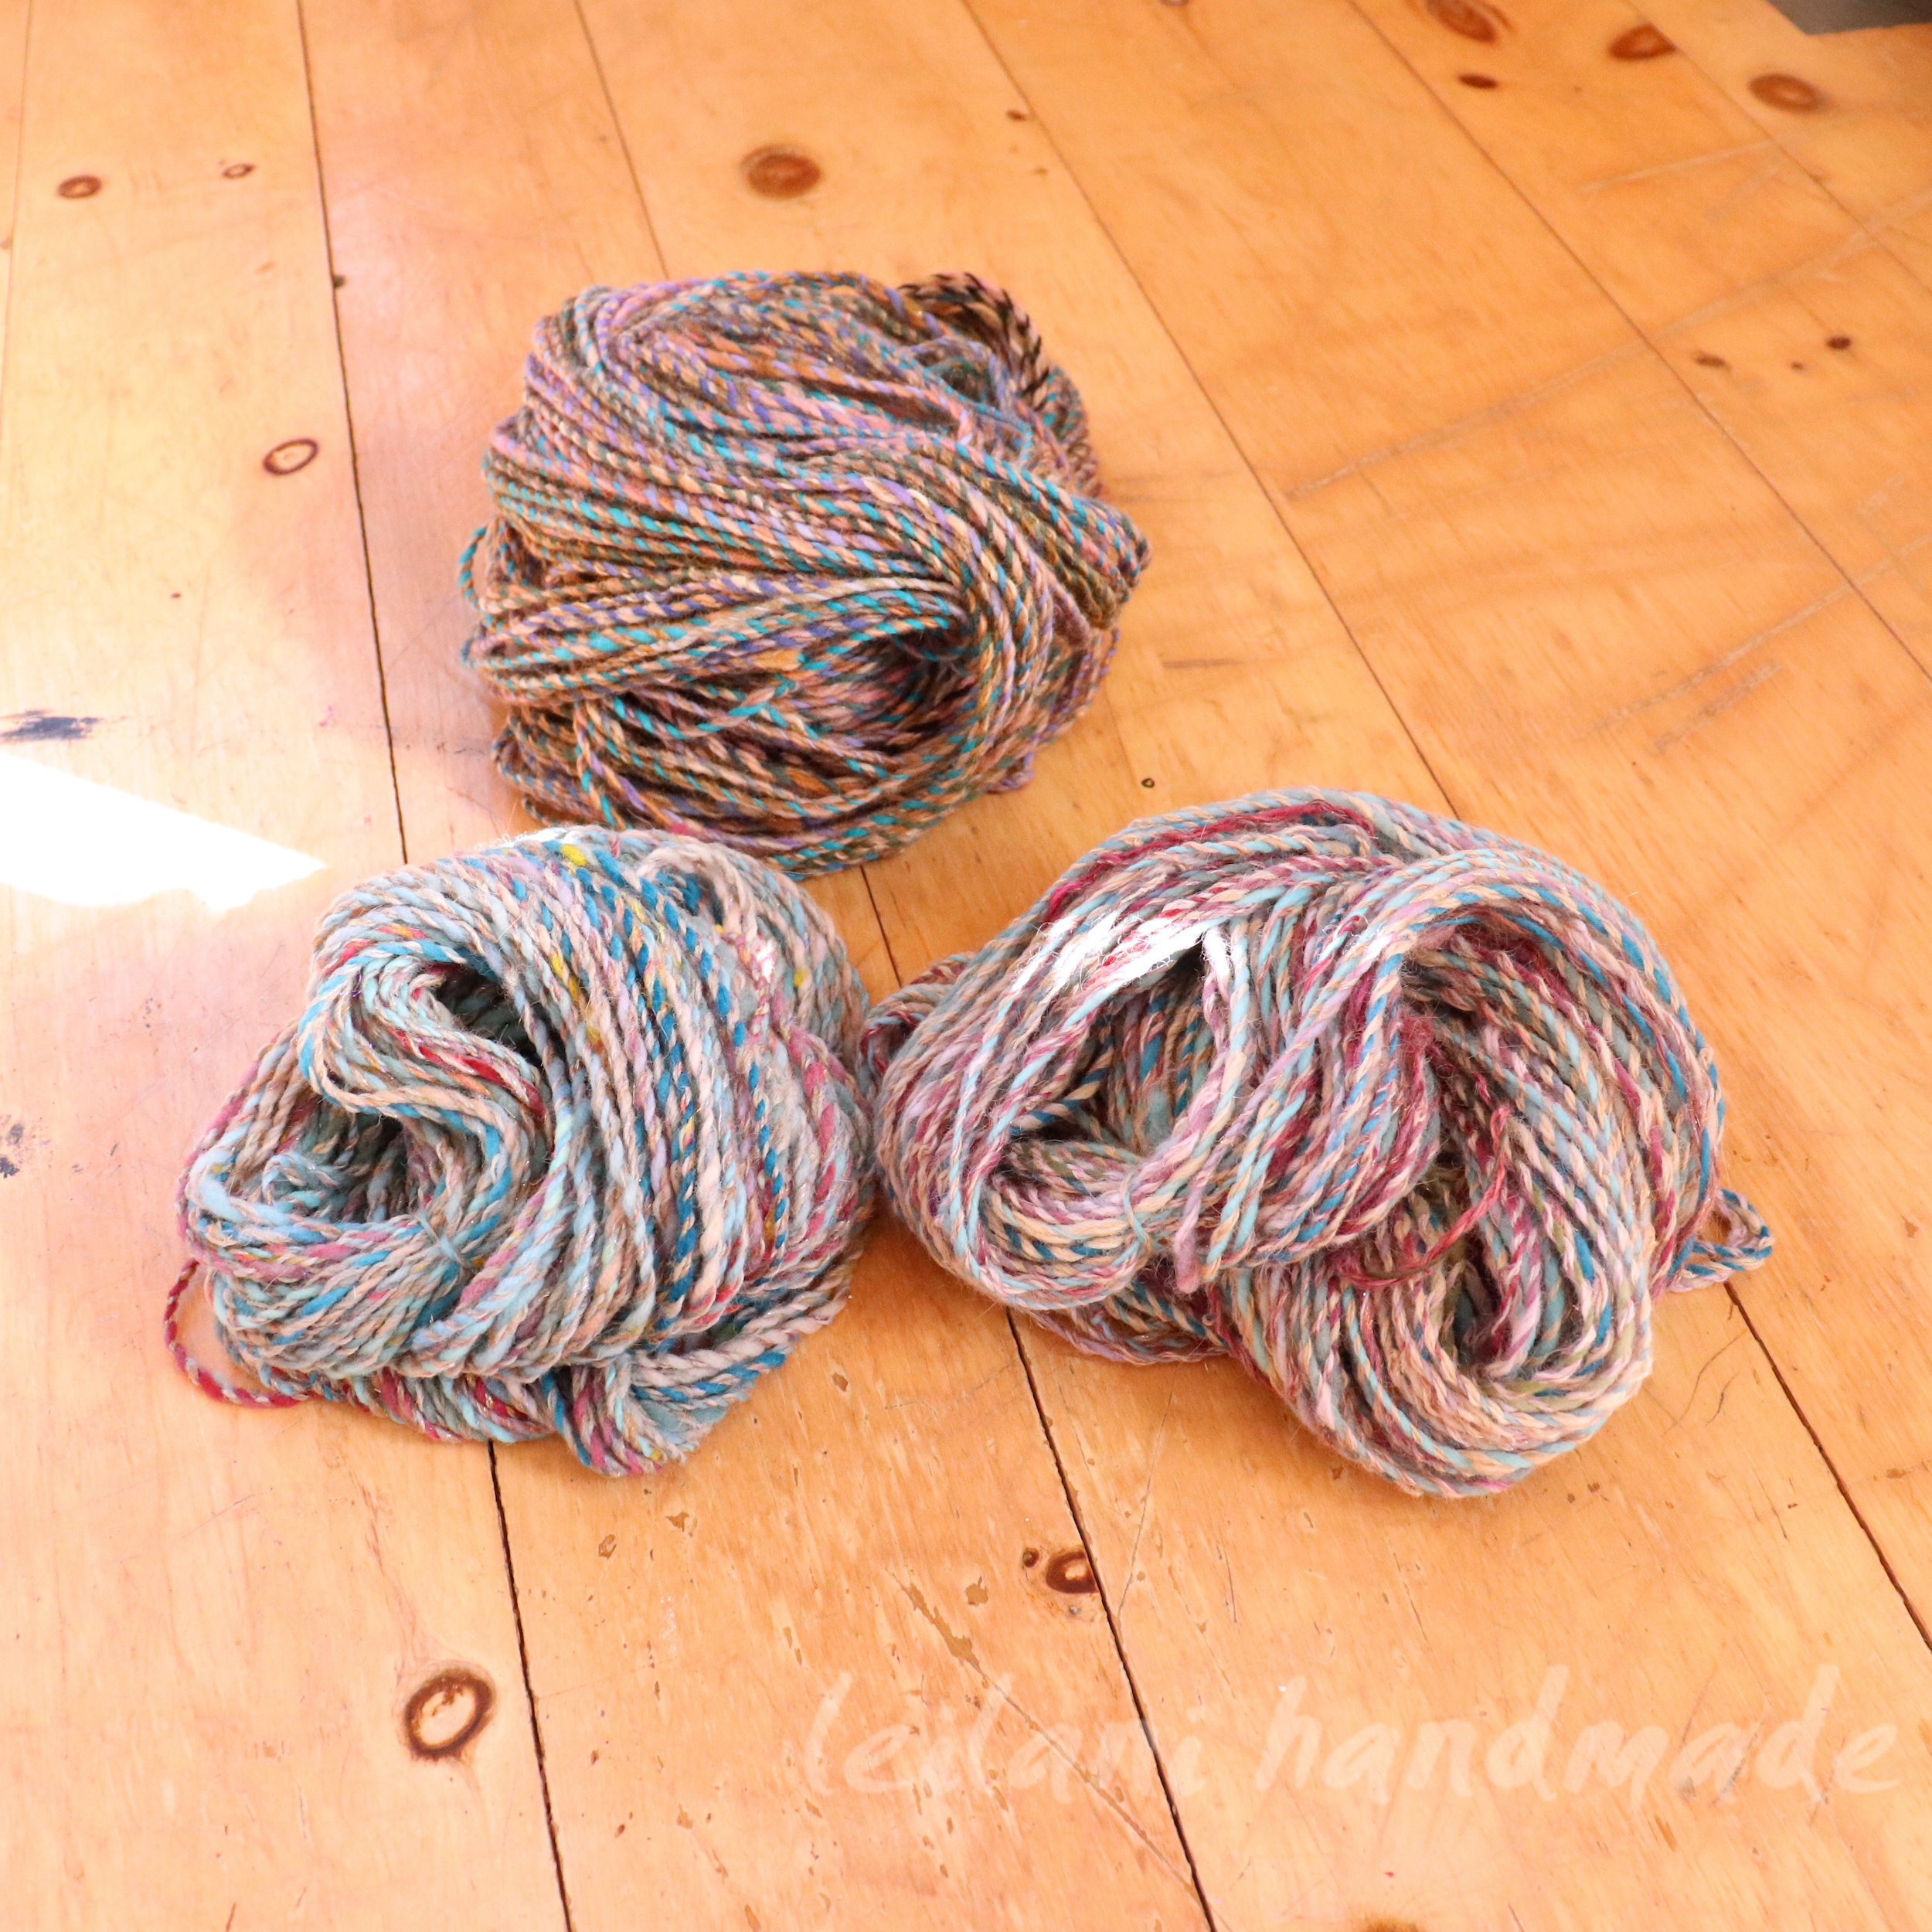
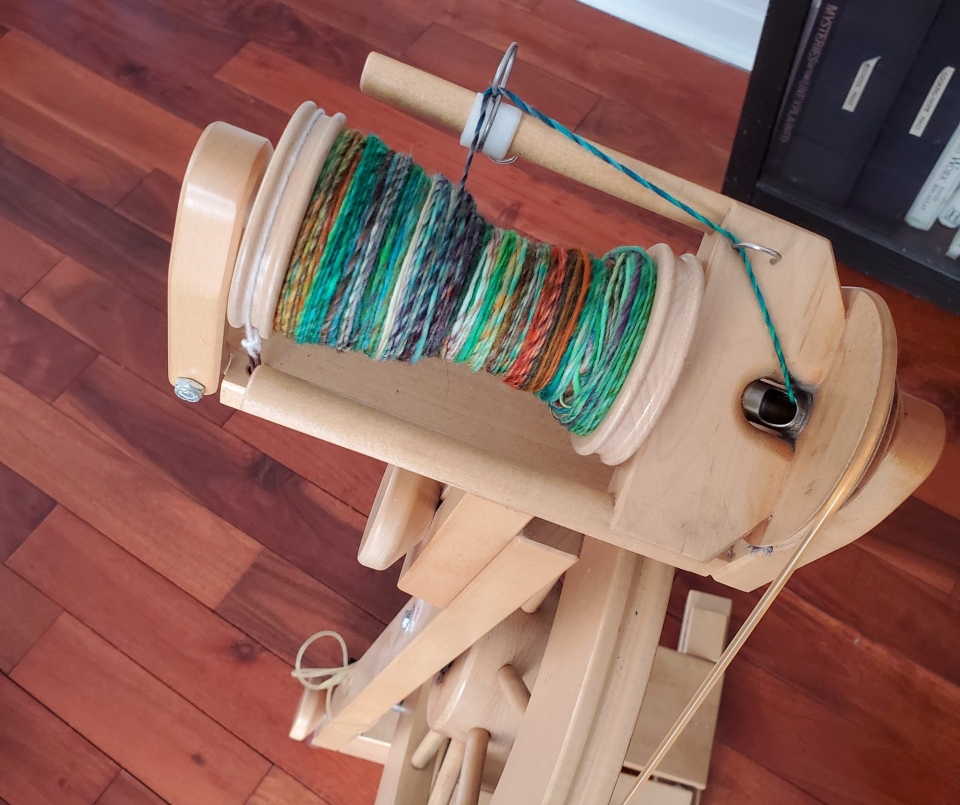
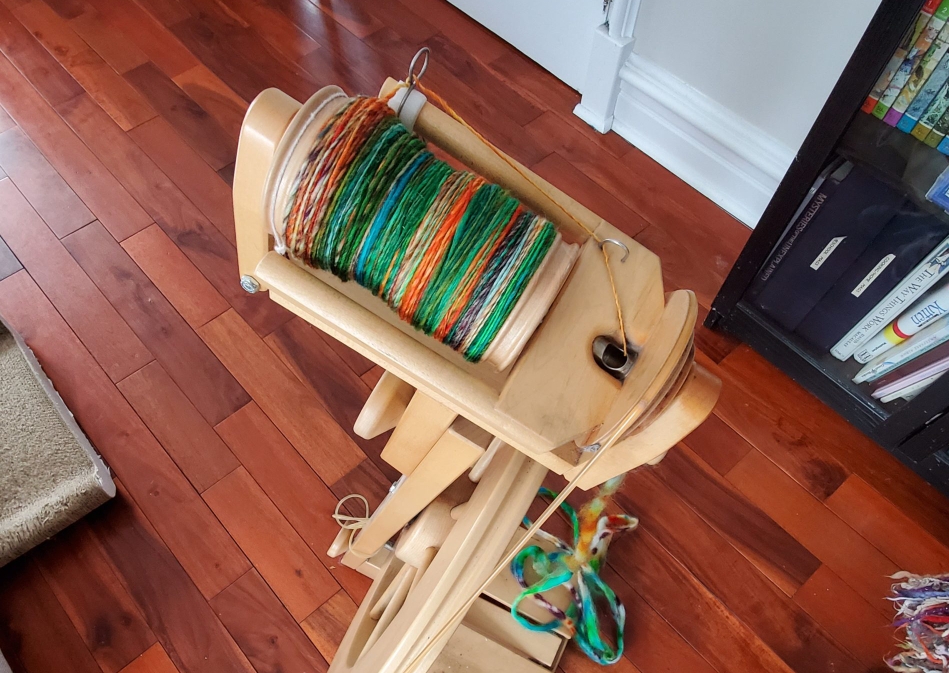
Unfortunately, I don’t have photos or videos of the fiber I dyed for this one or even how I spun the singles. We are starting this yarn’s story with three bobbins of spun singles and going from there.
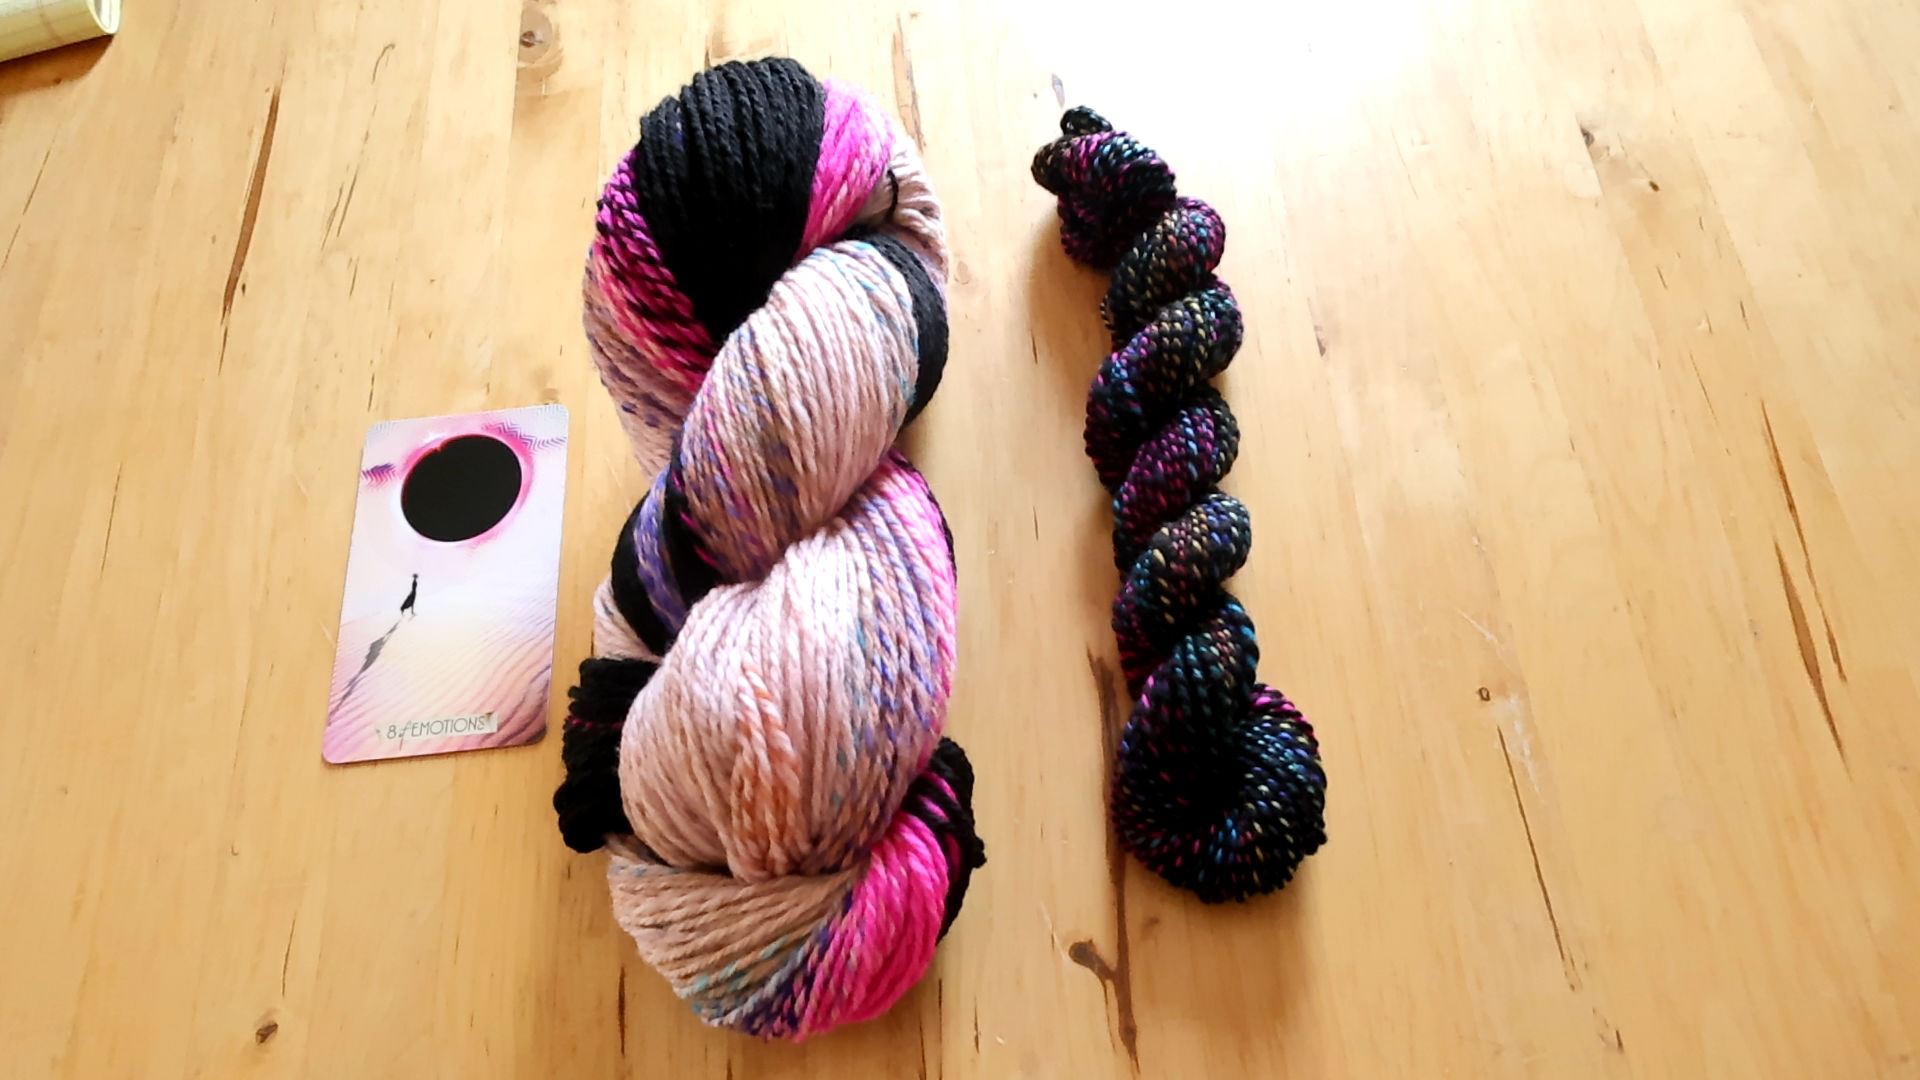
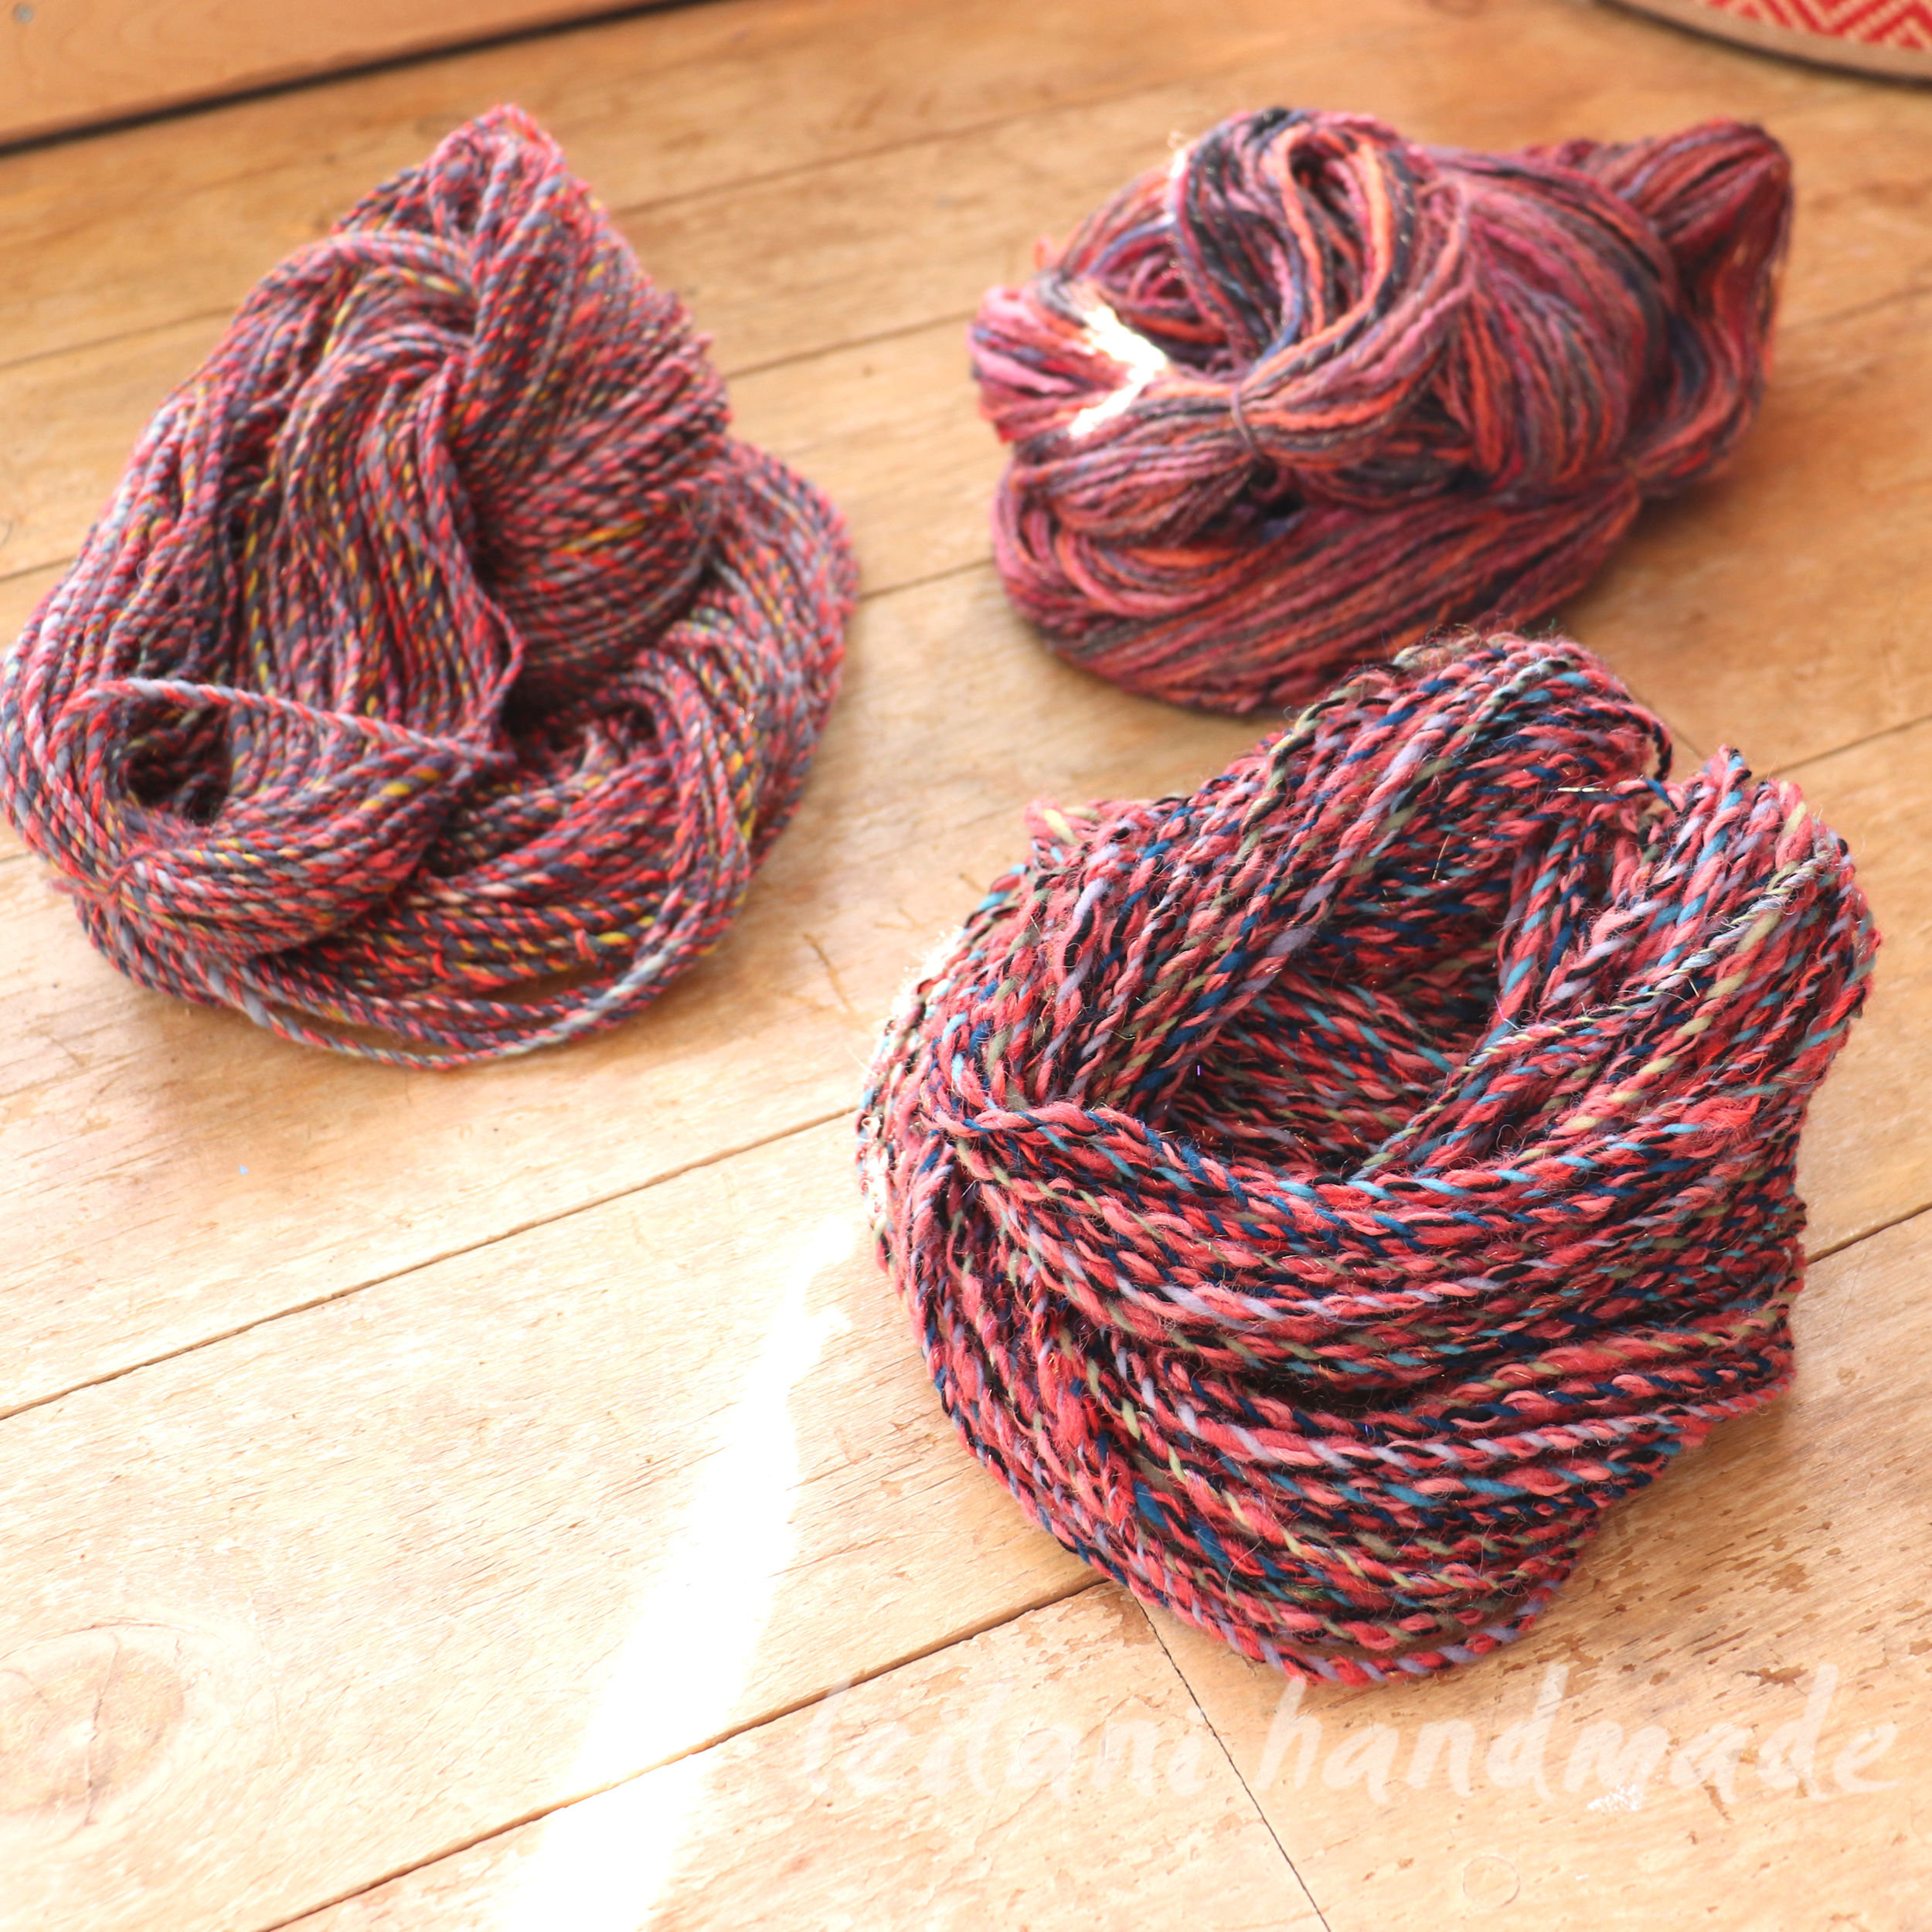
I end up with a pretty interesting skein of yarn colorwise, at least I think so! Plus, a bonus little spiral-plied skein with the leftovers.
Designing Yarn: Spinning Inspiration for Spinners – Watch Now (Below)
Tips for Designing Yarn
Grab Inspiration From Many Different Places
I’m always on the lookout for what inspires me. For example, my cream-colored cat on a grey and blue bedspread will give me the desire to dye that combination, so I’ll snap a photo for reference. Maybe it’s my garden during different seasons, urban buildings or graffiti, or just surfing the internet for people, places, or things that will inspire me. For this project, I used a creative Tarot Card deck that I’ll shuffle and use to help draw my creativity out. The artwork in this set is fantastic and provides me with endless possibilities of inspiration and color work with jewelry and dyeing fiber/yarn making.
Choose Your Colors
My first task when designing yarn is to write down the colors I want to dye the fiber for the finished yarn. Typically, I will use a wool top commercial roving, but that’s unnecessary. You could also dye bits of wool and spin it as you go. I often write down several colors that could work and adjust as I go. Sometimes, I will even swap out sections of color before or after spinning. The key is to be flexible and adventurous – and have fun with the challenge!
That doesn’t mean you can’t design yarn if you don’t dye. You can always purchase the colors necessary either commercially or from indie dyers.
Learn to do Joins
Learning how to break off and rejoin your singles while plying is essential to tackling a project such as this. Once you master that, the sky is the limit for designing your desired yarn.
Here’s a snippet from one of my other videos where I do a join while plying on my e-spinner:
This is the primary way that I like to join singles while plying yarn; you may find another method or your own way easier.
Pause and Regroup When Necessary
Taking breaks when unsure or overwhelmed by the process is also essential. This is not a project to power through mindlessly—unless you want to! But purposeful spinning will always give you more satisfying results.
If At First, You Don’t Succeed…
If I’m not fully happy that the yarn doesn’t reflect the inspiration, I use that opportunity to try it again. That doesn’t mean the first yarn was not structurally successful; I use it as additional inspiration to get the colors more true to the inspiration. Practice makes everything easier, and I love the chance (and excuse!) to spin. It also means I will most likely have two skeins of yarn that complement each other, so that’s a bonus for larger knitting/crochet projects.
Challenge Yourself for the Greatest Rewards
I hope this post inspires you to try designing yarn using artistic references. It’s always a good practice to challenge oneself and push the envelope of what we know how – or are capable of doing. If you are like me, taking on a challenge such as this will provide you with endless creativity for future projects.
Until Next time,
Also, Be sure to check out my YouTube Channel for more helpful spinning and dyeing videos. I add one new one every month.
How to Choose, Process, and Spin Alpaca Fiber from Raw
Several years ago, I was gifted a few large bags of shorn Alpaca Fleece. It had been in a garage or shed for an extended period of time, but thankfully, the fiber itself was dry and in relatively good shape.
I’ve spun raw Alpaca several times before, so I was pleasantly surprised by how clean this haul was, especially for free! After skirting (laying out the fiber one bag at a time and examining it to remove any unusable bits: such as large bits of vegetable matter, straw, poo, wiry over-grown guard hair-like pieces…) I divided it into piles of the best to the worst pieces.
Alpaca does not have to be washed before spinning, but it should be skirted first to make the spinning process smoother and more enjoyable. This is also good practice so that you can assess just what you have: how much is worthy of spinning, how much is potentially salvageable, and what is for the garden.
My Experience Spinning Raw Alpaca Fleece into Yarn
In this brief video, I cover the key points of my experience working with raw alpaca fleece: what to look for when choosing one, how to wash it if needed, and how I like to spin it. I’m currently spinning three large bobbins of this fiber. I’ll do a follow-up video later about how I ply the fiber into yarn.
Why I don’t (usually) wash my raw alpaca fiber before spinning it
Raw Alpaca fiber differs from sheep wool as it isn’t at all greasy. Lanolin is a greasy substance in sheep wool that most people want to be washed out before spinning. Some people like to spin in the grease and spin unwashed sheep wool, but the general consensus is to wash sheep wool before spinning it.
Raw Alpaca fleece can be dusty, dirty, and even muddy, but luckily not greasy. It also contains VM (vegetable matter), which, in a good fleece, is easy to pick out either by combs, hackles, or drum carder. Larger pieces can be flicked out while spinning (or often flick out on their own from the manner of spinning).
Extremely muddy, heavily soaked with urine or poo, or more VM that can be easily picked out should be discarded. Alpaca fleece is biodegradable and can even be used as compost or crop cover in the garden.
What I use for washing Alpaca if it needs it
I will only wash alpaca fiber if it is considerably dirty, such as muddy or “baked in” dusty. First, I will separate the good-quality fiber from the really dirty fibers. If I think the dirty portions are usable, I will wash them; if they are not, they get discarded.
Alpaca doesn’t need a heavy scouring detergent—not even Blue Dawn dish detergent. I use baby shampoo, which I buy at the Dollar Store. Usually, a soak or two in hot water and baby shampoo is all it needs. Rinse in between with clear water to determine how clean the fiber is. Let it sit in clear water, and if the water remains clear, then your fiber is relatively clean and ready to spin.
I usually lay out my fiber to dry on racks. I set the racks up outside in the summer when it’s sunny and hot; otherwise, I have them set up in my basement, where I could use a heating dish and fans if necessary.
How I like to spin it
You can easily spin raw Alpaca fleece from the tip to the end of a chunk of fiber—like breaking off a piece of a batt to spin. There probably is a “proper” way to spin it this way, but honestly, I line up the fibers as best as possible and don’t pay much attention to which end is the tip and which end is the shorn-off one.
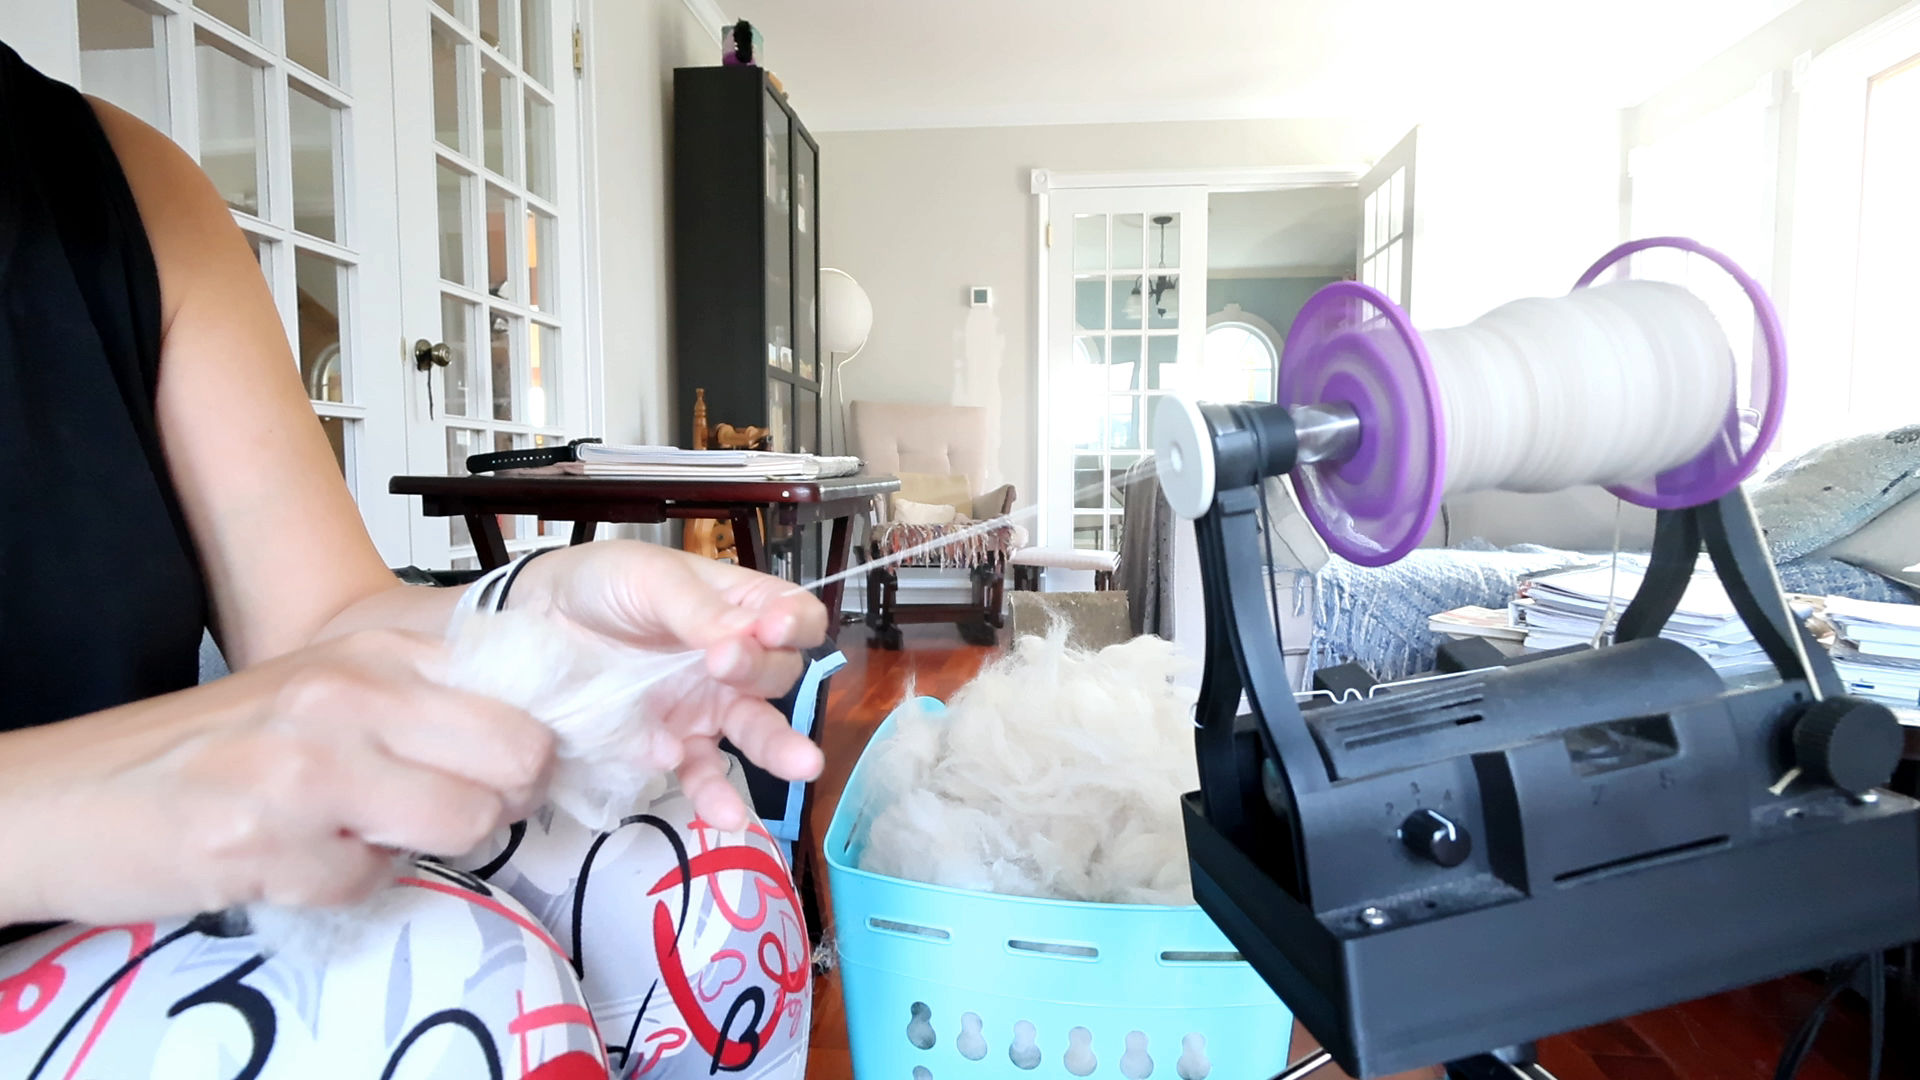
Spinning raw alpaca fiber from the fold on my e-spinner. See this process in action in the video.
My favorite way to spin it is from the fold. I’ll take a chunk of the raw fiber, line up the fiber as best as possible, and then fold it over my finger. Then, I pinch at the folded-over area and spin from there. This method feels tidy to me, and the singles from this non-processed fiber come out the smoothest this way.
If you are spinning unwashed alpaca fiber, be prepared to sweep the floor and clean your wheel or e-spinner afterward. Dust and dirt will fly out during the spinning process, and your fingers may become dusty.
What to look for when buying a raw alpaca fleece
Open the bag and examine the fleece as best as possible. Does it appear clean? Do you see lots of dirt, VM, or second cuts? Chances are you should pass on a really dirty fleece, especially if you see lots of insects. Most producers would never sell a fleece this dirty; if they did, it would be reflected in the price. This scenario is most often possible with gifted fleeces.
If you are up to the challenge, by all means, process an over-looked (AKA filthy) fleece. I’ve certainly done it—both alpaca and sheep! Just be prepared for a lot of work and that you may not get the best return on investment, as much of it may be unusable.
You may not get as lucky as I did with this free fleece haul, but free is always tempting for me, no matter how dirty. It’s not just about price but the desire to save the fiber rather than discarding it. Plus, there is so much to learn in a not-so-ideal fleece.
Give Raw Alpaca Fiber a Try
Once you choose your ideal bag of alpaca fiber, enjoy the journey of spinning it! Alpaca is considered a luxury fiber, and it is very warm and soft to the touch. Over the years, I’ve spun many different colors of raw alpaca fiber. It is a very user-friendly fiber that is easier to process than sheep wool, considering it does not contain lanolin and thus does not need to be washed (or at least only gently washed). You can start spinning immediately, especially if you purchase a skirted fleece.
One thing to note is that it tends not to be as springy as sheep wool, but a knitted comparison of different animal fibers is a post for another day. 🙂
This month, I decided to make a video showing how I dye roving in a crockpot. This is continuing my series on crockpot dyeing. So far, I’ve posted on dyeing yarn in a crockpot and over-dyeing yarn in a crockpot. I thought it was a natural progression to cover fiber next.
Dyeing Roving in a Crockpot is super simple. You just need time. 🙂
I recently received some new dye colors from G&S Dye. I was replenishing some colors that I was getting low on, and I figured I might as well get some new ones as well. These colors aren’t new to me; I have similar colors from other companies, which is why I didn’t buy them originally.
But since G&S is a Canadian company, I want to stock most, if not all, of their colors, as they are easy for me to obtain and thus economical. I like to have similar colors from different companies available in case I run out or one gets discontinued, then I have a substitute.
But first, I need samples of each color to see how they differ from those of other companies. So, why not dye roving along with my samples so I can show how I do this process step by step.
The colors are very random and very bright! I liked the spontaneity and surprise factor of just going for it and dyeing each color separately.
Watch the video below to see how I dye roving step by step:
Why Do I Dye Roving in a Crockpot
There are certainly many ways to dye roving, but here’s my top reasons for dyeing this way:
Easy and Economical to Get Started
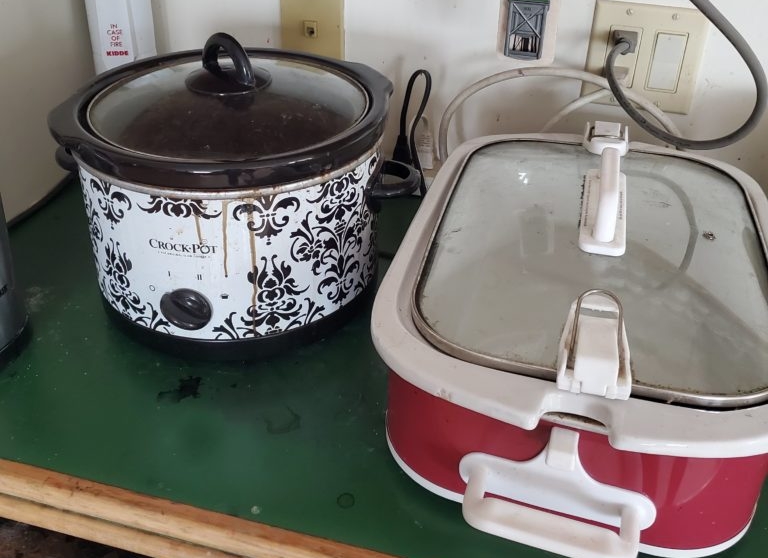
Crockpots (AKA slow cookers) are easy to obtain at most department stores and even second-hand. I got mine originally on clearance at a big box store, but I also see them available at thrift stores. You want a crockpot that is dedicated for dyeing only. Never use one that you’d also use for food.
Besides a crockpot, you could purchase a few acid dye colors to start, or even use food coloring and Kool-Aid—but I recommend getting acid dyes designed for dyeing wool. You don’t need a ton to start, and you’ll get so much practice dyeing with even three primary colors. There are several brands of acid dyes that I use, including Jacquard, Ashford & Greener Shades. Check out your local fiber arts or yarn store for acid dyes, or online. Even Amazon sells Jacquard dyes.
Acid dyes must be set with an acid – citric acid or vinegar are the most common. You can buy citric acid in bulk online, even on Amazon. One except to this, is Country Classics dyes, which are all-in-one and don’t require an acid for a mordant.
Other than those basic things, I also recommend rubber gloves, measuring spoons, a waterproof apron, goggles, and a respirator. Tongs and bins for taking the fiber in and out of the crockpot are also helpful. Access to a sink is also a plus, but not necessary. You can always soak your fiber in plastic bins.
A soap like Synthrapol or TNA soap is great to have as well, but Blue Dawn dish soap will also do the trick for soaking after you dye roving.
Fool Proof or at least Super Forgiving
I love to use my crockpot for dyeing because I don’t have to worry about constantly watching it or even being concerned about how long the fiber is in the pot. With a fairly consistent temperature, I get a nice, even dye without the worry of burning the fiber or the house down.
If the dye is not uptaking, I can add some more boiling hot water, and check on it again in about 20 minutes. Sometimes a little extra citric acid will also do the trick to get stubborn dye to transfer into the fiber. The gift of time will give you consistent results and fully exhausted dye.
No need for pre-mixing dye or citric acid
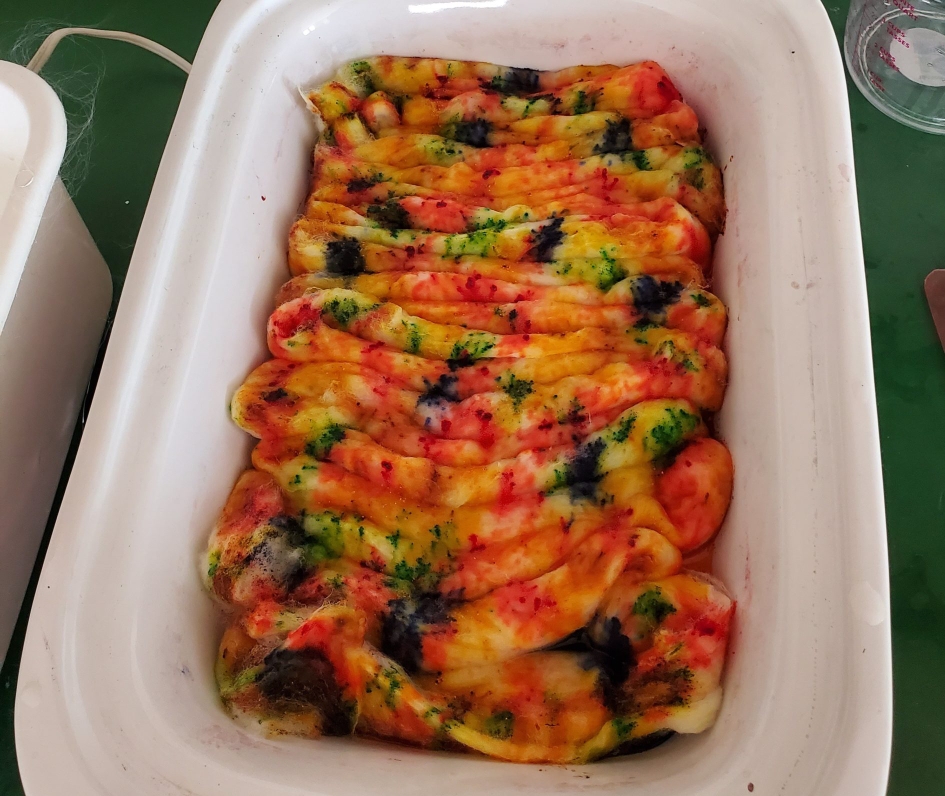
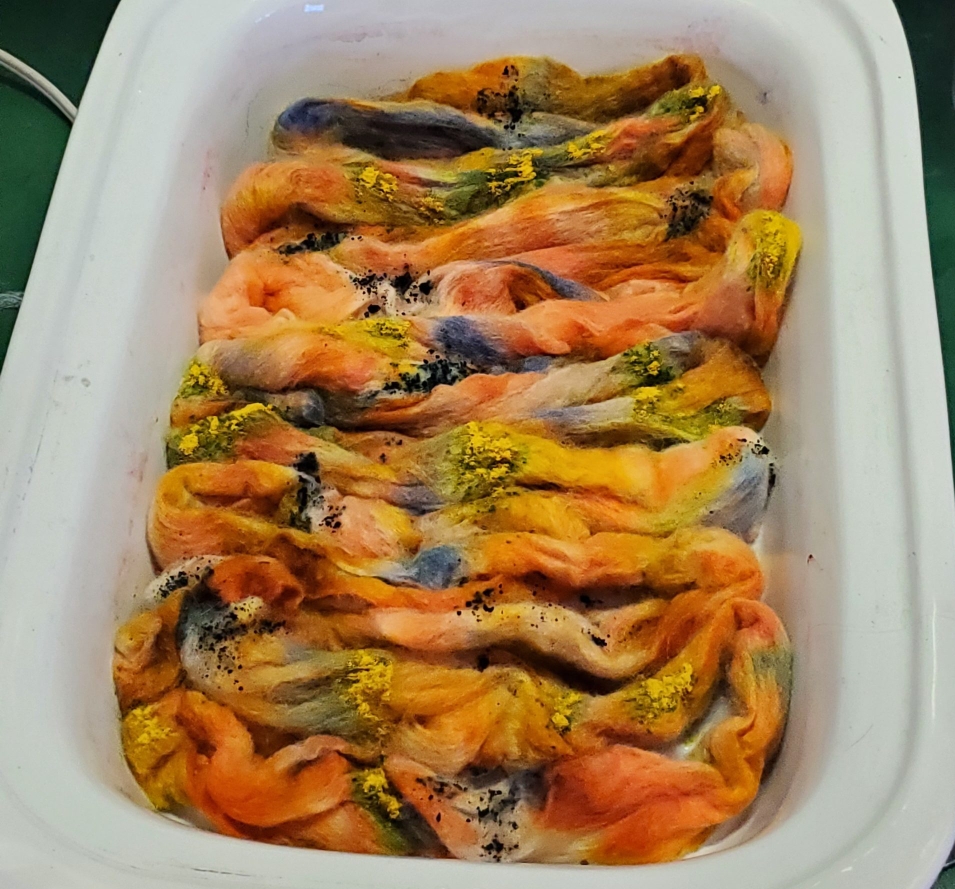
Another reason I like this method of dyeing is that I can do so on a whim. I choose the colors as I go; no pre-mixing is required. I also put the citric acid in the pot with hot water in powdered form and then add the dye. I’m working with 1/4 teaspoon of dye for the sections in this roving for each color.
No need to pre-mix dye, put it straight in the crockpot along with citric acid
Doing one color at a time is less messy and each color stays as pure as you want
Believe it or not, I’m the type of person who doesn’t really like to get messy! As creative as I can be and as “messy” (HA HA!) as my brain can get, I do appreciate tackling tasks with order and organization. I’m the type that likes to take all the ingredients out for when I cook, but I will put those ingredients away as a go and clean along the way. I find mess and chaos challenging.
Crockpot dyeing allows me to approach one color at a time without worrying about the color getting on other parts of the roving unless I want it to. I like to overlap the colors as I dip the roving into the next color in the pot. Whenever I have pre-mixed dye and dyed roving in the dip/wrap in plastic to steam method, not only does color go where I don’t want it to, but it tends to make a mess: color dripped on the work surface, for instance. Doing one color at a time is perfect for control freaks like me. 😉
That’s not to be confused with the times I dye and want the colors to mingle together. But that’s a blog post for another day. 🙂
Cons of Crockpot Dyeing
You need to have a crockpot exclusively for dyeing (though, as I mentioned, it is easy to obtain one relatively cheaply; at least this is the case here in Canada)
It’s time-consuming. It is a slow cooker, after all. You are dyeing your roving low and slow. However, I would argue the time you save not pre-mixing dye may make up for this
You can only do small amounts at a time. If you are looking to do large amounts of dyed fiber, then a large stockpot or a caterer’s steamer tray may be more to your liking.
I hope you enjoyed my video on how to dye roving using the crockpot method. In the future, I hope to cover this and many more ways to dye yarn and fiber.
I am a jewelry artist, spinner, and indie dyer in Nova Scotia, Canada, self-taught in all areas. I hope these posts help encourage and inspire you along your creative journey, no matter if you approach your craft my way or not. 🙂 Check out my About Me page for more info and the Fiber Arts/Spinning/Dyeing Category for more content like this.
What happens when two Skeins of Yarn go for an Extra Dip in the Dye Pot
This month’s post involves over-dyeing my handspun yarn with two grey hues to see what it does to the overall color.
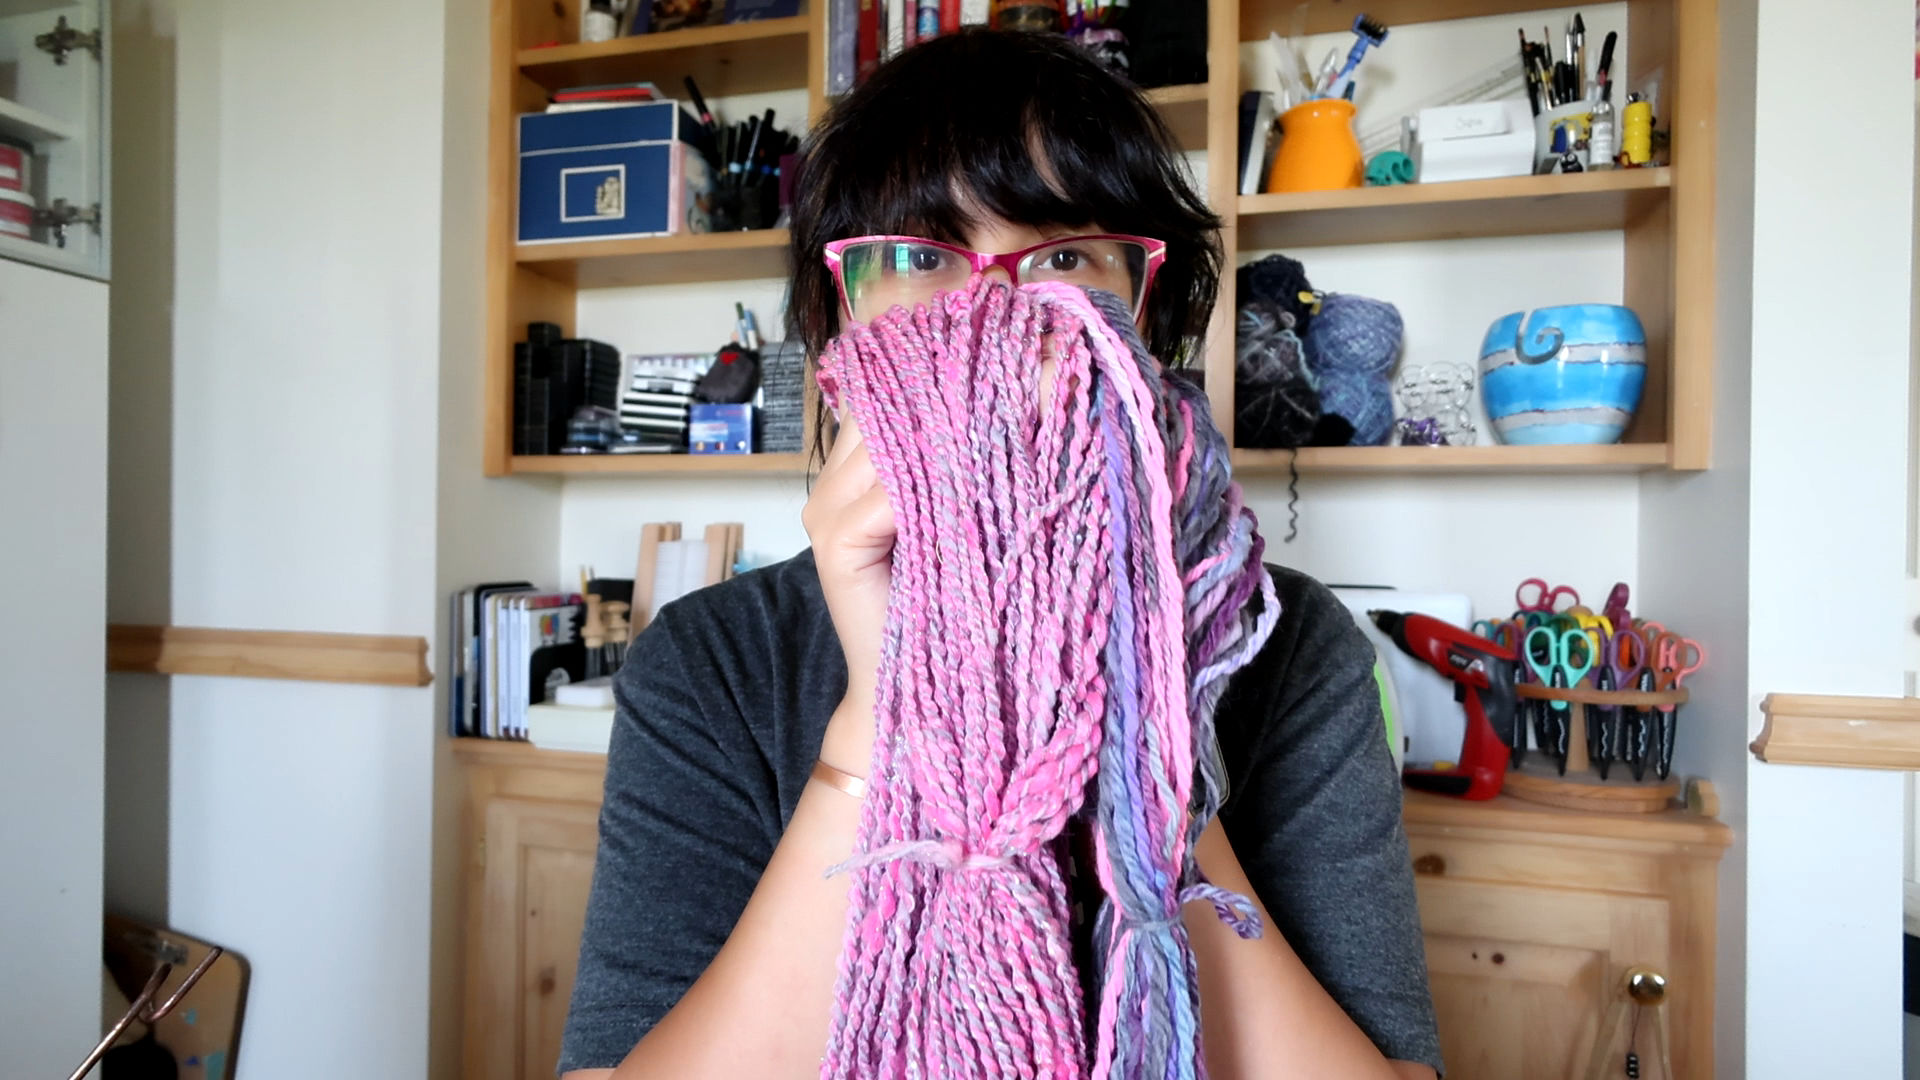
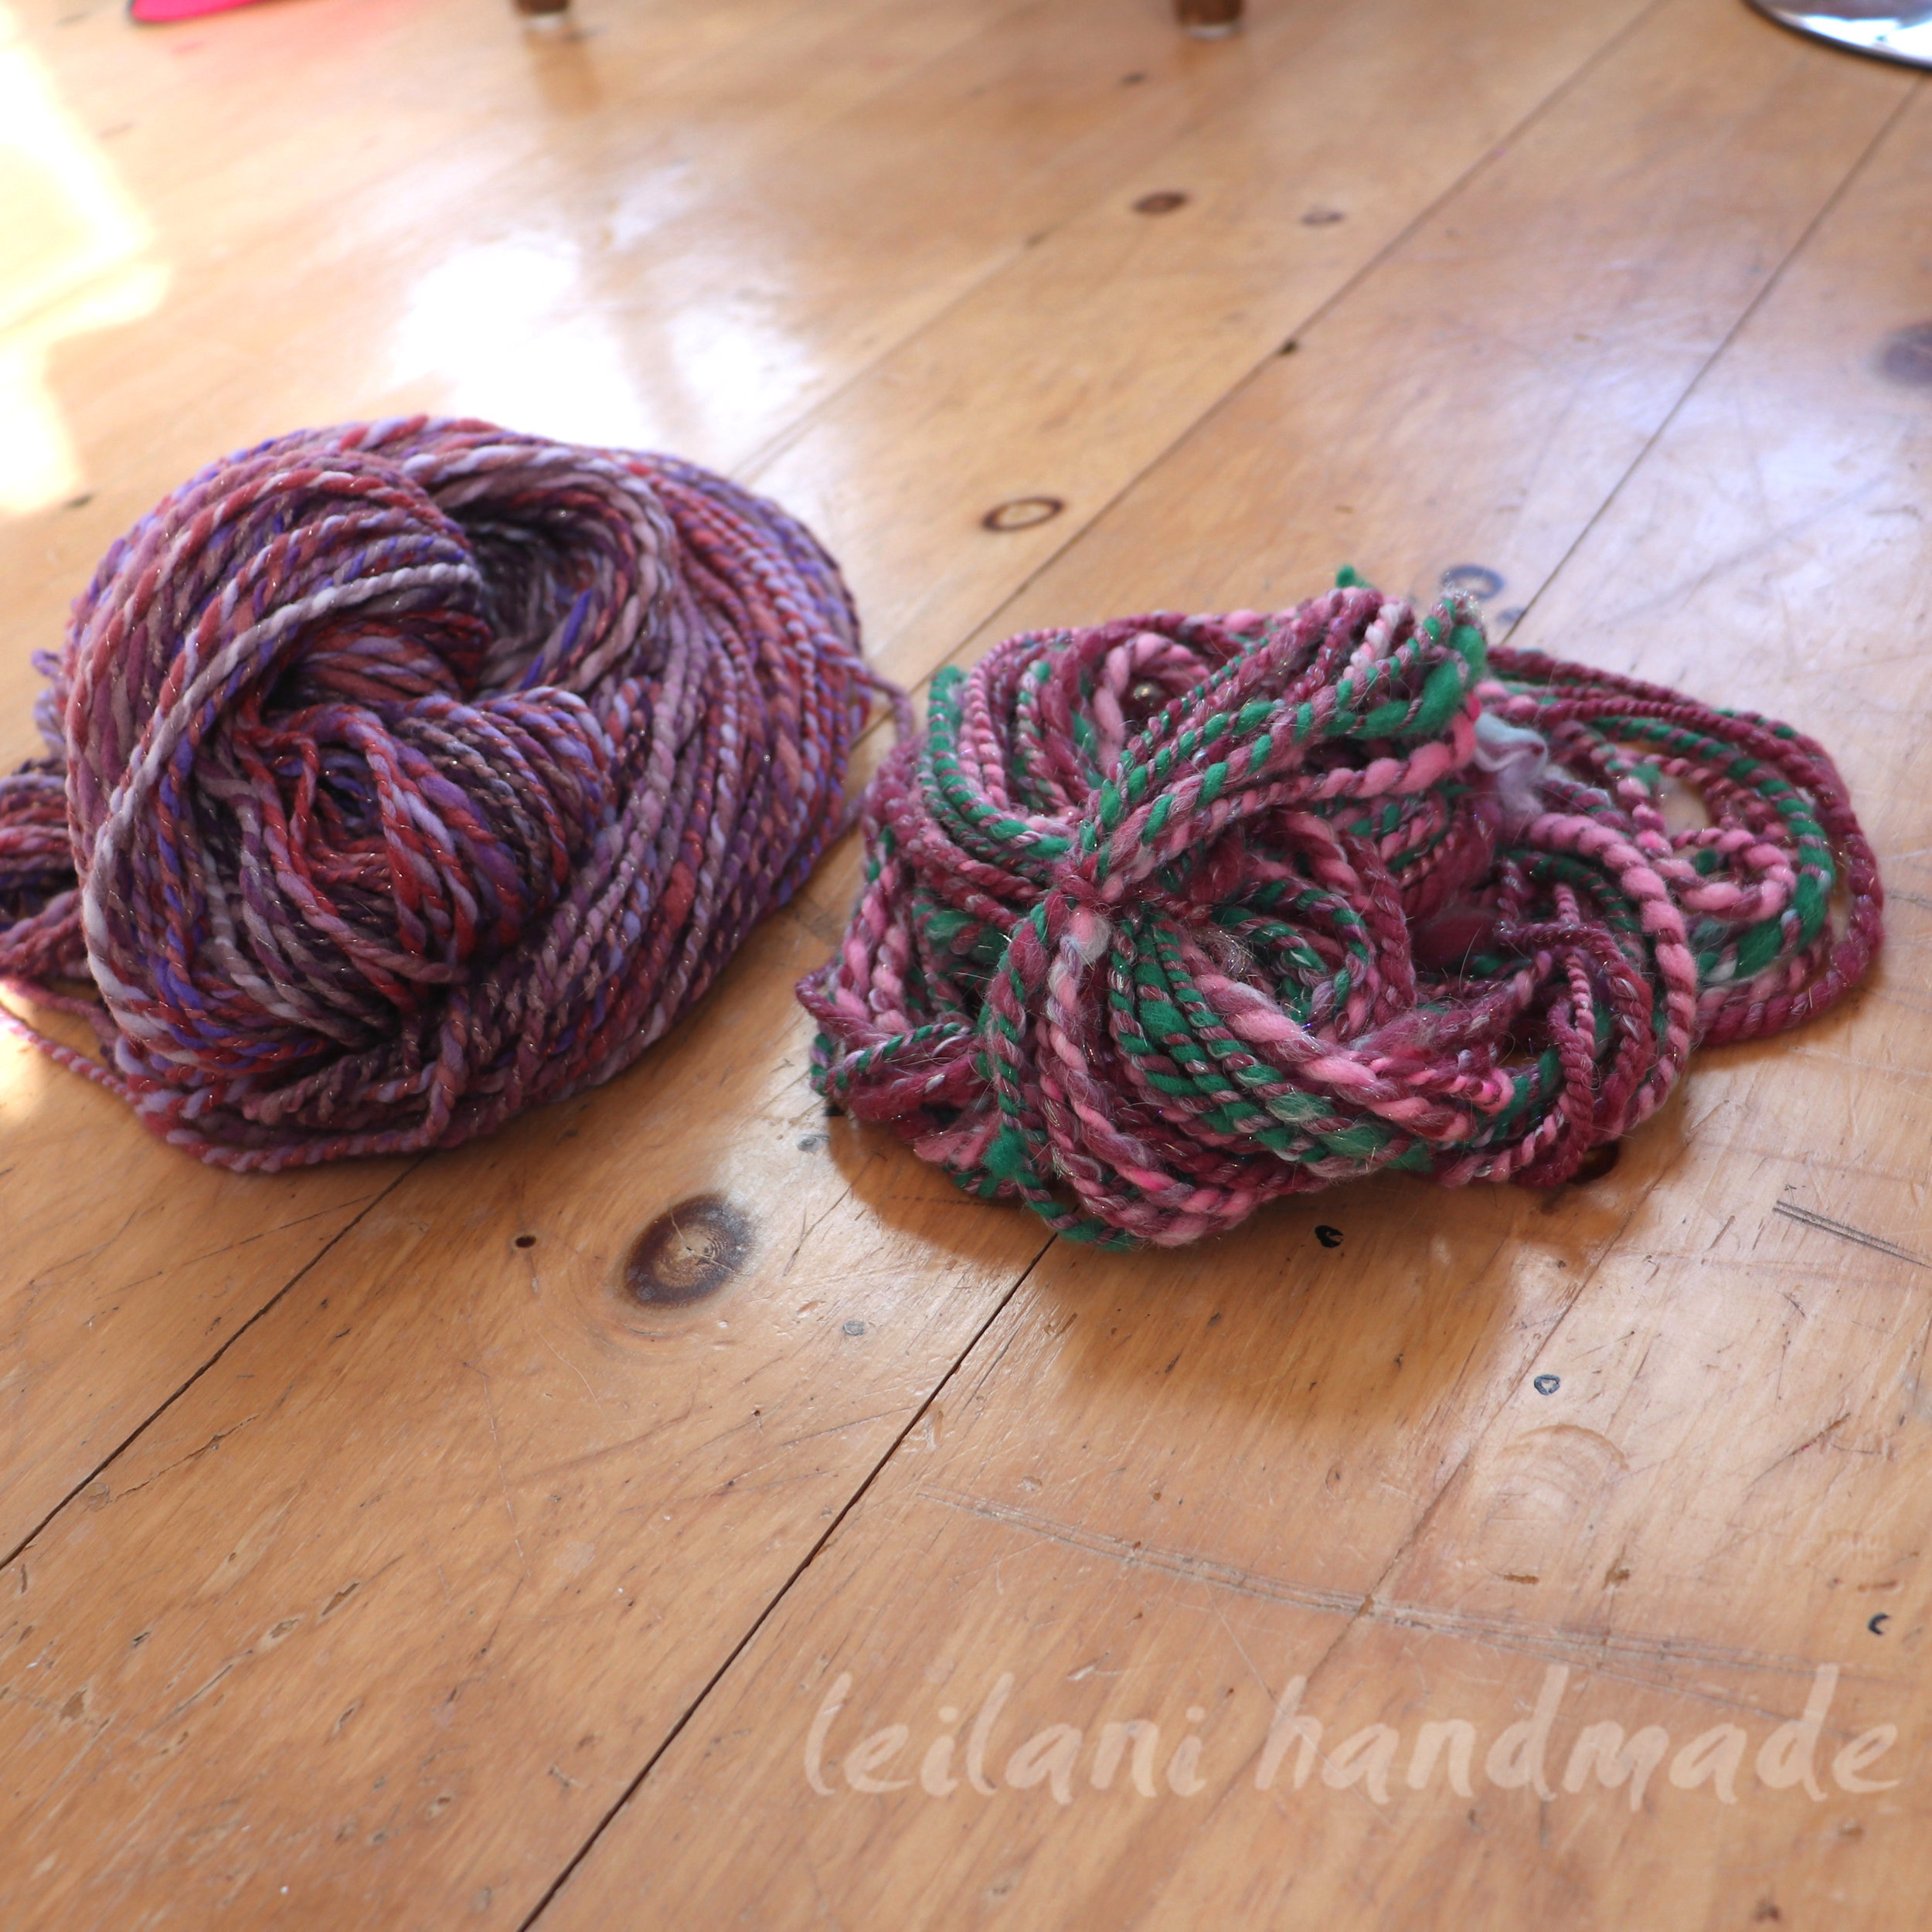
I chose two skeins of yarn. One was a freshly spun spiral ply that was really pink. I have nothing against pink, but this is just too much pink for me. The other is a bulky chain ply I did some time ago for a hat pattern featured in my 5 Free and Easy Patterns to Make with Handspun Yarn post. The hat turned out nice, but I didn’t wear it, so I decided to unravel and reuse it.
Curiosity Gets the Best of Me
I don’t necessarily dislike either of these yarns. Even the really pink one, I’m sure I could find a project for it. I’m more curious about what would happen if I changed one element of the color. Curiosity gets the best of me in the studio. Once I know I want to try something, I must go for it, for better or worse. And yes, I’ve often regretted not leaving well enough alone.
That said, every time I try over-dyeing, I learn valuable lessons about dyeing and color. So even the mistakes have their place, and probably mean a third dip in the dye pot to meet my friend black dye. 😉
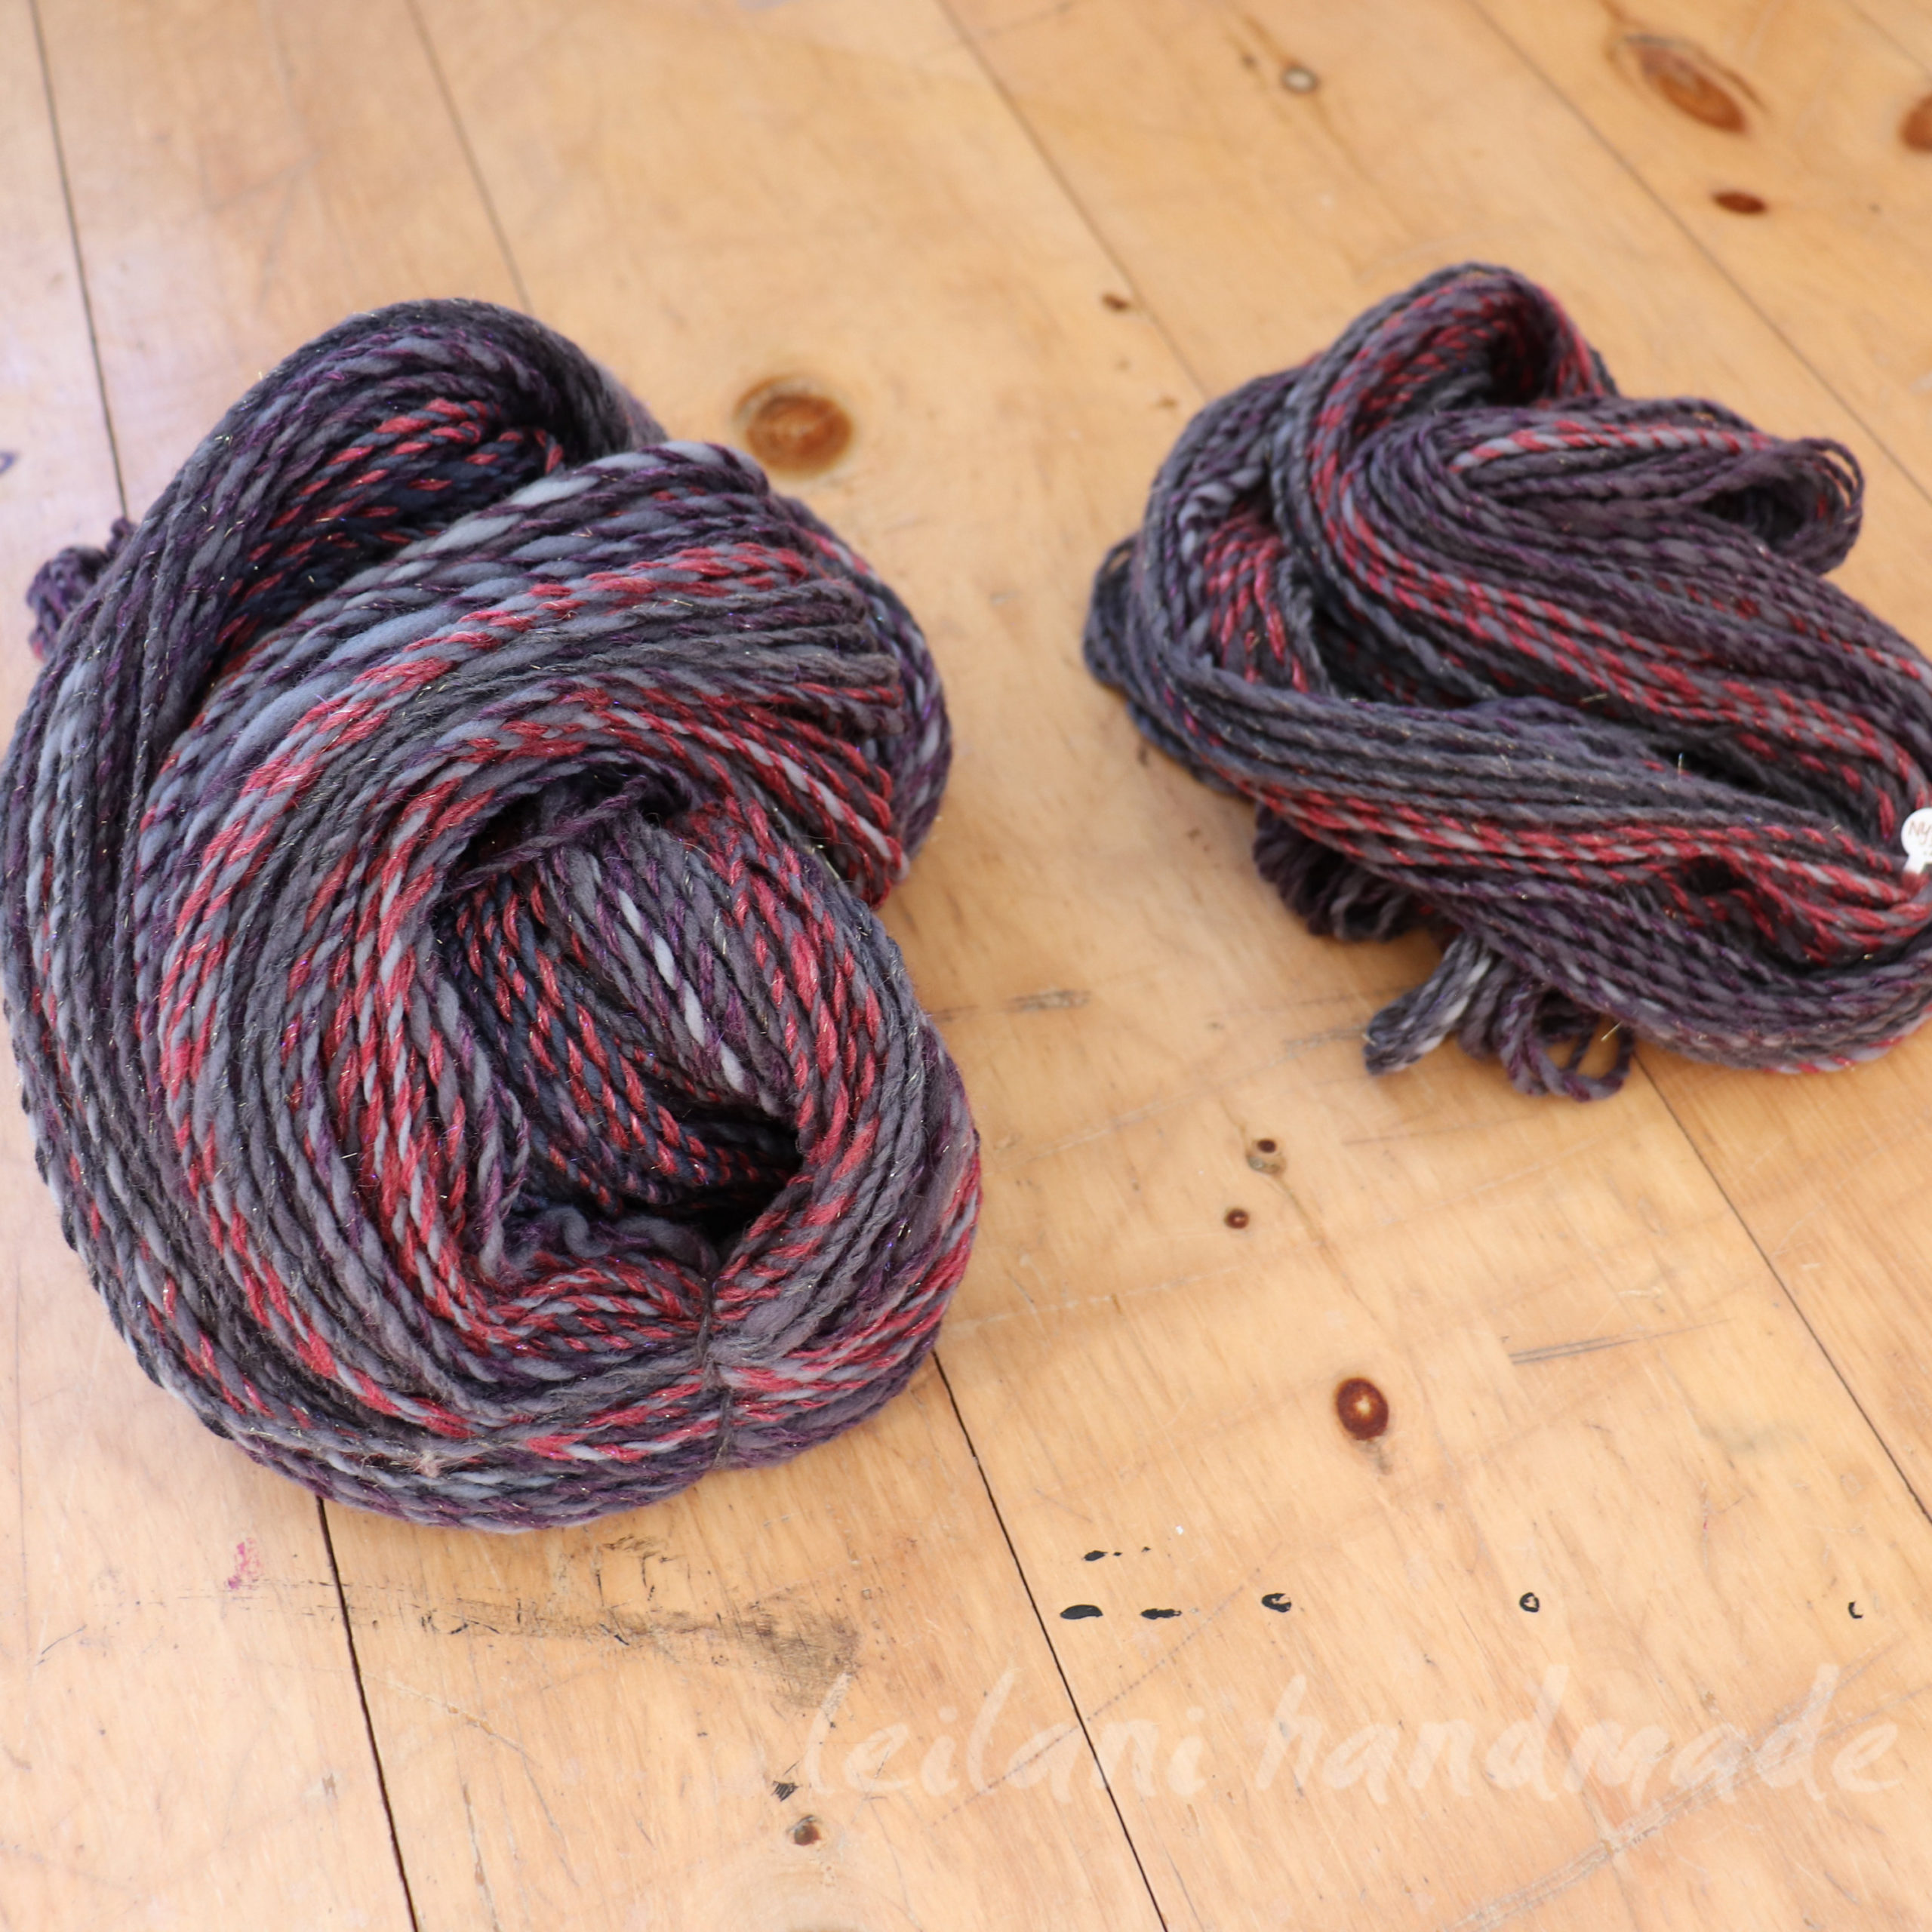
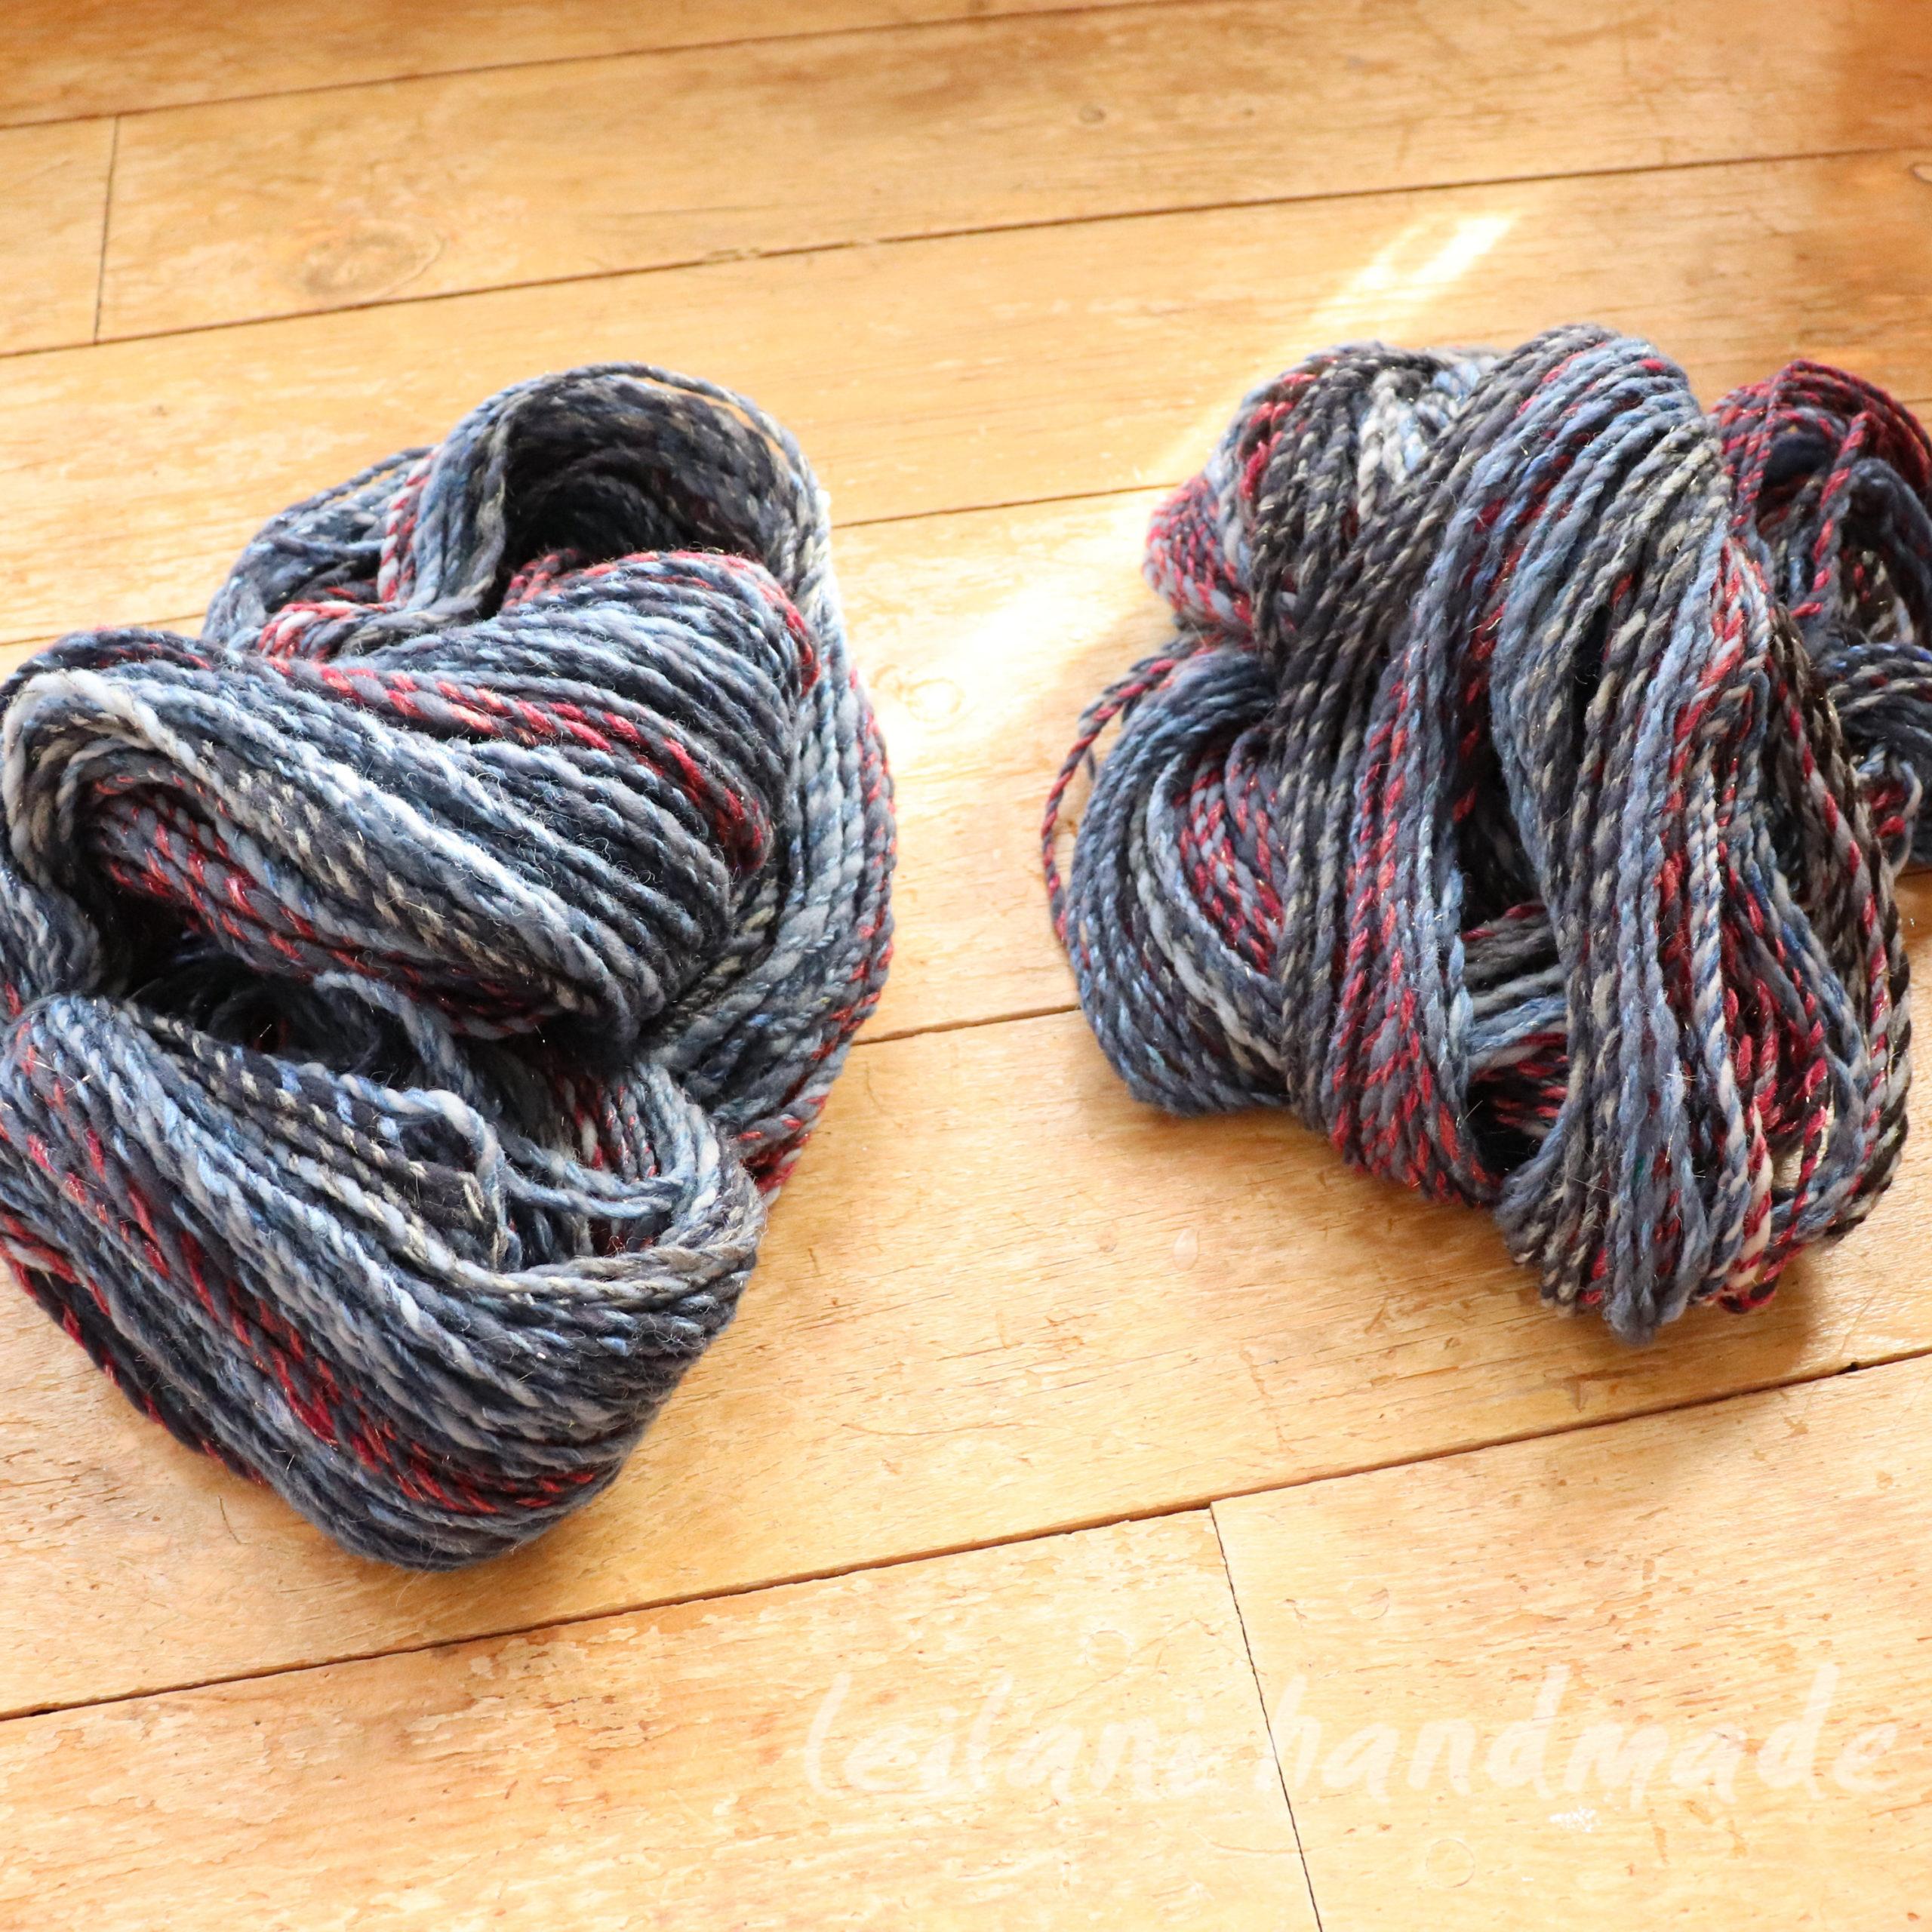
The Yarn Used for the Experiment
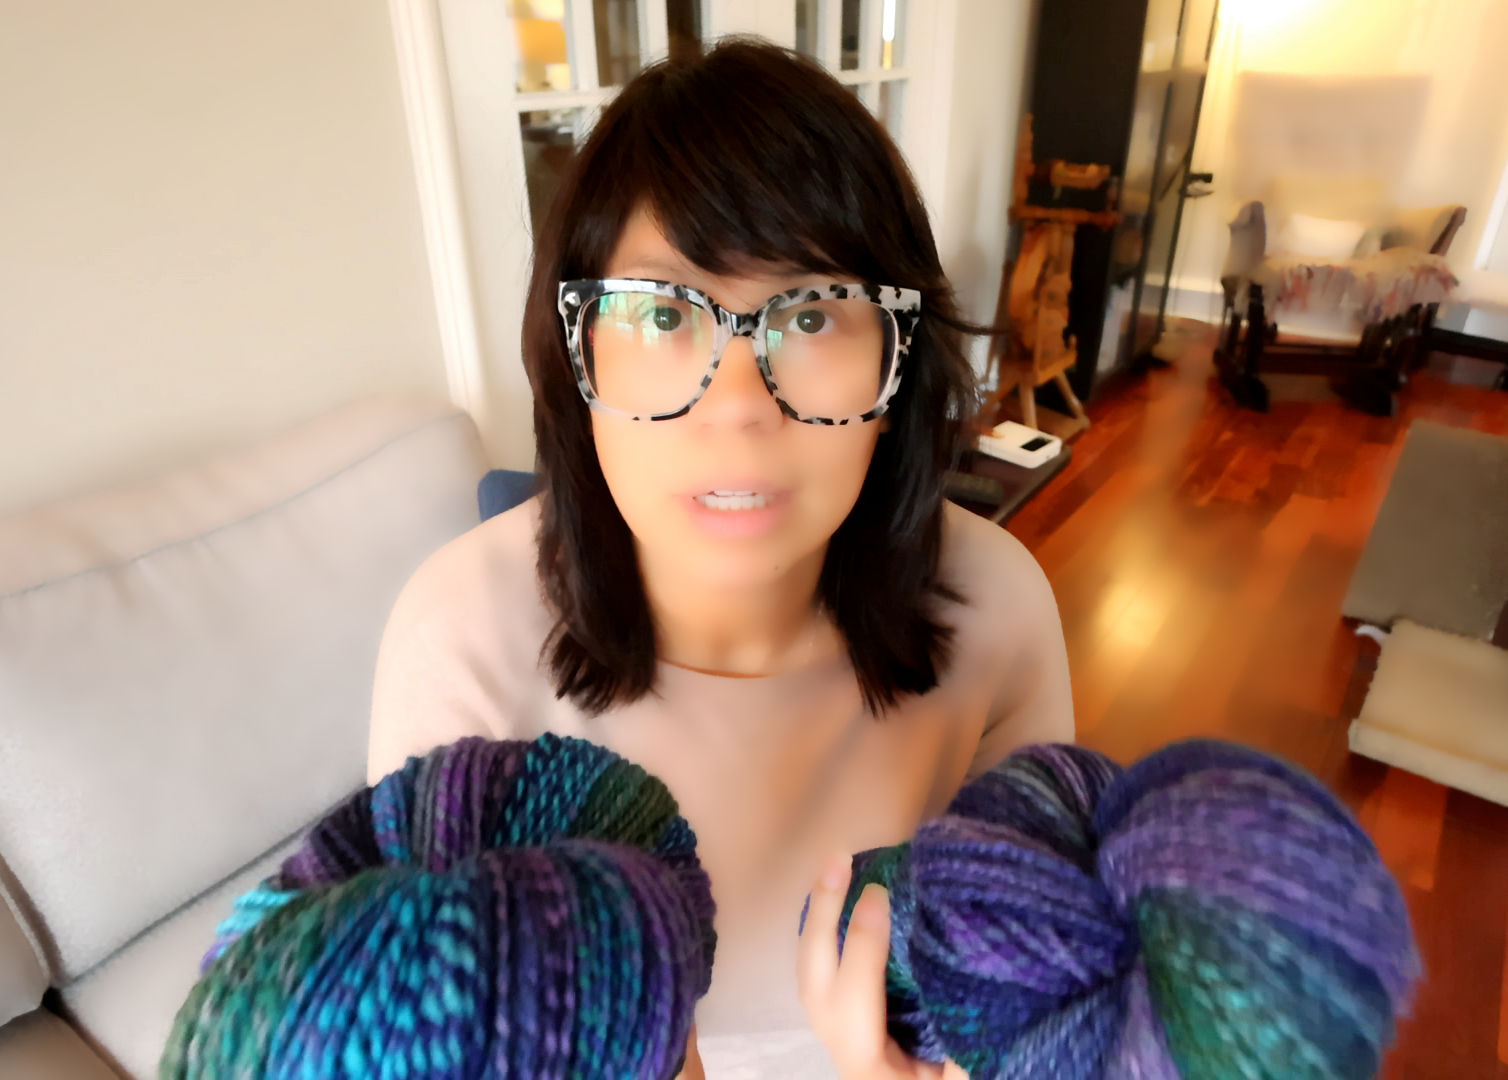
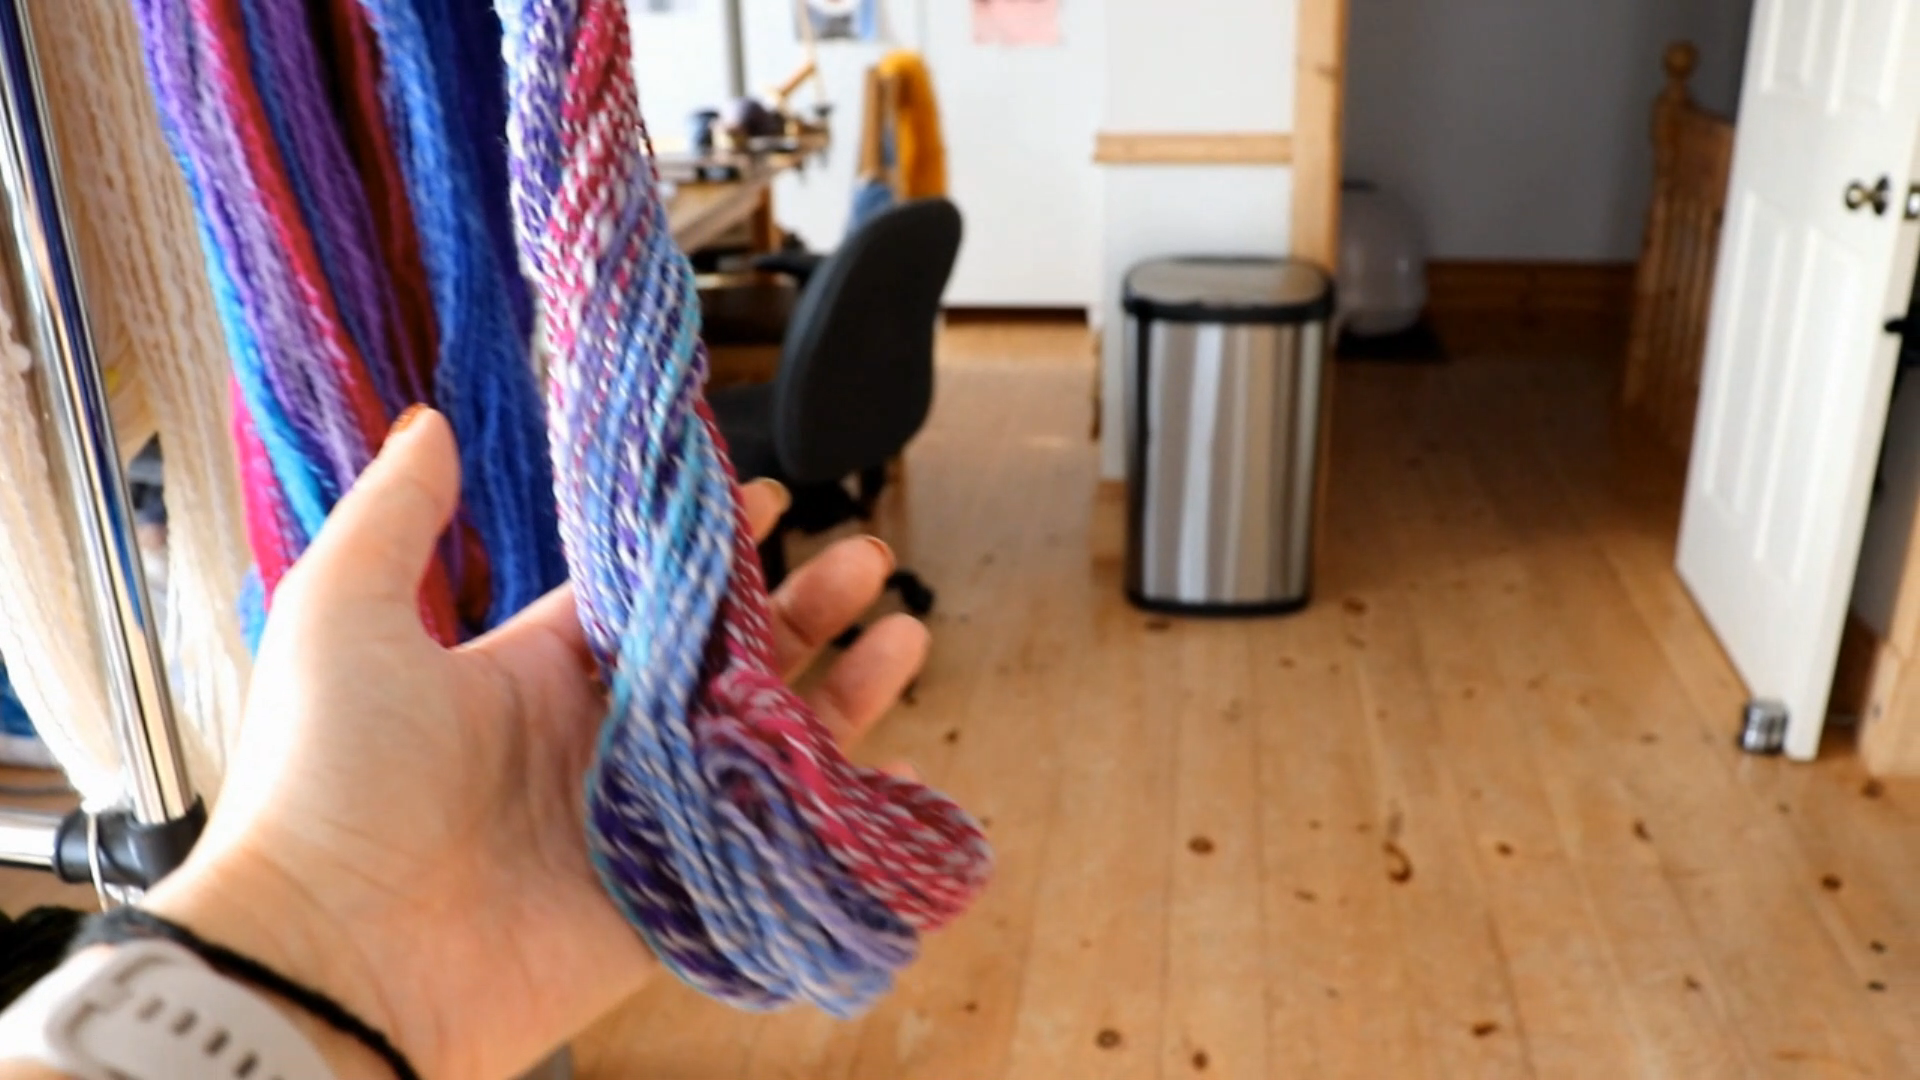
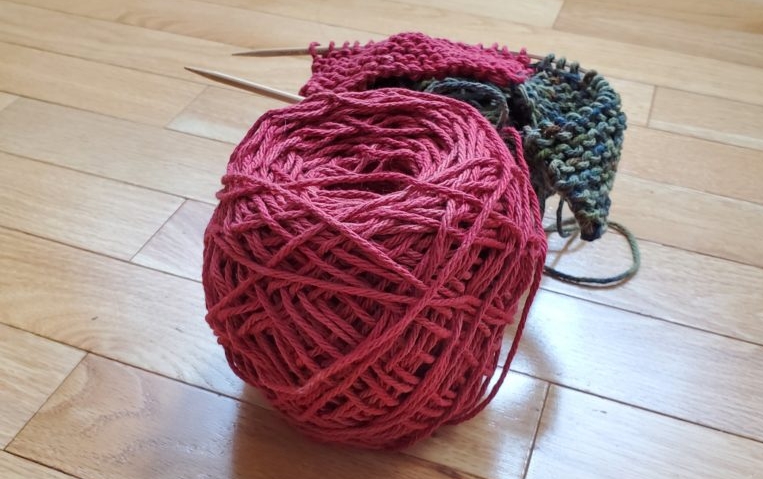
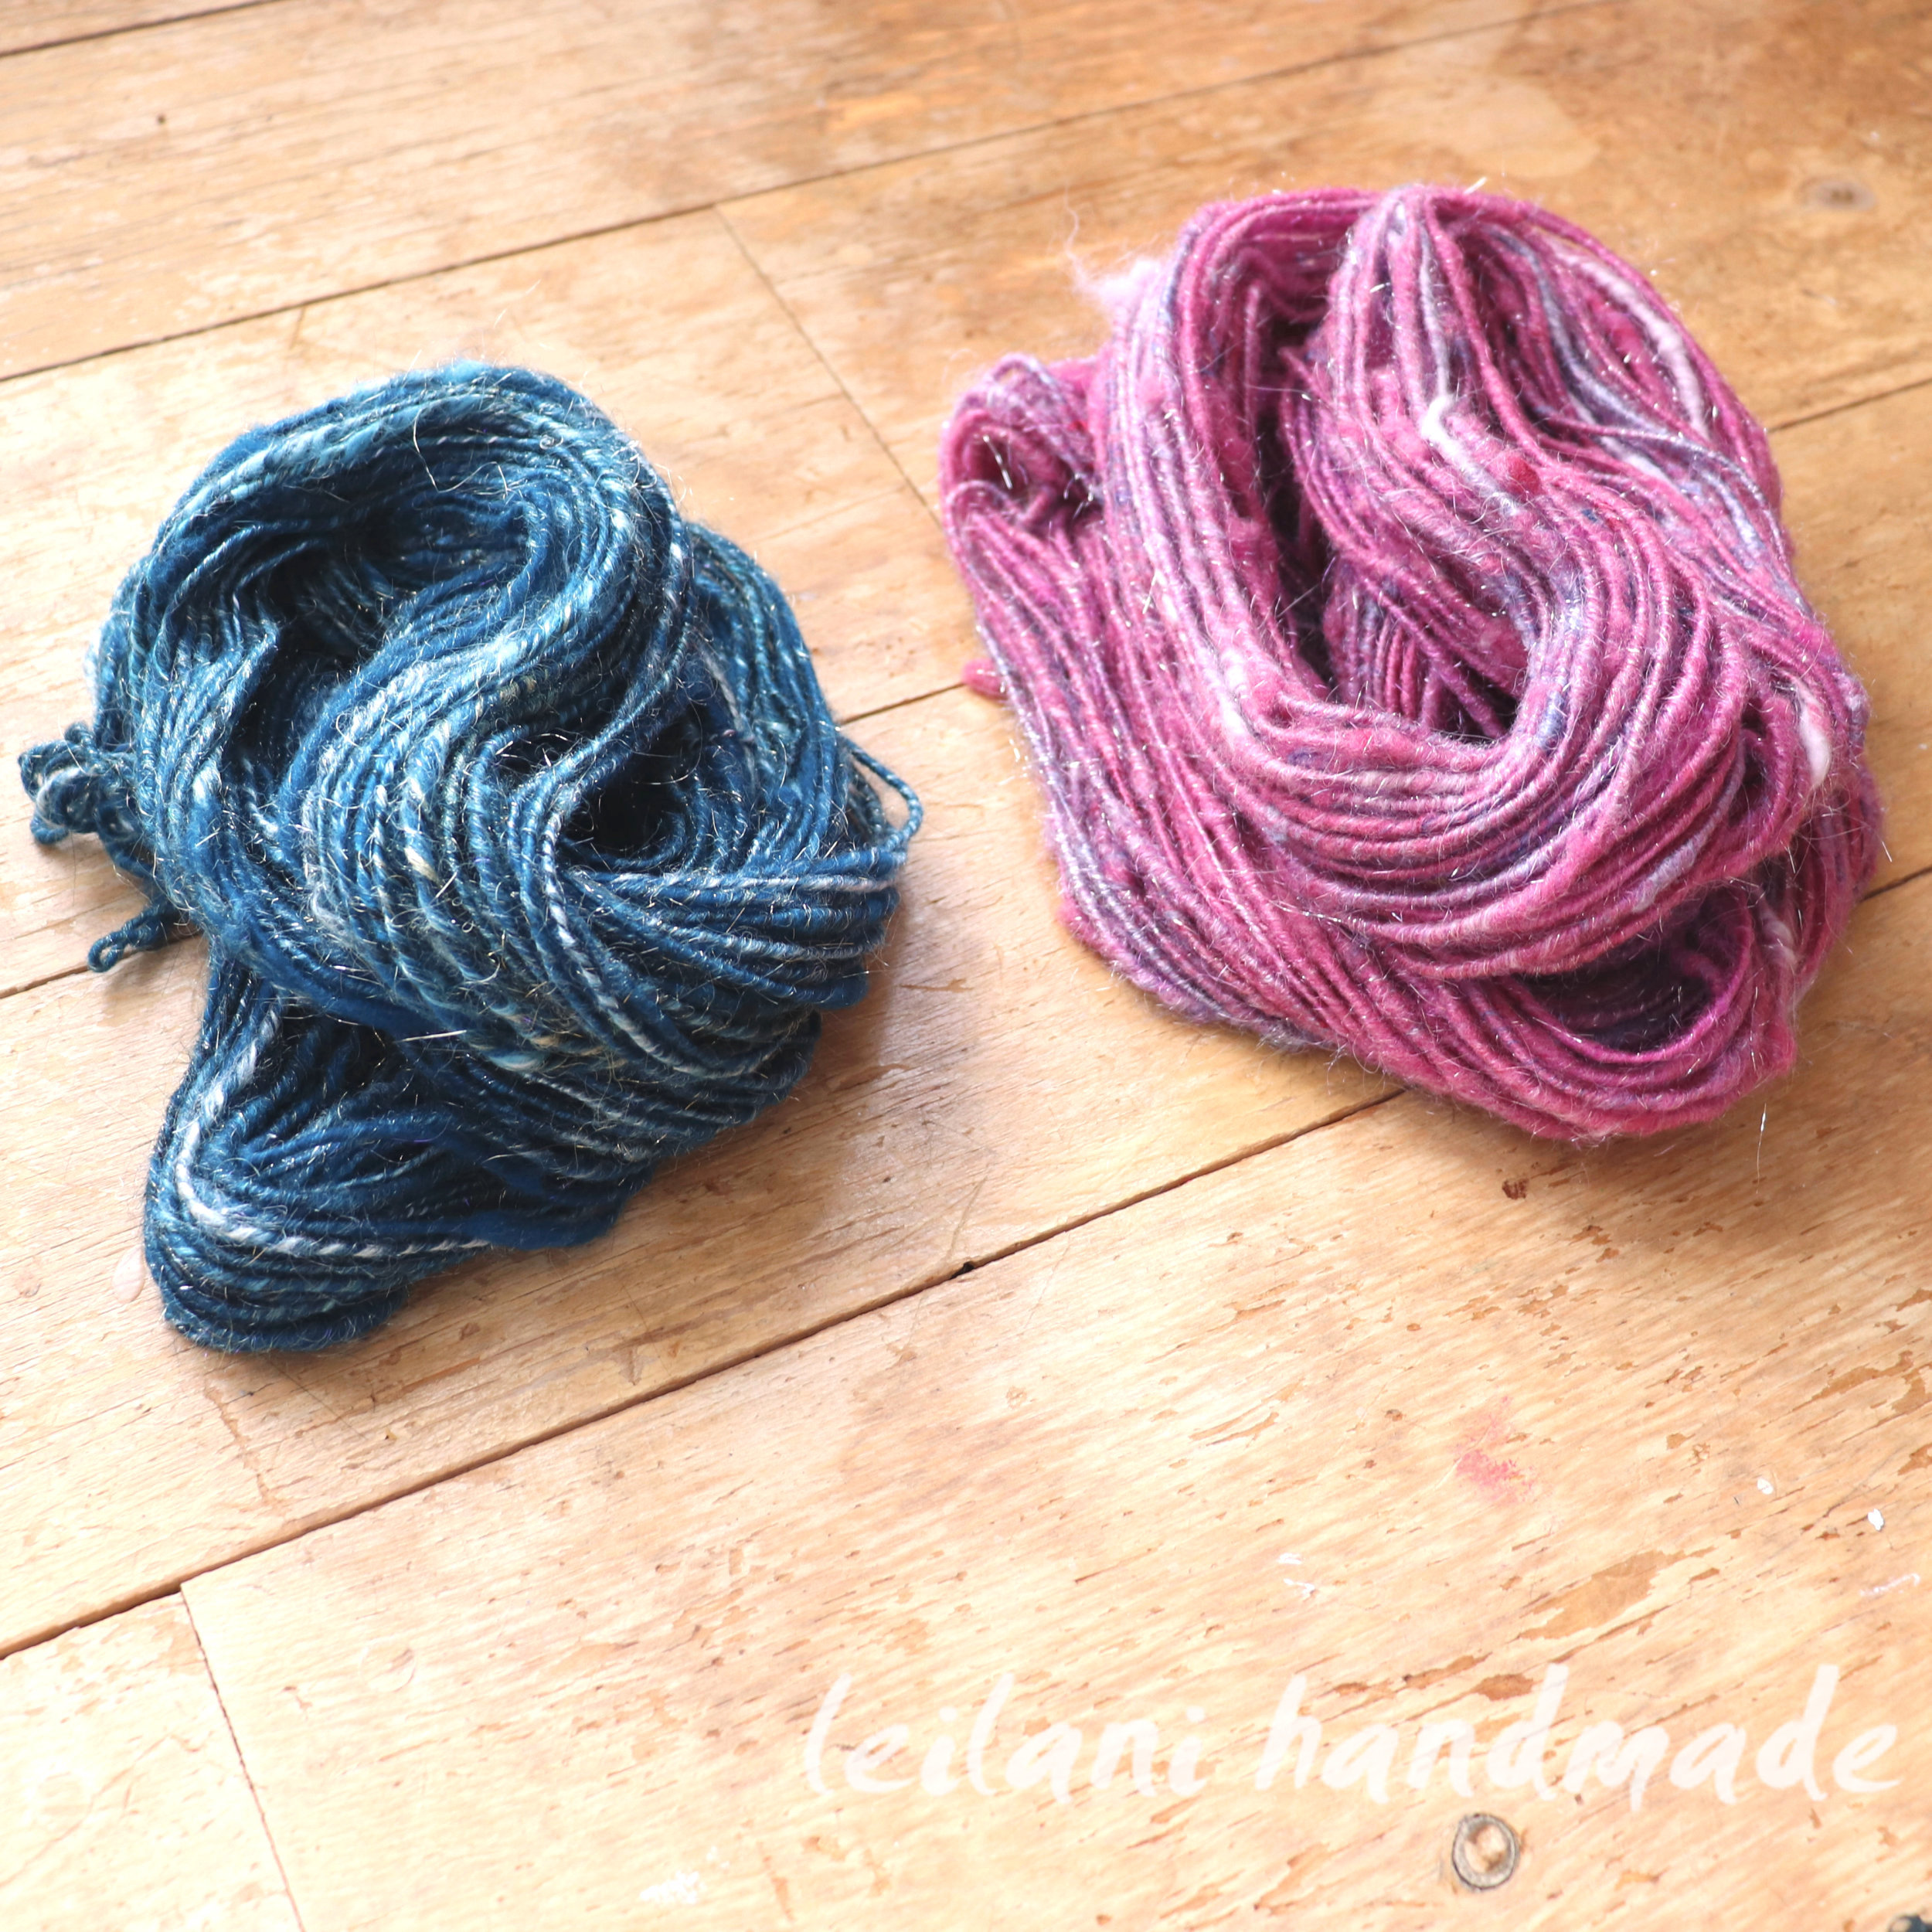
Here’s me with the yarn for the experiment: a pink spiral ply (left) freshly spun and not set, and a chunky chain ply (right) once knit into a hat and then unraveled.
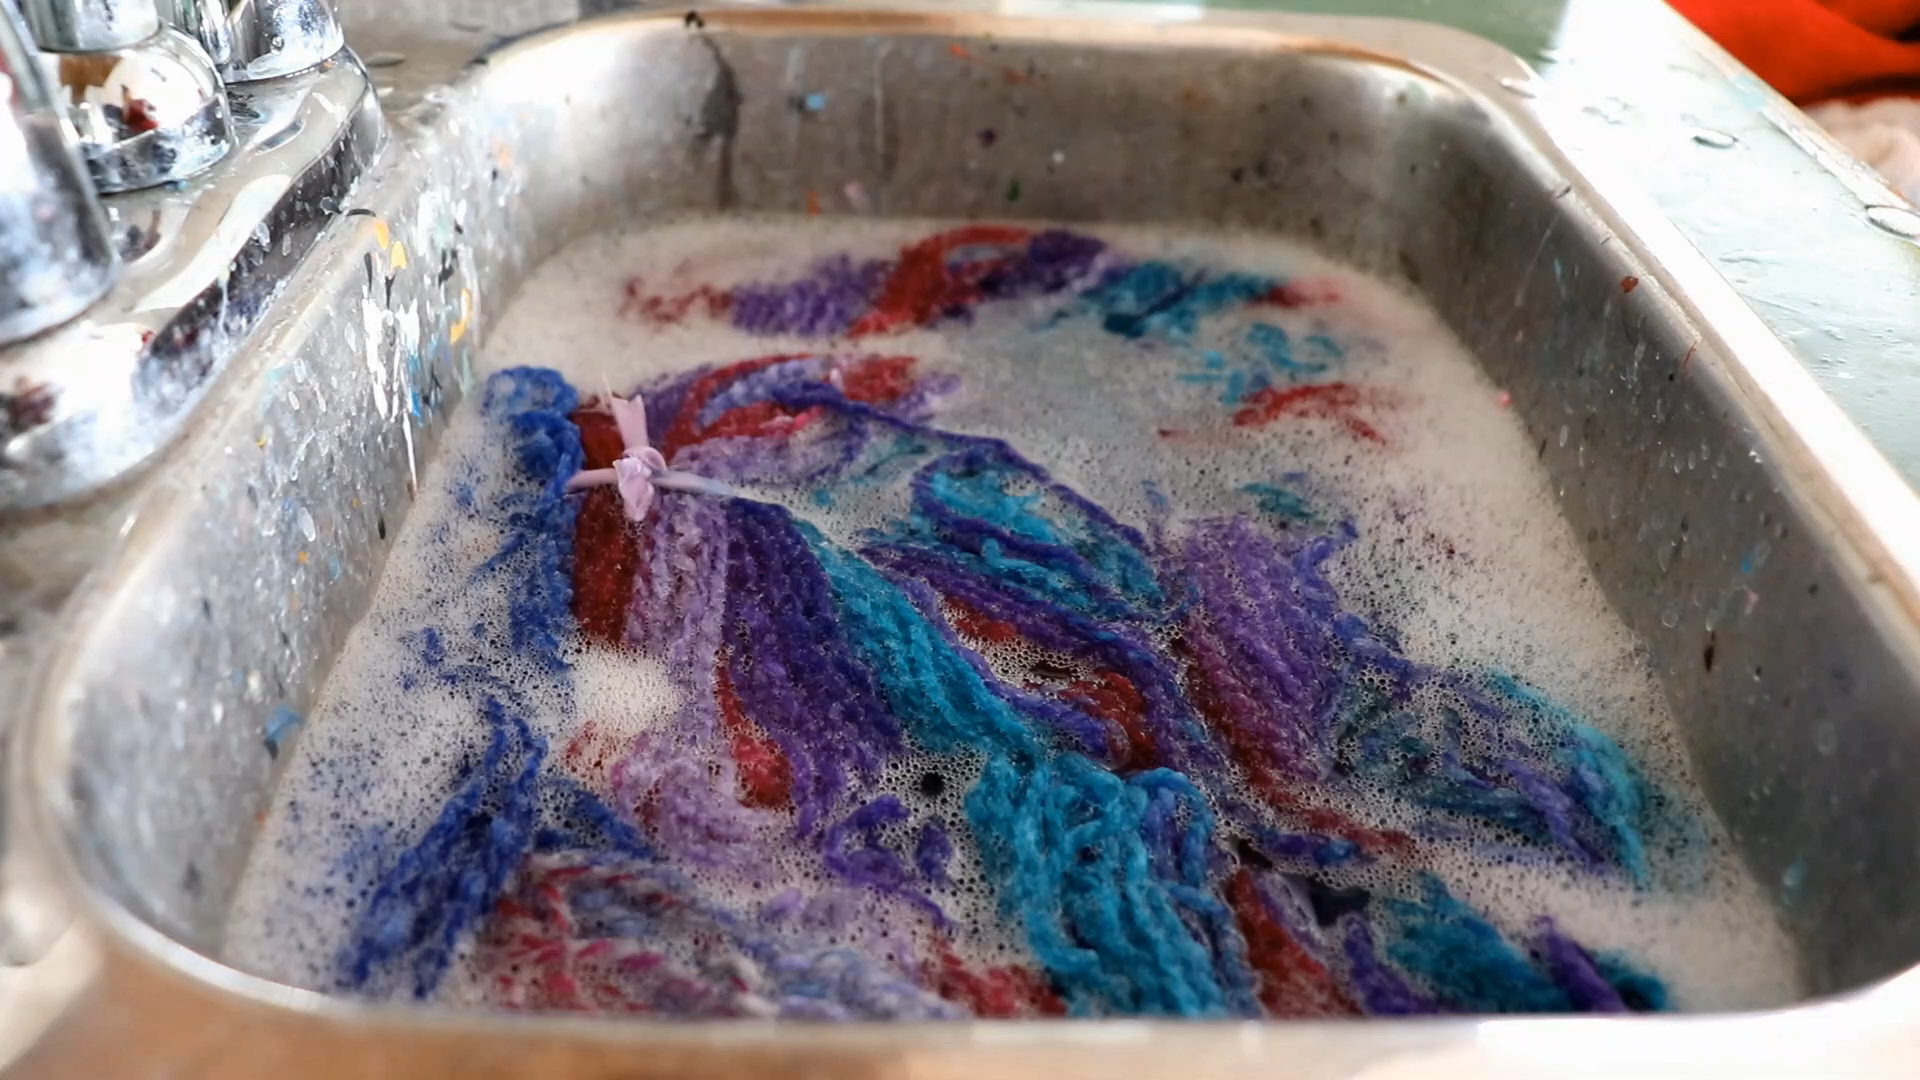
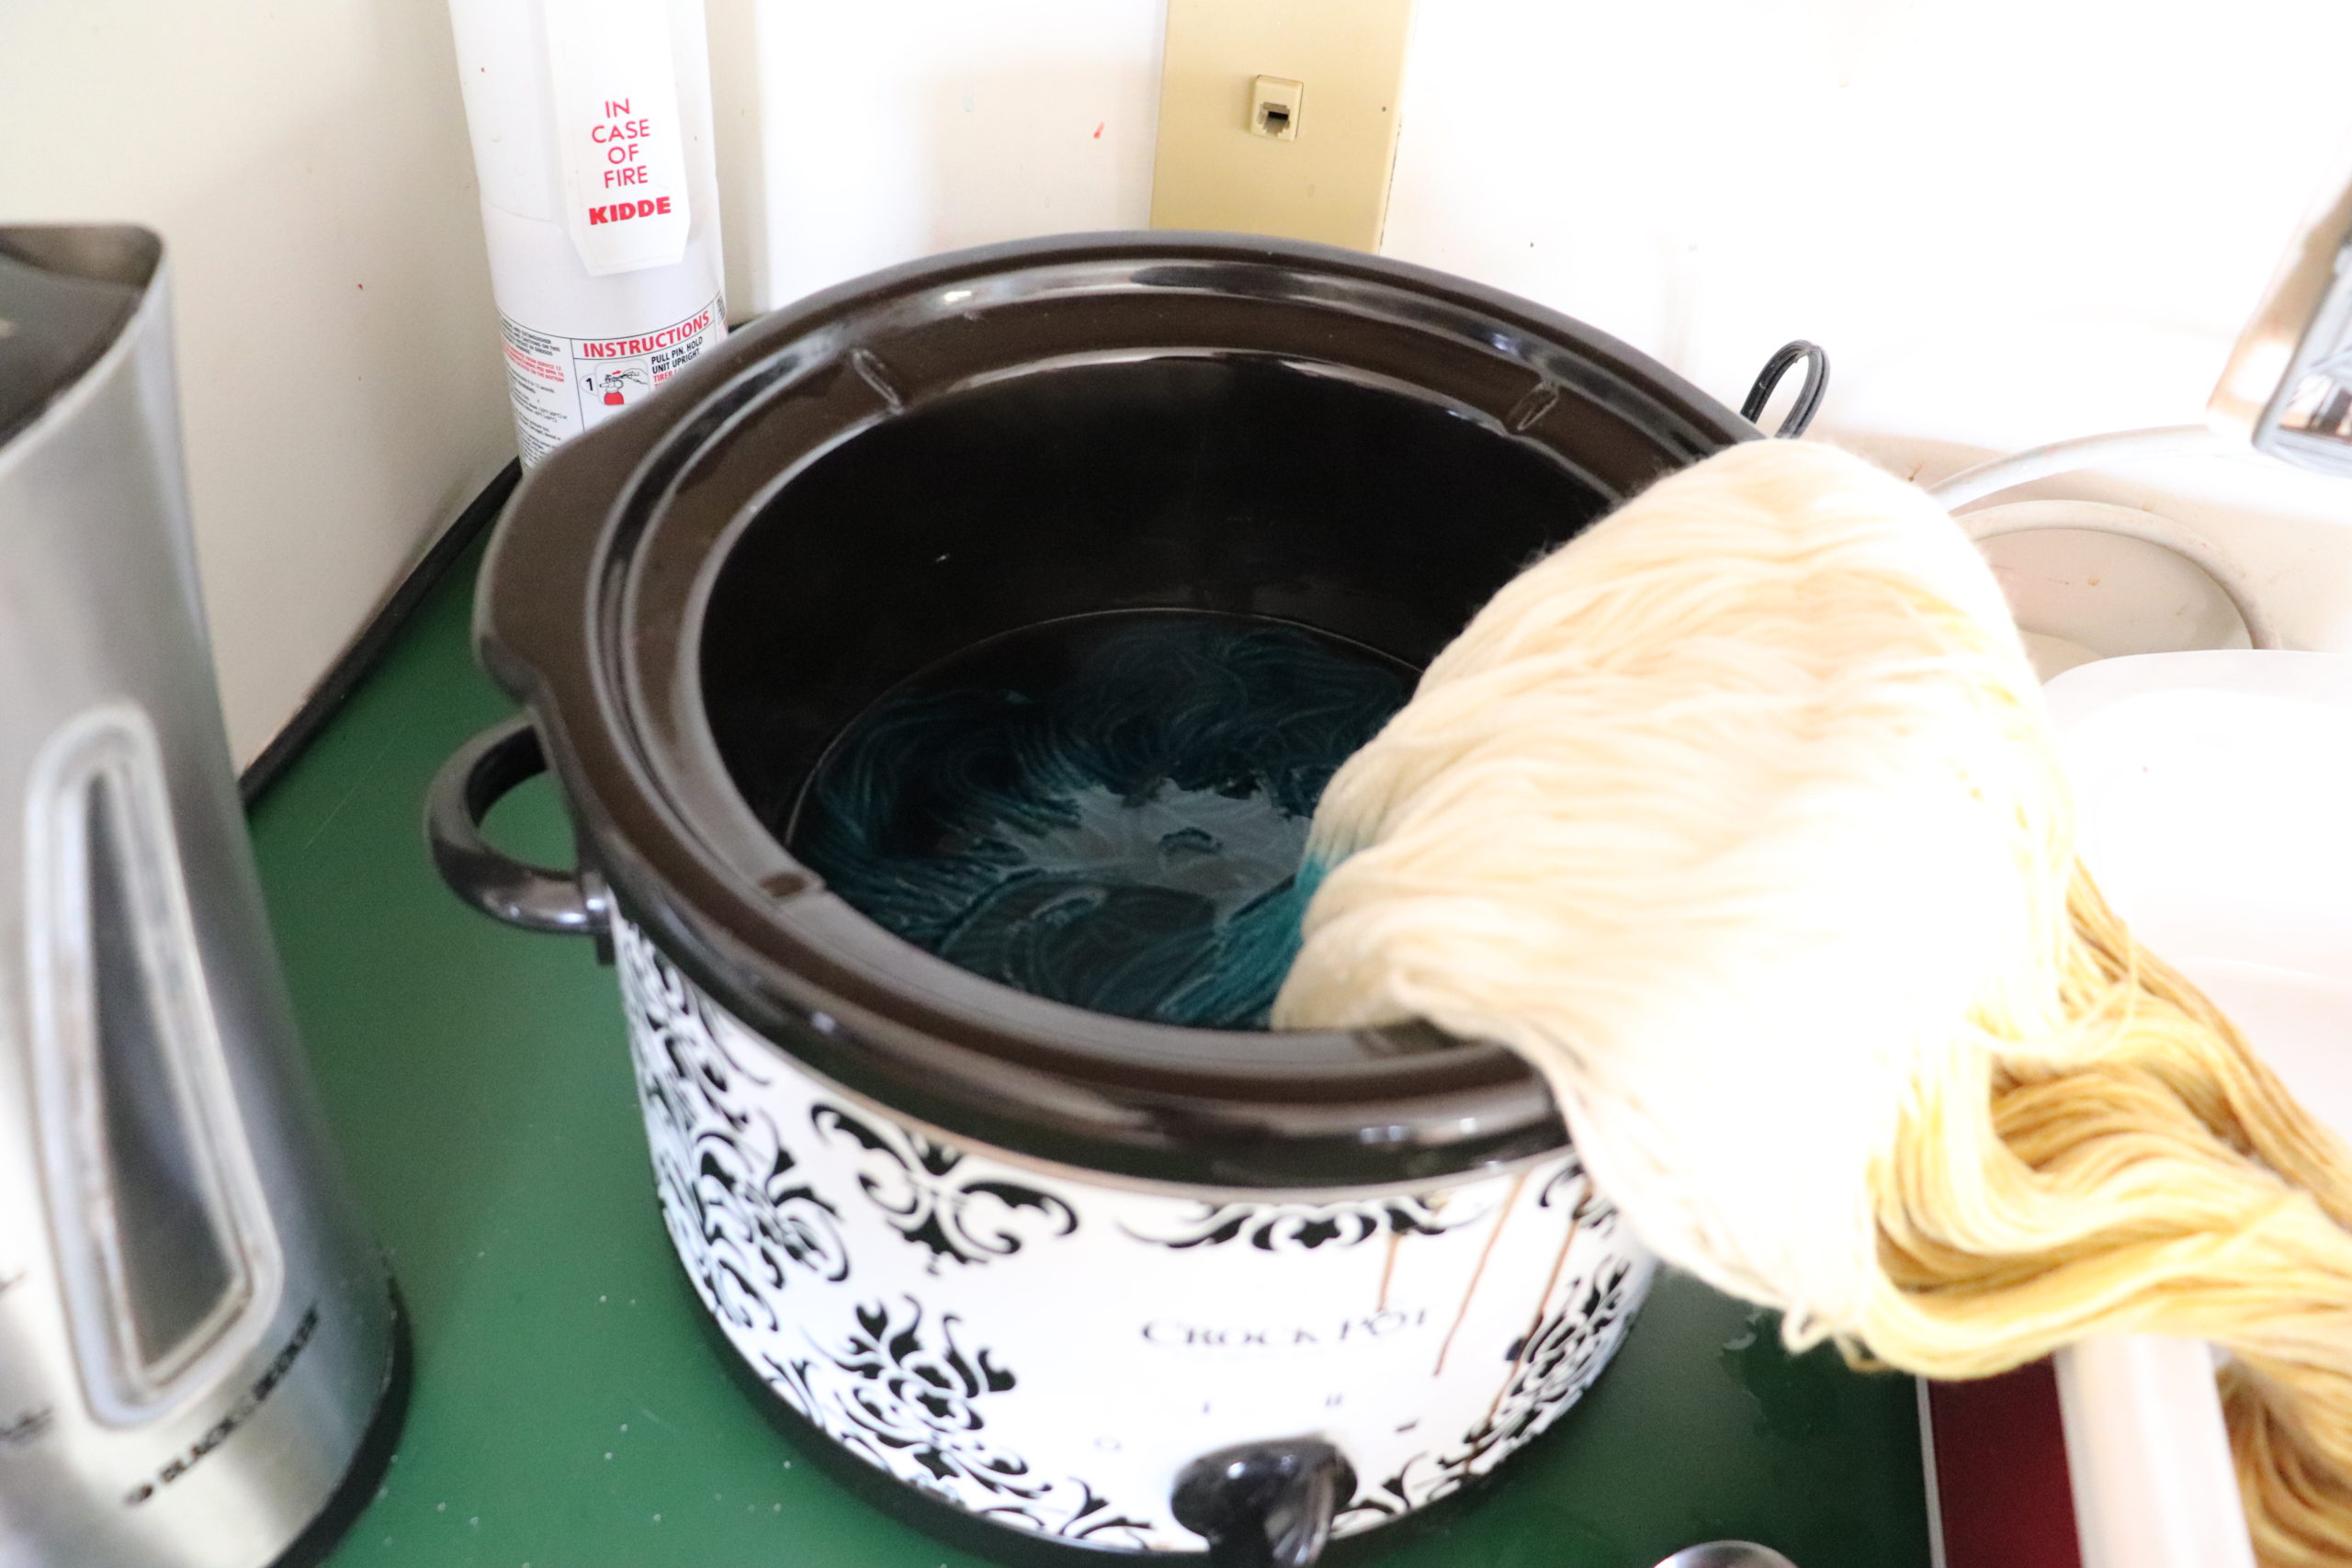
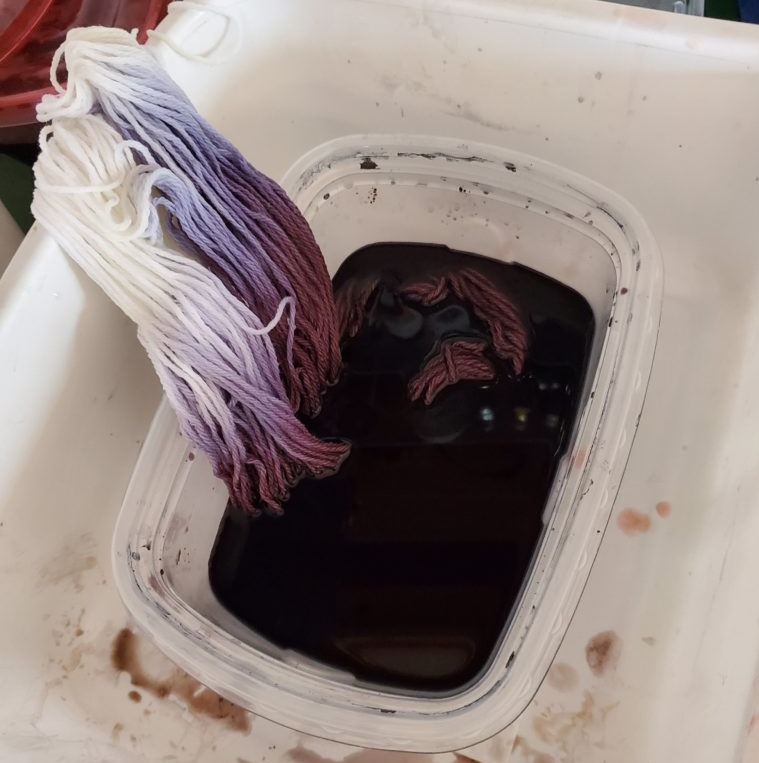
I’m doing a light silver-grey on the spiral ply. Hopefully, it will tone down the pink. I’m going to do a dark charcoal over the chain ply. I’m most concerned with this one. I don’t know how patchy or dull the charcoal grey will be over this vibrant color. This yarn has also been set, knit, unraveled, and dyed again. That’s a lot of friction on a non-superwash wool. Hopefully, I won’t be left with a strange felted mess! I do not know how this will turn out, and I’m taking you on the journey with me in the video below.
Why Over-dye Your Handspun
The main reason why you’d over-dye your handspun is simply because you dislike the color. Most of the time, you’ll hear of people using black as an over-dye, and I’ve certainly done this several times. I’ve spun yarn and realized the color is clashy or dull, so black is the most successful color for eradicating handspun sins. 🙂
In my experience, black doesn’t completely cover the color in yarn. Darker pieces will show through, and I like that effect. The color underneath will also blend with the black to give different undertones. But you can use other colors to over-dye wool yarn, as well. Typically, you’ll want to use a color darker than the yarn you’re over-dyeing. But as with the silver grey I use in this video, you can use lighter colors to subtly change or tone down the original color.
The main reason I like to over-dye is education and experimentation. I get bored of yarn that sits around the studio. Truthfully, I spin more yarn than I use. Often, I think, “Hey, I like this yarn in structure, but I don’t think I’d wear this color. I wonder what it’d look like if I applied this color over it?” Over-dyeing often breathes new life into the yarn for me, and then I get excited to use it.
Also, over-dyeing is a great way to gain experience with dyeing and color without breaking the bank. Start with the yarn you have laying around that you’re not 100% about. Unravel an old project like I did here and throw it in the dye pot. You have less to lose with less-loved or recycled yarn. You’ll be gaining knowledge about dyeing yarn without any feelings of deep regret. Once you perfect your skills, move on to the new/better stuff.
Why Grey?
For this experiment we’re playing it somewhat safe with grey. But I figured it would give me the best success of what I wanted to achieve, plus show that you don’t need to invest in many different dye colors to over-dye. I find grey is less harsh than black and therefore more forgiving if the over-dye is patchy.
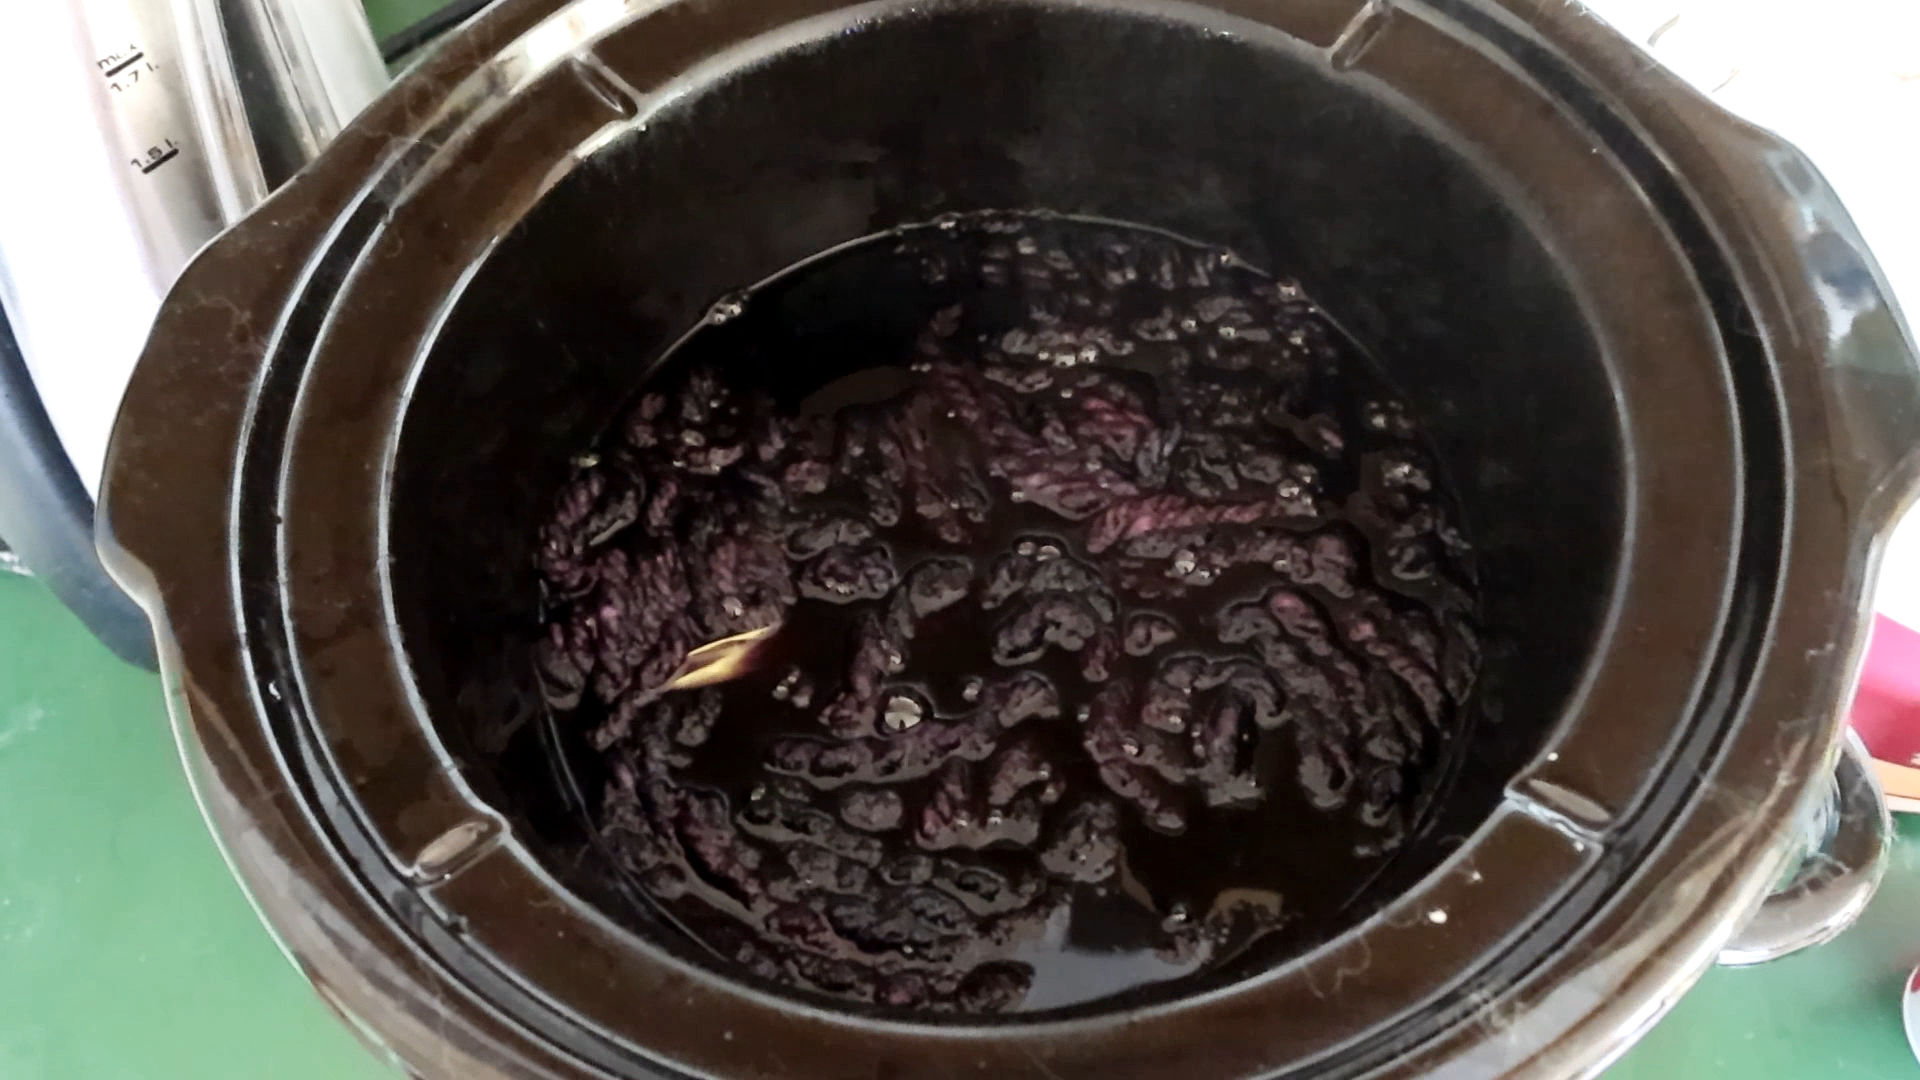
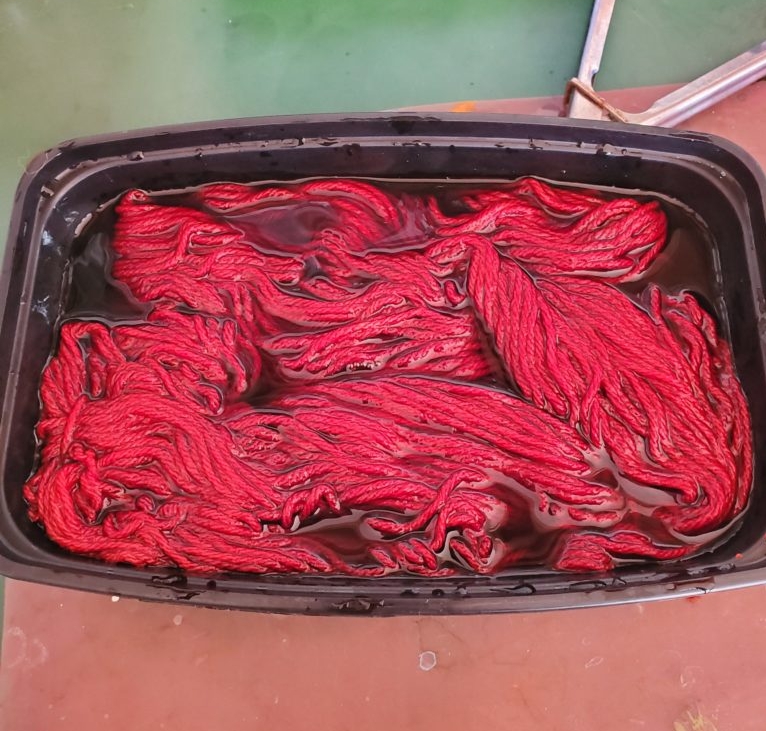
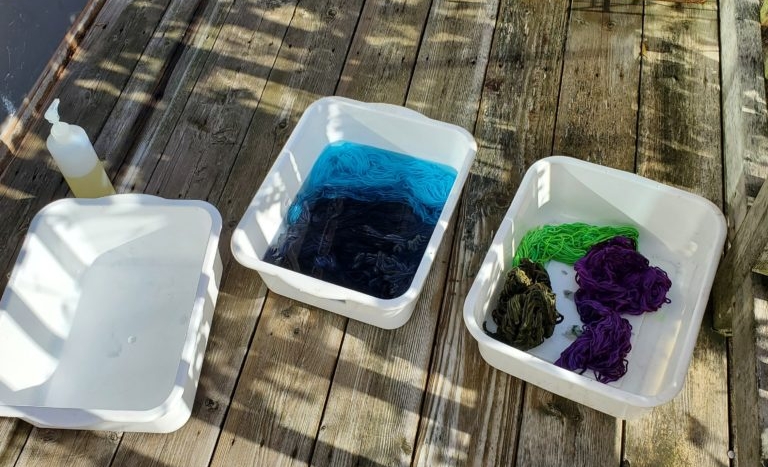
The chunky chain ply skein in the charcoal dye bath
Reduce, Reuse, Recycle
Yet another reason to over-dye your yarn is to simply re-use it. As in the case of the chunky chain ply in this experiment, why not over-dye your yarn and reuse it in another way? You could do this with leftover yarn from a project or yarn unraveled from an old project you’re no longer interested in or didn’t turn out just how you’d hoped.
One reason I got into fiber is how versatile and waste-free it is. Even the unusable fleece after picking can be composted in the garden. I like taking this further and ensuring I have many ways to use and reuse my yarn as well.
Over-Dyeing Commercial Yarn
You can over-dye commercial wool yarn. Oh yes I’ve done it. My dad once got me a whole bag of brushed alpaca yarn from an early 90’s Sweater kit at his church yard sale. The hue of red was not my cup of tea. I over-dyed it blue and it made a terrific dark purple color.
I’ve even over-dyed commercial cotton yarn (dyeing vegetable fibers is a completely different experience from dyeing animal fibers. You can read about it here in my post on Dyeing Cotton Yarn). However, I don’t have any expertise in dyeing synthetic commercial yarns.
What to Use for Over-dyeing
My recommendation for over-dyeing is to use a dye pot, whether on the stove or, as I prefer, in a crockpot. You really need to saturate the color into the skein, and I feel the kettle dyeing method is the best and easiest way to do this.
It’s helpful to have a color wheel available if you decide to over-dye with colors other than black or grey. It’s very easy to end up with some shade of brown, and if that’s not what you’re going for, be prepared to be disappointed. I’ve also made many ugly grass green to forest green over-dyes. They weren’t very attractive and were harsh in tone.
Now it’s Your Turn: Go For It! 🙂
I hope this post inspires you to try over-dyeing yarn, whether it’s your own handspun or commercial. You will learn lots, and although you may not necessarily love the results at first, you will gain immensely in dyeing experience.
Be sure to check out my YouTube channel for more fiber arts content. I’m slowly adding to it monthly.
It is possible to change or revamp a 2-ply yarn by re-spinning it into a 3-ply Crepe Yarn.
Here’s How I do it.
This freshly spun, not yet set 2-ply yarn gets a revamp
This summer, I completed this 2-ply yarn, but I was not “wowed” by it. There was nothing inherently wrong with it; it was kind of cool looking colorwise, but structurally, it was lacking for me. It hadn’t been wet set, and I usually reserve my final judgments on a handspun yarn until then, but spinning for 12+ years, I know when I won’t be satisfied with the final result.
My first instinct was to run the yarn back through my wheel and add more twist, but I knew it would still be relatively thin and uninteresting. So I thought, if I’m going to add extra twist, I might as well add A LOT of extra twist and make this a crepe yarn. I would have to spin a third singles that this 2-ply would be plied back to, but I’m pretty enthusiastic to have any reason to play and spin. 😀
Throwing caution to the wind, I thought, “Let’s go for it, and I’ll film the process as I go in case I decide to use it for a blog post.”
And here we are…
What is a Crepe Yarn?
Traditionally, a crepe yarn is two singles spun with an S-Twist (the the left), plied Z (to the right), and then wrapping around a third singles spun with Z twist.
I said traditionally.
You know that means I’m going to do the opposite, right? Several years ago, when I was learning about crepe-constructed yarns, I realized that I could use this technique to revamp some of my 2-ply yarns that I was…meh about or bored with.
Normally, I spin my singles Z (to the right); thus, my yarns are plied S (to the left). That means I’d have to do the opposite of the official instructions.
It’s a matter of personal preference. I know some knitters can be particular about which way their stitches lean in stockinette stitch, so I assume that’s why crepe is directed to be spun in that order. But I’ve revamped several of my 2-ply S-plied yarns, and it makes no difference to me whatsoever, nor did it matter to others who have purchased these yarns from me over the years.
I even used this method of revamping on handspun that I had already set because I am a “what if” kind of gal who wants to know just what is possible—pushing the limits, shall we say. It turns out it is very possible, and with a good soak and thwacking you can’t tell the difference that it was essentially set twice.
However, it is favorable to make the decision to revamp your handspun before setting. There will be fewer surprises that way.
Since this yarn has much opposing twist, it’s important to add a lot of extra twist to everything to compensate.
Yarn Revamp: Spinning a Crepe Yarn
In this video, I explain how a crepe yarn is constructed (with bad props and a special guest 😉 ), give step-by-step descriptions while reimagining this yarn in real time, adjust my plying of the final product, show how I soak the final yarn for setting, and give a show ‘n tell of the finished yarn as well as two of my all-time favorite crepe yarns.
My hope is that this video will inspire you to try revamping a yarn that you’ve spun that is structurally okay but not really doing it for you.
If you’d like to see me do a how-to video on spinning a crepe yarn, I’d be happy to put it on my to-do list. 🙂
Bubble Crepes
These are probably the most popular style of crepe yarn. They are constructed of two thin singles, usually the same color, and one fat singles. By using this spinning technique, the fat singles gets “trapped” inside the zig-zag pattern of the thinner singles.
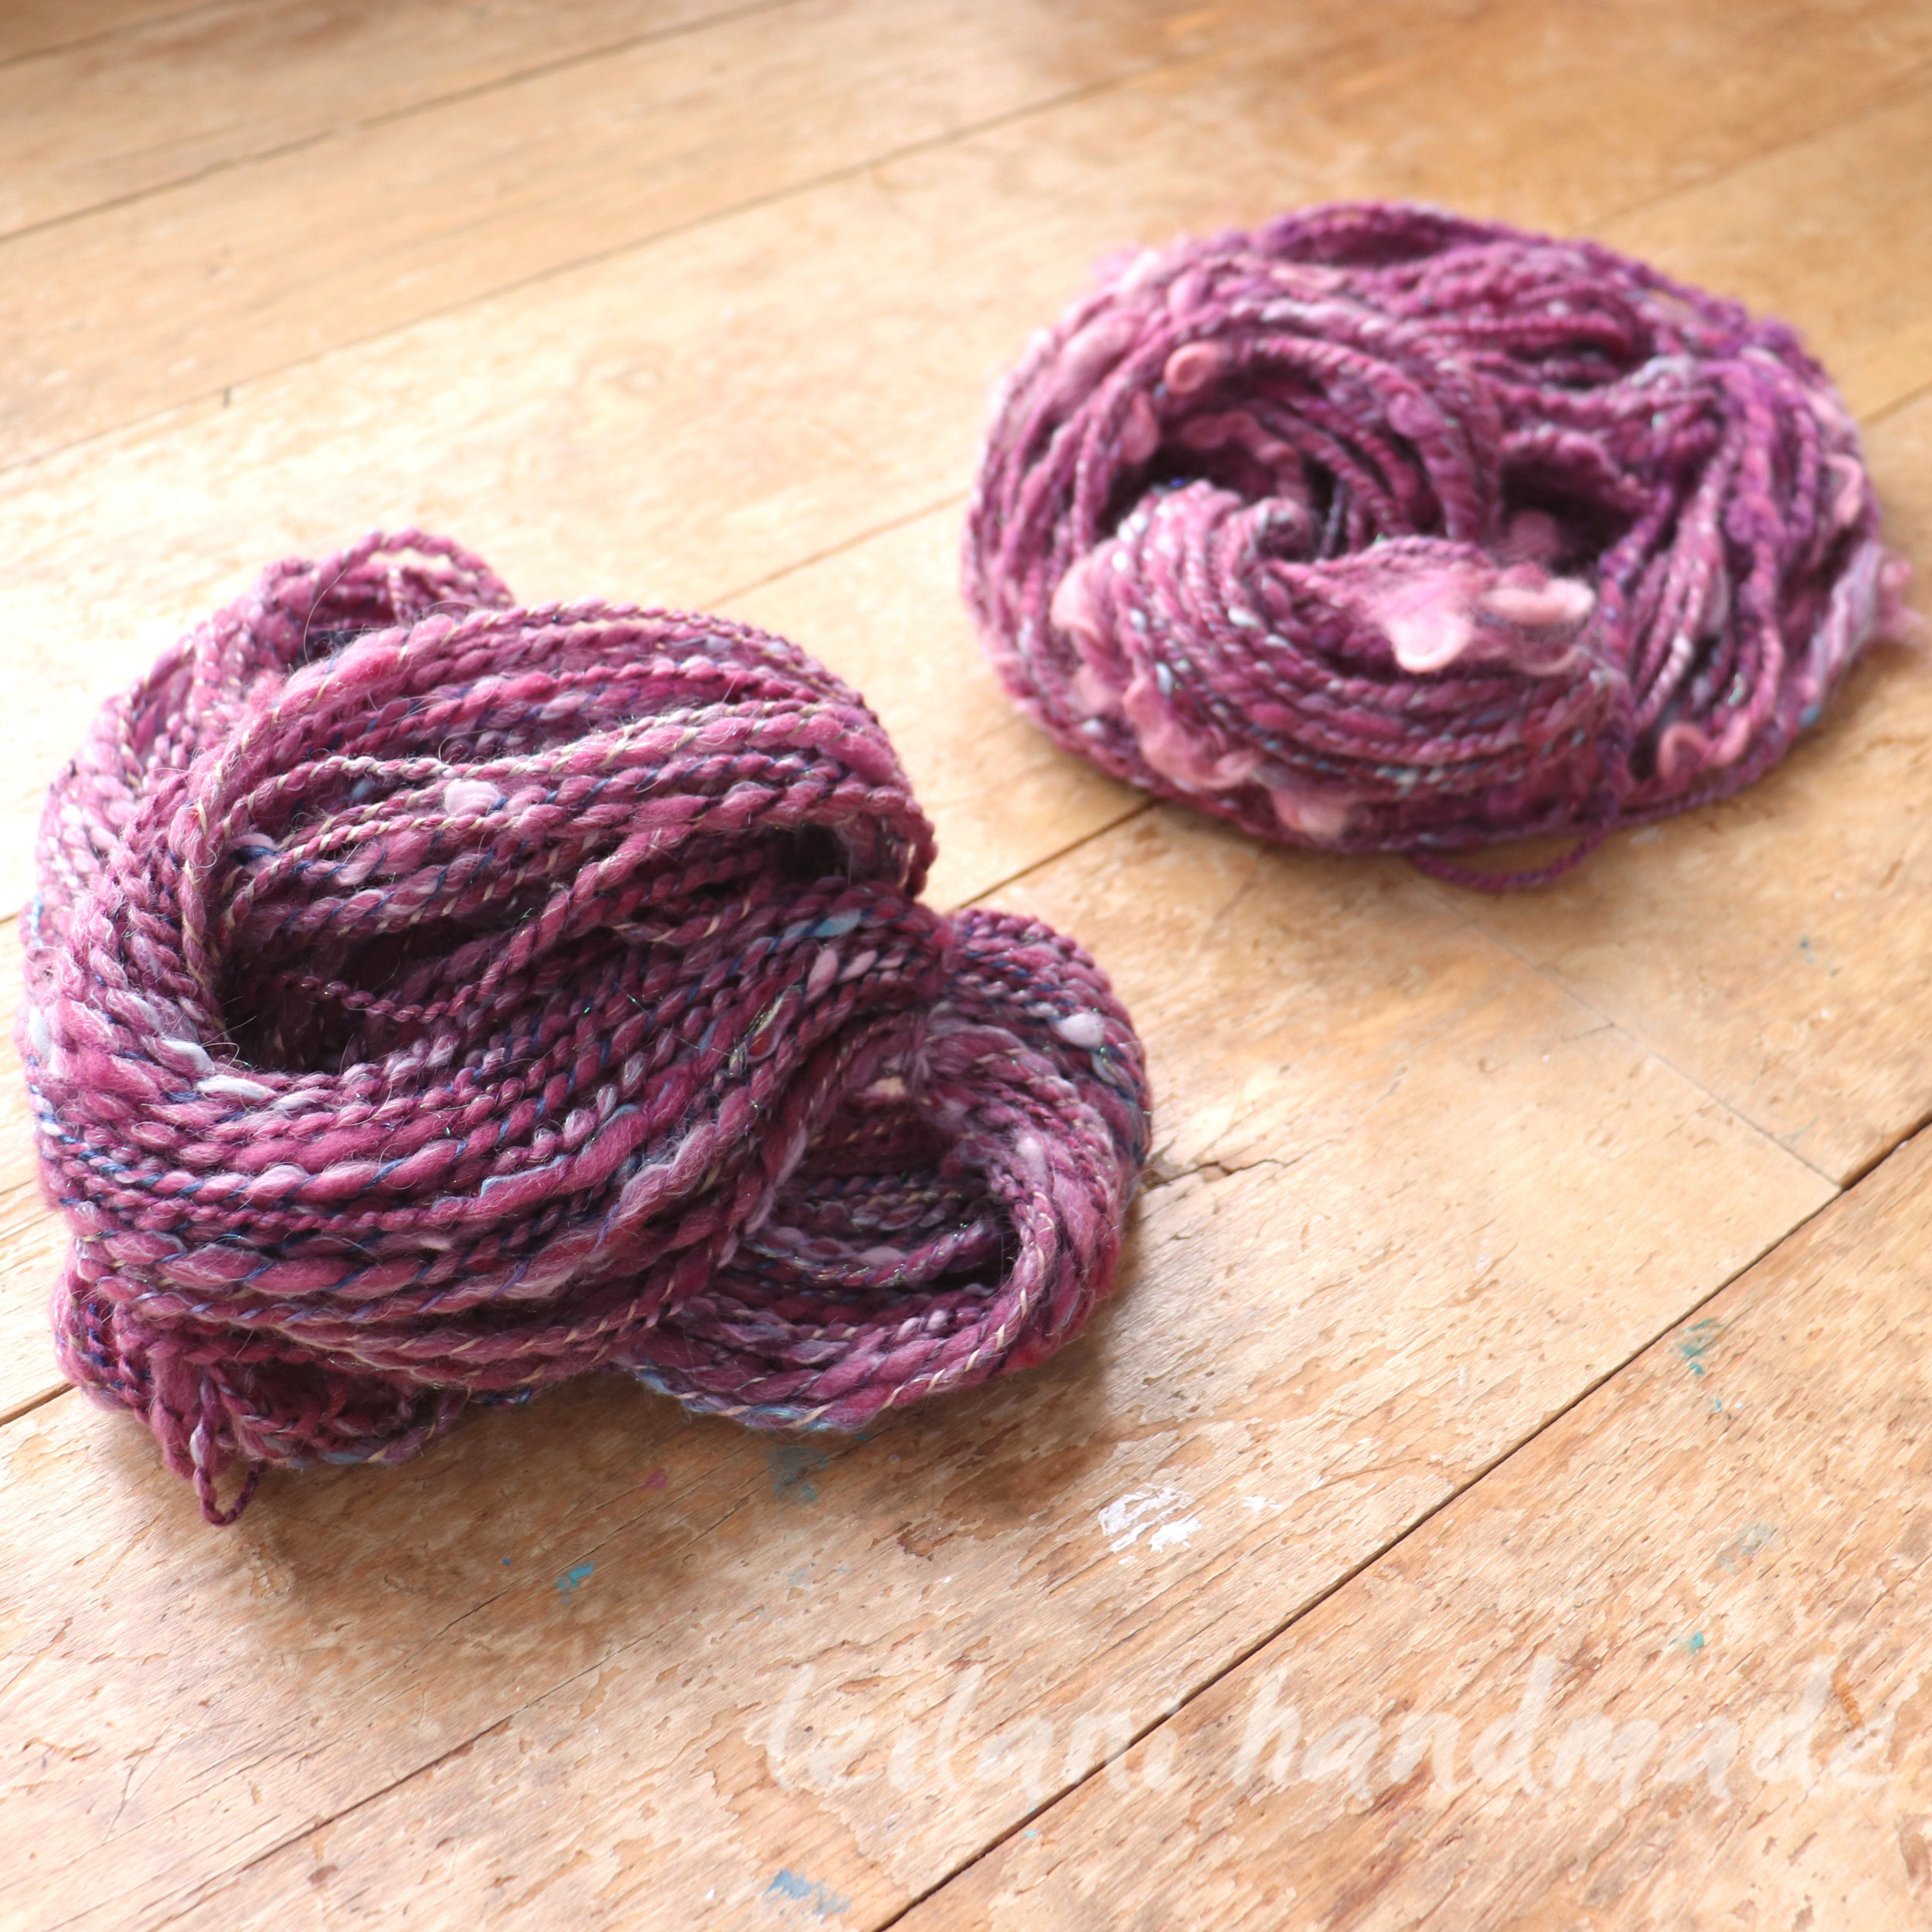
You can use a consistent fat singles (good practice; I still find these hard to keep consistent even after all these years of spinning) or a thick-and-thin singles, as shown below. This particular yarn was the first crepe yarn I attempted to spin, and as I explained in the video, it has problems. That said, it’s still a unique and fun yarn that I display in my studio.
My first ever bubble crepe. It does have some issues, but pretty neat-o nonetheless
The yarn below is my absolute favorite bubble crepe yarn. I spun a more consistent fat singles with this, but as you can see, it’s still not 100% consistent. I don’t think that deters from the yarn in any way, and it’s still a very well-done bubble crepe.
My favorite bubble crepe I’ve spun thus far
Letting go of the Compulsion of Being a Perfect Technical Spinner
In my humble opinion, as a self-taught spinner, it’s essential to step away from the obsession to get things technically correct all the time. Like most of us, I dove into spinning by reading books and studying videos, reading forums and blog posts. I was determined to do everything as technically proper as possible.
The problem with that is I grew to resent spinning. Not only that, but the opposite was happening. My spinning was getting worse and worse! So, in the case of all three of these yarns showcased, I was just going to go for it and see what happens with zero expectations.
I can’t say the yarn I spun for this video was my favorite. But it certainly is a nice weight, a good drape, super soft and possesses that perfect round yarn structure you get with these types of yarn.
We don’t learn or grow our crafty skills skills operating in the confines of “properness.” Being a rebel is how new techniques and styles are born. We create for fun, right?
The best advice I could give myself is to relax and enjoy the journey and ask myself at every stage, “What could be done to make this better next time?”
Above all, to hell with what anyone else thinks! I hope I’ve inspired you to try a new, possibly intimidating spinning technique.
Don’t forget, if you’d like to see a step-by-step how-to video on how I make a crepe yarn, be sure to leave me a comment here or over on YouTube. 🙂
Join me as I spin hand-dyed Targhee top roving into a 2-ply yarn using my electronic spinning “wheel,” AKA e-spinner. I spin the singles first and then ply, using joins where I decide to detach and reattach the singles when the color doesn’t match up just right. The yarn is finished via wet finishing and thwacking.
This video was made with the beginner or novice spinner in mind, or those curious to see how another spinner creates handspun yarn. I am a self-taught indie dyer and spinner with over 12 years of experience. I am by no means an “expert,” but someone passionate about the fiber arts who hopes to inspire others to take up the craft or expand their skill set without intimidation.
You may want to check out my post on How to Dye Yarn in a Crockpot. I hope to do a video in the near future of dyeing roving this way.
I filmed this video in the winter of 2023 – and I’m just getting around to finishing it, in the Fall of 2024. Better late than never, right?
The truth is when I filmed myself making this yarn, I wasn’t sure I was going to do anything with it. Last winter is when I was contemplating whether or not I wanted to make videos for the blog, so much of this was just me playing around with cameras and angles to see if I could get useable footage. All I can do is improve from here, right?? 🙂
Spinning Targhee Wool Roving from Start to Finish
I’ve subtitled the video, so feel free to watch with the sound off. 🙂
I’m still pressed for time so I don’t have the time to write a detailed blog post on this subject, but I am always happy to answer questions or support others in their spinning journey, as best as I can from a distance, anyway! So feel free to ask any questions to this seasoned but by no means perfect, or expert self-taught spinner. 🙂
Video Description
In this short video, I cover:
Different ways to split roving for spinning
Spinning two sets of singles and weighing them to see if I have an even amount on each bobbin
attaching the singles to the leader with a square knot
plying two singles together, with my advice for those getting started
how to do joins for reattaching yarn in the middle of plying
wrapping yarn onto a niddy noddy
how I tag/inventory my handspun yarn
wet setting my super fast way, great for small skeins
thwacking yarn
showing the final 2-ply yarn
This is not detailed instruction on how to do the above, but a quick example that will (hopefully) inspire you to continue spinning or to appreciate the art of spinning. 🙂
Thanks for joining me as I spin this hand-dyed targhee top. 🙂
Until next time…
My slowly growing Youtube Channel (If you like my content, I’d love for you to subscribe! :))
Setting Your Handspun Yarn is Just a Snap (or two, or three!) Away
Thus far, I’ve shared two variations on setting the twist of handspun yarn made with wool: wet-setting handspun yarn with thwacking and steam-setting handspun yarn. Today, I share the third and final way I set handspun. I call it snap setting, but I don’t know if that’s the official name.
It’s a type of wet setting, but instead of thwacking, you do a quick snap between your hands. I like this technique for yarn that is already pretty balanced and just needs a bit of encouragement to fall in line. (haha!)
Let’s face it: thwacking is therapy. 😉 It will always be my favorite way of setting handspun wool yarns. But snap setting is the perfect fast way to get the job done and get on with the day.
A Word of Caution
These techniques are my tried-and-true methods for setting the twist of wool yarns. I have not tested them thoroughly on vegetable fibers because I haven’t made a lot of yarn out of those types of fibers. Silk should not be thwacked (I learned this the hard way), and I doubt snap setting would be compatible either. Silk inclusions in wool yarns are just fine in my experience; it’s just not a good idea for 100% silk yarn. It loses its lustre.
How to Snap Set Handspun Yarn
Here’s a quick video of the process, a closer look at the spiral ply yarn and why I enjoy making this type of yarn
To Soak or Not to Soak
It’s customary to soak handspun yarn in warm to hot water as part of the setting process. I typically soak larger skeins of yarn or if they need a light cleaning.
For example, unless it’s filthy, I prefer to spin Alpaca fleece and wash it after the yarn is completed. The same goes for yarn I suspect might contain dye that will run (like red can do). But a simple rinse under hot tap water with a few pumps of TNA Soap (or Synthrapol or Blue Dawn dish detergent) does the trick for a small skein like this. It’s a resourceful and clever method that saves time and effort.
Rather than soaking the yarn in a sink full of hot, soapy water, I am wetting the skein under the tap and adding a bit of Synthrapol-like soap directly on the skein for setting the twist
I’m also usually doing several things at once, and the thought of soaking all these small skeins of yarn…well, what ends up happening is that they hang in the studio unset for months! So, this rapid method motivates me to move that yarn into the finished pile. In my opinion, it works just as well. I appreciate the time savings.
Water Conservation
Water conservation would be another reason to soak versus quickly wetting under the tap. We have a very deep well with lots of water at our disposal, not metered municipal water, so I can use water to my heart’s content. However, I’m still mindful of how much water I’m using. Running such a small skein under the tap will have a minimal impact on our water supply.
If water use is a concern, I recommend soaking several skeins at once in the sink. Tie them together so that they don’t become entangled.
Snap Setting
After your skein is well-soaked and you have gently squeezed out as much water as possible, it’s time to do the snap setting. Hold the yarn in both hands at either end of the skein, gently gripping inside the skein (think of a donut and gripping each side, or how you would tie off a skein at both ends).
Then, move your hands apart quickly, giving the yarn a good snap. Do this three or four times, preferably moving your hands to different positions on the skein so that most areas get a snap. You can see an example of what I mean in the video above.
This only takes seconds to do, and then you can hang it up to dry. Outside in the sunshine is always a nice choice, but if you must hang it indoors, choose a well-ventilated area and place a towel or pan underneath to catch any drips. You could gently squeeze out the water with a towel or cloth when you see it dripping.
Setting the twist of handspun yarn can be daunting, especially if we want to hurry up and use it! I hope this technique allows you to set yarn quickly and easily, especially if you get on a spinning tangent and the skeins are backing up. 😉
I’ve been plying yarn with a spinning wheel for 12+ years, and have mixed and matched fiber types before. But I was curious: What happens when you mix 10+ year old alpaca singles with a (fairly) newly spun Merino singles? Will I actually achieve a balanced yarn or just a hot mess?
Wow—what a transformation! When I started spinning—and more specifically, plying yarn—I would have assumed there was no hope for this twisted mess. Plying yarn with even these two different singles shows that you can successfully create a beautiful and usable yarn.
A Small Plying Experiment
I consider plying yarn not just a skill but an art form, so I’ve played around with different forms of plying many times in the past. Plying a balanced yarn, or chain plying yarn is up there among the techniques that spinners want to master. Have you ever wondered what happens if you mix two different fibers in the same yarn? I don’t mean blending before spinning, I mean one singles is one kind of fiber, plied to another singles of another type of fiber.
This past winter, I decided to spin this little skein of yarn to see what would happen. I have several storage bobbins with leftovers from past spinning projects. The leftover alpaca was a gorgeous natural black color that I obtained from the New Hampshire Sheep & Wool Festival circa 2013 (!!) and spun in 2013-2014. Yep, it’s a 10-year-old singles! Talk about resting!
As the color was a near-perfect match to some dyed Merino top that I had spun recently, I decided to ply them together to see the end result.
Unsurprisingly, it was a whirly, curly mess when I took it off the niddy noddy! But I had faith. It was nothing water, and a good thwack wouldn’t fix. The outcome was gorgeous, and I wish I had more.
What is a Storage Bobbin?
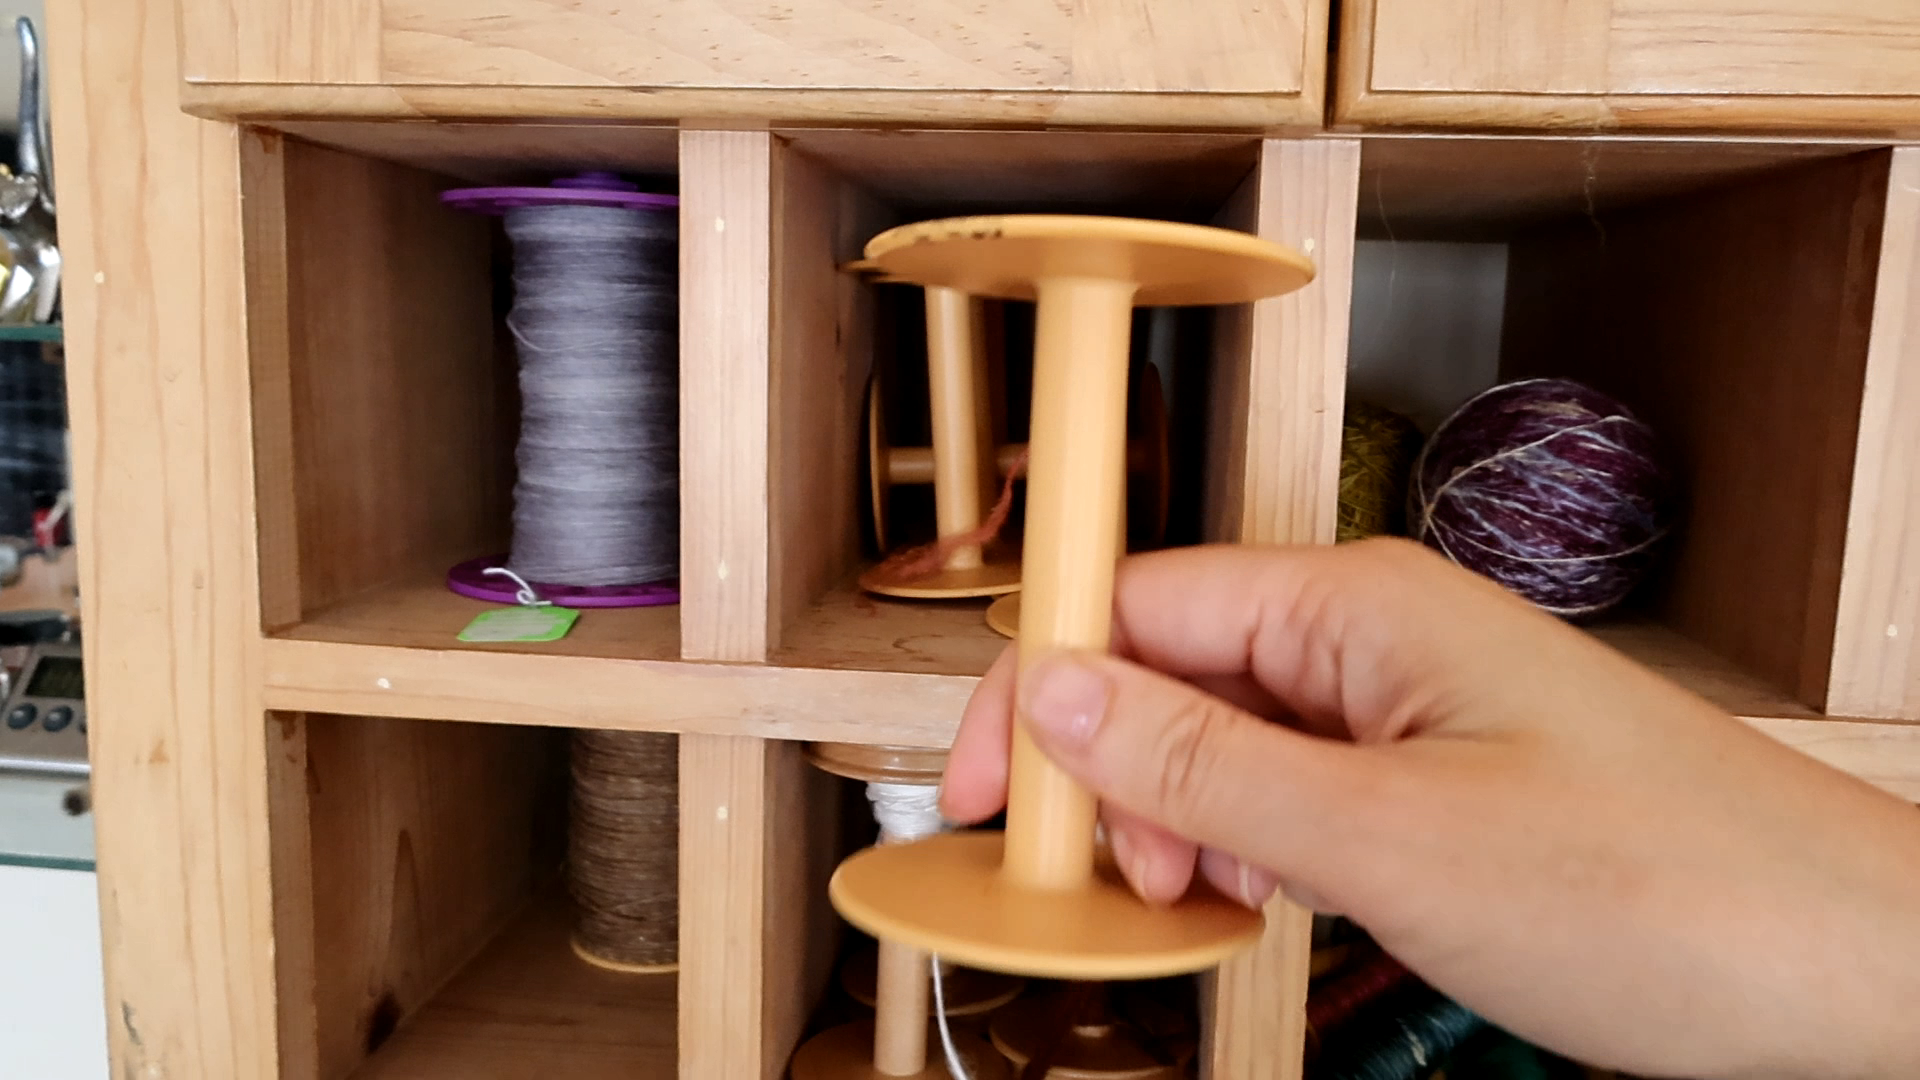
Storage bobbins, like the one shown, are used for winding off newly spun singles to even out the twist and for storage until ready to be plied into finished yarn. It is not advisable to store singles for extended periods, though it certainly isn’t the end of the world if you do
Storage bobbins are empty spools that store rewound singles after spinning. It helps even out the twist and gives them a place to rest before plying yarn. It is NOT advisable to leave your singles resting on bobbins for extended periods of time, especially not ten years! The longer your singles rest on the bobbin, the more relaxed the twist is, only to have that twist spring to life once wet. If you don’t consider this, you probably will not like the end result of your yarn.
It’s also important to wet set your yarn once spun. Imagine knitting with yarn made with well-rested singles and washing it for the first time. You’ll probably be dealing with quite a bit of shrinkage.
Believe it or not, I add more twist when plying well-rested (i.e., practically dead!) singles. Then, a wetting and thwack help redistribute that twist throughout the yarn, compensating for any unevenness.
Disclaimer: I am a self-taught spinner, I am not a technical spinner nor has anyone taught me the “proper” techniques. I prefer to learn by trial and error, and this is the method that works for me. Someone else will most likely tell you differently. I spin for enjoyment and find my own way in my craft. Now, with that out of the way…
Do I need Storage Bobbins?
Not necessarily. If you are only going to do small batch spinning, the three bobbins that came with your wheel may suffice. I usually have more than one project on the go, so I need storage bobbins. Mine are LeClerc brand, and they are larger bobbins used for weaving. I got them at a now-closed fiber store here in Canada and purchased a manual bobbin winder from LeClerc directly. I also found just the right size chuck for my drill to do it battery-powered.
I used to be adamant about re-winding my singles before plying. But between the time, the extra wear and tear on my shoulder, and the fact that my singles are always well rested before I get around to plying anyway, I only wind my singles onto storage bobbins if I am doing a large project or I have leftovers. If you are doing a lot of spinning, you may want to consider investing in storage bobbins. If you are using them solely for evening out and resting your singles, I find that as your skill grows and you become a better spinner, this step is not necessary. Just let it rest for 24 hours or so, and get plying. 🙂
How will I know my Yarn Has Enough Twist?
After you’ve been plying yarn for a while, you get more of a feel for how much twist, when, and where to add more. This is not a skill that anyone can teach you. Sure, someone can give you instruction, but from my experience, plying yarn successfully is something that you must feel.
My motto is: When in doubt, add more twist, then wet and thwack. 🙂 I know this will sound intimidating if you are starting to spin and have areas severely overtwisted. You know what? Give your singles a quick run through your wheel in the opposite direction before plying, minding those heavily twisted sections. I did this many times when I started spinning.
Plying Yarn Success! One singles Merino, one singles Alpaca = deliciously soft 2-ply yarn, even after one singles resting for 10 years!
I am so pleased with this yarn; I wish I had more of it! I love to experiment because it’s in those times that I end up with these little gems and gain knowledge. Spinning alpaca and merino separately and ply together: check! Success! I wish you could touch it through the internet. It’s a really nice, soft, bouncy yarn with a delicious twist!
If you want to read more of my posts about fiber arts topics, see this blog’s fiber arts/dyeing/spinning category. You can also access all the videos as I make them on my new YouTube channel, which will have links to the posts they were made for.
Thanks so much for checking out my little plying experiment. 🙂
One Method: Start to Finish with an Overspun Example
This month, I am continuing with my Fiber Arts Video series, this time about wet-setting handspun yarn. Last month, I gave an example of steam setting handspun yarn. However, wet setting is how I set most of my handspun. This example is for wool yarn.
Here are my steps for Setting Wool Handspun Yarn:
Prep yarn for its soak by tying off the skein in additional places to avoid tangling. I use ribbon or highway tape. If you choose to use yarn, be sure to use something that won’t felt to the skein, such as cotton
If you are dyeing more than one skein you can tie them together using the method above. Just make sure your sink is big enough to accommodate the amount of yarn for soaking
fill your sink (or tub, or basin) with hot tap water and add soap, such as Synthropol or blue Dawn dish detergent
Gently press the yarn into the hot water, and let soak for 20 or so minutes
Check the water. If it is clear from dye runoff and dirt, drain the water and rinse with the same temperature water
gently press and squeeze the water out of the skein(s) careful to not twist or tug
Take it outside for a good thwacking (optional)
Hang up to dry where there is good airflow
The Yarn
I spun a 2-ply merino roving top that I hand-dyed. There was a bit left over, so I decided to spin it with a grey singles I had spun quite awhile ago. I thought this would be a good example of an unbalanced yarn with extra twist, and how important wet setting is.
A Trial and Error Process
When I first started spinning, I would get dejected because the yarn would always have extra twist. So, I would ply looser, which doesn’t make for good yarn construction. Perplexed, I continued on, determined to get a properly balanced spun yarn. Two things I didn’t realize when I first started spinning:
Letting yarn rest on the bobbin for an extended period of time relaxes the twist
Wet-setting yarn will return that twist/energy into the singles
I’m self-taught, so no one told me this. Thus, I discovered all about twist and resting singles on my own! I’ve learned now to spin and ply much tighter than I thought necessary and to always set my yarn.
Soaking the Yarn
As I discussed in a previous blog post, you can steam-set yarn, and sometimes I do, but I always recommend wet-setting handspun for best results. It is an absolute must for unbalanced yarn/extra twist.
Here is the two skeins tied together and having a soak in soapy water for approximately 20 minutes.
Rinsing the Yarn
As there was no dye runoff in the water, I went ahead and rinsed the yarn carefully—no wringing or tugging/pulling. It’s not just about felting but about not overstretching the fibers. If you’ve ever hand-washed and dried a wool sweater, you get what I mean.
Thwacking
What is thwacking – and why do it?
I probably wouldn’t have bothered thwacking this yarn if it was just the main skein since it was pretty balanced to begin with. Maybe just a quick snap between my hands, if that.
But I wanted to give an example of thwacking in the video, and since the small skein warrants a good thwack and is tied to the big one, I went ahead and gave it a good crack on the side of the house. My goodness. It’s so satisfying!
To Thwack or Not to Thwack
There are many opinions on why and when to thwack yarn, and even if you should. I started out making chunky textured art yarns, so thwacking was pretty much a given with those. It helps open the fibers and gives the yarn strength.
Since I started with thwacking as my foundation, I continued to do so, learning that some handspun yarns don’t take to it well. Take silk, for instance. It’s a sleek yarn that looks best when laid flat, and whacking it only makes the fibers go willy-nilly, leaving the yarn looking dull and less lustrous. So, I steam my silk handspun now.
I still like how my handspun wool yarns look after a good whacking. The plies seem to line up, and the yarn itself drapes nicely.
I usually opt not to thwack a wool yarn to save time when it is already pretty balanced.
Drying the Yarn
It’s June, and I have some roving outside drying in the sunshine as I type this. But this yarn was set in the winter, so I hung it up to dry inside. My studio is equipped with a heat pump, so hanging it here is the best option for me. Bathrooms never have enough airflow, from my experience, but if you need to use your shower to dry your yarn, be sure to run the fan to get some air circulating.
The yarn looks nice and balanced now, but it’s weighted down with water. Did I achieve balance on that extra skein?
The Final Product
Here’s the finished product. There is still a very slight twist in the unbalanced bonus skein, but this is miles better than what it started out as. I wouldn’t hesitate to use this yarn.
This is why it’s important to set your handspun. Don’t judge it until you do. I don’t find the feeling of satisfaction or the beauty in the yarn is revealed until it’s set and dry!
Thanks for Watching/Reading
I hope this quick video and post helps if you have any questions about wet setting yarn. I’m committed to making short videos that would be of interest to up-and-coming fiber artists.
Why I’m Sharing My Experience
I’m a self-taught spinner, so what I know is trial and error. I’m sure there are others out there who have a more scientific explanation for it all, but my goal in sharing my experiences is to encourage others to experiment and figure out what works for them.
I prefer to figure things out on my own rather than be told the “proper” way to do things. This is the only way that I have found my way in my craft, and made me passionate to keep learning.
Have you ever wondered if there is a quicker or easier way to set yarn after spinning? I usually get on a spinning tangent and will have several skeins of yarn hanging in my studio before I get around to setting—and then I have several to do at once, which can be time-consuming.
There is a much quicker way, though my preference will always be wet setting for most of my handspun yarn.
Best Choices for Steam Setting
Once in a while, I will have a skein that is a good candidate for setting with steam. Silk is one example of handspun yarn I like to steam set. Art yarn that isn’t going to be used in a garment that would be concerning for shrinking would be another.
Wool is especially prone to shrinking or springing up once the twist is set. The more springy the finished yarn, the more the skein shrank up in the setting process.
In the following short video, I show just how quickly a freshly spun spiral-ply yarn transforms into a beautiful finished product in a matter of minutes. I’ve subtitled the video to make it easier to understand.
If you’d rather read than watch, skip below. I promise the video is not very long. I know I am stretched for time, and I’m sure you are, too. 🙂
In the video, I demonstrate the process using freshly spun Targhee wool and silk spiral-ply yarn. The technique is particularly effective for yarns with extra twist. You’ll see just how quickly the yarn relaxes once exposed to steam.
Setting Yarn with a Garment Steamer
I happen to have a garment steamer, but you could also use an iron on the steam setting. I also use my garment steamer to block my knitting. I normally wet-set my yarn but occasionally use steam to set the twist.
You Should Wet Set Your Yarn
I know this is a post about steam-setting yarn, but I still encourage you to wet-set your yarn. If you soak your handspun with a bit of dish soap or Sythrapol, you’ll be sure to release any excess dirt or oils from the fiber or simply from your hands spinning it. If there is any residual dye, it will also come out in this process.
This also will deal with any shrinkage before you start your knitting project, as some wools will spring up significantly when the twist is set.
I’ll have to make a video on how I wet set my yarn, but for now, back to the steam setting….
these kinks and extra twists will soon fall away once steamed
This particular yarn is a textured art yarn, so I won’t be using it for a piece of clothing where shrinking would be an issue. Right now, I’m thinking of using it as the weft of a woven scarf, but I may change my mind once I sit down to use it.
You can see how the extra twists and kinks disappear almost instantly with the steam. I’ll flip the skein so the inside is out and continue steaming.
The Final Product
I’ve thoroughly steamed this yarn inside and out and repeated this process twice just to be sure. Now, here is a closeup of the now-dry yarn. The other bonus of steaming is that it dries much quicker than wet setting. Look at those spirals!
I adore these spirals
Spiral plying is one of my favorite ways to spin when I want to relax and do something fun (spinning-wise, anyway!). I wasn’t going for an actual thick and thin yarn; I was just letting the fiber do as it pleased while I watched TV.
The thicker ply is a Targhee sheep wool top that started out bright yellow, and I over-dyed grey. I dyed it initially bright yellow for a spinning project, then changed my mind at the last minute and used another roving in my stash instead (this happens a lot, haha!).
I love how the grey toned down the color, making a golden-green color similar to golden pear. Moments like these remind me why I love spinning & dyeing fiber.
I’ll chat about the construction and inspiration for this yarn in another video. Hopefully, I’ll have decided what to make with it by then. I’m notorious for making yarn but having it sit around due to my indecision on what to make. It’s so soft and squishy that I keep it around to admire for far too long.
Will you give setting yarn with steam a try? Have you tried it? I love the instant gratification, but for the most part, the best way is not to take shortcuts and wet set handspun yarn.
My Method for Successful Dyeing with little to no fuss
When dyeing wool yarn or fiber, some colors can be more difficult than others. Two colors that can be challenging to fully exhaust are red and turquoise. The other that took me a while to dye successfully is black.
When dyeing basic black, we can erroneously end up with a shade of grey, possibly because not enough dye was used or all the dye wasn’t exhausted into the yarn or fiber. Black is a spectrum of all shades, so sometimes the dominant colors will exhaust fully but leave other hues behind. For me, the best way to dye a color like black is low and slow. My slow dye method uses a crockpot. It works well for me every single time. Like most things in life, all good things come to those who wait.
I like this method because it’s easy for even new dyers to achieve successfully the first time. Plus, there’s no pre-mixing or need for pre-measuring ingredients ahead of time—just time and patience.
New to Making Videos
I’ve been trying my hand at making little instructional videos for the fiber and spinning community, and here’s another installment all about dyeing natural yarn black. In this case, I use a handspun Corriedale that was not set beforehand. I like to save time whenever possible, and the dyeing process will set the yarn since I must soak it anyway.
My fiber arts experience spans 12+ years, and being self-taught I feel the need to pass along my knowledge to support others in their fiber arts journey.
This particular video I decided to do without narrating, but added text on the screen to explain what I am doing. I’m trying out different styles of videos, and I liked leaving in the sounds involved with dyeing and just letting the video speak for itself.
Slow Dyeing
My preferred style of dyeing yarn and fiber in my home studio is “Slow Dyeing.” It involves a crockpot and time. This method works for me because I can pretty much set it and forget it. Instead of fussing over a dye pot, I can set the yarn in the dye and check on it whenever possible. For a busy maker mom like me, this method is great.
The only downside is you can’t be in a hurry. With patience, however, you get a perfectly dyed, fully exhausted dye pot with little to no setup. No (gasp!) math required. Just some basic knowledge of how much dye you should use for the size of skein/fiber dyed, the addition of citric acid, and even heat throughout.
The good news is that you can adjust as you go, so as long as you are patient, you should have perfectly dyed yarn.
In the video, I added the weight and size of the yarn I am dyeing basic black. Every brand of dye will differ, but this should give you a good idea of how much dye to use for 3.7oz of yarn or fiber.
What is your favorite method for dyeing basic black on wool yarn? Do you use a crockpot, steam in the oven or microwave, or a traditional dye pot? Maybe you find my method totally ridiculous, and that’s okay! Everyone needs to find the best way of honing their craft. I hope you enjoy the video, whether it inspires you or not. 🙂
A couple of years ago, I wrote a blog post on scouring a raw sheep fleece step by step. The videos for the post were shot on my cell phone and posted in sections with explanations in between. I decided to combine all these small videos for those who want to run through them quickly. I also added a little update to the end.
Come with Me as I Scour Sheep Fleece
Scouring sheep fleece can be backbreaking or easy peasy if you are willing to wait. I have a bad shoulder from years of crafting, including skirting and washing sheep fleece. I swore I wouldn’t ever scour wool again, until I saw this half- fleece at a local fiber festival. It was local, pretty much clear of VM (vegetable matter) and delightfully curly. I couldn’t say no! This is my lazy scouring method over several days.
If you want to see the original blog post, with more detail, you can find it here.
Happy to answer any questions or connect with other fiber artists and enthusiasts. 🙂
If you’re new here, let me introduce myself. Hi! I’m Leilani. I am a wife, mother, autodidact, and jewelry and fiber artist. I’ve been creating jewelry since the late 90s/early 2000s and started spinning and dyeing fiber 12+ years ago. I love to express myself through color and share my creations with others who will hopefully feel the love and attention put into every handmade item.
My learning style is to – jump in there and figure it out – most of the time with limited knowledge. I like to have some personal experience with a skill before honing it or learning to do it “the proper” way.
This post is an example of one way you can easily start dyeing yarn at home with little experience. To see a tour of the items I have in my studio for dyeing yarn and fiber (most picked up on sale or second-hand/repurposed), check out my Dye Studio Tour post/video.
Sharing My Experience
The following footage was filmed to (hopefully) inspire others to take the leap and try a skill like dyeing yarn. I wanted to show how easy it is without fuss, pre-mixing/measuring (math!), or expectations. For me, the magic happens just by trying things out for size, and I want to encourage others to do the same because the intimidation of failure often gets in the way.
Hopefully, in all its imperfection, you will get something out of it or at least know more about me as a maker. 🙂
Below is the video transcript and some extra notes in case you’d rather read than watch.
Dyeing Commercial Yarn
I dyed this superwash Merino yarn at home with a crockpot in stages over several days. It’s my easy, fuss-free method of dyeing. Here’s a quick run-through of how, step-by-step.
Pre-Dyeing Prep
First off, prep your yarn for dyeing. I usually dye two skeins at a time and loosely tie them together. Even if you are dyeing just one skein, it is recommended that you tie it off in at least two additional places to keep the yarn from tangling.
Additional notes: What I use to add ties to my skeins is a product called highway tape, or as we call it, marker tape. It’s used to mark a path through the woods or to mark trees to be removed (among other uses). I bought mine at a local farm feed store. You could also use ribbon. I advise against using pieces of scrap yarn since you’ll want something that will be easy to find and remove later and also won’t felt or tangle with your skein. Be sure to tie it loosely so that the dye can flow behind.
I also label my yarn by type, size, and length with fade-resistant jewelry repair cleaning tags. As I also make jewelry, these were a no-brainer to use.
Additional notes: these tags can be found at any jewelry supply store or online. They are made of tough material, almost like woven fabric, so they don’t disintegrate in hot water or with a cleaning solution. Therefore, they also work well in the dye pot. I use a fine-tip Sharpie marker to write the info. If you are doing one skein at a time, a notebook where you write the details of each skein would suffice. Do take notes. Don’t rely on remembering; believe me, you won’t. 😉
Another thing I have on hand is a skein of yarn ready to absorb any extra dye from the dye pot, should there be any. I don’t like to waste any product, and I’ve created new color combos this way, as the dye added is usually from more than one project.
Additional notes: I use a cheaper commercial yarn or my own 2 and 3-ply handspun yarn that I’ve spun natural color, undyed. I like to re-tie these skeins longer to get more color on each. This is also how you get a self-striping yarn pattern. You can use two chairs, spread the desired distance apart, and wrap the yarn around both. Don’t forget to re-tie it off at both ends. I rinse every section after soaking up any unexhausted dye and then hang it up to dry/continue dyeing the next project where there is too much dye in the dye pot.
Superwash Merino is a wonderful choice for yarn dyeing since it doesn’t felt. My equipment of choice for this process is a crockpot – dedicated for dyeing only, of course. I’ve already added hot water to the crockpot, and I’ll go ahead and add the dye next.
Dyeing the Yarn Section by Section: Section One
After mixing in half a tbsp of powdered dye, I dipped a section of the yarn into the crockpot. I’m using Country Classics in the color gold, which does not need the addition of citric acid or vinegar. I also didn’t pre-soak this yarn, as I will probably have to dye it in stages over the next couple of days.
Additional notes: I don’t always have the dedicated time to dye, or something will come up and interrupt my project. For that reason, I normally choose not to pre-soak the yarn so that I can simply rinse the dyed section and set it aside until the next day. There are pros and cons to not pre-soaking. The pros are obviously convenience and speed. The downside is that the color may not distribute evenly, though this is design feature that I like.
Dyeing Section Two
The gold section is done, and now I have added approx. 2 tbsp of citric acid and ¼ tsp jacquard teal to the crockpot and dipped in another section. As you can see, the water is clear, which means the dye has fully exhausted and the color has completely transferred to the yarn.
Additional notes: I add powdered citric acid and powdered dye straight to the hot water of the crockpot without pre-mixing. I stir both until dissolved, then add my yarn.
Grabbing some rubber gloves to protect my hands, I cautiously remove the yarn from the crockpot and gently squeeze out the water. Teal is one of my favorite colors. Remember, this is two skeins of yarn tied together, so I will have two practically identically dyed skeins when this is done.
Here’s a closer look at the two sections dyed:
Dyeing the final Section
Alright, let’s do this final section of color. I’ve already added approximately 2 tbsp citric acid and ¼ tsp of G&S dye in the color burgundy to a bit of warm water in the crockpot while the bulk of the water boils. After adding the boiled water to the crockpot, I stir the mixture to dissolve the powdered dye and citric acid. I make sure to be careful not to splash hot dye water on me and not breathe in the powdered dye while stirring. Protecting your skin and clothes with gloves, goggles, a mask, and an apron whenever possible is always a good idea. I make sure to be really careful if I am not donning the full protective gear.
Now to dip the final section of bare yarn into the crockpot, and we’ll let it soak for a few minutes. I hang the two other sections already dyed to the side of the crockpot and move my rectangular crockpot closer to catch any drips.
After a few minutes, I check on how the color is developing. Using a spoon, I’ll gently press the yarn into the dye and shift it around in the pot to distribute the color more evenly.
Additional notes: I don’t keep track of the amount of time each section is in the crockpot. Usually, I do other tasks and check on it when it is convenient for me to do so. If I’m impatient, I check it every 10-15 minutes. But in reality, a good 30 to 40 minutes is usually needed for the color to develop, if not longer. Some colors, such as black, need hours in the crockpot to properly exhaust. This is an easy method, not a fast one. But it suits me because I can finish other tasks while waiting. Note that every crockpot (slow cooker) is different. Therefore, times will vary.
Shortcuts in Dyeing
You’ve probably heard that you need to pre-mix your dye into a liquid concentrate and pre-soak your yarn in a soap like synthrapol to open up the fibers and get it prepped for dyeing. Although this is advisable, I prefer to take a LOT of shortcuts when dyeing yarn. It’s partially due to saving time but mostly because it’s part of my creative process to let things roll and see what happens. I take detailed notes as I go, just in case I want to replicate the outcome.
Also, I find that once the dyed yarn is dry, if I don’t like the color then there is an opportunity to over dye to intensify the color or change the hue. You can come up with some unique colors this way. But more about that later.
I mainly dye fibers for spinning, but once in a while, I like to dye commercial yarn. Although I knit, crochet, and do some simple weaving, I prefer dyeing or spinning. When I get on a dyeing or spinning tangent, I end up with a backlog of yarn. So, I list those for sale on my website.
Final removal from Crockpot and Rinsing
Let’s remove this section now and see how it looks. Once again, I gently squeeze out the water with my rubber gloves. You don’t have to remove all the hot water, just enough that it doesn’t drip and scald you while getting it over to the sink for the final rinse.
Time to fill the sink to rinse our newly dyed yarn. This small bar sink came equipped in this space that I now call my studio. It’s a working sink that has seen a lot of art over the years – hence all the splattered paint. Don’t worry; it won’t come off on the yarn.
I’ll let this sit for a few minutes, then come back and check if any dye has been released from the fiber. I’ll add Synthrapol in a second rinse if the water is not clear after this soak. Synthrapol is a type of soap used for prepping fibers for dyeing or removing dye particles afterward. If you don’t have Synthrapol, you can use Blue Dawn dish soap.
The water appears to remain clear, so I think it’s safe to get this drained and hung outside to dry. Freshly dyed yarn will be the most vibrant, and the color will mute once dry. This color looks great and the dye has exhausted fully, but I can’t be so sure I’ll be happy with the results until I see the skeins completely dry.
After draining the water, I give it a gentle squeeze, careful not to over-agitate. Superwash yarns do not felt. But I still like to be careful so they don’t get tangled. I have managed to tangle yarn, even when tied off carefully.
Further Drying: Going for a Spin
Now for the spin cycle. A salad spinner has been an incredibly useful tool in the studio; who knew? Think of it as a mini-washing machine, spinning out the excess water. I tend to pump my yarn and fiber through the salad spinner 3 times. By the third time there is significantly less water and it then can be hung up to dry. I bought this spinner 40% off after Christmas online several years ago. You can see the huge crack in it from being pumped one too many times.
The Final Product
So I have a secret: these are not the original colors! Once dry I found the color to be a bit too dull for my liking, so I over-dyed each area. Unfortunately, I didn’t capture the process on camera, but the original gold section got over-dyed with 1 tbsp of grasshopper, the teal section with ¼ tsp more teal, and the burgundy overdyed with 1 tsp. magenta. Now, this yarn is vibrant and saturated with color, and most importantly, I’m happy with it.
Additional notes: It’s worsted weight, so this set has many knitting and crochet possibilities. I decided to list these on the website if you are interested in giving them a new home. I don’t seem to have enough time to keep up with all the yarn I make/dye. 🙂
Here I am with the finished product:
You may notice, especially in the teal section, that the color is of an uneven saturation.
I intentionally dye my yarn this way because I like how it knits up with darker and lighter variations within the same color. I think it looks more interesting than the usual even saturation you see with commercial yarn.
If you wanted a more solid color, you would need to soak your yarn beforehand, preferably with a product like Synthropol to open up the fibers, and then add salt to the dye bath. This will even out the distribution of the color to your yarn and not give so much of a mottled, uneven effect. You may also have to use more dye.
Your Turn to Play
I hope this inspires you to experiment with dyeing wool yarn with a crockpot. Remember, you don’t have to get it right the first time; tweaks can always be made.
I’d love to hear from you if you have any questions or suggestions for future videos.
The fantastic transformation: clean vs. dirty sheep wool. This is my process for scouring sheep fleece if you’ve ever wanted to give it a try
An Unexpected Project
A few weeks ago, I attended the 100 Mile Food & Fibre Festival in Billtown, Nova Scotia. I swore I would not buy any more raw fleece. I have so much unspun fiber.
But, after checking out the different vendors, I could not resist a half fleece from Ambleside Farm in Petite Riviere, Nova Scotia. Besides gorgeous fleece, it was nice to make acquaintance with someone who also has attended wool shows in the US (like Rhinebeck…oh, how I miss you, Rhinebeck!).
Why Process Raw Fleece
There is something lovely and reverent about taking a raw fleece and turning it into a wearable garment. Initially, I bought raw fleece for the sheer economic benefit: I get all that wool at a discounted price, and all I have to do is throw some elbow grease into it!
Sometimes a little elbow grease turns into a lot. Processing fleece by hand can feel like a back-breaking endeavor. I’ve learned my own do’s and don’ts over the years of trial and error fleece scouring. It will vary from person to person, but here is my process, step by step.
I decided to film my process of scouring. It’s easier to show than describe, and I’m a visual person who appreciates seeing things happen in real time.
This is crudely filmed with my cell phone for educational purposes. Please excuse my mumbling/fast-talking… I’m not comfortable talking to myself out loud – HA! I did not edit these videos but subtitled them, so you can understand me better.
Step 1: First Soak
Sheep fleece must be scoured to remove dirt and lanolin, AKA wool wax. The sebaceous glands secrete lanolin and helps waterproof the fleece for the sheep. Raw wool has a delightful pungent “barn-y” smell which I like…and my cats adore! It tends to keep this smell mildly even after washing, but I don’t find that it lingers after being transformed into yarn.
In Summary:
Fill plastic bins with hot water to soak the wool
add a de-greaser. The most popular cost-effective product for scouring fleece is blue Dawn (I kick it up a notch by adding Simple Green)
start adding the unwashed wool, careful not to over fill the bins
gently press down on the fiber to encourage the release of dirt.
don’t overly manipulate the wool so not to encourage felting
let soak 24 hours
How Much Soap?
I don’t measure the amount of soap degreaser I add. It depends on how dirty the fleece is. In this instance, the wool wasn’t too dirty so I squirted in some Dawn and added a splash of Simple Green. I wish I could be more specific, but it’s really by feel. If your fiber is not getting clean, add more soap in the next water change.
Why I chose this Fleece
This particular bag of fleece was super clean. It also had a uniform crimp, a nice feel in hand, and a combo I had never spun before: Romney, Corriedale, and BFL (Blue-faced Leicester). I figured it would be a breeze to scour.
As mentioned in the video, Simple Green and Blue Dawn are my fave products for scouring. It’s cost-effective and readily available. There are some amazing scouring products out there specifically for wool, and they work well, but they are on the pricey side (yes, I’m cheap). Plus I have to order it rather than pick it up at the local hardware or grocery store.
Step 2: Rinse and Repeat
In Summary:
24 hours later
You see oily lanolin residue floating at the top of the water
Drain & refill bins (away from septic whenever possible)
I’m Cautious With Septic Systems
When I lived in town, I never gave much thought to dumping the dirty water down the drain. Then we moved to the country and I started to question whether I should be dumping this greasy water down the drain. I’m unsure if lanolin would build up in your pipes over time like cooking grease, but I’d rather not take the chance. I empty the bins in a discreet area on our property away from the house, just in case.
In Summary:
The fleece is back in for a soak and already you’ll notice the water has become clearer compared to the first soak
It’s not necessary to leave the fleece to soak for 24-hour periods
You could change the water more frequently, but this is what works best for my time schedule
How Many Soaks?
Your fleece will get cleaner with each water change. How many times will depend on how dirty the wool is.
In Summary:
The fleece soaked for 48 hours and then drained
I placed it on a clean part of the lawn and rinsed it with the hose
A slight bit of oily residue floating on top in the water this time
Feel very little oil when touched
Will attempt a final soak
Can repeat if needed
When the water looks relatively clean and the wool feels fairly clean you can prepare your fleece for its final soak.
In Summary:
I spread the fleece out on the deck for inspection
It feels pretty much clean at this point
I contemplated what I should make with it
Currently thinking I should spin it into an art yarn, to preserve the gorgeous crimp
Will make an upcoming video on the process of making yarn with this fleece
For the final soak, I added a bit of vinegar to the hot water to remove any soap residue
Fleece will feel gummy (sticky) if the soap residue is not removed
Gummy wool is hard to work with
I don’t mind a bit of lanolin in my fleece before spinning
Don’t forget the Vinegar
Adding a bit of vinegar to the water for the final soak is important to make sure all the soap residue is removed. Just like adding the Dawn and Simple Green, I don’t measure. A splash of vinegar will do. Remember you can always repeat this step if you still notice any soapy residue in your fiber.
In Summary:
After the final soak, I laid the fleece out on the lawn to dry a bit in the sunshine
Moki checking out the newly washed sheep fleece
Time for Drying
After the sun disappeared for the day, I brought the fleece inside to prep for the drying racks. I ran small amounts at a time through the salad spinner to remove excess water. A salad spinner is a dedicated tool in my studio. I use it a lot: even for freshly dyed yarn to spin out extra water before hanging it up to dry. I purchased mine after Christmas a few years back for 40% off, so keep watching for those sales!
In Summary:
I placed the fleece on the drying racks set up in my basement
these racks are repurposed merchandise racks obtained for free
Will leave for a few days flipping ever so often
could run a dehumidifier or add a heat dish if need be
Clever and Free Drying racks
If you are Canadian, you will remember the popular department store chain, Zellers. When it closed several years ago, we snagged these merchandise racks for free. Our basement has pegboard already installed so they hang off pegs (also from Zellers). These racks have gotten a lot of use over the years. I’ve even used them outside for drying fiber in the summer months. They will rust over time if left outside, however. It’s always great to find inexpensive tools and you can’t beat free!
My washed fleece from a sheep named Lucy. Look at that crimp & curl! Thank you, Lucy
Do’s and Don’ts when purchasing a raw fleece
DO decide what you would like to do with the fleece once cleaned, what breeds you would like to check out, and your budget. It is easy to get overwhelmed if you don’t have a plan, esp at a large wool show or fiber festival.
DO be adventurous and try new fiber breeds. If you are like me and want to work with as many breeds as possible, then the budget is all that needs considering before shopping
DO ask questions. You can usually tell how the animals are treated by getting to know the producer. Some farms breed sheep for both meat and fiber, so keep that in mind if you don’t agree with meat eating
DON’T buy a fleece that is not well-skirted. If there is a ton of VM (vegetable matter), dirt/mud, or poo, it’s best to skip this bag. The more dirty a fleece is, the cheaper it tends to be, but remember this means more work for you (and a lot more discarded unusable fiber)
DO take a look at the crimp: are they even in size/length? Is the crimp appealing to you?
DON’T buy a fleece where there are broken locks – and/or evidence of lice
DO check for the bag over for second cuts, which happens when the shearer goes over an area more than once.
DON’T buy a bag of fleece with too many second cuts. Those shorter cuts are a pain to pick out and not good for spinning.
DON’T buy fleece that appears to be matted or otherwise unhealthy
DO purchase a fleece that you like the color, crimp, feel, and price of!
A Note on Free Fleece
I’ve been given free raw wool in the past. But now that I’ve picked and scoured many a fleece I would probably say no to any incredibly dirty ones. For the reasons stated above, it is a tedious job. Also to keep in mind, hobby farmers don’t always produce a healthy fleece, and meat breeders are not concerned with the quality of fiber. So you may end up with a lot of discarded, unusable wool. Not a great return for all that work.
Keep in mind alpaca does not contain lanolin in their fiber so that’s usually an easy one to work with. I’ll do a separate post about alpaca fiber in the future.
If someone asks for a product in return for the free raw fleece (eg. just make me a sweater), I would caution against this. It really depends on how much usable wool you get and people are often unaware of how much yarn is needed for such a product.
Browse for yarn inspiration
Looking for some handspun yarn inspiration? You can check out my handspun yarn section to see some of the skeins I’ve made in the past. I’ll be blogging about the progression of processing this fleece in the future.
Scouring fleece does not have to be a daunting task. Know what to look for, and trust your gut. Be sure to have fun, and I’m happy to answer questions or hear your comments. 🙂
My latest hand dyed cotton yarns drying in the autumn air
Last week I was dyeing commercial (aka store bought) cotton yarn in the studio, to add to my existing stash. It occurred to me that I have not seen many blog posts on the topic of dyeing cotton yarn, especially if you want to achieve vibrant, rich colors.
I’m a self taught (indie) dyer so I thought my trial and error experiences would benefit others. The following info is from my own personal experience with dyeing cotton, and should only be taken as opinion. Someone else may have success with other methods, or disagree with my methodology.
Over the years I have come across many posts and videos on dyeing wool yarn, but not so much with cotton yarn. If I do find a post or video, the colors achieved tend to be very muted or wash out quickly, which was my experience early on. This is a compilation of tips that I found helped me get vibrant, lasting color.
Currently I am going through mill ends of cotton, because you can buy these relatively cheap, and the odd knot in the hank doesn’t bother me. You can often get cotton yarn on sale at the local arts and craft store, as well. I re-skein them into smaller yardage as I don’t need large amounts of one color for dishcloths.
I have done a bit of cotton spinning. It’s challenging for me since it is such a short stapled fiber, but I do love the softness of the finished product. We’ll leave spinning and dyeing cotton fiber for another day.
Type of Dye Used
I am currently using MX dyes, which is a fiber reactive dye for cotton or cellulose fibers. At first I used packets of Dylon dye from the fabric store as I didn’t expect to get into dyeing cotton as much as I do. I found they worked just fine. The larger containers of MX Dye is more cost effective for me now. I purchase MX dyes from G&S Dye in Toronto.
Another learning curve I hope to tackle in the future is dyeing cotton yarn with natural dyes, but for now the synthetic stuff will do. If you have dyed cotton or plant fiber with natural dyes I’d love to hear about your experience! 🙂
Dyeing Plant fibers vs Animal Fibers
Here are the 4 main points to keep in mind when dyeing plant fibers such as cotton or bamboo yarn, especially if you come from a animal fiber dyeing background (like me):
No Heat Required
Unlike dyeing animal fibers, you do not need to apply heat in order for the dye to take. You also will not have to add a product like citric acid or vinegar like you do with acid dyes. Instead you should pre-soak your yarn or fiber in a soda ash and water solution prior to dyeing for maximum dye absorption/color brightness.
The most important element to successful cotton yarn dyeing is time, not heat
Set aside at least 24 hours for your yarn to soak in the dye, overnight at the very least. I leave my cotton yarn in the dye solution for up to 2 days. If you are opting to sprinkle on dye for the speckled effect, wring it out thoroughly from the soda ash water, sprinkle on your dye, wrap in plastic wrap and set aside at least overnight. Your yarns will always appear darker when wet, so expect the color to dull by a fair bit once dry.
MX Dyes will not exhaust like Acid Dyes
The first time I dyed cotton yarn I was horrified because the dye would not exhaust, and so much of the dye ran out at rinsing. I thought it was an epic fail. But it turns out, these particular types of dyes do not exhaust, and you can expect a great deal of color to wash out when rinsing. This is why it’s very important not to…
Do not Skimp on Dye when Dyeing Cotton Yarn
It’s important to read the instructions and follow the amount of dye required per yardage as suggested by the manufacturer. YEAH RIGHT! Who has time for that?? I am really impatient, and notorious for not reading instructions (or even taking the time to understand them). Like I have time to weigh and measure every skein before dyeing, then work out the proper amount of dye by using (gasp!) math.
A few years ago, I paid for an online video course for dyeing with acid dyes, and I swore I would stick to using a very precise scientific method. But let’s face it: WHERE’S THE FUN IN THAT?? I prefer to find out via trial and error and learn to feel out how much dye I should use. It feels more artistic and expressive that way. I can always over dye it, if it doesn’t achieve the color I wanted originally.
This yarn was dyed brick red the first time and while wet the hue was nice and dark. But after it dried, it was too muted. So back into the dye with 1/3 tsp of brick red and 1/3 tsp of scarlet
My Method of Dyeing Cotton Yarn Step by step
1. Soak yarn in a solution of water & soda ash for at least 20 min for best dye absorbency. Soda Ash, also known as calcium carbonate or washing soda, helps keep colors bright when dyeing with fiber reactive dyes. It is supposed to keep your yarn colorfast, though I haven’t found this to be the case (more on using a dye fixative, below).
I use approx. 1 tbsp, and fill my crockpot with water, leaving space for the yarn so it doesn’t overflow. The crockpot is not on, I just use it as a container for the soda ash water. Give it a stir, and the soda ash should easily dissolve in the water.
I have found if I use too much soda ash it won’t dissolve completely, but you want to use a decent amount as this is what keeps the color bright in your yarn. Less dye seems to run out at rinsing when I use the right amount of soda ash.
I love having a dedicated crockpot in the studio. It’s my prefered way to dye wool rovings and yarn since it keeps an even heat and I don’t have to worry about catching the studio on fire. 😉 It’s a bonus that I can use it for pre-soaking my cotton yarns. The flatter version on the right is great for low water immersion dyeing.
The Yarn is soaking in Soda Ash and water, what’s next?
2. While the cotton is soaking, make your dye solution. I have 2 ways that I like to dye cotton yarn. The first is mixing the dye with tap water in a plastic container. It’s very convenient, and since you don’t need heat, you just add the yarn, put the lid on it and let the magic happen. Usually I use stacking containers to minimize space used on the counter.
The second way is sprinkling the dye unmixed over top the soaked yarn and wrapping it in plastic wrap. Then set it aside at least overnight.
How Much dye should be used when dyeing cotton yarn?
I don’t have a specific formula for how much dye should be used at a time. Roughly, for a 80 to 100 yard skein, I will put two 1/3 tsp of dye into cold water, mixed directly in the plastic container the yarn will soak in. EXCEPT for black: I always use a ton of dye in order to get nice, true black. I’ll use 1 tbsp of dye for the same amount of yarn, and then dye more skeins in the leftover dye solution into shades of grey. I adore back and grey yarns for contrast in projects.
After dyeing cotton yarn black, I use the leftover dye to get a few small skeins shades of grey. Here I am adding a new skein into the dye solution, taking my time to make sure all the yarn gets soaked up with dye.
I have tried re-using the dye solution with other colors, but I find the color is so washed out and light it isn’t worth it. At first, it looks like you’ll get nice, rich color, only to have it mostly wash out when rinsing. The amount I use seems to be just right for one skein, and I can’t push it to get more like I do with acid dyes.
This is the final red yarn from above, once dry
Finishing Your Dyed Cotton Yarn
3. After your yarn soaks for a good bit of time, rinse the yarn thoroughly in cold water. Remember, time is your friend when dyeing cotton, so try to leave it in the dye solution at least overnight. With this last dye run I got the urge to do this pretty late at night. I removed it from the dye bath the following afternoon. You will find a fair bit of dye will run out when you rinse, you may prefer to soak several times until the water becomes clear.
4. Here is the controversial part: to finish your yarn at this point by hanging it up to dry, or soaking it in a fixative such as Raycafix. The first time I dyed cotton yarns the color faded very fast in my dishcloths. Like, almost back to its original color. Mind you, my first dishcloths were a very light color. Little did I know that I did not use enough dye, so maybe the remedy is to simply use more dye. Since that first run I discovered Raycafix and I have not had any issue with color fading or bleeding.
To Soak or Not to Soak in a Dye Fixative
I say it’s controversial because these types of products assumingly contain some harsh chemicals such as formaldehyde. I don’t know this for certain but I do take precautions when using. Let’s face it: if you buy conventional clothing or furniture, you are already exposed to these toxins.
I am pretty sensitive to toxins, and have detox protocols for many synthetic products I come in contact with, even for certain food additives. I’ve never had any known health issues with using this product. From time to time I use a variety of noxious materials, from synthetic dyes for fibers, to patinas for metals or polishing compounds for gold and silver. It’s up to you to decide what you are comfortable with.
I take my yarns outside to soak in their Raycafix bath. I pour a small amount into some hot tap water, swirl around with a gloved hand then allow the yarn to soak for 5 min. We have septic, so I have a dedicated place away from the house to pour out the water. Again, I have no idea if that is even necessary but these precautions are easy for me to do.
My latest yarns taking a bath in Raycafix Color Fixative
If you don’t feel comfortable using a dye fixative, I’m confident you will be just fine using soda ash and a fiber reactive dye.
If you do use a fixative, soak the yarn afterwards in cold water before wringing out and hanging to dry.
I’d love to hear about your experience dyeing cotton yarn! If you have any tips and tricks for me, I’d love to hear them.
It’s a miracle, I got all the destash yarns from my personal stash listed! They are grouped in bundles. A couple of these are new product, I figured I might as well list them all and clean the slate entirely.
Be sure to read the descriptions on each so you are confident on what you are getting. You will notice a slightly higher price on etsy to cover fees. If you are buying one bundle you’ll probably find etsy cheaper as each listing is free shipping. If you are spending more than $45 CAD (approx $36 USD currently) it’s cheaper to buy here on the website. Don’t forget to apply the BULKSAVE100 code to save 15% if you are spending $100 CAD (approx $79 USD currently).
Ugly dye? That doesn’t sound appealing at all! I’ve had many hits and misses over the years in my indie-dye journey. When I started spinning 9 years ago, I swore I would never get into dyeing: another learning curve. But then I started processing fleece from raw and the appeal was there to learn. Soon I learned it was easy to fix mistakes by over-dyeing, salvaging over heated/manipulated fiber by re-combing or picking it, and by spinning the fiber in a more methodical way so to get the color to flow more beautifully together.
All four of these rovings were dyed using similar colors (the middle roving has purple omitted). Amazing to see the dramatic difference in the final project depending on the technique and amount of each color used
I decided to document this mini-experiment for myself to refer back to, as well as for encouragement for those who are interested in dyeing, who feel they are failing at dyeing or are feeling stuck in their indie dye journey. Let my curiosity be your inspiration!
This post will not be helpful if you don’t have some basic knowledge of dyeing fiber. There are many ways to dye and this should not be taken as the best way or the only way.
It all started with this roving I dyed several months ago. I called it my ugly roving:
My ugly roving turned out to be nothing like I envisioned/sketched out. With disappointment, it sat on the shelf for several months. I had absolutely no idea how I would spin this, nor any desire to do so
As people on Instagram pointed out, it’s not really that ugly. I think it had too much going on, and it went back in the dye pot (in this instance a rectangular crockpot with low water submersion) a total of 3 times while I tried to “salvage” it. The second time I added more dye to areas in order to intensify the color. There were these muddy areas where the colors ran together that I simply hated! The third trip to the pot was to add those blobs of purple that I was convinced was the nail in the coffin for this ugly roving. I had officially gone too far, done too much. After drying, I braided it and socked it away. Since it is merino top (good quality fiber) I knew I had to use it at some point.
Recently, it emerged from its ugly slumber due to boredom. I was in between spinning projects with no good ideas. Upon examining it, I decided to strip the roving before spinning it (the action of pulling apart roving into thinner pieces for spinning). Breaking up the color more, instead of spinning the intact roving from top to bottom, would hopefully give me the best chance of harmonizing all that color.
I was really pleased with how it started to look:
As you draw fiber out for spinning, you are also drawing the color out, having less of it saturating a small area, and thus muting the tone. If you’ve ever dyed a “muted color” roving that you liked well enough but found it rather bland and flat once spun, this is why. In this instance, stripping the roving helped re-distribute the bright color throughout, toning down the loud, and complimenting the muter shades. I was having such a good time spinning this “ugly” roving, that I decided to spin up all 4oz and ply it to another roving to give me maximum yardage. Not all 4oz fit on my bobbin. I am still deciding what I will ply this to. It may not even exist yet! The beauty of dyeing, is that you can have whatever color scheme you want at any time
My hate-turned-to-love for this roving intrigued me enough to try experimenting some other variations. Again using 4oz of merino top, this “ugly dye” consists of:
Gold ochre
Deep orange
Kelly green
Turquoise
New fuchsia (not to be mistaken for fuchsia)
Amethyst
My dye notebook. This is the start of my notes on the final dye, a dip dye of all these bright colors. I tried to keep the ratio of each color similar to that in the original ugly roving (thus less fuchsia and amethyst). Each roving gets assigned a number so that I know what to reference in the future.
For the second experiment, I decided to lightly soak the roving in water with dissolved citric acid. The bottom was well saturated, but the top was not. It was then arranged it into a rectangular crockpot. Dyeing fiber and yarn in a crockpot is super simple, and I love that I can set it and forget it while I work on other things.
In the first ugly dye, the roving went into the crockpot dry with a little water and citric acid in the bottom of the crock. I also added the original color in sections rather than at random. This time I sprinkled all the colors all over.
I let that sit for awhile, before spritzing it a over with water and citric acid:
After spraying down the top, I walked away for awhile. Probably about 15 minutes. Then I pressed the color into the roving with the back of a spoon:
The roving after spritzing with water/citric acid (l), and the color pressed into the roving (r)
I know what some of you are thinking. It looks so pretty, why press the color in?? Remember, we are going for UGLY roving… ????
Here’s the finished 2nd “ugly” roving. Hard to believe this is the same colors as the original one, just distributed differently, in different amounts
Like the first ugly roving, there is a lot going on. Nonetheless, I love the “mood” of this dye combo, and there is several interesting patterns and striations of color that does not come through in the photos.
For the 3rd ugly dye experiment, I decided to soak the roving entirely with a water/citric acid solution. Then into the rectangle crock. I erred on the side of caution and omitted the purple as I knew the dye would travel around more on a thoroughly wet roving, and it may cause too much muddy color:
I forgot to get a pic of the dye after I pressed it into the roving with a spoon – but see below for round 2
After pressing in the dye, I left it in the crockpot for approximately 1 hour. After rinsing, I was dissatisfied with the result. The color was very muted, I assume because the roving was fully wet, allowing the color to spread a larger distance. Sooooo…back for round 2 it went.
Left: returning the dull color roving to the crock pot, sprinkling in more dye. Right: after pressing the dye into the roving with the back of a spoon
Here’s the end result after rinsing for a second time, then drying:
The results of a fully soaked roving before adding dye is fascinating: “muter” in some elements, and brighter in others
This may be a good contender for plying to the original ugly roving:
Maybe ugly dye number 3 will be plied to ugly dye number 1? I won’t know for sure until I spin it
The final roving in this project was a dip dye of these colors for comparison. What a dramatic difference:
All 6 colors neatly arrangedOnly six different dye shades to make 4 completely different rovings for spinning
Now that you’ve seen what can be done with just 6 shades of acid dyes, I hope this is inspiration for your next dye project. If you are new to dyeing, I hope this encourages you to simply invest in a handful of colors to get started. I am far from an expert in this topic (obviously!). I’m simply willing to try and share. I hope to do more posts like this in the future, and if I can assist you in any way on your indie dye journey, please do not hesitate to contact me! ????