Not-So-Ugly Dyeing Roving for Spinning

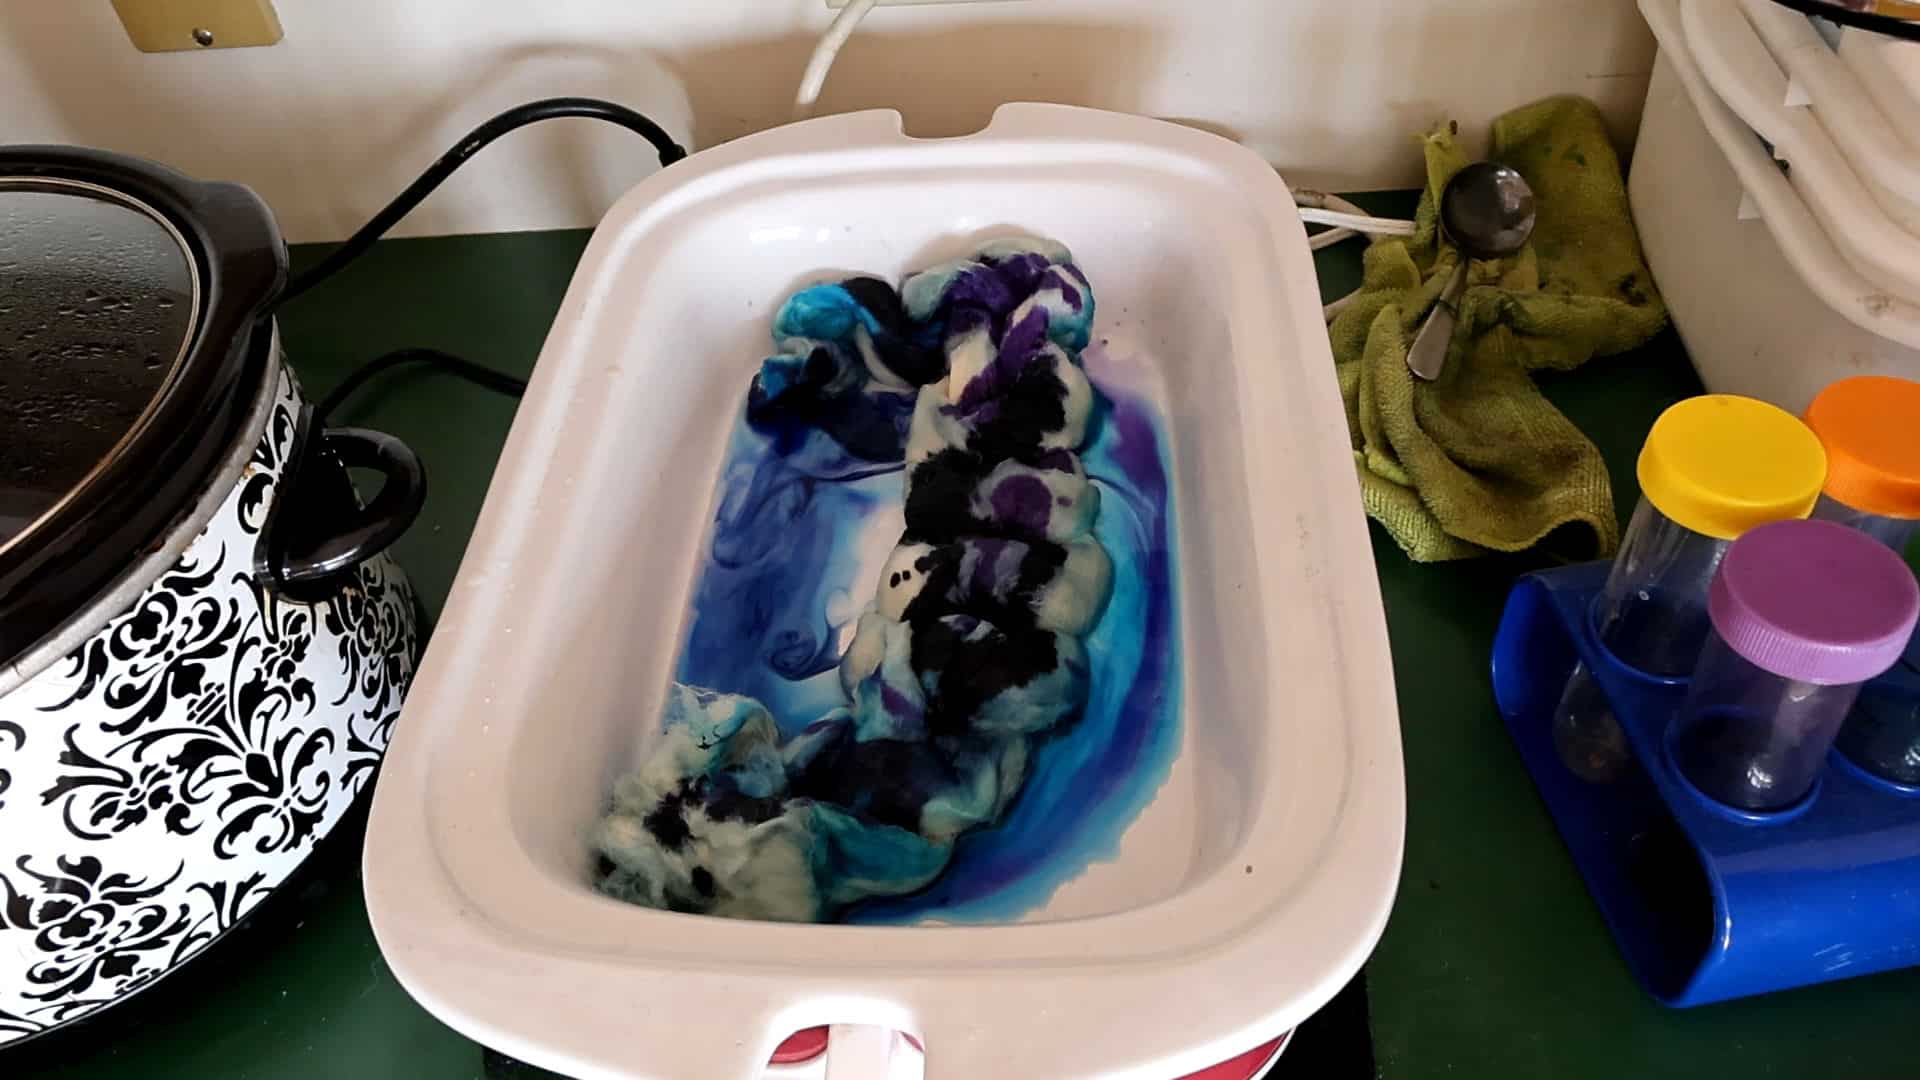
A white tray holds wet wool dyed with blue, purple, and black colors, creating swirling patterns. The tray is on a green counter near a black-and-white slow cooker, a green cloth, utensils, and colorful containers.

What is Ugly Dyeing (or not-so-ugly dyeing)?

Dyeing roving for spinning is a goal that many of us handspinners like to achieve. Ugly dyeing is a term I coined for dyeing with the intention of mixing or muddying the colors when dyeing roving for spinning. This is typically considered a no-no to most dyers, known as the dreaded muddy color. But a few years ago, I wanted to test the theory of whether you could truly dye ugly roving. I have yet to dye a roving with this technique that I didn’t like to spin…the roving, at times, could be… questionable color-wise. The end result has always been a desirable handspun yarn; it’s all in the technique of how you spin it.

Typically for “ugly dyeing,” I would sprinkle several colors all over the roving, let it set, and then flip the fiber to dye the other side. Usually, this is achieved in a casserole-style crockpot in low-water immersion, but there are variants.
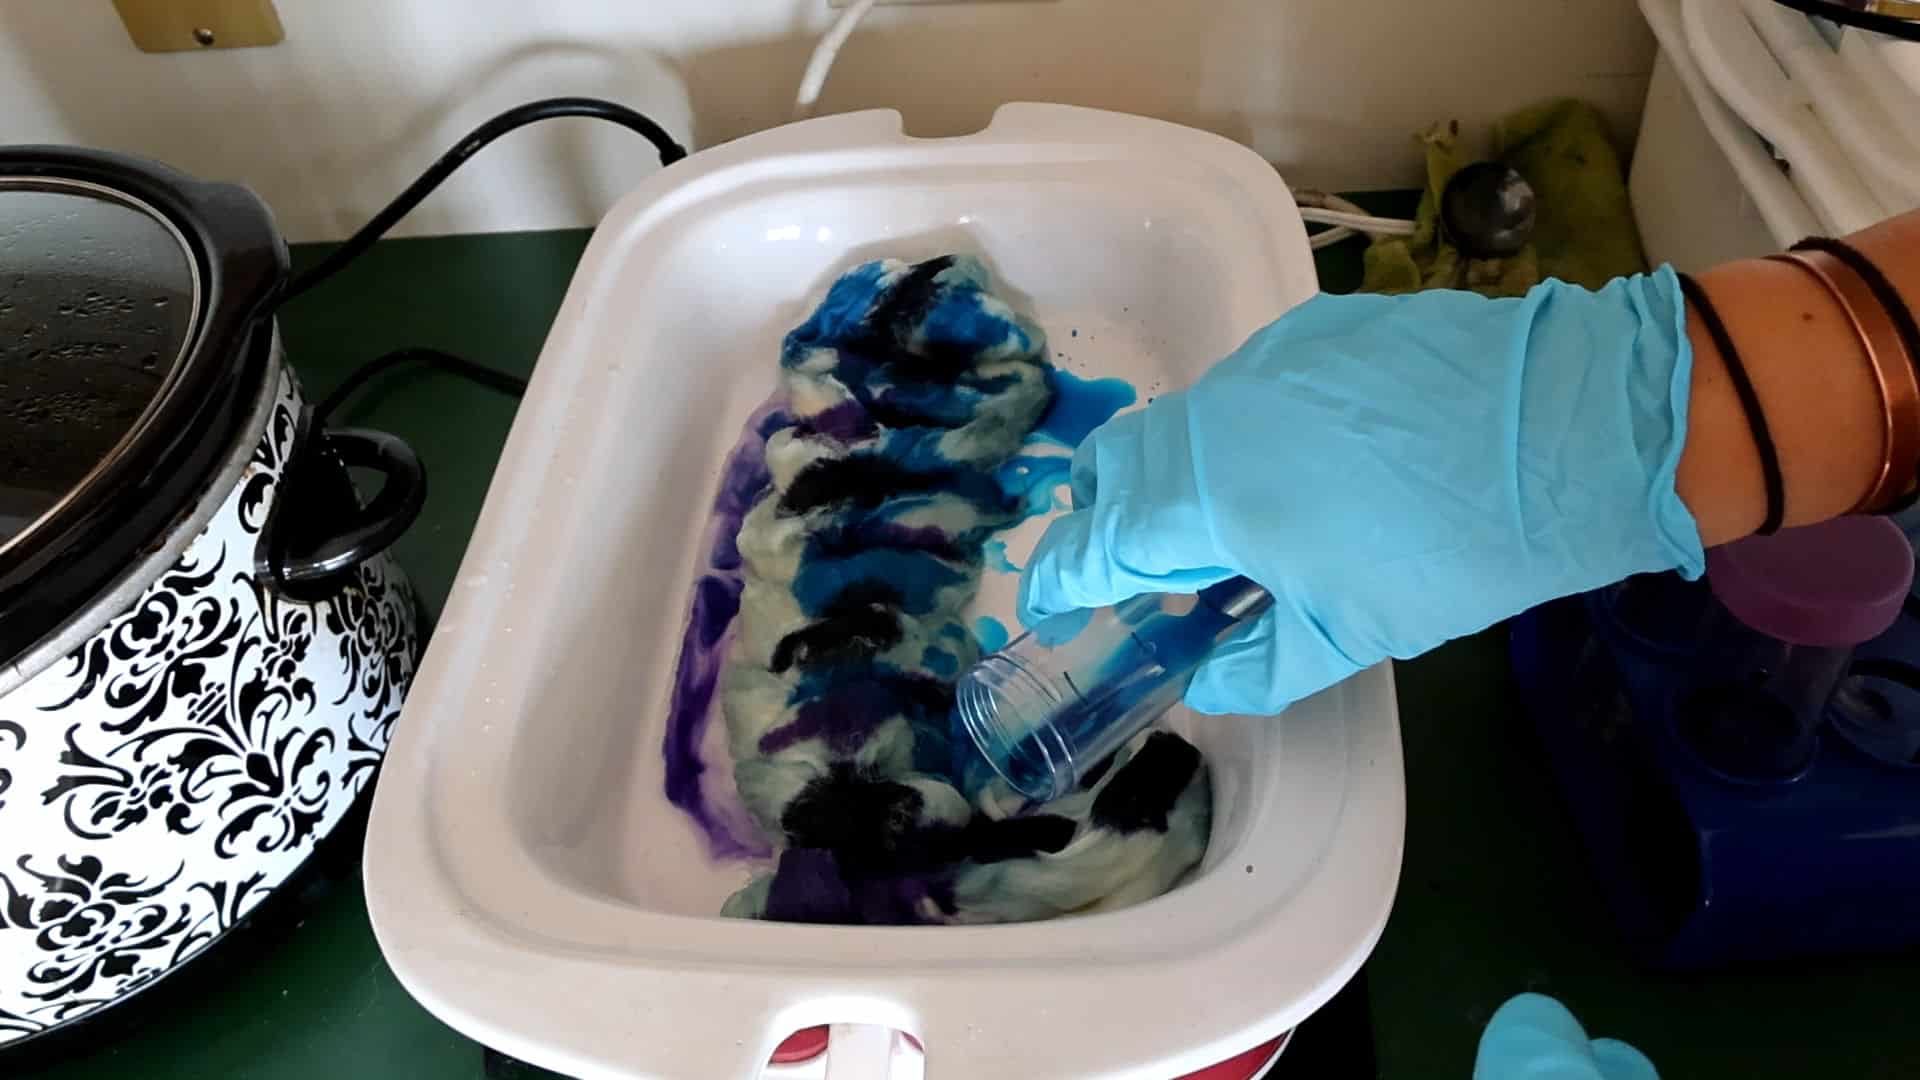
A hand wearing a blue glove pours blue liquid dye onto white wool in a white dish, dyeing roving for spinning. The wool is also streaked with black and purple dye. A patterned slow cooker is visible on the left, and various containers and tools are on the green countertop.

For the not-so-ugly dye, I left the roving braided for the entire dye process. This left a fair bit of white space throughout the roving, making it a lot less…ugly compared to dyeing with the goal of saturating the entire roving with dye. I also used leftover pre-mixed dye rather than sprinkling for this experiment. Usually, I like to sprinkle powdered dye onto the roving.

Why dye roving for spinning?

Dyeing roving for spinning is not only a fun and artistic endeavor, but it also allows you to customize colors and patterns to fit your style and tastes. By the end of this post, I hope you’ll be inspired to transform plain roving into uniquely dyed fiber that will enhance your spinning projects.

Gathering Materials

For this technique, you will need a braid of roving soaked in a mix of warm water and citric acid. You could also use Synthrapol and add the citric acid water later, but I find this works just fine for this technique. We are not going for accuracy here, just a lot of fun color applied onto random areas of the roving.

Keep the roving braided as you add it to your pan, where you will apply gentle, even heat. Acid dyes for wool require heat and citric acid to set. You can use vinegar as well, but I have better luck with citric acid. I add approx. 1 tbsp to a large amount of water. In this instance, I used my traditional round crockpot for soaking. Do not squeeze out any of the water; just transfer it directly to the pan. You could use a steamer pan, a pan on a stove or hot plate, or a glass dish in your microwave, though be cautious with heat for the last two.

Pre-Mixed Dye Supplies

Pre-mix some dye and get ready to pour it randomly on areas of the wet, braided fiber. As this technique is not about accuracy, the amount of dye used in the pre-mix does not matter. I would recommend starting with 1/4 tsp and adding enough water to reach your preferred dilution.

Additionally, you’ll need a container for mixing the dye, gloves to protect your hands, and a workspace that can get messy. Remember, dye may stain your work area, so either cover it with plastic or work in an area you don’t mind getting stained.

For this project, I had leftover pre-mixed dye from a previous project, stored in a children’s chemistry test tube set. These are plastic test tubes, and since my children are too old to use these, I was happy to repurpose them in my studio. Any kind of plastic container you have on hand would work; just remember never to use them for food storage after mixing dye in them.

I also recommend an apron to protect your clothes, goggles, and an N-95 mask.

Again, it goes without saying: don’t mix the tools you use for dyeing with those for food preparation.

Roving Selection

If you are new to dyeing, you may opt to start with a braid of superwash fiber, as you don’t have to worry about felting the fibers, which makes it hard to spin. But ultimately, choose a fiber or fiber blend you would be happy to spin, be mindful of the temperature, and avoid over-agitating your fiber.

I used a blend of Superwash Merino and Silk for the video.

Not-So-Ugly Dyed Roving Start to Finish Handspun Yarn

Watch the preparation and spinning of this yarn in the above video.

Preparing the Roving

Braided Roving

Once your roving and dye supplies are ready, it’s time to prepare the roving for dyeing. A useful technique is to braid your roving, which will leave white space throughout. The braid is achieved much the same way you would do a crochet chain and is a typical way to store/display roving before spinning.

The more dye you use, the more of a “tie-dye” effect you will get. For this roving, we will have quite a bit of white space. We will do one with maximum dye saturation in the future.

Position Your Roving in the Dye Pan

Lay out your braided roving as flat and as spread out as possible. You will need to dye both sides; otherwise, your roving will turn out mostly white, unless that is what you are going for, but your dye colors will be very muted when spun.

Applying the Dye

Pour On the Dye…Randomly

For pouring the dye, you will need to decide how you want to apply it. You can use squeeze bottles, syringes, or small containers to apply the dye directly onto the roving. Start from one end and work your way to the other, applying the dye in sections. Ensure you saturate the fibers evenly, allowing the dye to penetrate through the entire roving for rich, uniform color.

Letting the Dye Set

I love using slow cookers for dyeing yarn and fiber because I can basically set it and forget it. The setting process involves letting the dyed roving sit for a period of time, usually around 30 minutes. I usually check it at the 20-30min mark, and if it needs more time, come back in another 20 minutes or so.

For the rectangular casserole crockpot I use for this style of dyeing, I start it on high, then turn it down to low after 20 minutes, since it gets hotter than my round slow cooker.

You may have to add more water to the slow cooker as your dye sets. I normally will pour a small amount of water onto the roving to check if the dye has set. If no dye runs out of the roving, the dye is exhausted, and it’s ready to be hung up to dry.

Finishing your Dyed Roving

Once all the dye is exhausted and the water is running clear, carefully remove the roving from the pan and set aside to cool off. Alternatively, you can turn off the crockpot and let it cool overnight.

I usually give my superwash roving a final soak with Synthrapol in the sink, but if it is a fiber that will felt, I often skip this step to minimize the chance of felting. I hang it straight up to dry, allowing any excess dye to run out during the final set of the handspun yarn.
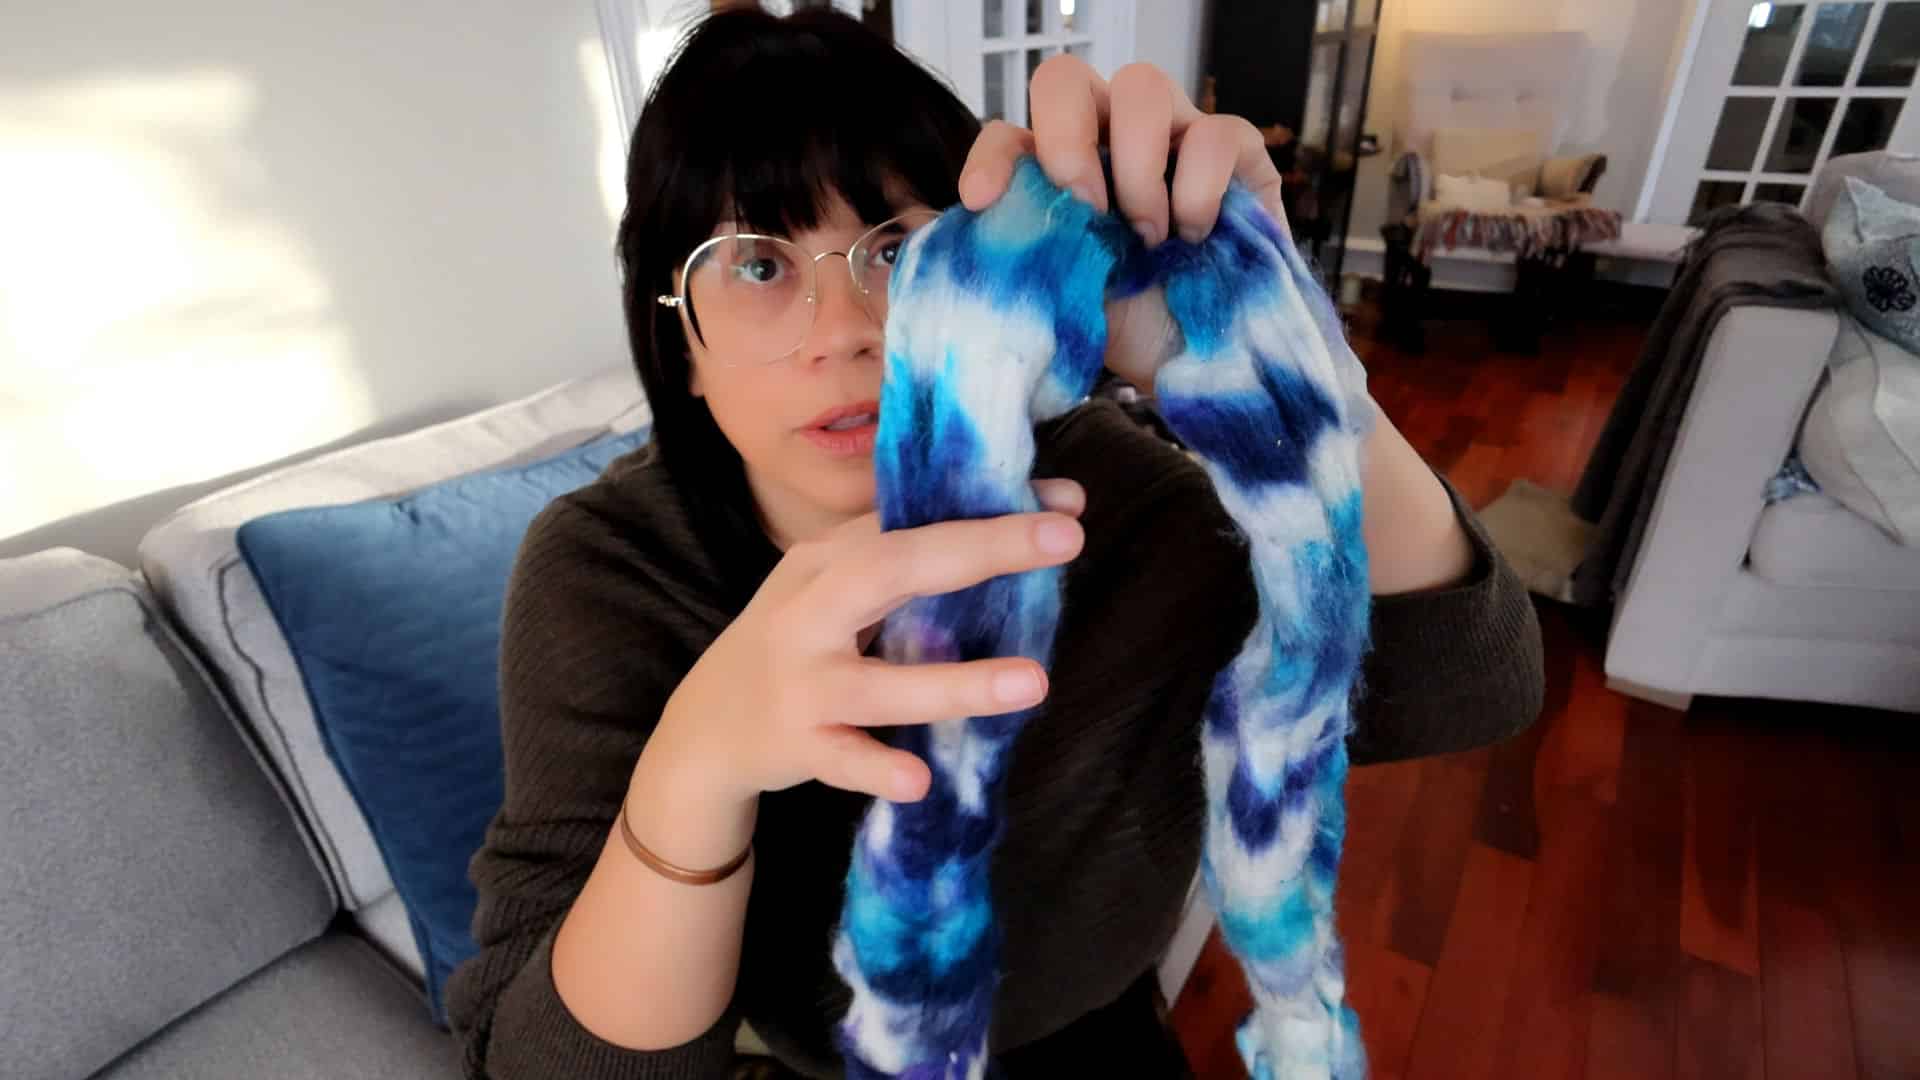
A person with dark hair and glasses sits on a gray couch, holding up the not so ugly dyed roving for spinning. The roving colors are blue, white, and purple with a tie dyed look. The room has wooden floors, a blue cushion, and furniture visible in the softly-lit background.

Spinning the Dyed Roving

Creating a 3-Ply Yarn

Creating a 3-ply yarn from your dyed roving can add volume and texture to your final product. To do this, split your dyed roving into three equal parts and spin each part separately. Once you have spun all three sections, you can ply them together, which will enhance the thickness and create a more balanced yarn. This method also helps to showcase the beautiful colors of the dyed roving, resulting in a vibrant final product.

Choosing the Right Spinning Method

Once the dye has set and the roving has been rinsed and dried, it’s time to start spinning! The spinning method you choose can greatly influence the texture and appearance of your yarn. As there is a lot of white space, I like to spin the blocks of color rather than spinning straight across the roving.

For example, if I hit a section of blue dye, I will spin all the blue dyed roving from this section before moving on to spin the usual side-by-side way (for me, it’s usually left to right). Refer to the above video for a demonstration.

I chose to do a 3-ply handspun yarn because I prefer the round look of a 3-ply yarn in my projects these days. This dye method would also make a great 2-ply or chain-plied yarn. You could also pair it with other rovings to achieve maximum product. For example, ply it to a natural colored white roving to have a more subtle color effect.

If you are looking for an easy technique for dyeing roving for spinning, I hope you will consider this one.
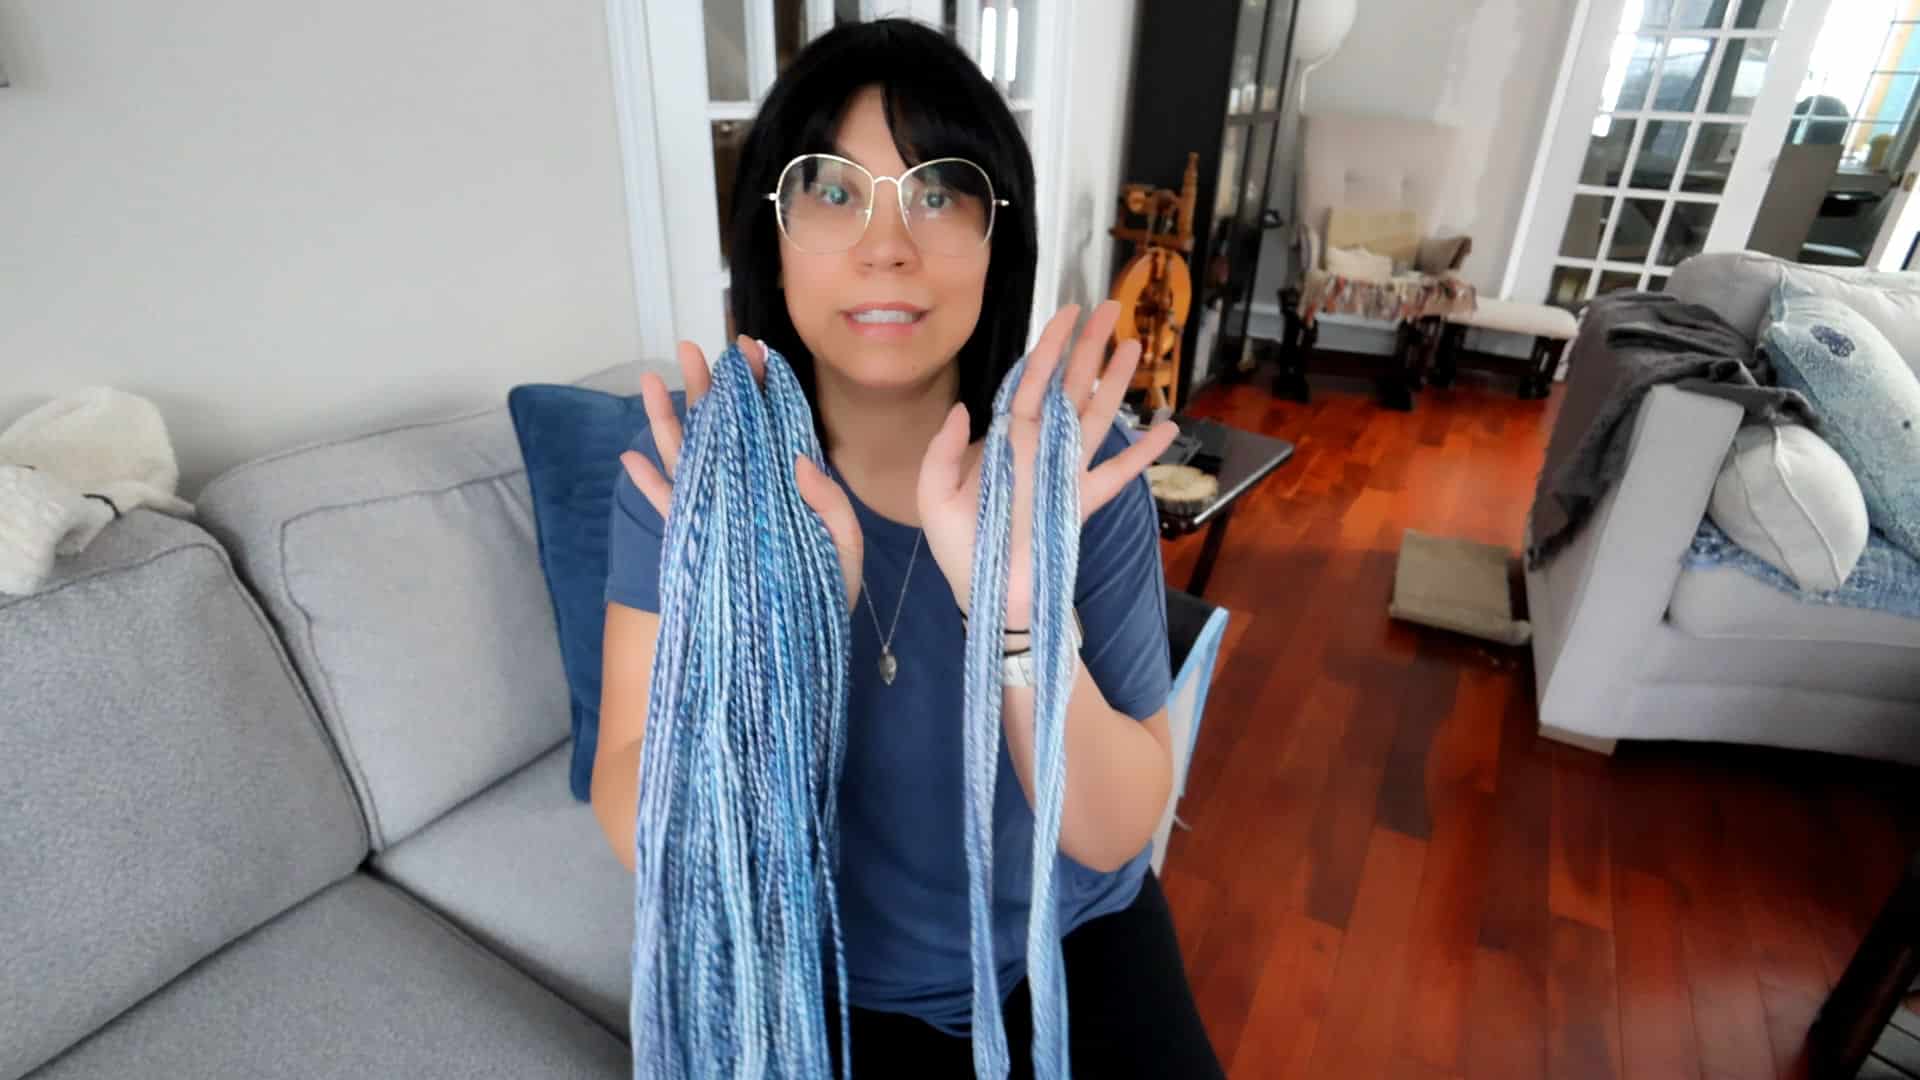
A woman with glasses and dark hair sits on a light gray sofa in a cozy living room, holding up two sections of blue-and-white yarn with both hands. The room has wooden floors, a spinning wheel, and a pile of blankets on the right.

The completed yarn reminded me of denim. I loved the final product. What do you think? Will you give this dyeing technique a try?

Visit my YouTube channel for more dyeing and spinning projects.
Leilani signature

Spinning (and Dyeing) Ugly Roving

What is ugly roving? And why would I want to dye it?

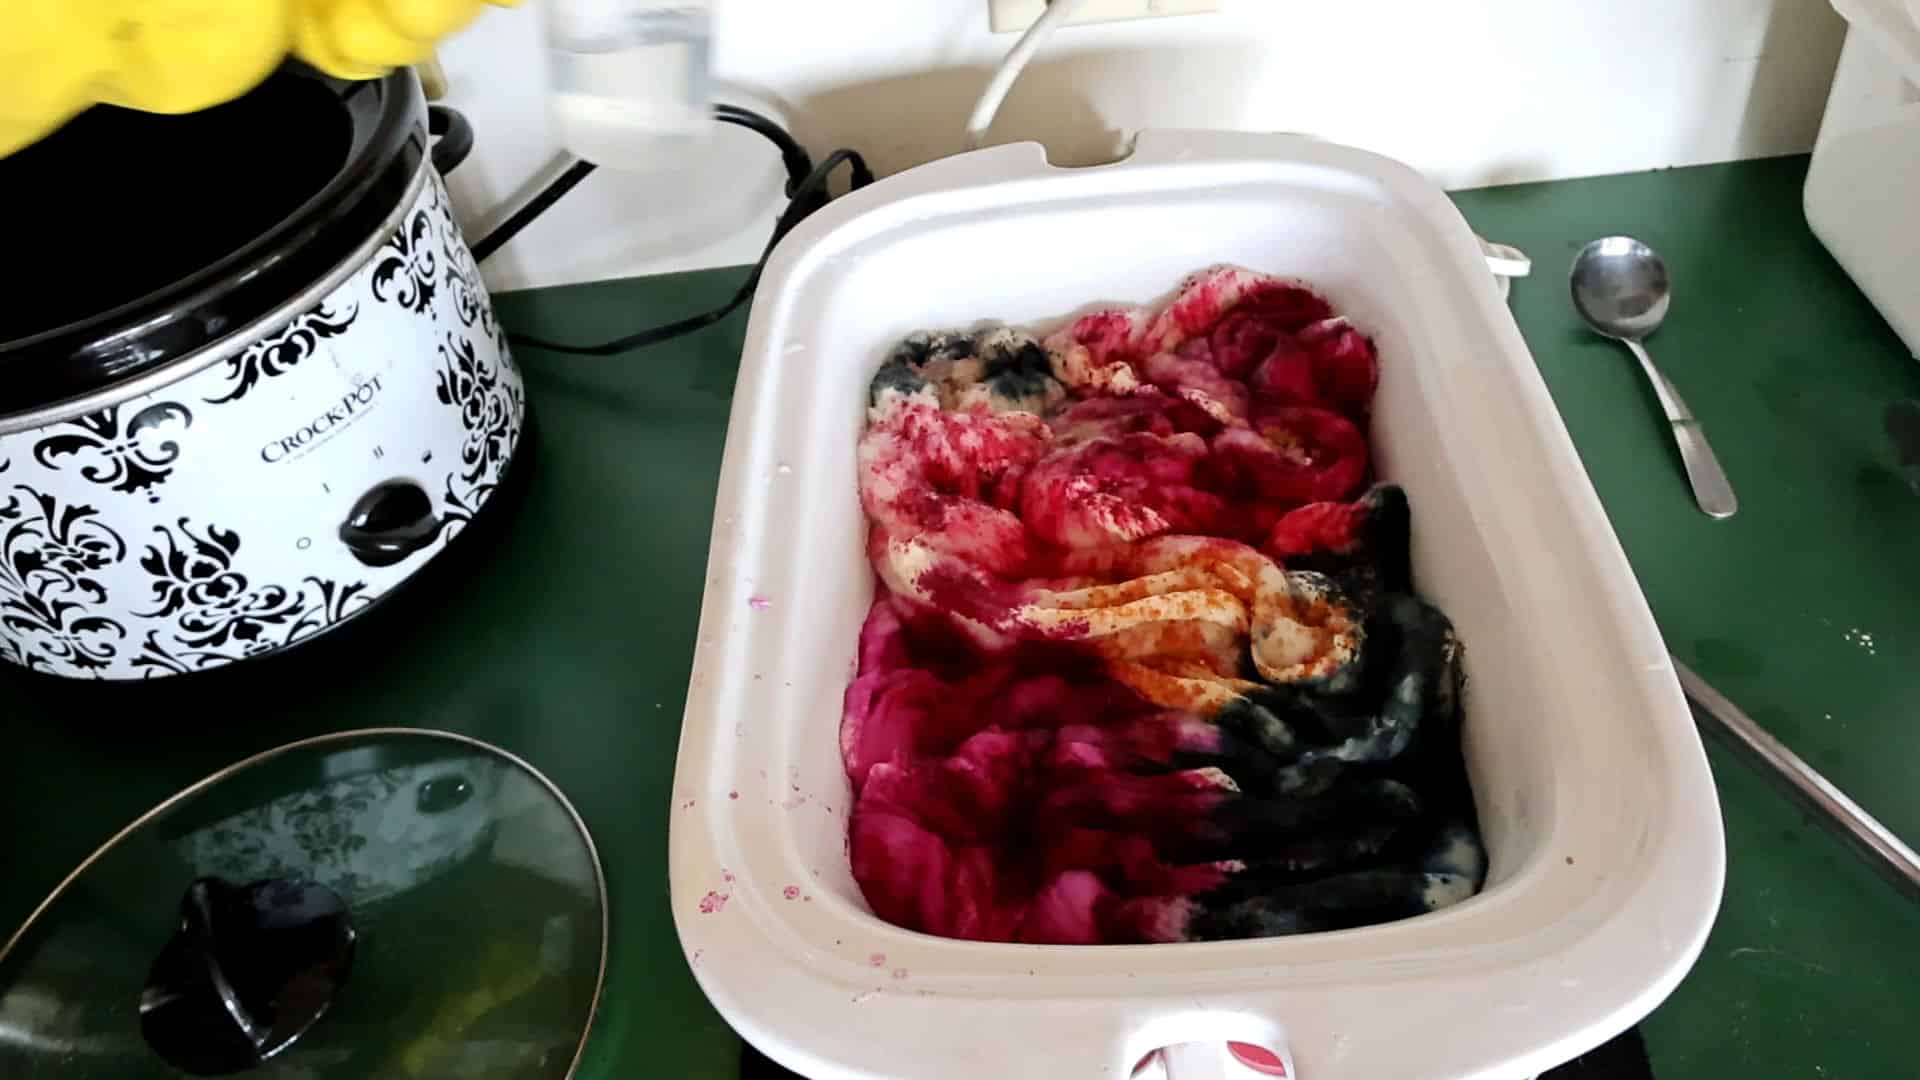
A white slow cooker filled with wool roving spinkled with pink, orange, and dark green swirls of dye. The slow cooker sits on a green countertop next to a spoon and another decorative slow cooker. This is the beginning process of the Ugly Dye Experiment video on YouTube.

My latest spinning experiment over on my YouTube channel was recreating a project I did a few years back, where I challenged myself to dye “ugly roving”.

I was curious as to what would happen if I simply set out to dye a piece of roving, throwing all the rules out the window that I ever learned about dyeing fiber, such as not pre-mixing or even measuring dye for that matter, allowing muddy colors (letting the dye colors to all mix together during low water immersion), not setting out with a plan or choosing colors that will compliment rather than clash, for example.

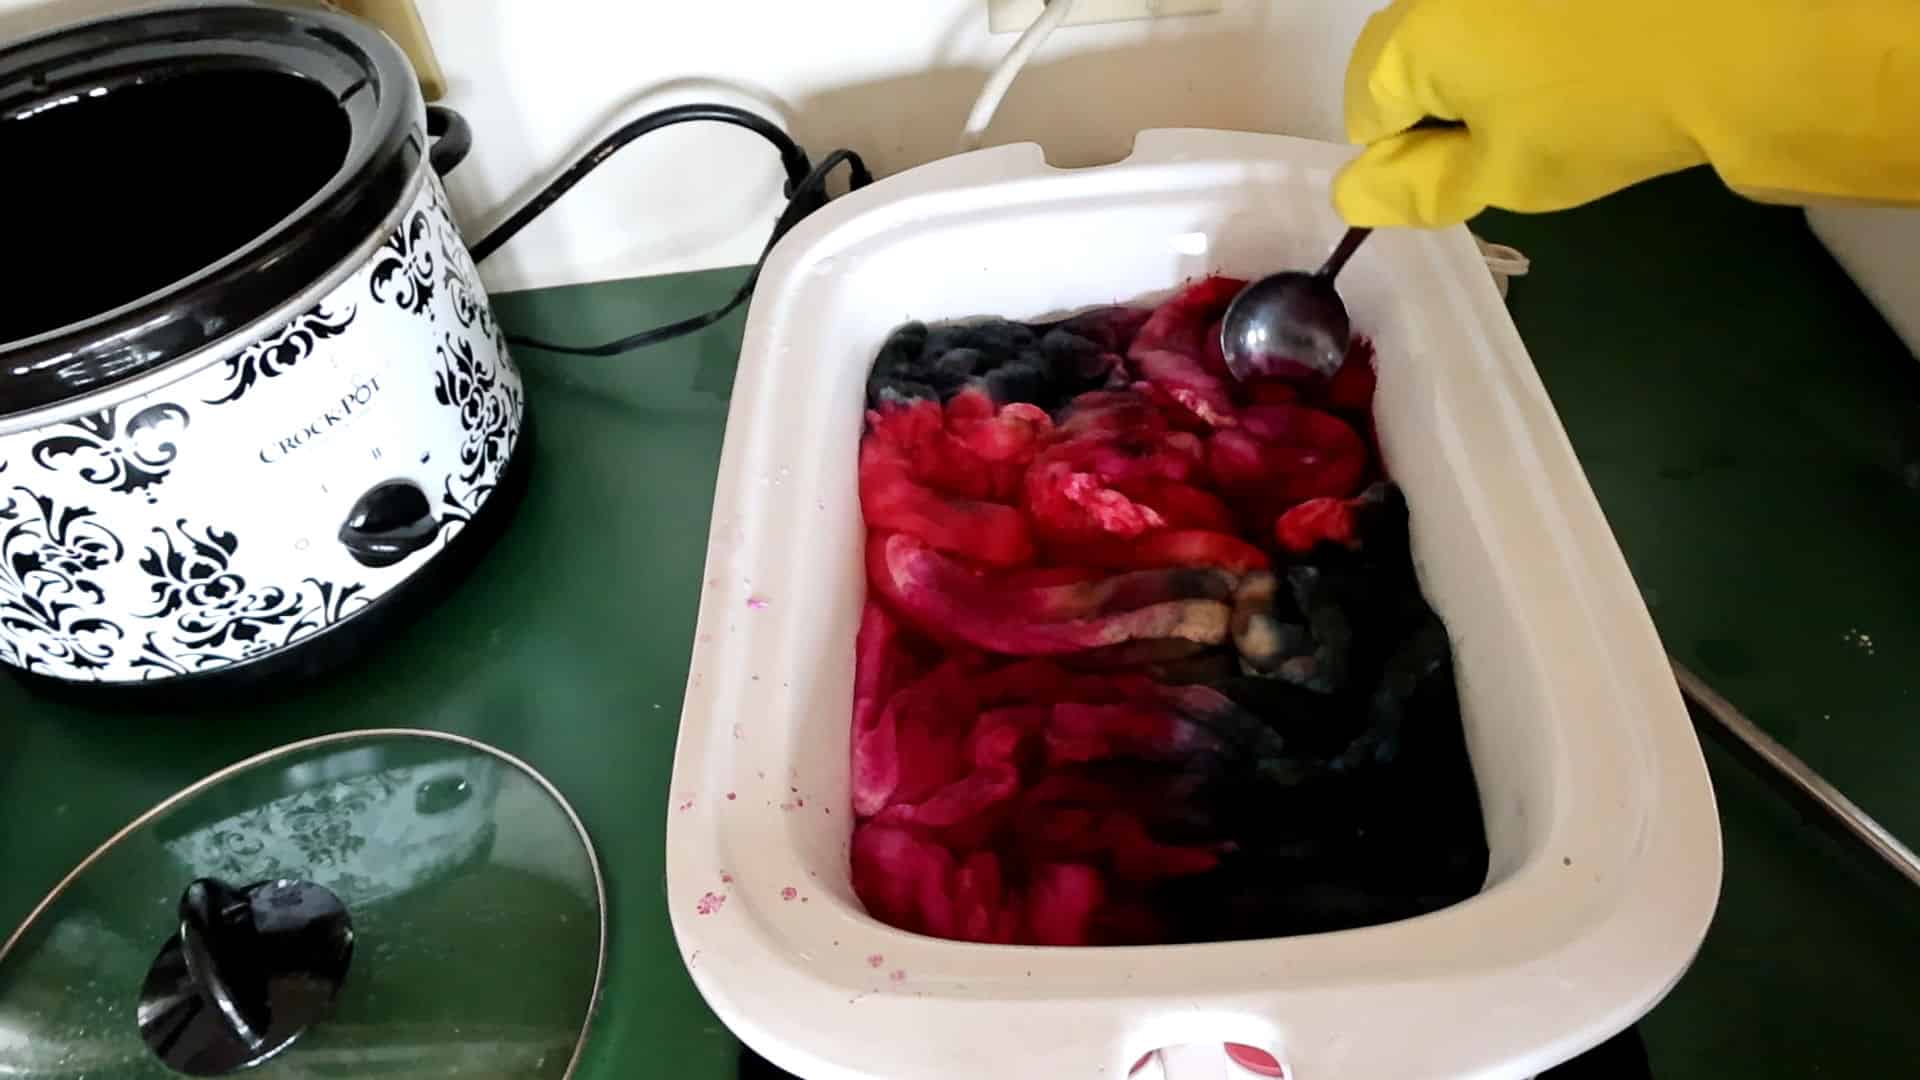
Dyeing ugly roving: a person wearing yellow gloves stirs colorful purplish red and dark blue/green wool fibers in a white slow cooker with a metal spoon. Another decorated slow cooker with a glass lid lies nearby on a green surface, suggesting a dyeing process in progress.

What if I just…dyed roving? Sprinkled on a little powdered dye here and there, what will I end up with, and would the subsequent handspun yarn just be too ugly to even speak of?

What I found is that it’s not so much in how you dye the fiber, but in how you spin it.

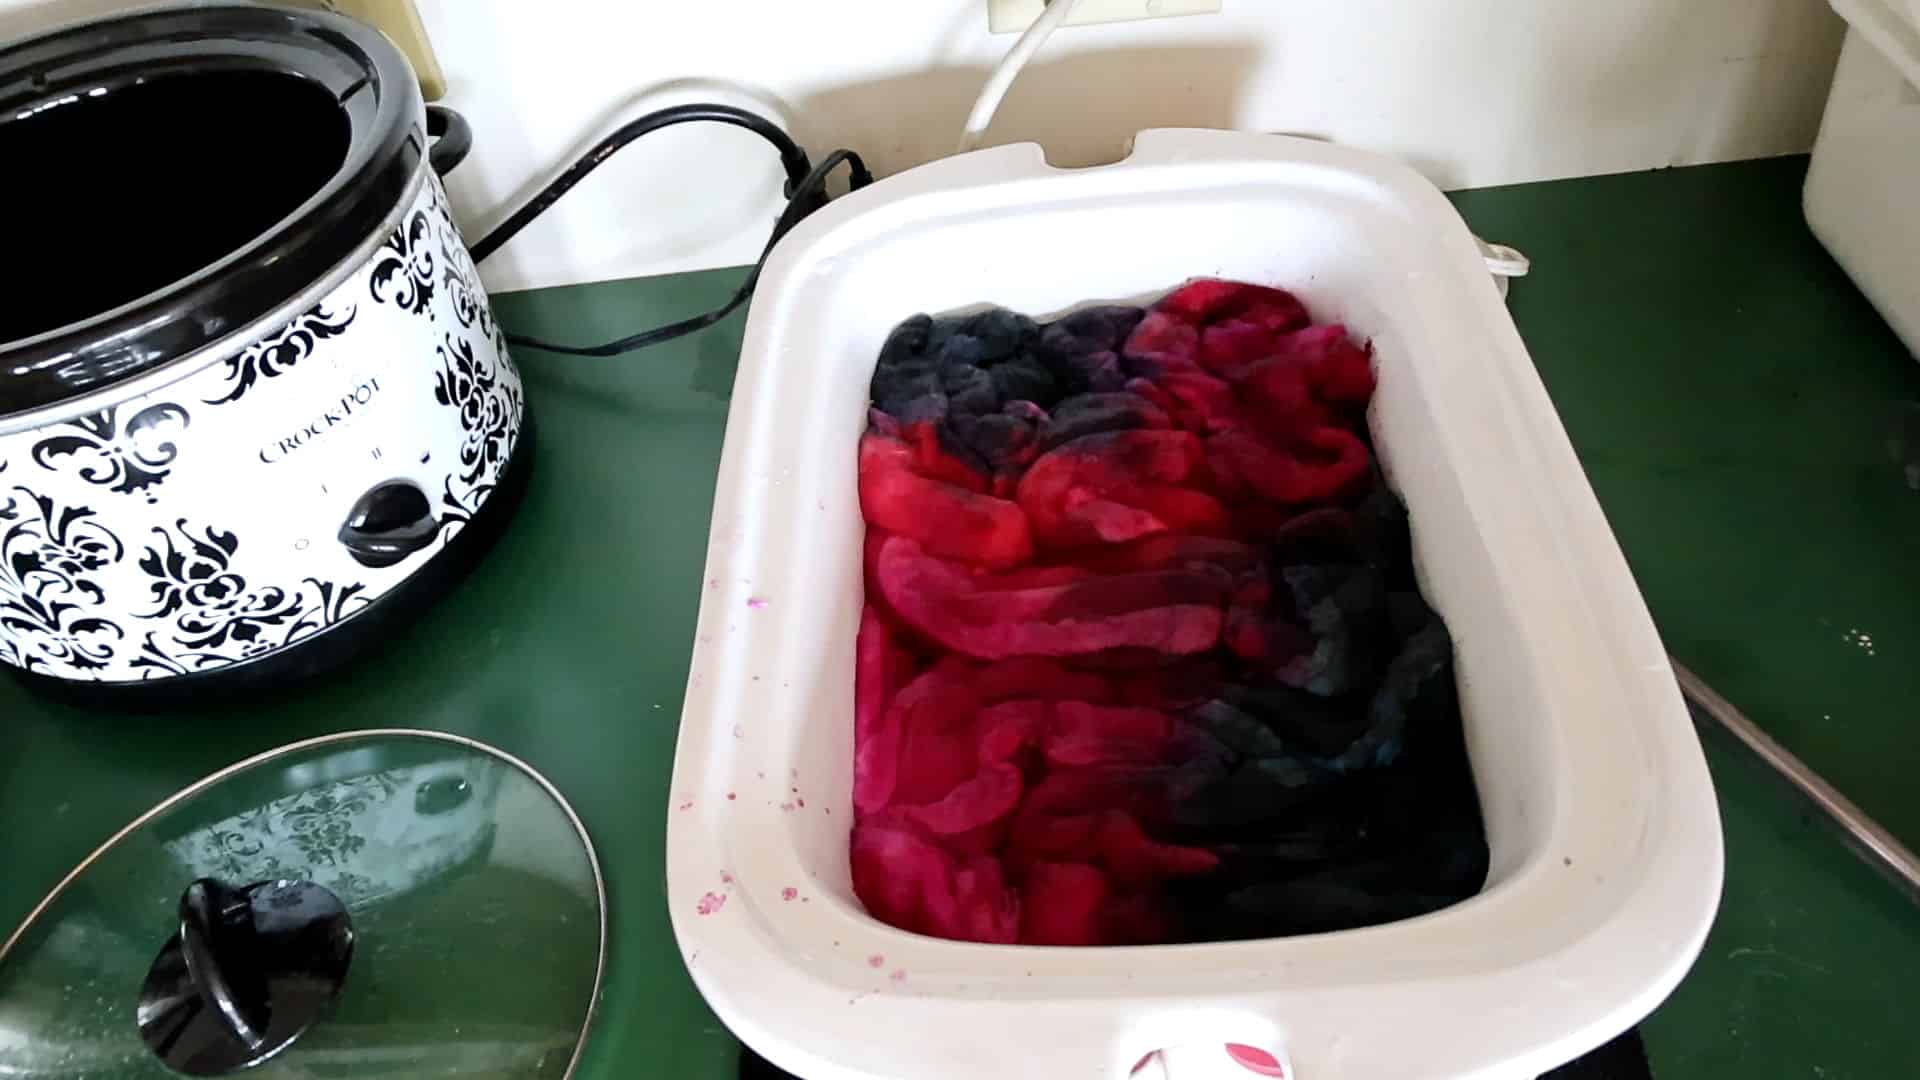
The "ugly dye" has been added to the roving and is now ready to set. A white roasting pan filled with wool roving being dyed in shades of blue and red sits on a green counter. Next to it is a patterned black-and-white Crock-Pot with its glass lid resting nearby. Electrical cords and outlets are visible in the background.

Now, if you are the type of person who dyes fiber for spinning for specific projects, this may not be the technique (or lack thereof) for you. But if you are like me and get excited about spinning based on the color (sometimes a challenge) and the journey, then you might want to give this a try.

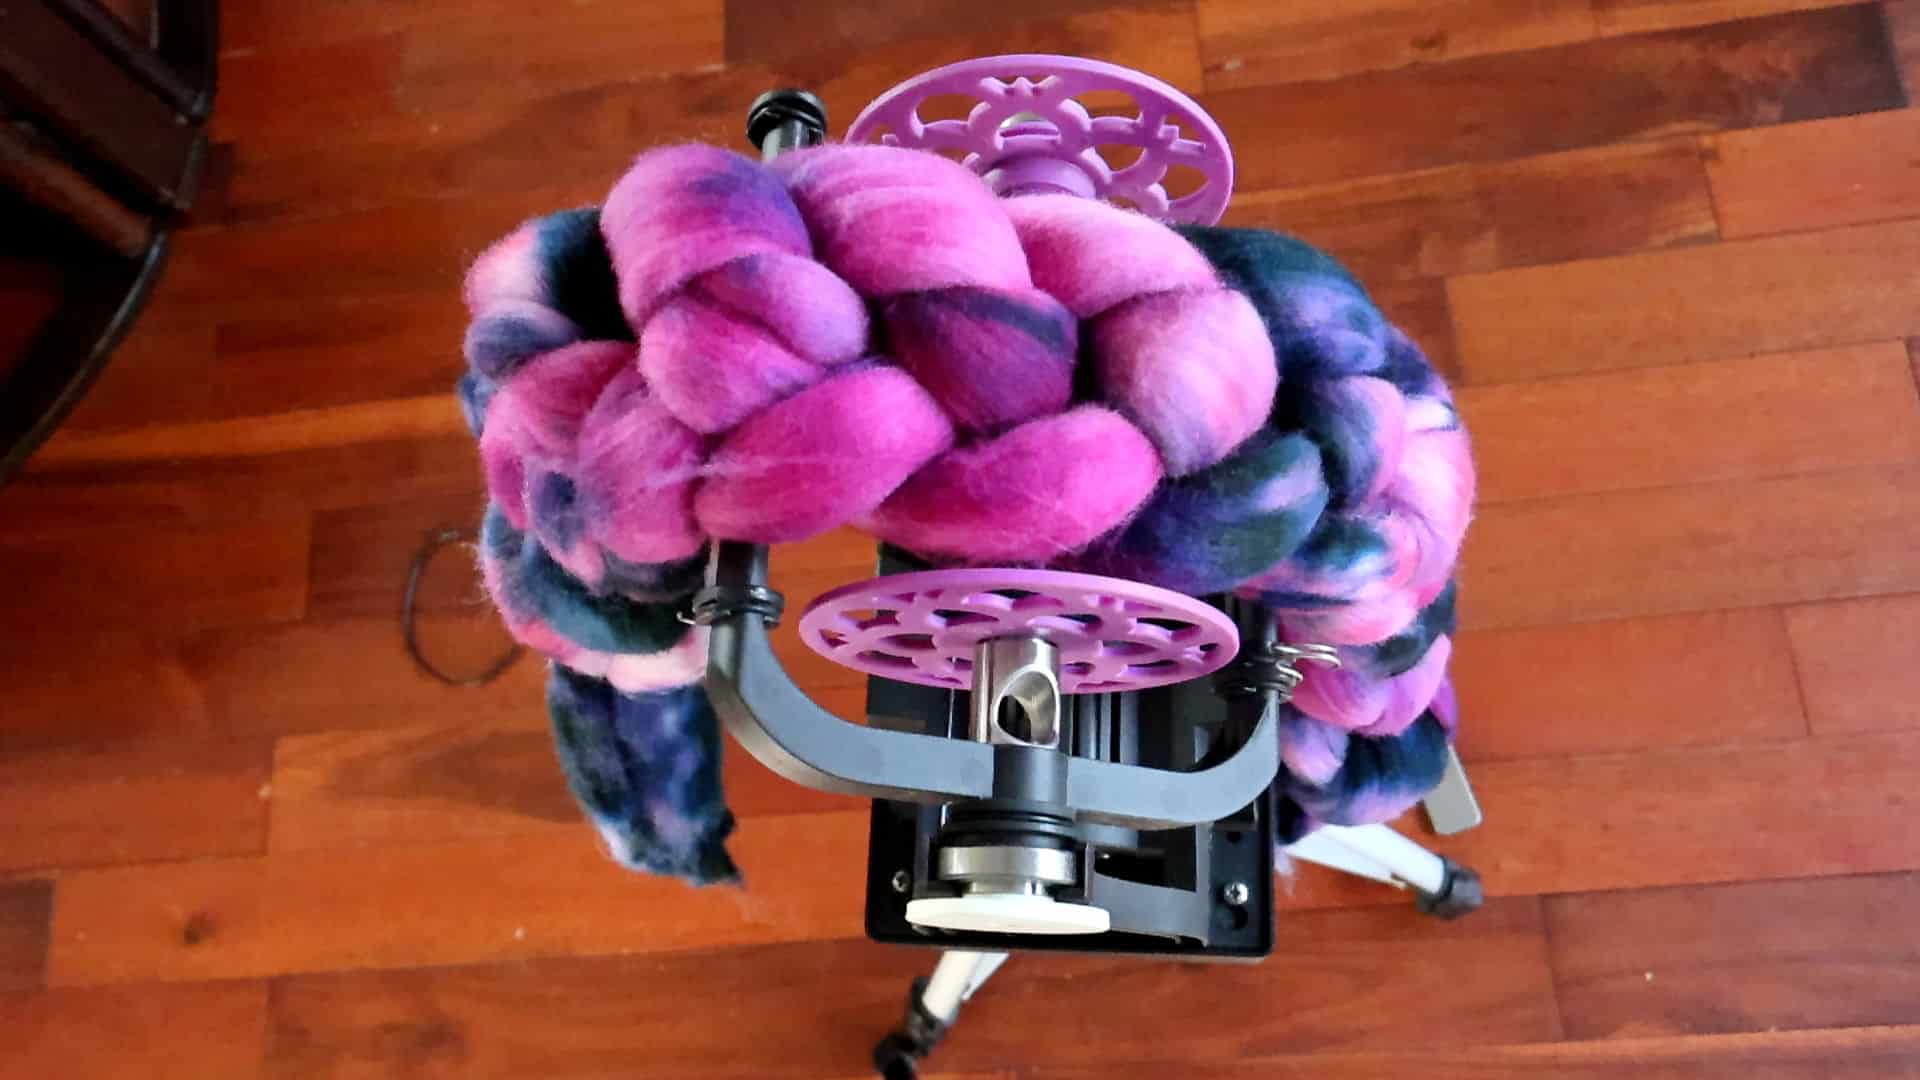
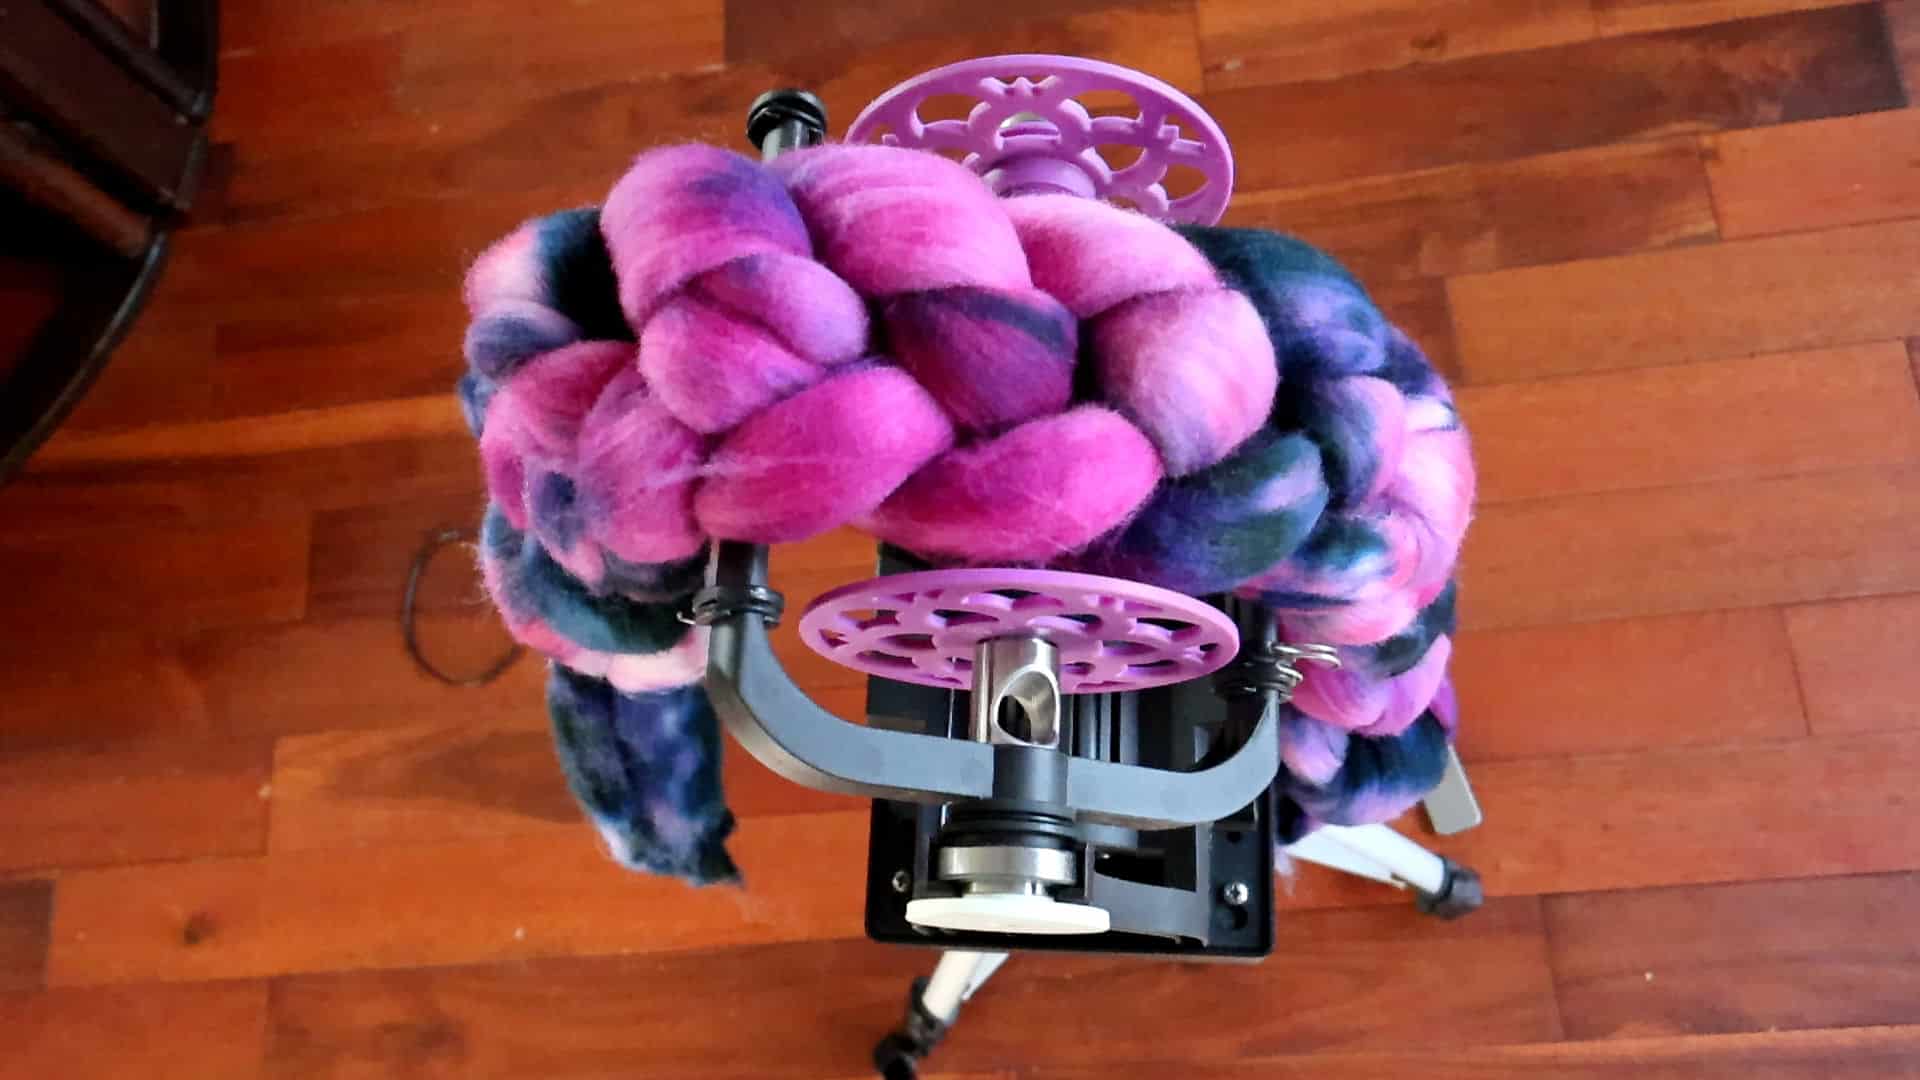
The "ugly roving" from the Ugly Dye Experiment is braided and draped over a black e-spinner with a purple bobbin. The e-spinner is mounted on a tripod. Th ebackfround is a cherry wood hardwood floor.

This is also a great jumping-off point for you if you’ve always wanted to try dyeing but were too scared to try it. Before you reach the level of expertise where you get what you want, I stress the importance of getting a feel for dyeing, much as with spinning or any creative skill.

In Part One I cover the “ugly dye” process:

Dyeing Ugly Roving, Part One

Part two is how I tackled spinning the ugly roving and the final product. Hardly “ugly” – if you ask me. 🙂

Dyeing Ugly Roving, Part Two (the Spinning Part)

Truthfully, I’ve never met a dyed roving I disliked – colorwise anyway. I have bought rovings back in the day at wool shows that were terribly overworked and were slightly felted. They were no fun to spin. So I revamped those by reblending them with either my hackle or drum carder, sometimes with or without added fiber from my studio. This is truly why I love spinning so much – there’s hardly any waste if you are thoughtful. Even if you are learning, you can always revamp those first-time rovings and handspun yarn into other projects (more on that in the future).

Will you give “ugly dyeing” a try or buy that “ugly roving” from the fiber festival? So long as the fibers are not partially felted, rovings of all colors can be a joy (and a pleasant surprise!) to spin.

More “ugly dye” projects are coming up in the future. The best way to know when they are posted is to either check back here on the blog or subscribe to my YouTube channel. I enjoy sharing my spinning experiments and hope they inspire your dyeing and spinning projects.
Leilani signature

How to Dye Roving in a Crockpot: Step-by-Step

My Favorite Way to Dye Roving for Spinning

This month, I decided to make a video showing how I dye roving in a crockpot. This is continuing my series on crockpot dyeing. So far, I’ve posted on dyeing yarn in a crockpot and over-dyeing yarn in a crockpot. I thought it was a natural progression to cover fiber next.

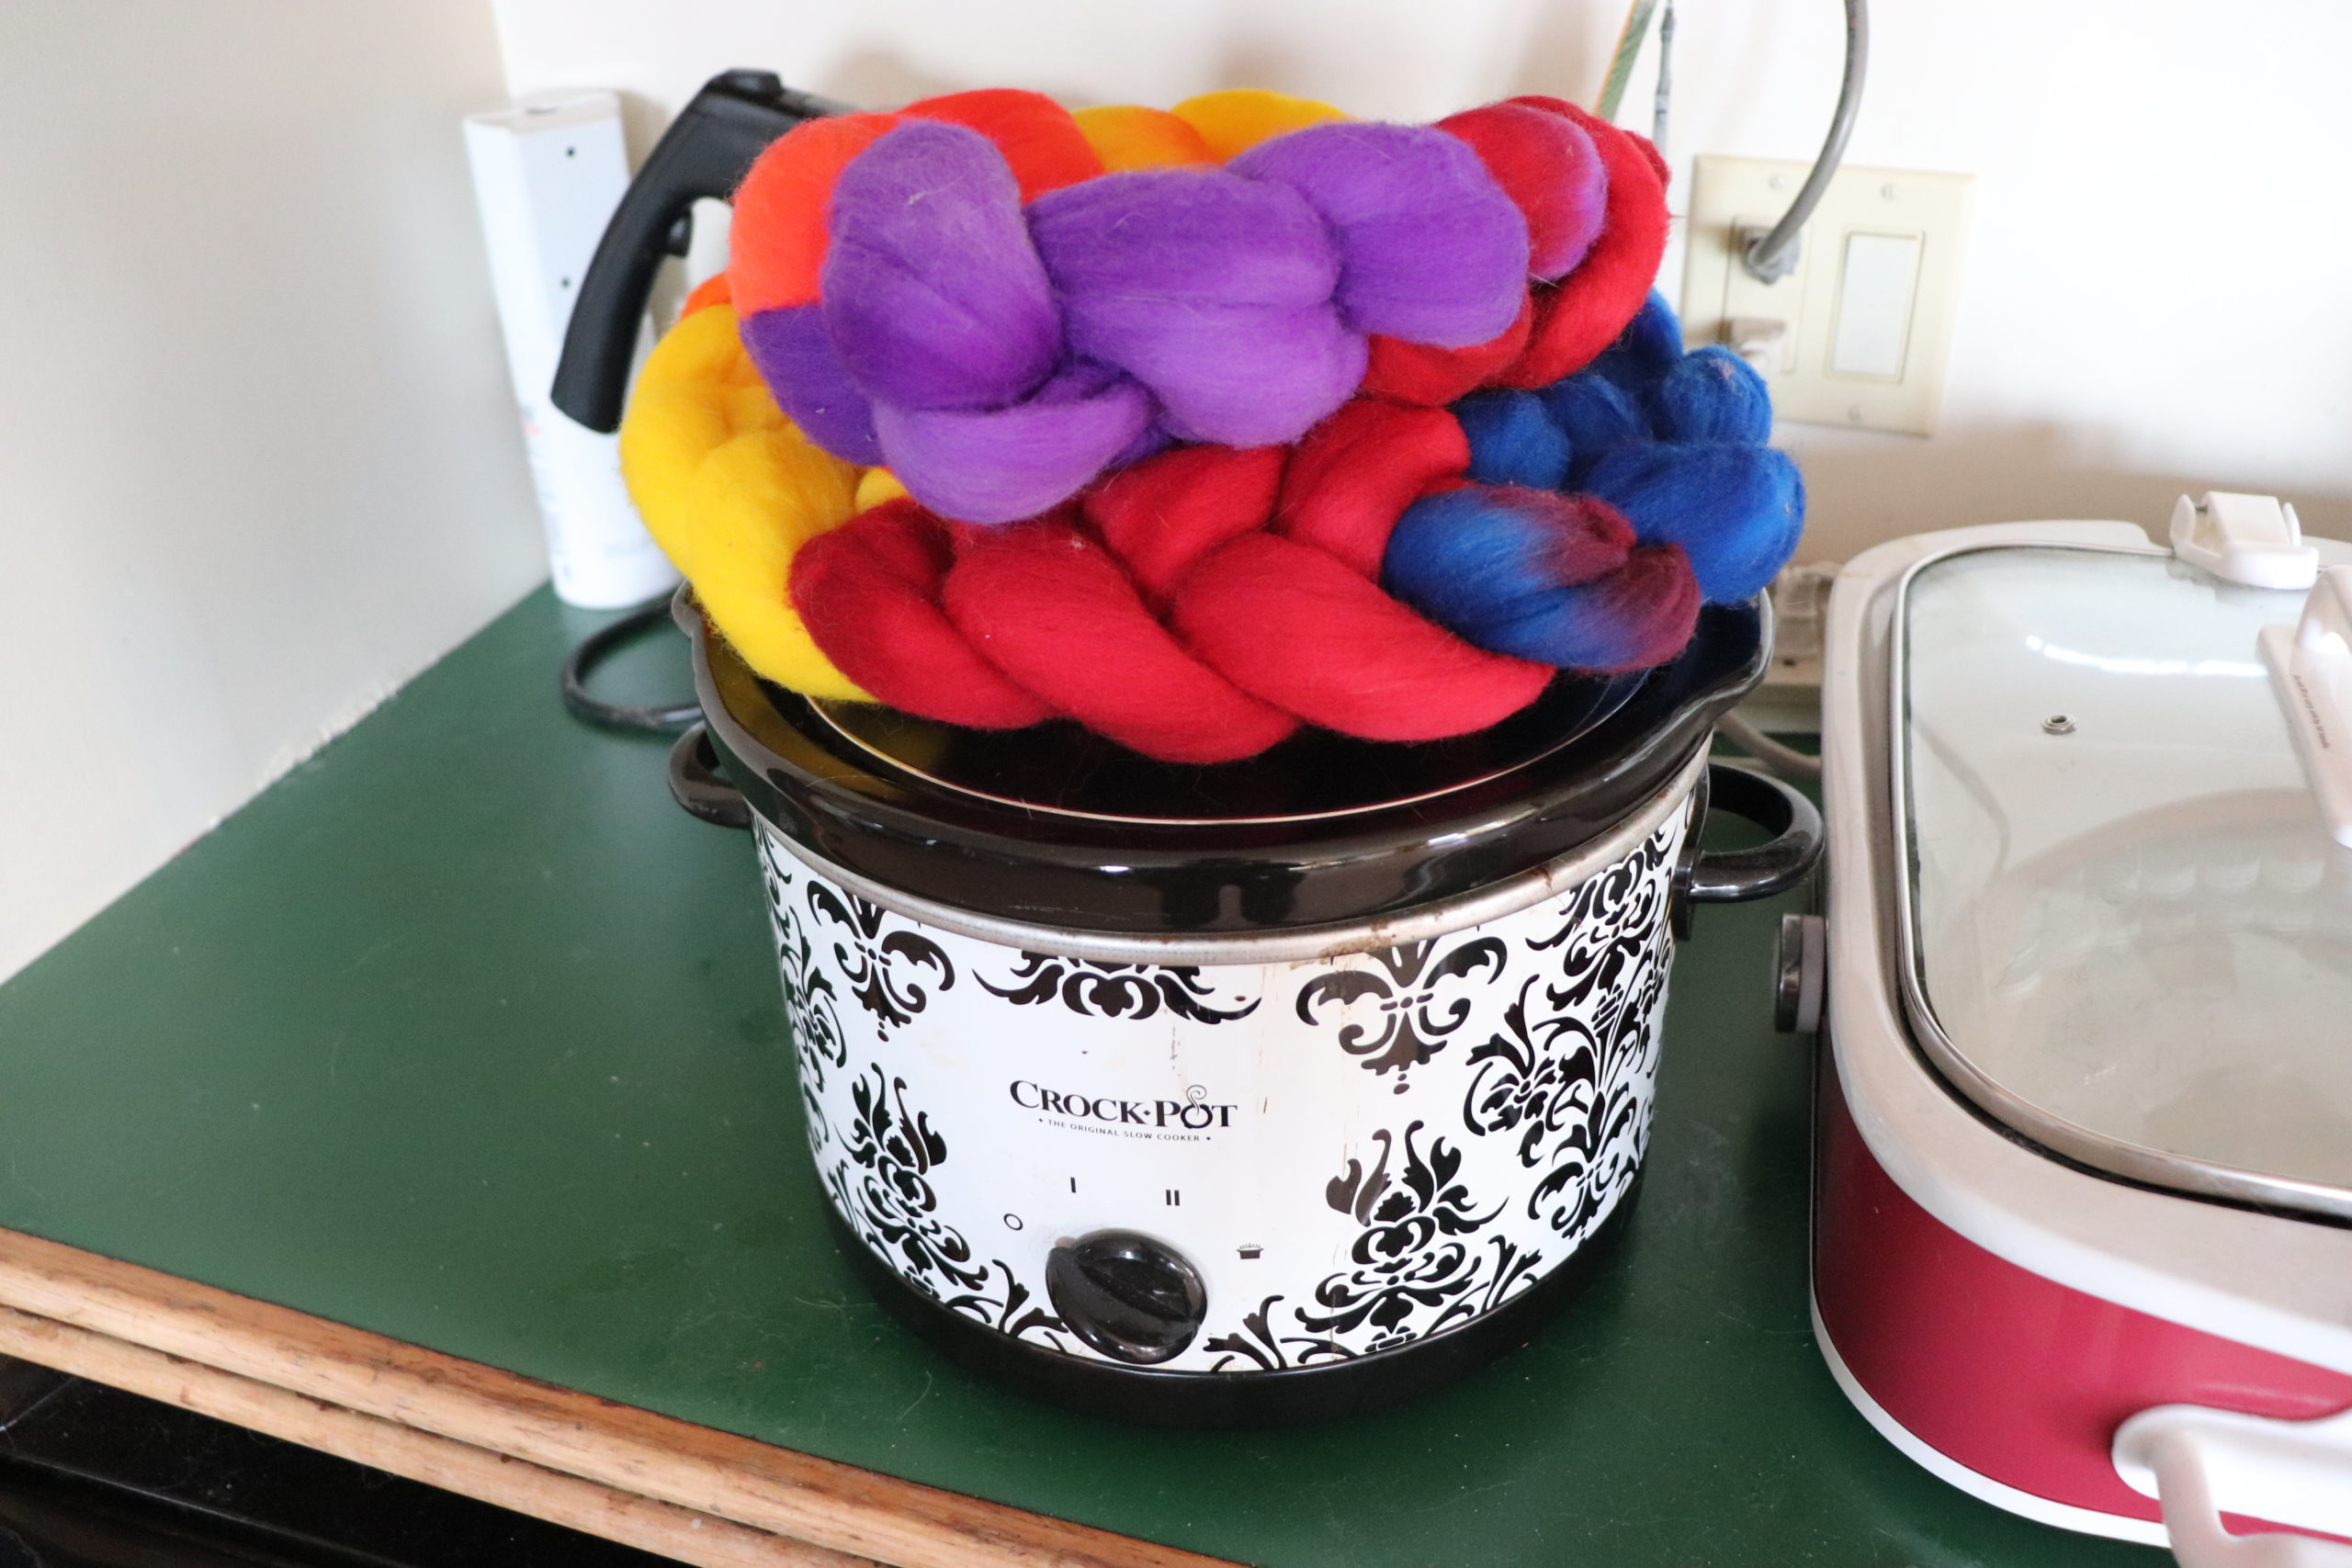
A crockpot with a decorative black and white pattern has a braid of colorful wool roving in shades of red, orange, yellow, blue, and purple, sits on top, placed on a green countertop next to another red and white crockpot.
Dyeing Roving in a Crockpot is super simple. You just need time. 🙂

I recently received some new dye colors from G&S Dye. I was replenishing some colors that I was getting low on, and I figured I might as well get some new ones as well. These colors aren’t new to me; I have similar colors from other companies, which is why I didn’t buy them originally.

But since G&S is a Canadian company, I want to stock most, if not all, of their colors, as they are easy for me to obtain and thus economical. I like to have similar colors from different companies available in case I run out or one gets discontinued, then I have a substitute.

But first, I need samples of each color to see how they differ from those of other companies. So, why not dye roving along with my samples so I can show how I do this process step by step.

The colors are very random and very bright! I liked the spontaneity and surprise factor of just going for it and dyeing each color separately.

Watch the video below to see how I dye roving step by step:

Why Do I Dye Roving in a Crockpot

There are certainly many ways to dye roving, but here’s my top reasons for dyeing this way:

Easy and Economical to Get Started

Crockpots (AKA slow cookers) are easy to obtain at most department stores and even second-hand. I got mine originally on clearance at a big box store, but I also see them available at thrift stores. You want a crockpot that is dedicated for dyeing only. Never use one that you’d also use for food.

Besides a crockpot, you could purchase a few acid dye colors to start, or even use food coloring and Kool-Aid—but I recommend getting acid dyes designed for dyeing wool. You don’t need a ton to start, and you’ll get so much practice dyeing with even three primary colors. There are several brands of acid dyes that I use, including Jacquard, Ashford & Greener Shades. Check out your local fiber arts or yarn store for acid dyes, or online. Even Amazon sells Jacquard dyes.

Acid dyes must be set with an acid – citric acid or vinegar are the most common. You can buy citric acid in bulk online, even on Amazon. One except to this, is Country Classics dyes, which are all-in-one and don’t require an acid for a mordant.

Other than those basic things, I also recommend rubber gloves, measuring spoons, a waterproof apron, goggles, and a respirator. Tongs and bins for taking the fiber in and out of the crockpot are also helpful. Access to a sink is also a plus, but not necessary. You can always soak your fiber in plastic bins.

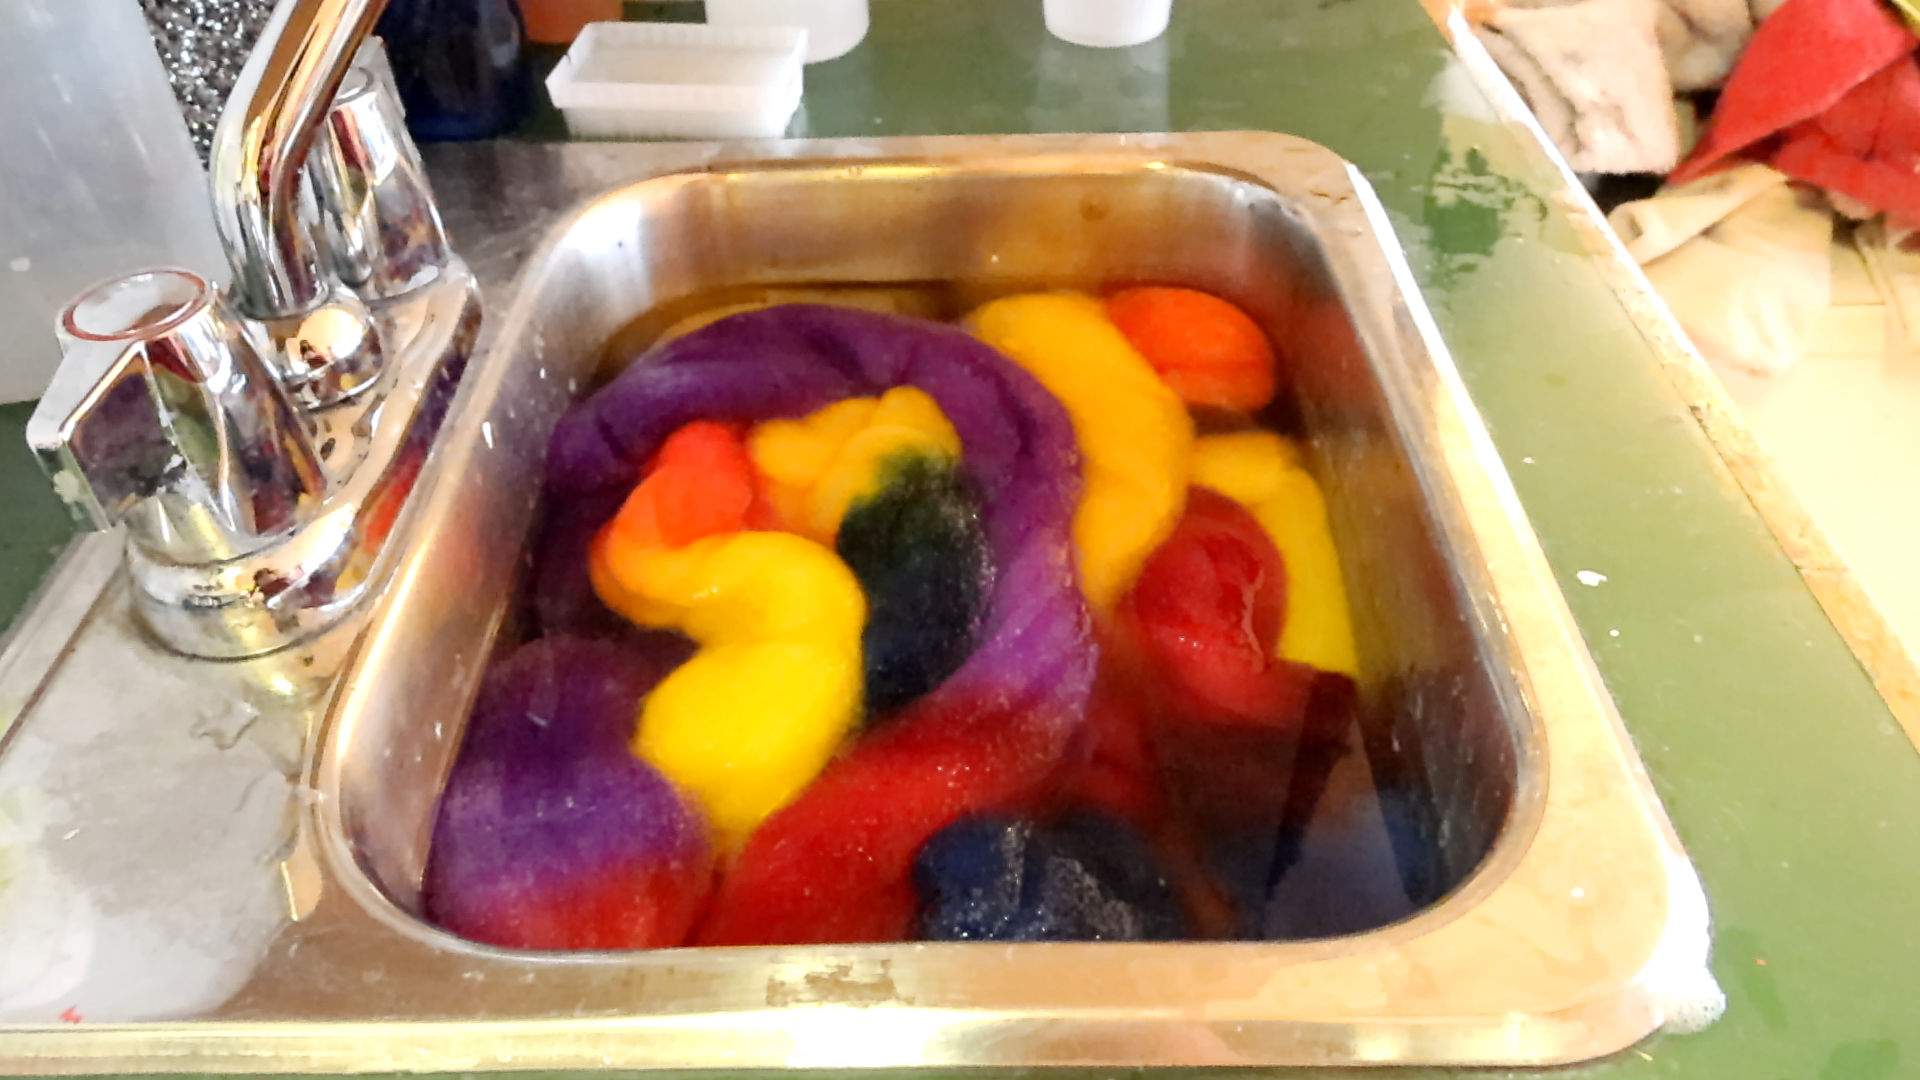
Colorful wool roving soaking in a metal sink filled with water. Various shades of purple, yellow, orange, red, and green are visible, after a fiber dyeing process. A silver faucet is on the left side of the sink.

A soap like Synthrapol or TNA soap is great to have as well, but Blue Dawn dish soap will also do the trick for soaking after you dye roving.

Fool Proof or at least Super Forgiving

I love to use my crockpot for dyeing because I don’t have to worry about constantly watching it or even being concerned about how long the fiber is in the pot. With a fairly consistent temperature, I get a nice, even dye without the worry of burning the fiber or the house down.

If the dye is not uptaking, I can add some more boiling hot water, and check on it again in about 20 minutes. Sometimes a little extra citric acid will also do the trick to get stubborn dye to transfer into the fiber. The gift of time will give you consistent results and fully exhausted dye.

No need for pre-mixing dye or citric acid

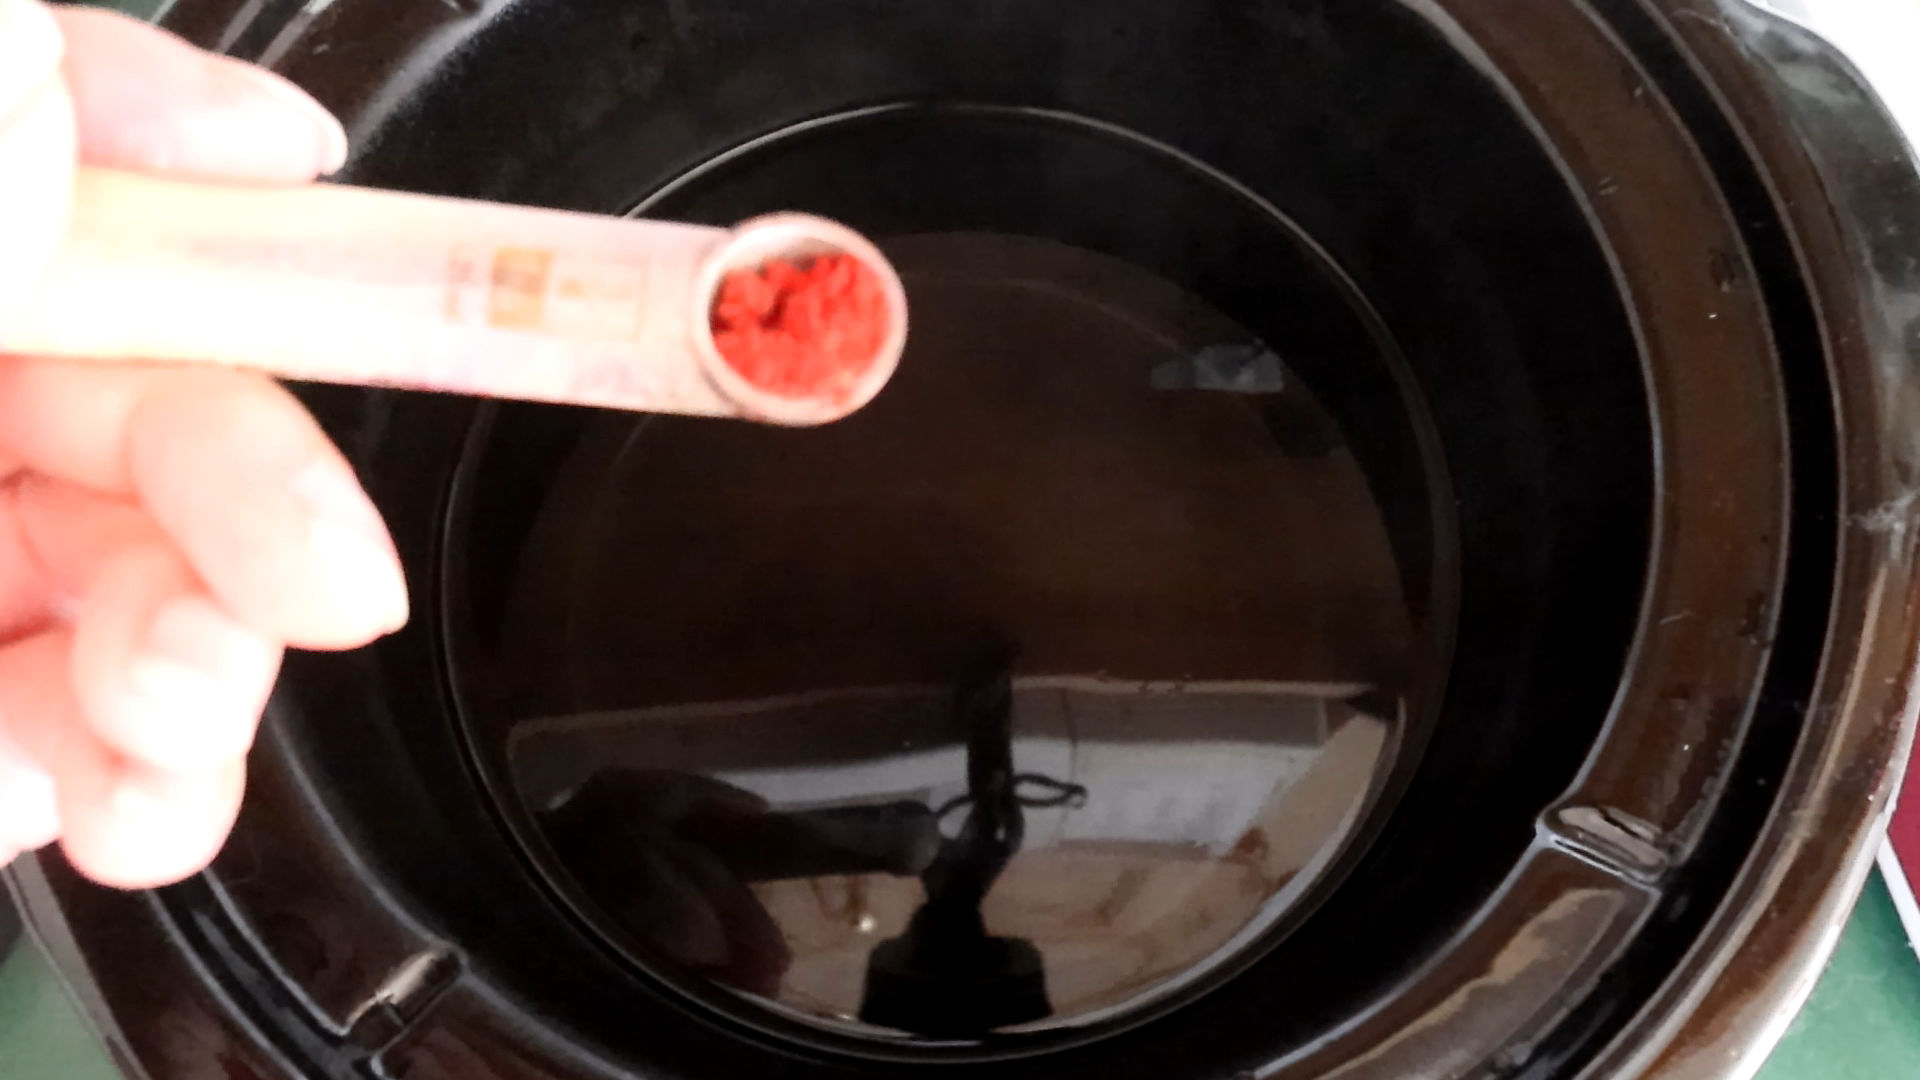
Another reason I like this method of dyeing is that I can do so on a whim. I choose the colors as I go; no pre-mixing is required. I also put the citric acid in the pot with hot water in powdered form and then add the dye. I’m working with 1/4 teaspoon of dye for the sections in this roving for each color.

A hand holds a white one quarter teaspoon containing red powder used to dye roving in a black slow cooker filled with water. The background is slightly blurred, focusing on the spoon and the cooker.
No need to pre-mix dye, put it straight in the crockpot along with citric acid

Doing one color at a time is less messy and each color stays as pure as you want

Believe it or not, I’m the type of person who doesn’t really like to get messy! As creative as I can be and as “messy” (HA HA!) as my brain can get, I do appreciate tackling tasks with order and organization. I’m the type that likes to take all the ingredients out for when I cook, but I will put those ingredients away as a go and clean along the way. I find mess and chaos challenging.

Crockpot dyeing allows me to approach one color at a time without worrying about the color getting on other parts of the roving unless I want it to. I like to overlap the colors as I dip the roving into the next color in the pot. Whenever I have pre-mixed dye and dyed roving in the dip/wrap in plastic to steam method, not only does color go where I don’t want it to, but it tends to make a mess: color dripped on the work surface, for instance. Doing one color at a time is perfect for control freaks like me. 😉

That’s not to be confused with the times I dye and want the colors to mingle together. But that’s a blog post for another day. 🙂

Cons of Crockpot Dyeing

  • You need to have a crockpot exclusively for dyeing (though, as I mentioned, it is easy to obtain one relatively cheaply; at least this is the case here in Canada)
  • It’s time-consuming. It is a slow cooker, after all. You are dyeing your roving low and slow. However, I would argue the time you save not pre-mixing dye may make up for this
  • You can only do small amounts at a time. If you are looking to do large amounts of dyed fiber, then a large stockpot or a caterer’s steamer tray may be more to your liking.

I hope you enjoyed my video on how to dye roving using the crockpot method. In the future, I hope to cover this and many more ways to dye yarn and fiber.

Leilani signature

Check out my Youtube for other how to spinning and dyeing videos.

I am a jewelry artist, spinner, and indie dyer in Nova Scotia, Canada, self-taught in all areas. I hope these posts help encourage and inspire you along your creative journey, no matter if you approach your craft my way or not. 🙂 Check out my About Me page for more info and the Fiber Arts/Spinning/Dyeing Category for more content like this.