Leclerc Bobbin Winder & Storage Bobbins

081

Spinning so many singles means my handful of bobbins for my wheel just isn’t cutting it anymore for storage. Upon doing some research, I was happy to obtain a bobbin winder and 2 dozen storage bobbins from Leclerc Looms here in Quebec. I purchased their larger size styrene 4in spools, not the typical boat shuttle spools that are too small to hold much yarn for plying.

The winder is a simple heavy duty tool that I am really glad I bought. Not only is it faster than winding off by hand, it winds nice and even, and not too tight as I find the case with hand-winding. I have it screwed to this side table for my rocking chair in the livingroom for now until I move back into my studio again. What can I say it does the trick. 🙂

Making Handspun Yarn – the Tools Involved

133

I have been having a fabulous time learning all about spinning since purchasing my first spinning wheel in February. I’ve been spinning wool roving mostly from my collection of roving by Bartlettyarns obtained from the New Hampshire Wool Show last year (they had a buy 4 get one free sale…or something like that. At the time I had no idea I would learn to spin; I simply stocked up because it was a darn good deal and you can never have enough wool roving for felting :)). It’s very light and fluffy and I enjoy the texture it creates once spun. I am still waiting for the plying head/jumbo flyer I ordered for my Lendrum, so for now I have been spinning and storing my singles…for the most part anyway. I also have been experimenting with plying just to get a feel for it (you can most certainly ply with the regular head you just get less yardage).

I own two lazy kates and I use them for storing my bobbins when I am not plying. I tend to get bored spinning one color so will switch it out for another fairly often. I watched a wonderful video called “The Gentle Art of Plying” by Judith Mackenzie. Judith calls these marvelous contraptions just “kates” and I chuckled because I agree with her – how can you call something so useful lazy? When she made this remark in her video I was nodding my head in agreement! If you are looking to understand more about plying and a good method to do it, I highly recommend her video. It certainly took the intimidation out for me. I even tried plying cables. It is a whole lot of fun and really addictive. I think once you understand twist and counter-twist (S and Z as it is called in the spinning world) plying is not so intimidating. I always thought I would only make fun bulky singles, but I am really loving plying and the balance created in the finished yarns.

A niddy noddy is another useful tool with an entertaining name. One you have finished plying your yarn (or spinning your bulky single yarn as it may be) you wind it onto a niddy noddy. This helps straighten the fibers as well as a tool to count how many yards was made. For my particular niddy noddy, I count the wraps and multiply by 1.5 to get the yardage of yarn made. Winding yarn on a niddy noddy takes a bit of skill and this is where my jewelry making experience really help me out. I have heard of people who, even after years of spinning, never could master wrapping on a niddy noddy. For me, I find it quiet fluid! 🙂

After winding the yarn onto the niddy noddy, you tie off the yarn and then set the twist and/or full. I will talk about this in another post. 🙂

Lendrum DT Spinning Wheel

1 Lendrum


This is my new baby. Surprising, no? It’s definitely not for jewelry making, although you can spin beads into the fiber. 😉

We are a Waldorf Inspired household. Before I had my children I could have cared less about knitting and crochet. I had been slowly making time to teach myself to knit last year,but  finally decided to make a concerted effort at it during the holidays. I had a 3 month old, and spent a lot of time nursing & rocking…and I thought it would finally be a good time to dedicate a good amount of time for learning (read: a nice, quiet creative project so not to disturb baby). It went okay at first, but I found myself wanting to know more about the textile I was working with. How is yarn made? What is the difference between natural and synthetic fibers? Between machine or hand spun? Drop spindle or spinning wheel?

After watching a few videos on YouTube, I was totally intrigued about spinning and really wanted to get a wheel (I was pathetically clumsy with a drop spindle).

So after considering my options, I ended up purchasing a Lendrum Double Treadle. This is a scotch tensioning wheel, which meant nothing to me at the time, but I so enjoy spinning on this type of wheel now. Another post is needed for technical whatnots…

I chose this wheel because it is compact, folds for storage (not that I have never had a chance to store it!) and is locally made in Ontario. I am waiting for a plying head/jumbo flyer that I ordered back in the spring. Lendrums are in demand and worth the wait.

You can find  a local Lendrum dealer by visiting his website.

Spinning, understanding fiber and how yarn is formed has been like a kick start to my brain as far as knitting and crochet goes. Although I am still very much a beginner, since spinning patterns/stitched/formation make so much more sense to me. I bought this wheel in February and spin pretty much everyday we are home. A joy!

More info to follow…


Creativity 2011 – Learning to Knit! Basic garter stitch…

Knit

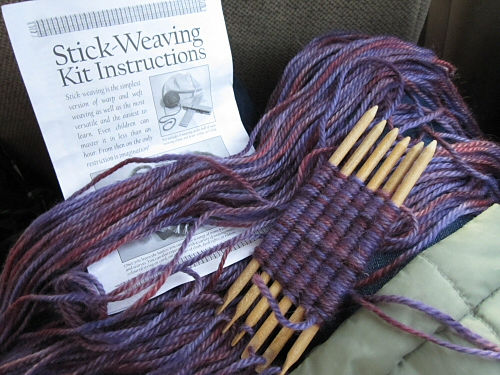
With the stick weaving mastered in no time flat, it was time to try my hand at the needles. Knitting is another skill on my list of things to learn in 2011.

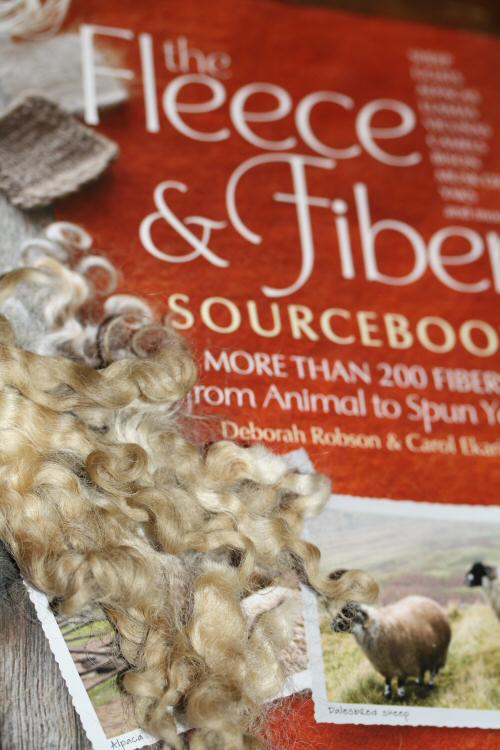
So on this same trip, I brought along with me some size 7 needles and a great skein of wool I had picked up at the Vermont Wool Show. I should mention that I have knitted before – when I was about 10 years old. I don’t remember actually completing a project, just casting on/off and doing what I know now is the basic garter stitch. I can’t even remember how got to doing it – if it was a kit as a gift, if someone showed me or I just figured it out somehow, but I can picture the plastic knitting needles. In any event I don’t remember a thing about how to do it, so to me this was like my fist time. 🙂

The thing with me is, I simply do not learn in a conventional manner. I find books and instructions rather confusing as they are too one dimensional, and videos I never seem to be able to keep up with or I am too concerned with copying exactly what the person is doing in the video rather than actually learning. In other words, take the video away, and I freeze. If my work doesn’t look like that in the book or my technique doesn’t go as smoothly as the person in the video, I get discouraged. This is probably due to anxiety of my conventional schooling: text books are intimidating & due to the learning anxiety I simply regurgitated what I was “taught” in school – nothing truly retained. I guess that’s why with my jewelry making I’d rather just figure it out for myself than be taught…regardless of how many hours extra it takes me…I can be stubborn like that!

So after reading through & studying diagrams from an ebook on my Nook, and watching a video on our Tab – I felt I had somewhat of a foundation of what I was supposed to do – so I threw them to the wayside and practiced myself.

First of all I loved the size 7 needles & found them easy to maneuver – I can see why this size was recommended to me for a beginner. But, I really wanted to work with a larger size while I was learning. Smaller needles = smaller stitches so my work was progressing really slowly.  I wanted to see some results fast just to keep me motivated. I also realized I needed to get some cheap yarn for practicing. I kept unraveling the good stuff if it wasn’t perfect…I just felt like I was wasting it. As with jewelry making, it felt like leaping straight into the fine silver wire when you don’t even know how to wire wrap yet… 🙂

So the next day I was off to the craft store. I bought a pair of size 10 bamboo needles & some yarn that was on sale for about $2. The instructions for the project on the yarn called for a larger needle than a size 10 so it had the “fatness” I desired to see larger stitching.

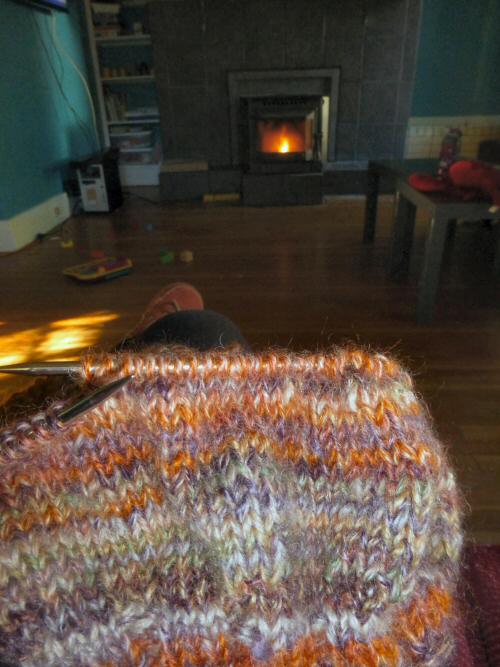
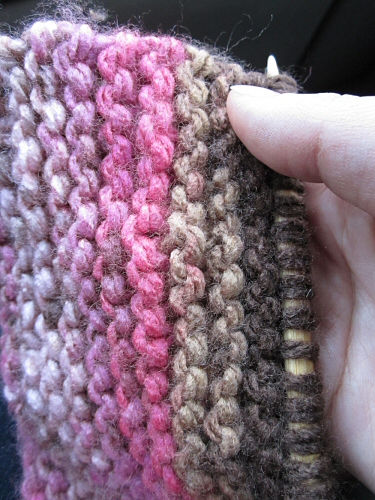
My very first knitted – anything. It’s a simple cast on & garter stitch. Believe me there are a lot of mistakes here…yarnovers, double stitches…oh well. My goal was to get comfortable with the feel of knitting, so rather than going back to fix mistakes I simply carried on.

My tensioning gets tighter as I go as well. I think I struggled with this the most even more so than holding the needles. My stitches were loose in the beginning and would easily fall off the needle, as well as looked sloppy…with practice they got better & will continue to get better.

See how loose the stitches are at the bottom…

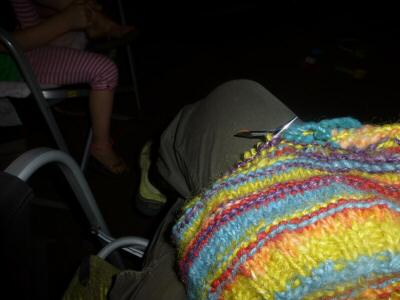
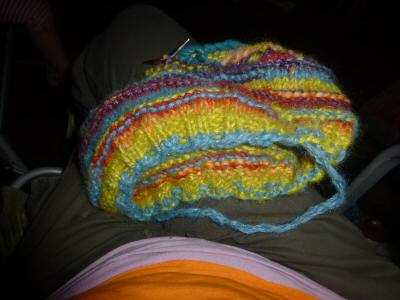
I keep this project in the car & work on it while we are away. Obviously, I am not the one driving. 😉 I love being able to have something to do with my hands…jewelry making was never a practical traveling project for me since I work with beads. I love how easily yarn & needles tuck into a bag. “But what are you making?” My husband says. He only pictures knitted socks & hats! For now, I think I will stick to making blankets for my girls’ dolls. 🙂 When this is done I’ll try a different stitch to make another one. Those dolls will be nice & warm. 😉 Once the movement becomes totally natural with a variety of stitches I will then tackle an actual project…other than just square objects. 🙂

So I am finding knitting, now that I don’t have to think so much & the feel is natural, very soothing & satisfying. I wondered if the repetitive motion would bore me but I found just the opposite. Interested in seeing if other stitches feel as natural, or what actual projects I will be inspired to do.

I couldn’t tell you if I knit in the “English” or “Continental” method. Or even if my form is correct – hell, even if it looks correct. All I know is, in my hand, it feels right, and that’s all that matters. If there is a new project that you want to take on but you are intimidated because you may not do it “just so” or the “right way” – what makes it right is if it is right for you. Make it your own…Own it! Make 2011 your year to try something you’ve always wanted to do! 🙂


Stick Weaving

Stickweaving

I have declared 2011 the year to learn some creative skills that have been on my list for ages (not jewelry making related). One is to learn to knit, which actually has only been on the list a few months. I was inspired to give it a go after attending a Sheep & Wool Festival last fall.

Before knitting however, I found this inexpensive stick weaving kit from Lee Valley. It says it’s simple to learn so I thought I’d give it a go. I am always looking for creative objects that I can pass along to my girls as they get older.

On a recent road trip I packed the stick weaving kit & the knitting needles. Upon reading the instructions I opted to try stick weaving first. The verdict? Stick weaving makes knitting look like rocket science!! This was incredibly easy – and incredibly satisfying as the projects work up really fast.

The instructions say that stick weaving is “the simplest version of warp and weft weaving” and I believe it! It made me feel like I knew what I was doing right away.

Definitely a project highly appropriate for children. Not my girls who are very young, but elementary grades for sure. Although I am sure you could teach pre-schoolers this as well.

Finishing is a breeze. You can knot or braid the ends, creating fringe. Or tuck it under with a crochet hook. Weave sections and sew them together for larger projects.

In fact, I enjoyed this so much I decided to go out & buy another kit while we were on our trip & purchase some inexpensive yarn to experiment with a 12 stick weave.

It will be neat to try weaving other materials as well: embroidery thread, strips of fabric…I’m sure you could even weave wire in this fashion. The possibilities are endless…and I love that the finished project looks like you had a lot of skill & took a lot of time to make it. 😉