Jewelry Inspired: My Prophetic Charm Bracelet

Weddingbracelet

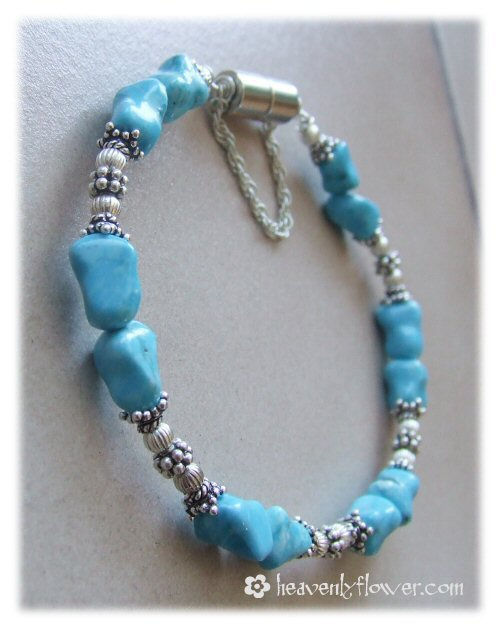
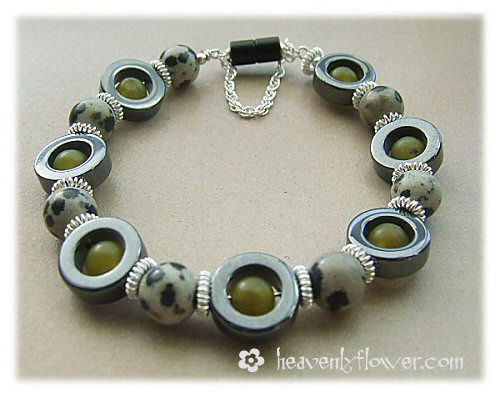
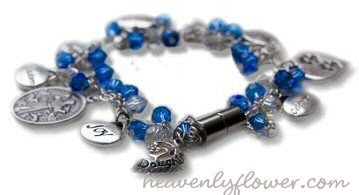
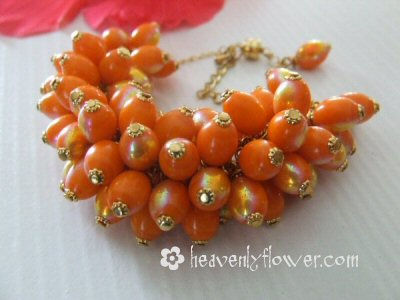
If you are familiar with my work, or have ever picked up my business card, you may recognize this bracelet. It is the official logo for heavenlyflower.com.

This bracelet has a lot of significance beyond just being something pretty to use as a logo. This piece represents many facets of my life, and it is ever changing.

I designed this bracelet as part of my bridal jewelry. At the time, I wanted something that represented my wedding colours, and a few inspirational charms to serve as good luck for the big day. It wasn’t until after the wedding was long over that I realized that the bracelet held potential to become an ever-evolving keepsake of memories & symbolism.

The bracelet originally was made up of sapphire & clear Swarovski crystals, a few inspirational word charms (“celebrate”, ” honor”, “trust”, “wisdom”, “joy”), symbols (paw print charm for my love of animals, St. Francis of Assisi medal), and an “L” and “R” for our first initials. I also had a mother daughter charm (I will get to that one, shortly…). I used a magnetic clasp because I didn’t want to be fumbling with clasps on the big day! 🙂

Fast forward 16 months after our wedding, and the birth of our first daughter. I started thinking about the bracelet again, and wanting to add elements to it that symbolized me now as a parent.

When I took the bracelet out of the jewelry box, I was astonished to realize that the two types of crystals used symbolized both my birthstone and my daughter’s (Sapphire for September – when Sophie was born, and April is diamonds – signified by clear Swarovski crystals). Sophie was supposed to be born in October – but was 2.5 weeks early. To me, this was fairly significant.

These past couple of years, I have added new elements. An ” S” for my daughter’s fist name, baby feet charm, and a ” Mom” charm. A ” teach” and “patience” charm when I needed to be reminded! Just recently I added an “A” for my second daughter, and updated the clasp to a sterling silver flower clasp.

I mentioned the mother-daughter charm earlier. I have half a heart that says “daughter” – I made a bracelet for my mother for my wedding, and it has the other half of the heart, that says “Mother”. Her bracelet contained the birthstones (symbolized with Swarovski crystals) for myself and two siblings.

My mother passed away suddenly on October 25, 2008 at the age of 54. My dad had asked me if I wanted her engagement ring, and at that moment of grief I decided that she should be buried with this bracelet (I wear her engagement ring on my right hand and am glad I decided to keep it).

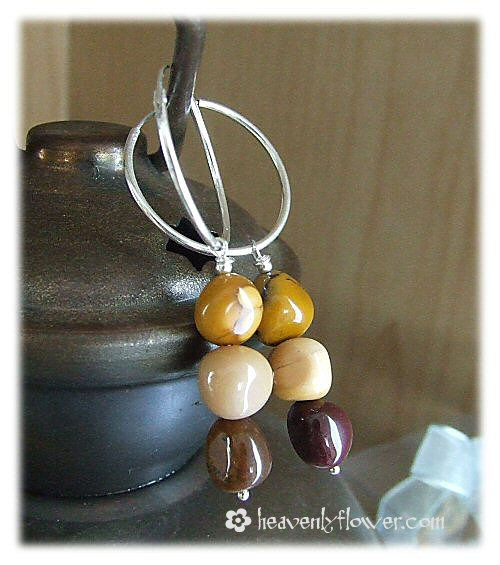
Over the weekend I decided to add my youngest daughter’s birthstone to the bracelet – and I used Swarovski bicones instead of the round beads. Ava is very angular in features just like a little ram – she is an Aries afterall, and it just seemed to fit better. 🙂

See the rest of my wedding jewelry in the post: Come Tour My Jewelry Box: My Wedding Jewelry Then & Now

Bringing The Beads Back to The Bench…

Bench

I haven’t done any beadwork in quite awhile since I have been teaching myself some metal techniques. Today I brought the beads out again in order to work on my Artbeads Blogging for Beaders Project for Summer.

I doubt I will finish both pieces today…actually I know I won’t, esp. since this beautiful weather is calling me outdoors!

I have to admit something: I have WAY too many supplies. I am serious!! Not exactly a bad thing – but over the past two and a half years, I seem to have had more time to BUY beading supplies than MAKE jewelry! Plus I scope out suppliers, buy wholesale and volume discounts and close outs – well, you get the picture. When I sat down to look at colour options for these two necklaces, I had too. many. choices.!!  In a way it was overwhelming – too many possibilities! I spent a half an hour this morning just looking & considering colour schemes!! I came to the conclusion for example, I have way too many gemstone beads in the hue of ORANGE!! I went to get large guage headpins and paused to consider dozens and dozens of different metal components. And I am organized – believe you me – it’s just too many choices staring at me. At this point, I think I could open a small store…if I had the time! HA!

Anyway, I mean that somewhat in jest of course – but still…anyone else feel the same way – even some days?? The possibilities are endless when it comes to beads…I thought I was limiting myself by not buying glass anymore but nope… 🙂

Happy Creating! I should be posting this project within a couple of days…

Clasp-o-phobia: Getting over my fears ~ a review of Bali Silver Clasps.

Onyx

For December, Artbeads offered through their Blogging for Beaders program the opportunity for us to try products from their Bali Bead line. Upon reviewing my choices, I decided to try & review the clasps.

You see, I am self-diagnosed with clasp-o-phobia: the fear & doubt of the functionality of most clasps on the market. I have tried different clasps in the past, including barrel clasps, toggle clasps, “S”-clasps, hook & eye clasps, etc…but none really impressed me or gave me a sense of security. I am one who hates the frustration of doing up clasps on bracelets, and also the feeling of a clasp that may become undone during regular use.

So because of this, I have stuck to using two tried and true clasps: the lobster clasp and the magnetic clasp. Although the lobster clasp can be tricky to get latched at times, the security you get from knowing that it is not going to come undone makes it a winner in my books. It’s a clasp we are all familiar with, and can be used in adjustable bracelets and necklaces.

The magnetic clasp is a dream for us who hate to fiddle with clasping bracelets. The worst thing that has happened is it accidentally pinching my skin if it was too close to my wrist when the magnets come together. I also like to include a safety chain with magnetic clasps in case they become attracted to another metal object and possibly come undone.

So when Artbeads offered the opportunity to review items in their Bali line, I thought this was a good chance for me to overcome my clasp-o-phobia. Many of the Bali clasps are very ornate and add beauty to the piece. I also know from past experience with Bali products that they are sturdy & well made.

As you can see I am a bit late with December blogging due to the holiday rush, but here are the finished pieces inspired by the Bali clasps…

The first clasps I wanted to try were the toggle clasps. I immediately noticed how ornate & well crafted they were: very sturdy – great for big stones that I love to work with! They also had chain already attached which I appreciated. In the past, the sterling silver toggles I have tried did not contain a chain, and for me to add one was trial and error – sometimes too long, sometimes too short. These totally took the guess work out of it!

Above: toggle clasp with wire loops paired with 16mm faceted quartz & 12mm reconstituted smoky quartz beads.

Above: square beaded toggle clasp paired with large aquamarine nugget beads.

The verdict: I *LOVE* these clasps…who knew the functional part of a bracelet could also be a focal point! Very easy to put on and pair well with large stones. You will probably find when buying a bracelet with a toggle clasp you will appreciate going up a size so to have room to maneuver the bar piece through the clasp. For example I usually make my bracelets 7.5 inches – the common ladies wrist size, but these are approx. 8 inches. I don’t think I could comfortably get them on if I made them the standard 7.5.

Next I tackled designs around the “S”-clasps. At first, I found these clasps very frustrating. Again very sturdily designed, and very beautiful…but since they are made out of such a strong gauge of wire I found them very hard to get clasped & undone. Some slight manipulation with the pliers to loosen the “S”  part slightly, and success! A beautiful clasp that was fairly easy to use. A good shake and it was clear that these were very well designed: I was not worried of it coming undone accidentally.

Above: “S’ Clasp with double wrapped and snaked wire paired with square faceted onyx beads and pewter bead caps.

Above: “S” Hook Clasp with granulation & wire work with faceted onyx coins & pewter bead caps.

Finally, I tried the hook & eye clasps. I want to comment separately on these since all three were so very different.

I was really excited with this Simple Hook & Eye Clasp. This large clasp works perfectly with larger stones, as seen above with 16mm red banded agate beads. Because of the size it is quite simple to use.

The Hook and Eye Clasp Set is the polar opposite of the previous clasp. Very petite and great when you want a clasp that is inconspicuous. It works beautifully with the bracelet above showcasing 6mm South Sea Shell Beads in Sterling Silver. I was happy to find this clasp very easy to use – definitely a good alternative to the lobster clasp and I will be keeping this one in mind for future adjustable pieces as well.

I decided to use the Triangular Hook & Eye Clasp last. I had a hard time deciding what to make with it, considering its design. I found it rather awkward to use. Although it was my favourite clasp esthetically, it was my least favourite in terms of usability. When I finally decided to make a three-strand sterling silver & onyx bracelet with it, I really had to bend the hook part out with my pliers in order to get the clasp undone & easily done up. Because of this I added a safety chain. But to be honest although it takes some practice to learn how to use this clasp, it wasn’t so bad in the end. And it looks fabulous!

For 2010 – Free Gift With Every Purchase

Due to the success and positive feedback of my “free earrings with every purchase” holiday promo, I have decided to give a free gift with every purchase for 2010. It maybe a pair of earrings, a gift certificate for $5 off your next purchase (or pass it along for a friend to use), a beaded bookmark or hair pin…the fun is that you never know what you are going to get, but because it is from heavenlyflower.com you know that it will be quality!

Happy 2010 everyone…I am embarking on a new journey I am calling my “jewelry sabbatical” ~ new equipment and supplies are on its way and I will be blogging about it so you can take the journey with me. Hopefully we will be inspired together!

Jewelry Inspired: Funky Copper Disc Choker

Copper

I added a little somethin’-somethin’ to my Artfire Studio today. This copper choker has been sitting on the bench for some time begging to be finished. I bought these copper discs – no word of a lie – 10 years ago. I used to buy a fair bit of Estate sell-offs back when ebay wasn’t so saturated. I admit at the time, being new to the jewelry making game, I wasn’t aware of the size when I bought them. 15mm just didn’t compute in my brain as being on the large side. So when the lot arrived – almost 100 – I had no idea what to do with them. They seemed so big and flying saucer like…

So they sat in the supply pile for well, a decade. Then this summer I decided to pick up some copper headpins, and see if I could make one of my signature funky chunky bracelets.

(Oh and I decided to pair up the discs with a 3.3mm bicone copper bead to add some dimension…)

I wanted the piece to be really solid so I started putting the discs really close together on the links of dash dot sterling silver chain (I love this chain by the way – although it is expensive it is really heavy duty, perfect for projects like this). It definitely was solid…however by doing this it did not have much bend…kind of hard to make into a bracelet. Since I already started it, I didn’t want to dismantle and start again, and I knew I had a fair bit of beads, so I decided to turn it into a choker.

So I got the beads put on and then, there it sat for a very long time. About three months! I just couldn’t decide how to finish it. Although I had assembled the discs on a heavy gauge sterling silver chain, I did not like the way the sterling stood out against the copper for the extender chain portion of the necklace. I probably could have oxidized the chain, but I was lazy. Instead I found some really heavy duty vintage copper chain to finish off the piece.

NLE149 (1)

NLE149 (4)

I put a fairly long extender chain on it so that it can be adjusted to wear in a variety of ways. I also like the dramatic effect it has: the large beads at the front, and the slender sleekness of the chain trailing down in the back…I really love how it feels like a puzzle in your hands.

This is a piece for someone who wants to make a bold statement, and own a truly one-of-a-kind. I know I could never get these beads again. They are assumed “vintage” although I cannot confirm this…

Jewelry Inspired: Sparkly Reconstituted Smoky Quartz…

Amber

Expanding on yesterday’s post, that lately I have been working with colour themes, I now introduce you to one day’s project: fun with reconstituted smoky quartz. Essentially, these are glass beads that contain particles of smoky quartz. So yes, they are “just” glass but are they ever so pretty! I don’t purchase a lot of glass anymore but when I saw how these faceted beads danced under the lights I had to have them. They are a nice size too – 12mm, so they really make a statement.

Initially, I set out to make one of my signature chunky bracelets. However, as the piece evolved it became clear that it laid better across the neckline than on the wrist. And so, voilà – this piece was born:

NLE148 (1)

NLE148 (3)

Unfortunately, my photography skills do not do it justice. It looks and feels like a million bucks on. This is probably due to the heavy sterling silver dot dash chain, as well as the 22 gauge sterling silver wire each bead is affixed on the chain with. I also made sure to make it adjustable length wise so that it could be worn in different ways: choker style or longer. I love how it looks and feels on –

I was really, really tempted to keep it for my own personal collection!

If you can imagine, this was a fairly labour intensive project, so I finished up my adventures in sparkly amber coloured bead land with two elegant and tasteful pairs of earrings:

ELE098 (1)

ELE098 (5)

ELE099 (1)

ELE099 (5)

That was fun! I am really hoping to find time to do more projects like this!

Jewelry Inspired: Aqua Blues…

Aqua

So the other day I had the opportunity to have an adventure in sea blue – or aqua blue as these particular beads are properly called. I currently have dyed quartz and fiber optic cat’s eye beads in aqua blue. I have beads of all colours of the rainbow in the cabinet…so I love to get requests for specific colours to work with esp. if it is one I have not touched in awhile. I mean really, do I need an excuse to get creative? Twist my rubber arm…

Check out these dyed faceted quartz beads paired with sterling silver hoops. I tell you, the pictures do not do these babies justice: so pretty and sparkly!

ELE101 (1)

ELE101 (5)

I also have many round 4mm dyed quartz beads. Kind of boring, you know? So I had this idea to wrap them around some memory wire  – the bracelet size – with 24ga sterling silver wire to make a fun & funky hoop earring. I have not worked in memory wire in a long time, & due to the success of this experiment I think I will be doing more projects using memory wire in this way. I can also see making some cool pendants & such as well, not just earrings!

ELE100 (1)

ELE100 (3)

The hoops face back-to-front when you wear them – just like a normal pair of hoop earrings. I decided to put them on sterling silver French ear hooks (earwires) for comfort.

Finally, I really love the look of this hue of blue with white, so I wanted to make a dangly pair coupled with a freshwater pearl accent…and here you have it: 4mm dyed quartz, fiber optic cat’s eye beads and 5mm frewshwater pearls on sterling silver:

ELE102 (1)

ELE102 (4)

It was really fun to work with this colour amongst all the Fall colours here in Québec…really makes me long for white sandy beaches and turquoise seas! 🙂

The Gift of Re-Gifting: heavenlyflower.com’s Holiday Promotion

Re-gifting. You can’t tell me the thought has never popped into your head. You receive a gift that really, is perfectly fine but just not your personal taste or style.

So, I decided to give you my re-gifting blessing! Every purchase from my Etsy Shop or Artfire Studio will receive a gift from me.: A free pair of earrings. You can keep these handmade artisan earrings as a gift from me to you, or use as a gift for someone on your holiday shopping list.

The earrings will be made of good quality materials: either sterling silver or gold-filled ear hooks, hand-painted cloisonné beads or semi-precious gemstones.  ANY PURCHASE qualifies. Just my way to say thank you and to give back. I know there is always someone on that list you’d like to give a little something to that maybe the budget doesn’t allow.

As always, there is free shipping worldwide on all items! 🙂

The promo is currently on and will continue until January 11th, 2010. You will automatically receive a pair with your purchase.

Creativity Requested: Adventures in Komboloi

Komboloi

DSCF1741

I had a request for a komboloi (worry beads). I have never made worry beads before, so I jumped at the challenge. After getting a few details, I started searching through my supplies to see what I have that would be suitable. Luckily I have a pretty decent stash of supplies now. I buy wholesale, so unless I need to order a few hundred dollars in supplies, I don’t take custom requests unless I have the beads on hand. With the exception of, the chance I may be attending a gem show or personally visiting a supplier where I can pick up a few things at wholesale price. In this instance, I was putting in an order for chain anyway so I added a couple of strands of carved bone beads for accents.

A traditional komboloi is constructed out of light organic materials such as amber, coral, wood or nut beads, bone, horn…although they can be made out of just about any kind of bead from glass, crystals or gemtones. The key is to have a good feel weight wise but still be light enough to make the pleasant clicking/tapping sound when the beads hit together.

So…since I have never constructed one before, this posed several challenges for me. I had to judge size, weight and length as well as decide which materials I felt would work the best.

In the instance that I get a request for something that I have never encountered before, I will come up with a few variational designs (at least three, usually), show them to the potential client, and have them judge which they like best or tweak a design to their liking (if possible). This way the client can see my creative take on the design. Extra pieces get listed in my online shops.

The design itself looked simple enough, but I ran into a few challenges. Without having the client feel the beads first hand, I wasn’t sure which size would be suitable. So I had to do a lot of digging through my supplies picking a few variable sizes that the client could try to help decide which felt the best to them.

Just when I thought I had the right variations, I ran into a major problem with stringing the beads. I had originally laid out some leather cord & chain – of which none of the beads fit through. Holes on stone beads tend to be on the small size to prevent slippage.

So before throwing in the towel I dug deep into my stringing supplies and also got out a very useful tool: a bead reamer! It’s used to help file & shape out the holes of beads to (hopefully) make the passage wider. I ended up with 4 different designs in the end.

DSCF1786

I decided to construct this horn & bone piece first since they had large holes & slipped easily through the chain. 11mm translucent butterscotch horn beads with 10mm carved bone beads on an antiques silver chain.

DSCF1747

I dug out some waxed linen cord to make this one & was delighted that it easily slipped through the holes but has a durability that is needed for the constant clicking together of the beads. This one is 10mm onyx beads with 10mm carved bone beads. A 25x8mm carved horn bead is accented at the bottom.

DSCF1765

I was really excited to work with these beads as they are very unique. I bought them sometime ago with the intention of making a men’s piece out of them, and never got around to it. It’s 14mm black banded agate that has been treated with an acid to give it this cool denim crackle finish. These are the beads that I had to ream (file) the inside of the hole to get he to fit through the chain. But it worked! Accented with a 25x8mm carved bone bead.

DSCF1774

Finally, I chose these 16 – 18mm jade rectangles to make the final piece. It is constructed with a tough beading wire, and accented with a  25x8mm carved bone bead.

It was a fun experiment nonetheless. Always good to be pushed outside the box!

Jewelry Inspired: Halloween

Darkangelonyx

Halloween will be upon us very soon so I wanted to try my hand at some pieces inspired by the holiday.  The first thing I thought of was All Souls Day: Day of the Dead/Dia de los Muertos and the artwork/tattoos that are based around this theme. The second thing that came to mind was a goth/vampire feel. So the challenge was to create pieces based on left over materials I had on hand (since my Etsy & Artfire studios are the places where I list jewelry made mostly from leftover materials from past projects).

I bought these pewter skull charms on closeout awhile back, so I knew they would be perfect. Paired with some red flower beads & hematite I created these Day of the Dead inspired earrings:

ELE096 (1)

The red flower beads reminded me of the red roses I’ve seen in tattoos inspired by El Dia de los Muertos.

After those were constructed, I decided to go into a whole different direction. The words “fallen angel” kept popping in my head, as well as “Angel of Death”. So I worked with this idea, again with the pewter skull pendants, adding pewter wings. I just needed the perfect “body”. So for this time, I decided to wade through my “premium” (read: not leftovers) supplies as the hematite beads I had on hand just weren’t cutting it. Fabulous labradorite faceted rondelles caught my eye quickly. They are a nice ghosty gray tone, plus the metaphysical properties seemed to fit. Here’s what I came up with:

ELE095 (1)

I used moonstone to create the neck of the “angel”.

This soon had my mind working in the direction of a pendant. I have a few of these black (dyed) quartz faceted teardrops that I knew would be perfect for  the body. A little wire twisting and voila:

NLE147 (1)

A 4mm hematite bead makes up the neck, & I used a 22 gauge sterling silver wire. I decided to hang it from a sterling silver chain so not to take away from the focus of the pendant itself.

What I really enjoy when making themed pieces – particularly when it comes to holidays- is to come up with a design that can encompass wear year round & not just for the certain event. I find if you are not careful, jewelry designed around a theme can appear costume-y (which of course is fine if you are designing costume jewelry!). I want to create something that could be enjoyed year round. I think with the right customer, these pieces can be enjoyed over & over again.

And you know what – I really don’t find these pieces morbid. Perhaps because for me death is a transcendence of the soul, where we are reborn…although the body may die and flesh rot away. To me, that is beautiful…

Orange Crush: The Bead Wrist Corsage

Orangecrush

I am enjoying my summer vacation, therefore I am on a hiatus from jewelry making. I did find time this evening to list this great piece I made several weeks ago. It is inspired by the orange dahlias in my garden. I have had these vintage orange beads for several years now. I bought them as they intrigued me so, but no design ever came to mind. Let’s face it, it’s a pretty funky colour! The 10mm oval glass beads have a gold AB (aurora borealis) finish on one side.

Since the piece is inspired by flowers, I was thinking wrist corsage when I made it. Therefore, I concentrated on getting a large cluster of beads to sit on the front of the wrist, rather than wrap all the way around. A magnetic clasp finishes the piece. I thought of adding a lobster clasp in order to make it adjustable but it was way too tricky to clasp. So a magnetic one means no fuss, no muss!

NLE146 (1)

DSCF0789

DSCF0786

100 Days of Creativity: Day 78

Turquoisestonebracelet

I feel like I am on auto pilot today, yet I was still able to put together this turquoise bracelet. I do love turquoise. I never seem to tire of it.It always looks great with silver…

ble129-1

I do apologize that these posts are getting shorter & shorter. I twisted my back putting my daughter to bed last night so I am trying to not stay in the same position for very long. Happy creating!

100 Days of Creativity: Day 77

Cutesimple

Today’s creative endeavour is a companion to yesterday’s anklet. Cute and simple dangle earrings in tiger eye and faceted garnet:

ele093-1

Needless to say, I am starting to run out creative steam…but on I push regardless if it’s just a simple pair of earrings. I commited fully so on I plug each day until I simply can’t anymore…but on that note, I must get up and move…

100 Days of Creativity: Day 76

Cutesimpleanklet

Today was helping DH clean the house day. I know I know, it’s Sunday but lately I have just decided to do the cleaning when the whim hits me. So this afternoon when I had a moment I decided to put together an anklet, again in anticipation for soon-to-be-bare-legs. This one contains tiger eye tubes & faceted garnet beads. It’s completely adjustable giving the versatility to wear it a variety of ways as well as no fuss with getting the size right. As usual I fashioned the anklet with a safety chain. Simply slip over your foot; that way if the clasp becomes undone, you won’t lose your anklet. I learned this lesson from many a lost ankle bracelet. 🙂

a040-1

a040-7

Tiger eye is associated with astrology as the planetary stone for those born under the sign Gemini; & is commonly associated as a birthstone for those born under the sign of Leo.

Tiger eye also contains many metaphysical properties. For centuries people have believed that the unique properties of gemstones hold specific healing powers & awareness. Tiger eye is said to be associated with the correct use of power, clear thinking, courage, enhances protection, grace, grounding & integration of spirit with worldly energy, integrity, personal empowerment, practicality, the ability to see clearly and without illusion, & willpower.

Red garnet is deep transparent cranberry red with some inclusions, and is the birthstone of the month of January. Garnet is associated with astrology as the planetary stone for those born under the sign Scorpio.

Garnet is said to aid in career success, energy, inspiring romantic love, sensuality & intimacy, passion, past life recall, positive thoughts, and self-confidence.

100 Days of Creativity: Day 75

Day75

Woot! Day 75! I can’t believe I have been able to keep this up for 75 days! Although my goal is 100 days of making at least one piece of jewelry a day I certainly wouldn’t mind stopping here…especially considering all that I have going on right now. But I will keep plugging away as long as I can. Today I was still inspired by the sun, so I made this cheerful sterling and fossil beaded anklet. I still had a bit of time left so I pulled together a cute pair of dalmatian jasper and fossil bead earrings. Simple, yes. Affordable, yes. I have built a reputation on good quality, affordable jewelry, so although this may seem like boring old bead stringing I think it is a must to offer. Sure there are many other aspects of artisan jewelry I would like to delve into but time & economy are against me right now. So I will stick to what I know and what I am good at. 🙂 As the saying goes, if it ain’t broke… 😉

a041-4

a041-1

ele091-1

I love the versatility and affordability of fossil beads. Cut & dyed limestone in many cheerful colours. I prefer it over fiber optic glass actually. Cheerful yet earthy. Happy Saturday. I hope it has been sunny where you are…

100 Days of Creativity: Day 74

Day74

Happy Spring everyone! It was a gloriously sunny day here today. Hard to not feel optimistic on a day like today. My offering for today’s creativity, was purely aesthetic. I wish I had some spiritual reason for pairing these stones together, but it was totally just because I liked how they looked. This bracelet contains hematite donuts, dalmatian jasper and lemon agate:

ble127-2

The dalmatian jasper is fun huh? Reminds me of so many things…ice cream with cookie bits? Jersey cows?  Hee hee…It’s believed to have gotten its name because the spots resemble those from the dog of the same name.

Off to start my Friday night! Tomorrow is another milestone…day 75! 25 days to go. It has been a rewarding & fun journey…

100 Days of Creativity: Day 73

Day73

I am in such a good mood today – spring is definitely in the air!  So nice to know the equinox is tomorrow!  Today I was distracted by the sun, but was able to complete a custom order with hematite and moonstone, list it, sell it and ship it off. After that there was only time for yet another simple pair of earrings, so out came the turquoise again. The stone faired well for my mood yesterday, so I figured I’d keep that going today. I was hesitant about this one because it is featuring small turquoise chips; the average size is 3.5mm, and some are flatter than that. But I am really happy with the results. I’d definitely wear them and I don’t make anything I wouldn’t wear myself. 🙂

ele090-1

Because chips are affordable, these are listed at only $12 – and as always, free shipping. There is still sun shining thanks to daylight savings time so I am going to enjoy before dinner.

100 Days of Creativity: Day 72

Day72

I finally am starting to feel like myself again. I think a lot of contemplation and some nice weather really helped. I only had time to make one pair of earrings today. Turquoise is such a spiritual stone I wanted to use it in a piece today; but with limited time it had to be something simple:

ele089-1

These are turquoise nuggets on 30mm sterling silver hoops. Turquoise is said to be balancing; connects us with all life; is generally healing; helps us attain honest communication; increase serenity; give us meditation energy, positive thinking, protection, sensitivity, strength, and wisdom. All things, I so needed today. I feel like I am getting there…

100 Days of Creativity: Day 71

Day71

Today was a fairly easy design day as I simply finished up the last two pieces in the garnet & pearls series. I think I needed the break, anyway. I’m feeling a bit unmotivated as I deal with some emotions stemming from my mother’s death a few months ago. Strange how those things come up at different times. So today, I put the finishing touches on a pair of earrings to match the necklace & bracelet I made yesterday, as well as a pearl cuff bracelet accented in the 4mm faceted garnet:

ele088-1

ble125-11

Even after all that – I still have some of these garnet beads left! The smaller sized beads are definitely deceiving. 🙂

100 Days of Creativity: Day 70

Day70

When I started to think this morning about what would be my inspiration for today’s creations, I decided to take direction from my destash pile of beads. I have these 4mm faceted garnet beads to use up. One of those, I needed some for a creation awhile back & over bought…sooo…thinking about it, I didn’t want to make the same garnet pieces I made back in January for a birthstone theme, I really wanted to pair these up with something more light. Since we are heading into wedding & formal season,  I decided to pair them up with some freshwater pearls. This is two of four pieces that I started. These two, a bracelet and necklace, are finished & I’ll complete the other two tomorrow:

ble124-1

nle145-1

Interesting info: garnet is the birthstone for the month of Janurary and also the planetary stone for those born under the sign of Scorpio. Pearls are the birthstone for the month of June & also the planetary stone for those born under the sign of Cancer.

Till tomorrow…

100 Days of Creativity: Day 69

Day69

Today was mookaite day. I felt the need to add a couple more affordable pieces to my Artfire Studio, and mookaite came to mind. This bead stands really well on its own therefore I thought it was the appropriate choice for these pieces. Mookaite (also spelled moukaite) is a form of jasper native to Australia. Stone variance from a reddish brown, tan and cream colored.

ele086-1

ele087-1

You can see by comparing the first and second pair of earrings, there really is a neat variance to the colour of the stone. Truly one of my favourites to work with. As far as lore goes, mookaite is believed to aid in in embracing new circumstances, acts as an emotional protector, encourages the desire for variety & new experiences, enhances decision making & helps us when dealing with negative situations. Indeed, a fascinating stone.

Simple & Effective Jewelry Cleaning

(NOTE: I originally wrote this post in 2009 based on my personal experience with my own jewelry and experimenting with jewelry cleaning. At present, new, engraved sterling silver items are hand polished as needed and wiped clean with a soft cloth before shipping. These are not the steps taken for new items you purchase from me).

Living in a virtually chemical free home myself, it became necessary to seek out ways to clean my jewelry without using chemicals. Here are some of the methods I use to keep my pieces sparkling…

STERLING SILVER CLEANERS

These methods are perfect for your jewelry which contains sterling silver components. The bonus is you don’t have to worry about them damaging your stones!

First method:

In a glass bowl, cover the bottom with a piece of aluminium foil, shiny side up. Place 2-3 inches of boiling water in the bowl (distilled water is preferred, but I have used boiled tap water as well and haven’t noticed any difference). To this add 1 teaspoon of salt, one teaspoon of baking soda, & a squirt of dishwashing liquid. You’ll notice the mixture begin to fizz. Add your silver pieces, making sure the water covers them completely & that they are touching the aluminium foil. I find swirling the pieces around gently helps loosen any dirt. If you do this be sure to use a wooden or plastic utensil. The foil will absorb the tarnish from your silver jewelry. There may be a bit of a sulphur smell as you do this, which is okay. After a couple of minutes, remove, rinse with cold water & dry thoroughly. Buff with a soft cloth. An aluminium pie plate will work in replace of the foil as well.

Second Method:
Plain old white toothpaste! Do not use gels. To clean off tarnish, gently rub a small amount of white toothpaste on the silver, and then run it under warm water. Work it into a lather and rinse. An old toothbrush will help get it into all the crevices. This provides minimal cleaning. I still prefer the first method to this one. I do keep a tube of white Crest toothpaste around if I need to clean pieces quickly that only need a quick clean to become shiny again. Be sure to pat dry your pieces thoroughly before putting them away.

Third Method:

This is my least favourite method but it’s great if you just want to give your piece a little shine & only have a mild residue to remove. Place a tiny drop of baby oil on a disposable baby wipe. Be sure to use a VERY small amount, or it just becomes an oily mess. This method works on gold as well.

USING A JEWELER’S CLOTH

Of course, the best tried & true (and time consuming) way to keep your silver or gold jewelry sparkling is to use a rouge cloth, also known as a silver cloth or jeweler’s cloth. I do offer these as an add-on purchase to pieces, and they are very handy to have. I always recommend finishing your cleaning job with a jeweler’s cloth as it will give the silver or gold a bright shine & slow down the tarnish.

GOLD-FILLED CLEANERS

Gold-filled jewelry reacts much like its more expensive gold counterparts as the gold is bonded with another alloy throughout rather than just being electroplated to the outside like gold plate is. Therefore, it is considered a life-time product, as it has the same durability & characteristics of solid gold. You can expect to clean it much like sterling silver, so I find that the cleaning suggestions that I have listed for sterling silver work just as well on gold-filled components.

A NOTE ABOUT THESE CLEANING TIPS

Although these are tried & true methods, many jeweler’s would never recommend such products as baking soda & toothpaste as they can leave microscopic scratches on the metal. I have even heard jewelers go as far to say never use chemical dips or silver polishes either, and that the only tried & true way to polish your beloved metal is with a jeweler’s cloth. I can tell you from my own experience, that I have never noticed any scratches from doing these methods myself, and I certainly don’t have the time to sit and polish every piece by hand every time.

If you have a piece of jewelry that you have spent hundreds or thousands of dollars on, or if you are unsure because your piece contains a delicate component such as pearls, it’s best to err on the side of caution and have a professional do the cleaning for you.

Careful storage of your jewelry will equal less time cleaning it. In a future post I will write about storing your jewelry…