 As a thank you for visiting my blog, please enjoy 15% off your entire order at bb3.ca*. Use code: creativity15 at checkout. *Cannot be combined with any other promotion.

 As a thank you for visiting my blog, please enjoy 15% off your entire order at bb3.ca*. Use code: creativity15 at checkout. *Cannot be combined with any other promotion.
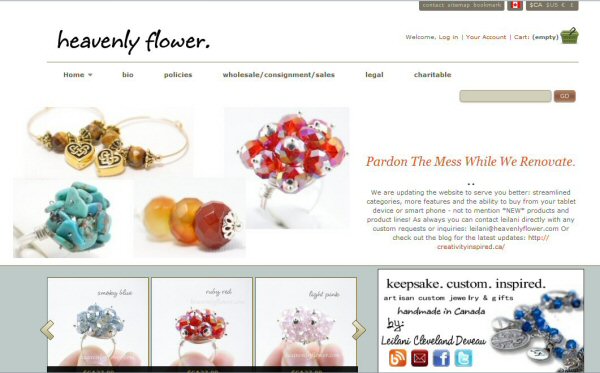
When I decided back in January to set up my own website using open-source cart software, I had every intention of blogging about the process along the way in hopes of inspiring or helping others in the handmade community who were thinking of doing the same. I have always felt rather suffocated & limited by third-party sites. I tend to like to do things my own way and not have to play by the rules -or agendas- of others…it’s the artist and the entrepreneur in me, I guess… 😉
What I wasn’t prepared for, was how time-consuming it was going to be. Oh, open source, la la la…once I learn how it works, how hard can it be? I have enough geek knowledge under my belt – this will be fine. Truthfully, it was a HUGE learning curve…one that has left me feeling totally accomplished – but still, jewelry making (development & skills) has been put on the back burner while I take on this very big endeavor (all the while, I still am taking custom requests. Eeek!).
So here is what I came to realize:
1. You can’t go it alone – unless you are a programmer in your “day” job.
Whether you use ZenCart, Magento, PrestaShop or OSCommerce…whatever the software you find, it will never be perfect, and will need tweaking. Unpacking the software and uploading it to the web space in the first place was a head scratcher. And then, I cannot express my frustration loud enough of loading in a section or a product and having it not display properly. Luckily for me – I happen to live with a developer. My husband got me set up with the site, and tweaked the style sheet when items would not display properly. I am geeky but I do not code – unless you count simple html and that ain’t gonna cut it. 🙂 So, no matter how many hours of sweat equity you want to put in, you will still need to have help from someone with technical know-how. That may mean paying someone – or maybe setting up a bartering system for goods in trade for programming. In my case all I have to do is turn really red and mash the keyboard really hard and my hubby comes to my rescue. I know everyone cannot be so lucky. 😉
2. Be willing to make compromises.
One of the reasons why it has taken me so long to even develop my own site is because I had visions of grandeur…all the things I wanted it to be able to do, to represent – AND do it all the while with an edgy, artsy look. Over the past 7+ years I have sketched out the website of my dreams on paper over and over again…tweaked and re-tweaked. The truth is, to have the kind of website I envisioned it wouldn’t have taken several hundred dollars in development time, it would have taken a few THOUSAND dollars in development time. Although I am married to a developer – time taken to put together that kind of site is food out of my children’s mouths. Literally! If he is working for free for me he is not doing work for his clients…
So I realized that I had to settle for heavenly flower, version 1. You have to start somewhere. So when demo-ing different cart software I looked for one that was closest to what I wanted. The one I chose has a fairly easy to understand back-end, it also had modules I could add for features I wanted. Besides being able to sell a product to customers, this one allowed browsing with different currencies, had a customer wishlist and also a rewards program. Also, I was able to find a theme I liked that was inexpensive, that was fairly easy to implement and fairly easy to tweak (again – hubby took the lead here…it would have been a disaster if I gave it a go solo!!). It’s not perfect. There are things I would like to change – and being open source we will probably change. But for now, version 1 is usable and presentable so onward & upward as they say. 🙂
3. Be realistic with your goals
In January when I finally decided to go ahead with this project, I thought end of May would be ample time for implementing and launching the whole site. We are talking 4 months. Then, life happens. I am a mom to 2 little ones – and at the time I decided this timeline, I didn’t realize I was a *pregnant* mom. Yet, I like to give myself tight deadlines as I tend to procrastinate. It turned out the fact that there is a new family member on its way really kicked my butt in gear. I spend my days with my kiddos, and added an hour or two extra at night to get my crap together. It did mean compromises – like going with older photos I had taken with the old camera. But this is heavenly flower, 1.1. I had to tell the perfectionist in me to politely eff off. I can always go back & retake photos later, once the site is finally live.
4. educate yourself as much as possible about the software you choose
I read many tutorials & posts on message boards to understand how the software worked, what I could expect, and any issues people had encountered with it. Hard on the head, yes – but if I hadn’t of done this, there would have been useful features that I would have totally missed. Not to mention when something wasn’t working it was such a time saver to pin point the exact problem.
5. weigh out the pros and cons of having your own site, and think long term
Are the sales rolling in since launching the site a little over a week ago? Oh hell no, of course not! I still have SEO (search engine optimizing) to do, not to mention all my own promotion and advertising I did when I sold on the third party sites. It ain’t that easy folks. For me, it is a long term plan. First, set up shop on a site like Etsy and try out this online thing for a couple of years. It had been over a decade since I first sold online – a lot of things have changed about online shopping since then. As a busy mom I love to shop online so I soon learned what I like and dislike about the experience. I plan to spend the next year building up my brand…which is a never ending process whether you have your own website or not. The point is, I have not made and am not making sales my goal for this year. If I get requests, great, but again I am thinking long term. I’ve never really been comfortable with my name attached with such-and-such selling community. So it is worth it to me to take the time -finally- to build something for myself. For others that may not be such an issue. Nor is everyone ready to invest that kind of time (and possibly money) on something that is not necessarily a sure shot. Remember that your own site means not only paying to set up the site, but for hosting. In my case, once I stopped paying Etsy listing/renewing fees and downgraded my Artfire to basic I have ample money to pay for the monthly hosting cost. The goal is to eventually offer my own credit card processing as well. What you want to offer, who to and when are all questions to ask yourself.
***
So it’s the end of May – did I reach my goal? Yes in the sense that the site is live. No, because I am not done – yet. Still more products to load. And we need to move over to the faster more reliable hosting. Am I happy with the direction things are heading? Absolutely! Having my own site in many ways is like birthing a baby. It’s a huge responsibility and can be scary/intimidating at times. But I have never felt so free and excited about the future of my handmade business! 🙂
Well, I cannot believe my eyes. As of last night, the website is LIVE! All of my Etsy & Artfire inventory is now available on my own little piece of the world wide web. But, before I work on search engine optimization, we still need to move the site over to the faster hosting, & I really need to get my custom collections up & running. I had originally set a goal of having it all live by the end of May, however after finally assessing how many collections I developed over the the winter, I have my doubts that I can go public with every single one in less than 2 weeks, especially with the custom requests that happen to come in in the meantime.
Here is a sneak peek of what to expect nonetheless. I will launch one collection at a time and announce each on the home page of my website. I also would like to do a giveaway to kick off the launch, but I haven’t figured out what just yet. Suggestions welcome! And sooner than later before I get wrapped up in all things infant! 🙂
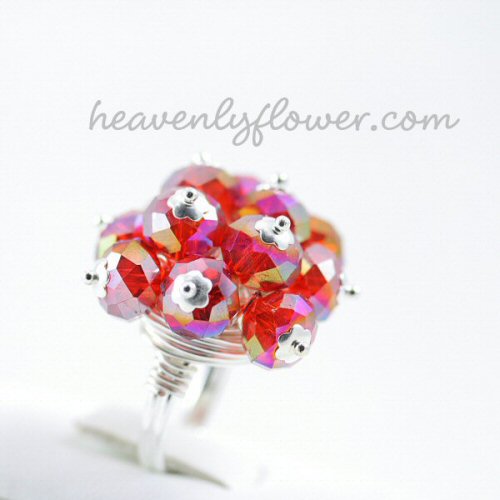
So here is but one item available from each collection.
From “Awareness”:
From “Beaded”:
From “Children’s”:
From “Dark Angel”:
From “Gemstone”:
From ” Gothic Spider”:
From “Keepsake”:
From “Sweetheart”:
From “Remembrance”:
I also have a pet tag engraving collection conceptualized on paper only. At this time I decided it is best to go forward with what I have before developing anything new. 🙂
Cross fingers that the attributes (for customization/choice on each piece) built into the software are straight forward and I can get this up and running smoothly. With open-source, anything can happen. 🙂
I have been quiet. The end of the 2010 was drawing near & I wrapped up my jewelry sabbatical getting a head start on 2011 projects. Like a writer who sequesters themselves in a secluded cabin to write a novel, a lot of times I do similar when I feel a new project idea coming on and I need no distractions to bring it to fruition. I’m glad to have been inspired to get a jump start as January is not going quite as smoothly as I had hoped. I am the perpetual over-achiever. 🙂
So let’s recap what I’ve been up to…
I started one year ago my jewelry sabbatical. I decided over Christmas break a year ago, after over a decade of beading/beaded jewelry that I wanted time to concentrate learning/trying new skills. I found myself feeling really stagnant making the same style over & over – and I needed time to not feel pressured to be making sales. The biggest result of that is I learned how to engrave using a pantograph engraver. A line is already in development & well on its way to completion. I decided to source out supplies that were quality but not precious metal. I’ve always been dedicated to offering my work at a price that is affordable to everyone. There will be sterling silver variations as well, but I will start out with blanks that are treated for durability, the cores being metals such as brass, copper & steel.
This is my new project. Named after my two girls, jade-n-rose will be offering jewelry making & craft supplies in small lots. Inspired by my early days jewelry making, I will strive to offer quality supplies in small quantities for those who only want a few items at a time. Currently housed on Artfire, we are starting to work on its very own website in tandem with the heavenlyflower website. I was hoping to have more items listed by now but have gotten sidetracked. I hope to get back to it soon; I literally have hundreds of items ready for sale.
I also (finally) chose a blog layout I am happy with! I believe these types of themes are called “magazine” layouts…and they give a snippet and photo from the post rather than showing the whole post on the front page. I’m a skimmer so I love this format for searching for topics that interest me. My holistic blog has also been updated.
There was a lot of things that I didn’t get to last year or only barely scratched the surface. I have carried it over to my to-learn list this year, although it is a tall order since I already have non-jewelry creative projects on the list. Considering all the goals I have for this year, it still feels exciting & ambitious rather than daunting and impossible. I will dig in, and hope that the blog this year will continue to inspire you to take on a creative project that perhaps you have been putting off for some time. This is my theme for 2011: tackle the projects that I have always wanted to do but never got around to do it.
Creatively yours,

The other day I was looking for a new book to write down my creative ideas, and I came across this one that I had made 10 years ago. A printer, old photos, paper & a hole punch…decoupage et voila: 🙂
After all these years, several moves & even a location to another part of the country – and I had never used this book. Until now. I made this book in a very sad time in my life…I think it was waiting for a more positive time to inspire. 🙂
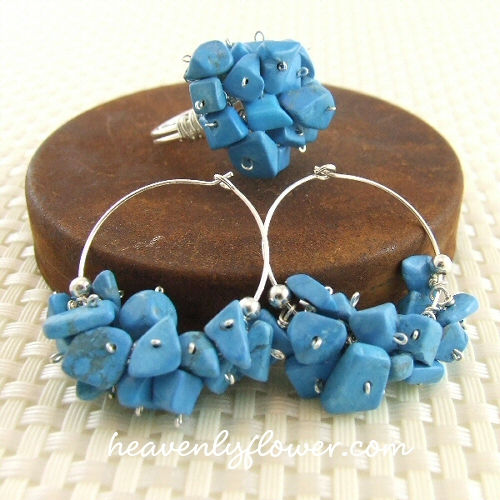
Back when I started jewelry making, the thought of using actual gemstone beads in my designs seemed unattainable. I was unemployed, and I had to decide between jewelry making supplies or food much of the time.
Then one day while browsing ebay I stumbled upon chip beads. Long, 18 to 21 inch strands of stone chips with a hole drilled in each – and if you think of how many beads you get per strand, that makes them more affordable than machine cut glass beads.
I must admit in the beginning I had a hard time using these irregular shaped gems in designs. But soon I grew to appreciate the raw feel of the stone. It also was a good practice in judging detail. For example, if I were to make a pair of earrings with chip beads it is important to try & find beads that are similar in shape & size so that both the earrings in the pair appear balanced.
I still have quite a few chip beads from “back in the day”- and will even pick up a strand or two here and there at a Gem Show if they catch my eye. My only word of caution is, they can be soft & fragile due to their irregular shape thickness, so if wrapped too tightly they can break.
Here’s some examples of jewelry I have made with gemstone chips:
Malachite
Mookaite
Howlite (dyed)
Turritella agate
Red tiger eye
Lapis lazuli
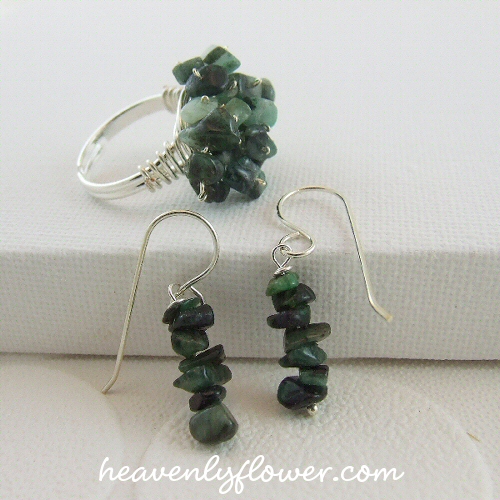
emeralds
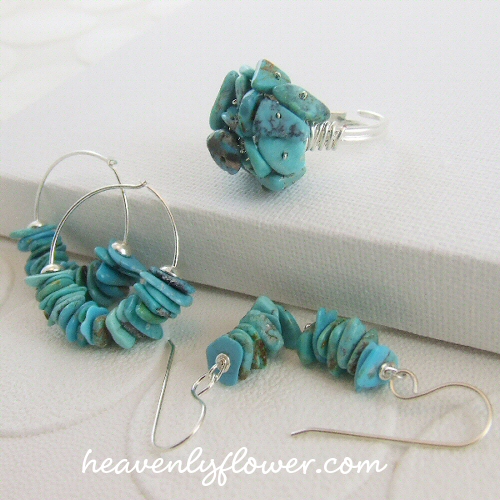
turquoise
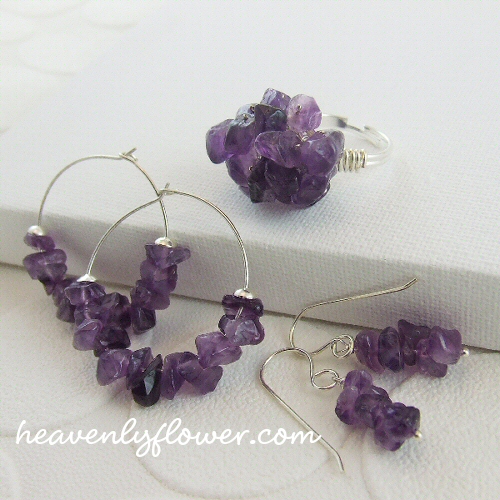
amethyst
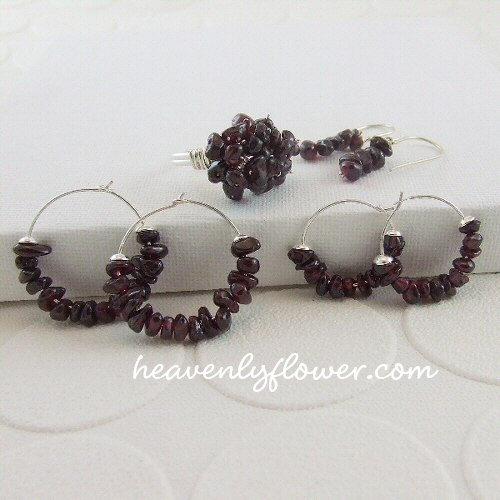
garnet
It’s no secret, to anyone who knows me, I love rocks. I was ecstatic to find out my now-husband likes rocks too. Between buying beads, minerals and specimens we can do some major damage at a Gem & Mineral Show. Eventually we both want to get into rock hounding & lapidary. For now we leave that to the experts and simply admire.
These pieces from my jewelry box, are what I call my homage to the Gem Show: Slabs. 🙂
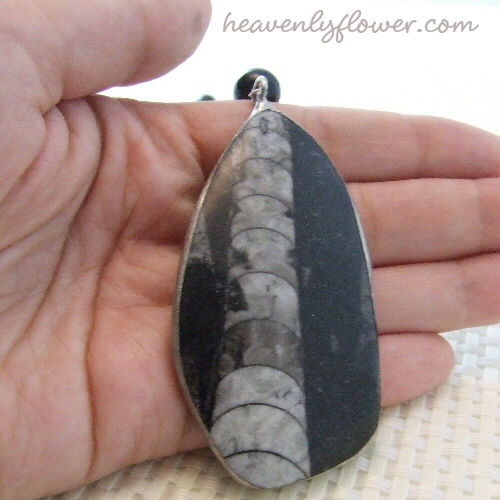
Above is an orthoceras, a common fossil. Both this slab & the one below were set into pendants by a Nova Scotian artist. These were purchased at the Parrsboro Gem & Mineral Show about 7 years ago. Paired with fossil beads (dyed black) and snowflake obsidian chip beads.
The above slab pendant, by the same artist, is paired with bull’s eye agate & flower jade beads, as well as milky quartz chip beads.
This pendant was from the LBS (local bead store). I loved the patterning of the agate & felt it went well with my collection. So I added this to the jewelry box a couple of years ago. 🙂
My style ranges from the big & bold to the sweet & dainty. But everything has meaning. 🙂
Check out my girls’ toddler bracelets also from my jewelry box.
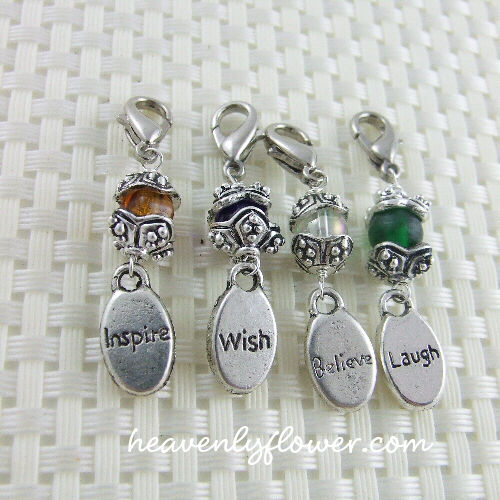
This particular project is combining orphan beads with an excess of nickel lobster clasps. I upgraded to sterling silver lobster clasps sometime ago so I have a wholesale lot of nickel ones sitting around gathering dust.
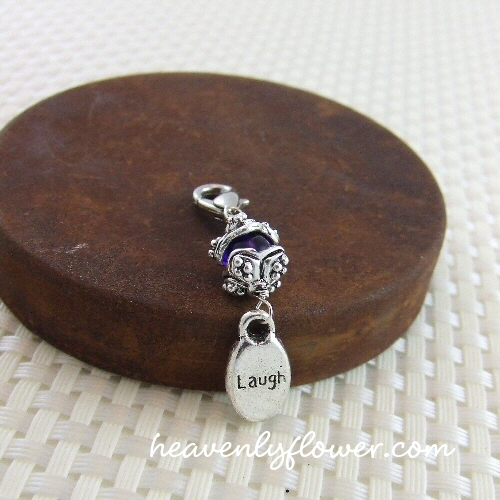
So applying the same inspirational principle as the key chains and bookmarks, I came up with this zipper pull simply because the metal pull on my girls’ lunch box snapped off.
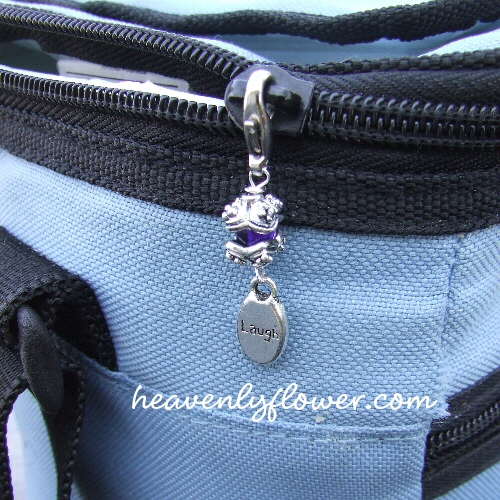
It gives a nice touch to the usually boring lunch box. I think these would make cute little gifts for jackets, purses & bags, children’s shoes or even as cell phone charms. Since they are on the lobster clasp, you can easily change the pull to another style as the mood desires. I can see my girls having a lot of fun with these when they get older.
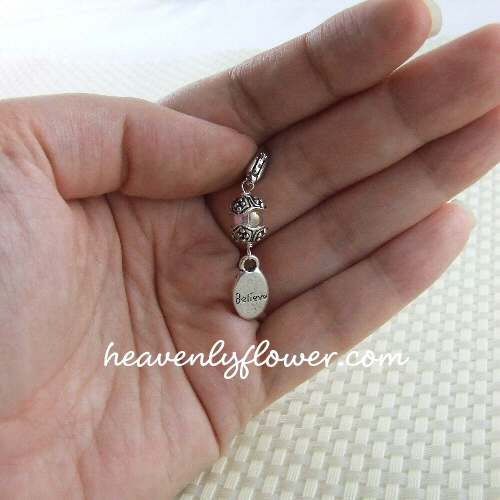
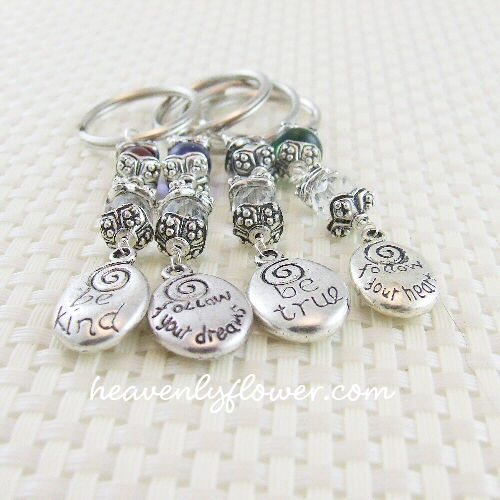
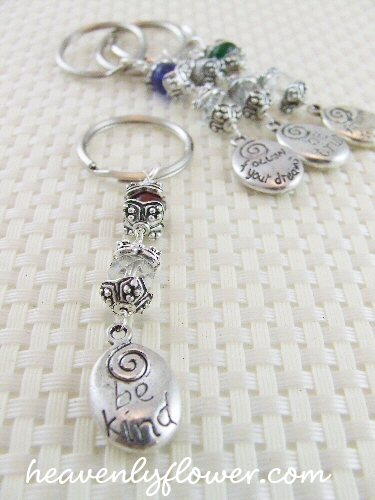
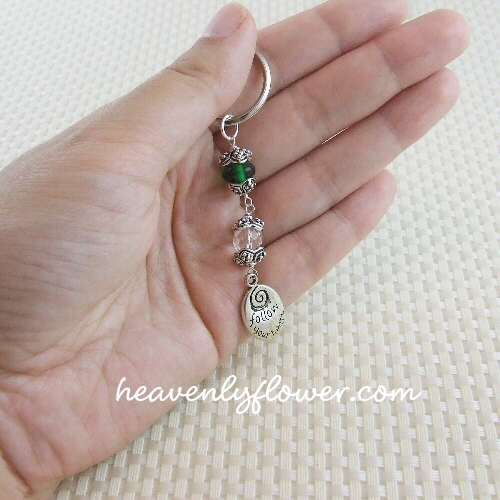
Expanding on yesterday’s post on Beaded Bookmarks – the same theory could be applied to make beautiful & inspirational keychains out of leftover beads:
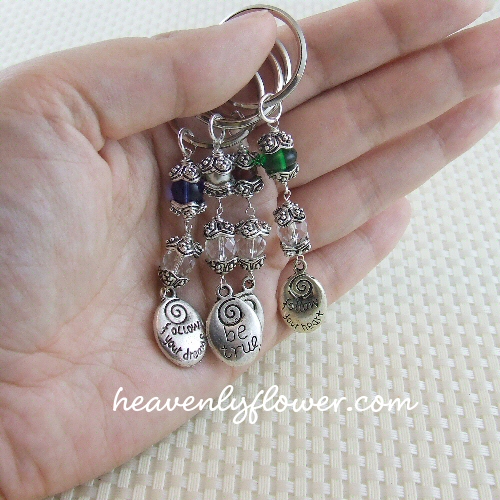
A little positivity to take with you as you go about the day or a little keepsake for your friends & family to know you care. 🙂
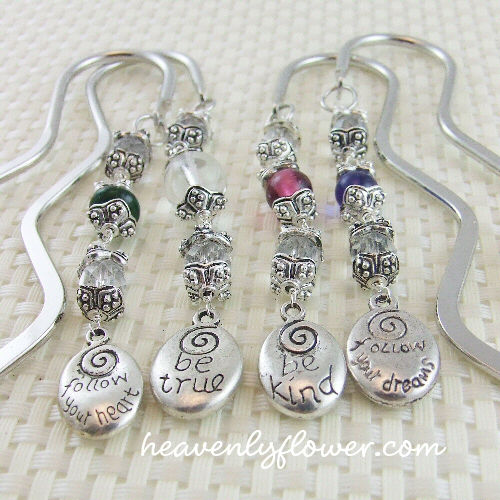
Another great way to use up leftover beads is to adorn bookmarks. Bookmark bases come in a variety of shapes & sizes and best of all are readily available at most bead supply stores – many exist on Etsy. Or, you can buy leather cord and make beaded leather book thongs, also an affordable idea.
I like to include a bookmark in a birthday or Christmas card or if I am giving a book as a gift to personalize it even more.
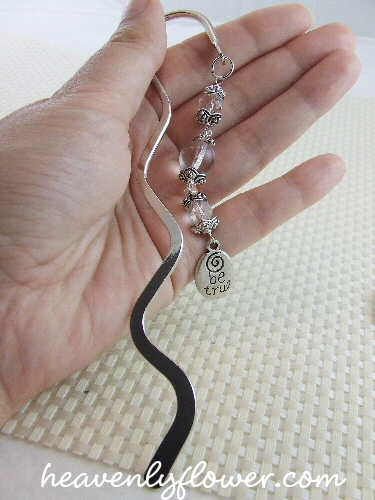
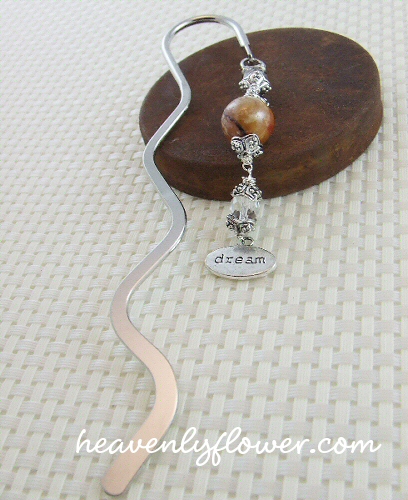
To make them extra special I acquired some inexpensive word charms to make them an inspirational keepsake.
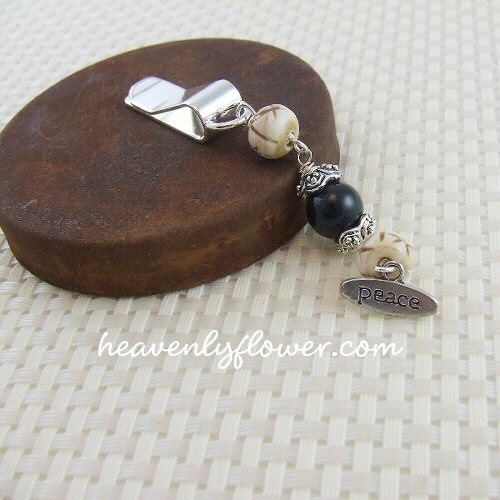
I also find it easier if I have some inexpensive findings on hand, rather than dipping into my main batch of findings for my jewelry work. I am always on the look out for wholesale closeouts & sales so that I can acquire a large lot of findings cheaply.
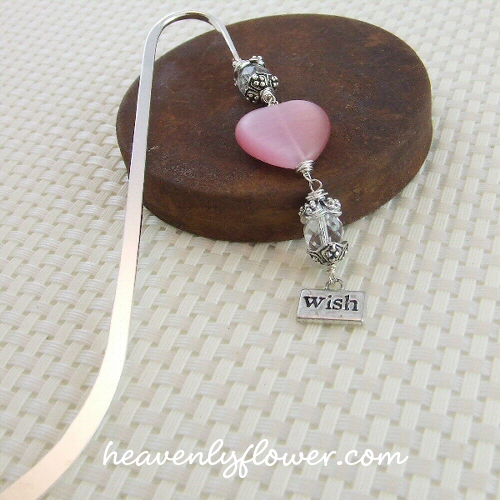
Here you see pewter bead caps which I acquired at wholesale & on sale. Buy a large amount to get the best price, and then store them away for these type of mini projects. These bead caps are pewter & have a nice weight to them…and only cost a few pennies a piece.
Check out my orphan bead project idea: Hair Accessories
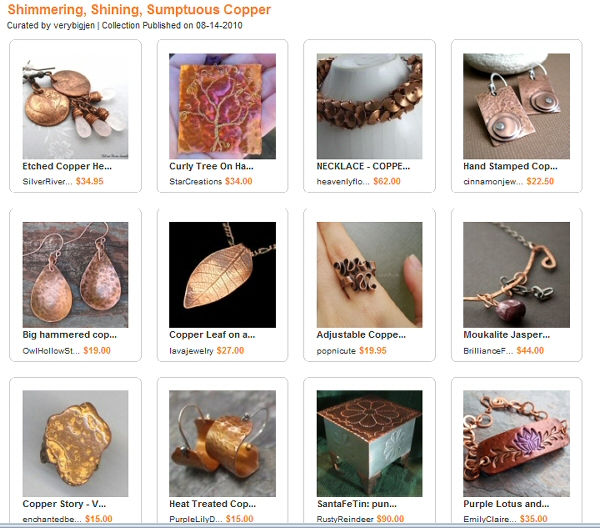
It appears that Etsy has successfully launched their new treasury format, which now allows you to tag your creation with key words so to make it searchable.
Just recently Artfire also launched their Collections and users have been creating fast & furious.
Both platforms are a wonderful way to promote & blend together different art mediums you will find on each site. heavenlyflower has been featured in:
Funny how the 3 Etsy ones are all featuring my turquoise color pieces! 🙂
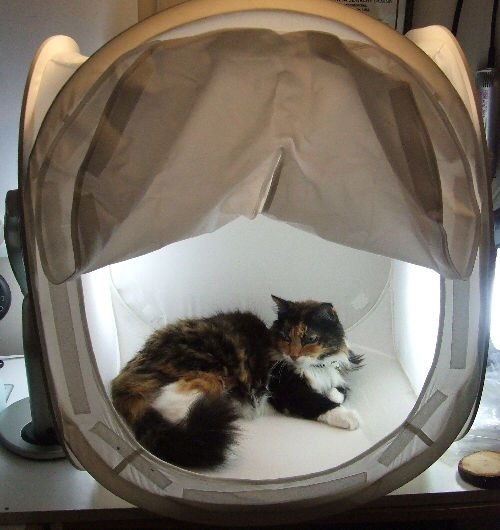
I step out of the room for a brief moment, and look who found a new nap spot:
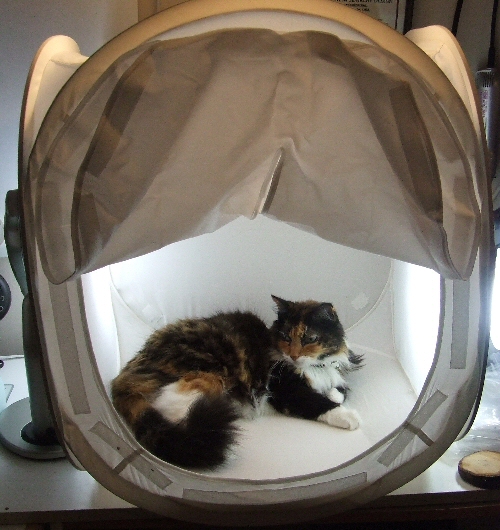
Before I assess the mound of jewelry to be photographed you plowed over, the tools you knocked off the table, and the amount of hair I will now have to delint…
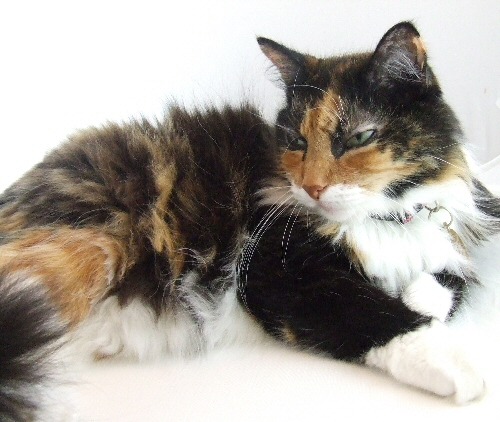
I might as well get some nice shots of you. You are after all, in the photo box!!
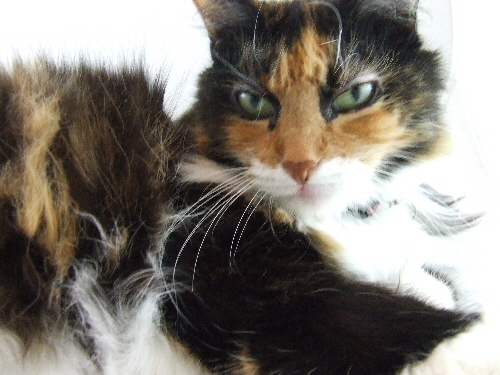
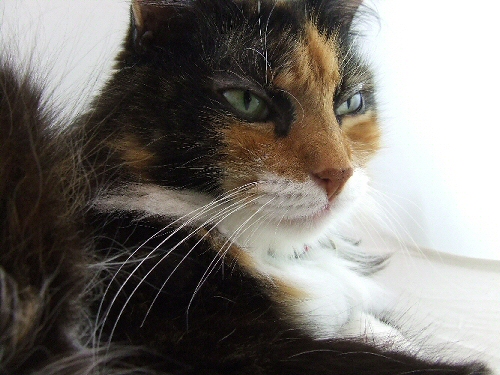
That’s the Zany cat – 13 years still ticking & boldly going where no cat has gone before (because the other two are scared as to what I’d do to them if they attempted this!). 😉
All in a day’s work. 🙂
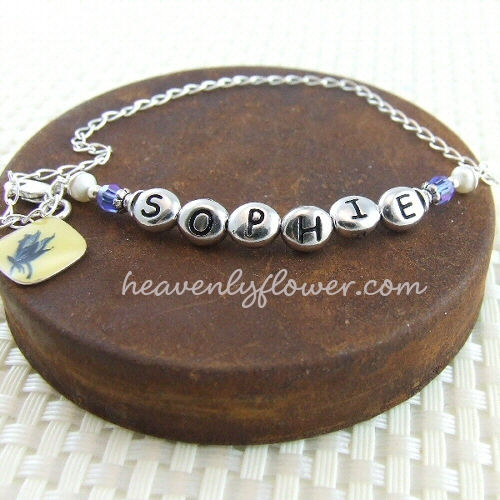
The next items I wanted to share from my jewelry box, are actually not for me at all, but for my two little ones.
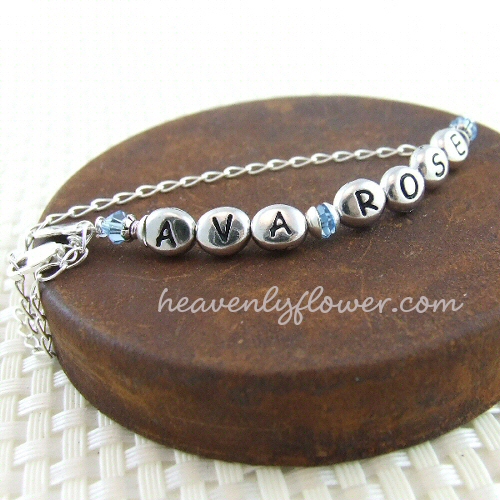
I designed ID bracelets for them that could be adjusted as they grow (currently my girls are 16 months and almost 3 years). Now as they are very young they wear their bracelets as anklets. The bracelet is one continuous chain. I simply slip the piece over their foot & clasp where comfortable. When they grow large enough that I cannot slip it over their foot anymore, they can continue to wear them as bracelets (I can easily slip the 8 inches of chain over my hand to fit my wrist).
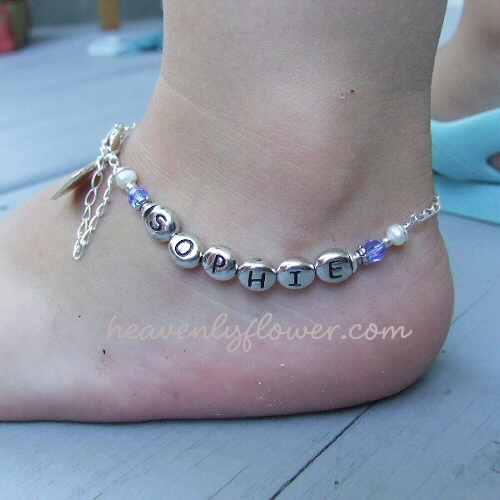
I thought of making them baby bracelets and then as they grow designing larger ones however I like the value of being able to use the same object for as long as possible. My jewelry philosophy is to make something that lasts, so why not make an item for growing children that grows with them.
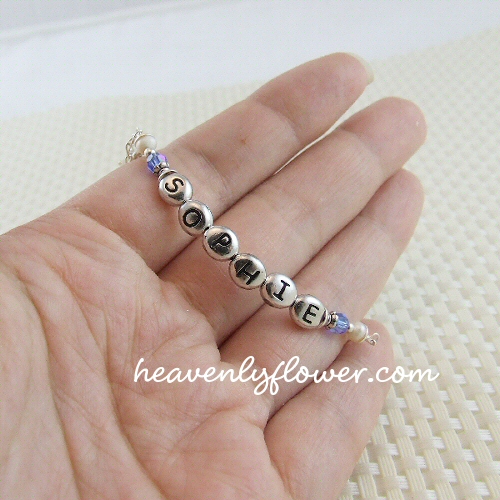
Both bracelets are constructed out of sterling silver chain. The alphabet beads are culinary grade lead free pewter. Both contain their birthstones in Swarovski crystals & a small charm. I added two small freshwater pearls to Sophie’s design.
See more items from my personal jewelry box. Check out my Wedding Jewelry in this post. 🙂
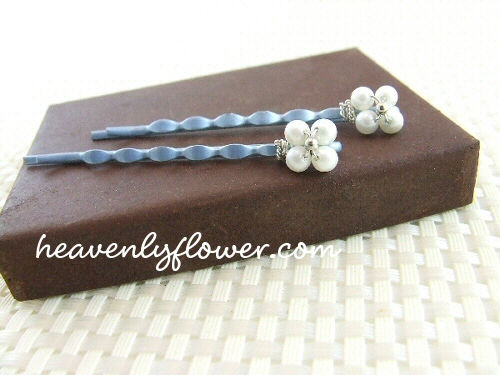
After 12+ years of jewelry making, I have a lot of beads without a home. Meaning, they are leftovers from past projects – from one to a handful – that I just don’t know what to do with. So when I opened my Etsy Shop, I decided to challenge myself to come up with designs using just the orphans & leftovers. 🙂
I am starting a blog series of quick & easy projects that can be done with leftover beads. I hope this helps kick start your creativity and for you beaders, gives you some inspiration as to what to do with those excess supplies.
The main key to these projects is making sure you have an excess of supplies that can be paired with your beads. So I always have on hand inexpensive ring bases, bead caps, hair pins, etc. that can be adorned with beads.
For idea #1, I give you the hairpin/barrette.
Having two little girls – who both were born with a lot of hair – is my inspiration for this project. I started decorating hair pins and barrettes for Sophie when she was 5 months old. She had quite a bit of hair to begin with, and the bangs were growing fast! I found these were a great way to use up the small lots of leftover beads.
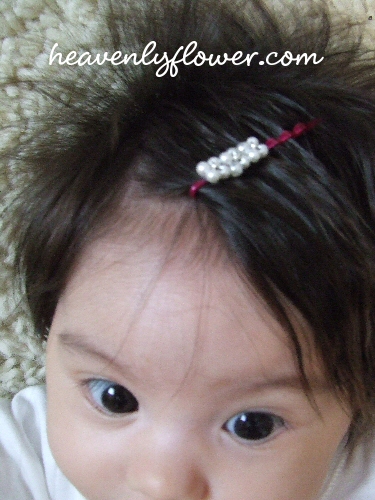
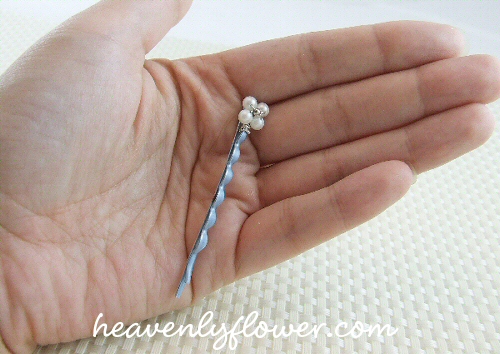
I found out one day, that these hair pins also make great bookmarks! I needed to mark my page in a book, and one just happened to be lying around close by. And voila: dual purposed hair pin/bookmark. 🙂
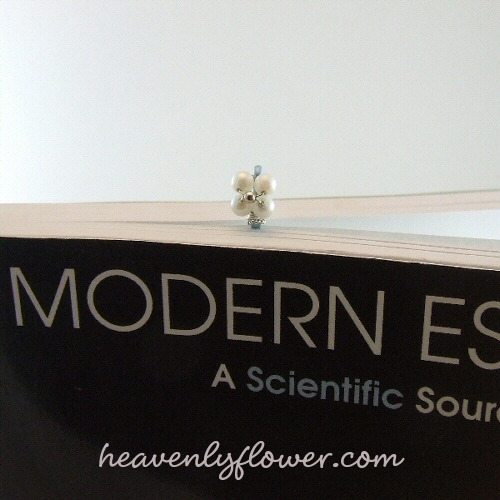
Besides the hair pins I also like to acquire some of the long metal barrettes to bead on:
Other ideas: bead head bands, hair elastics & hair combs. Hair accessories are an affordable supply to keep around for such projects. They are available practically everywhere. I am always picking them up on sale at local department stores or pharmacies. They are even sold these days at you local Dollar Store. 🙂
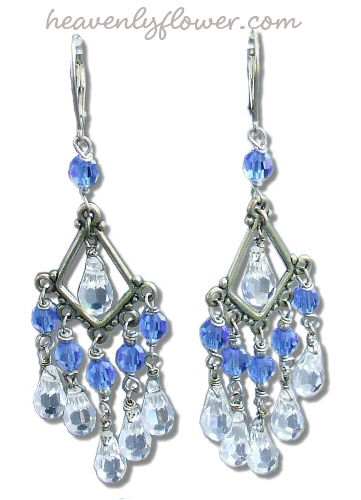
After my last post about my prophetic charm bracelet – it gave me the idea to start a series on my personal jewelry collection. Over the past couple of years I have really been pairing down the collection to just a few dear pieces. Here’s the rest of my wedding jewelry, then & now. 🙂
I’m not exactly sure why I picked sapphire blue to be my corresponding wedding colour. I know that I wanted something different than the usual creams and lilacs and lavenders – & I was really into blue. I still find it an amazing “coincidence” that sapphire just happens to be Sophie’s birthstone…another major milestone in my life. 🙂
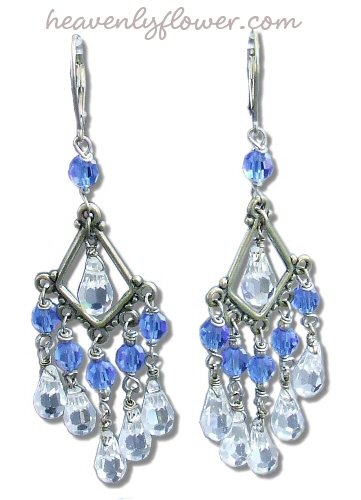
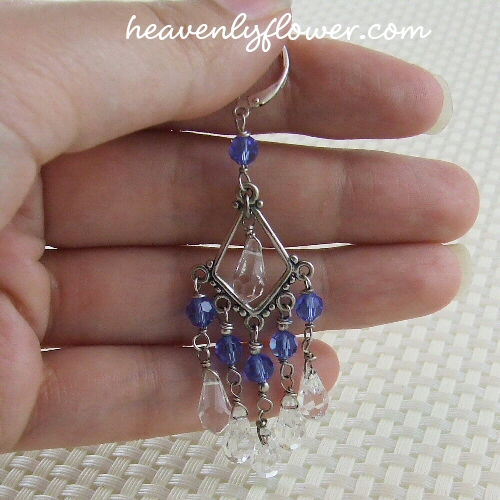
The earrings, then. Sapphire Swarovski crystals and crystal clear Swarovski drops, on sterling silver components.
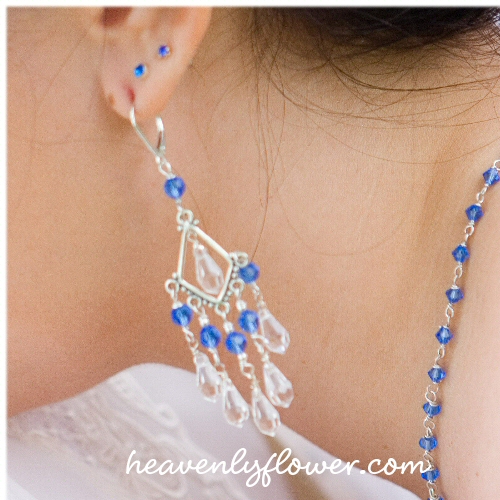
The earrings, today. The sterling silver wire has a nice patina now that matches the frame.
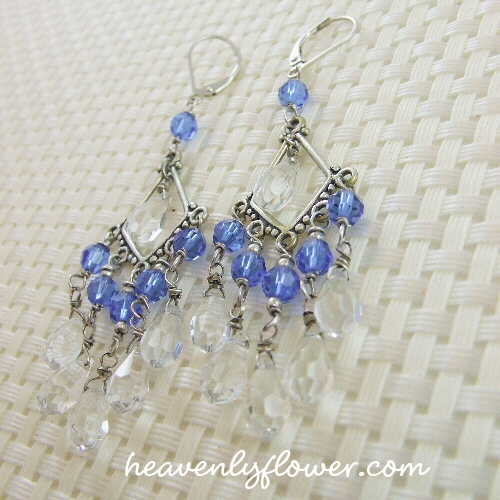
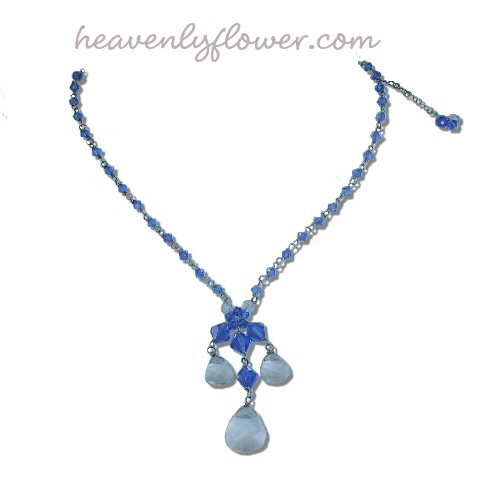
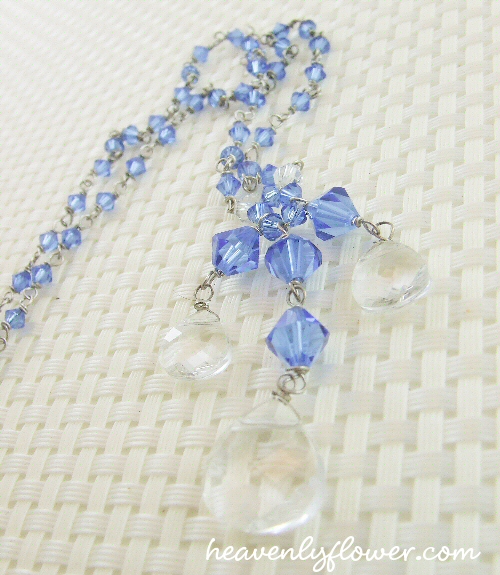
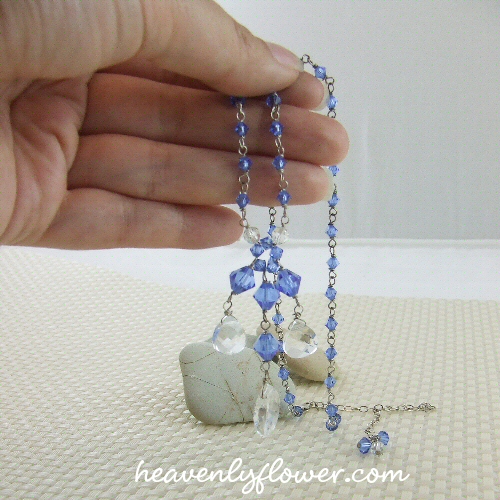
The necklace was made up of 4mm Swarovski bicone beads & Swarovski briolettes.
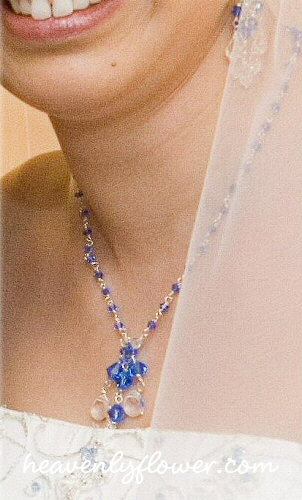
The necklace today:
I wasn’t sure if I would make a headpiece, as it was not something I had a lot of experience with. But after seeing my options on the market, I knew I had to make one. I wanted something really simple & understated rather than the usual bling that is out there for wedding head dress. So, not having much experience with wire, I just let it flow adding a few Swarovski crystal beads here and there.
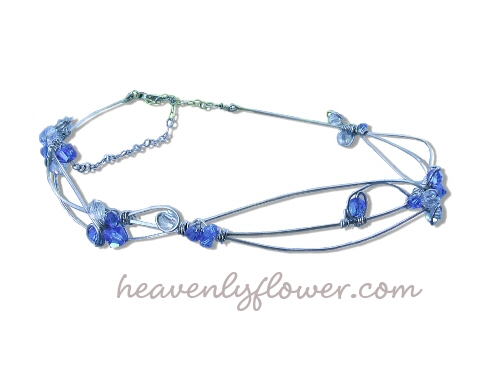
I made it so that I could be worn as a choker necklace ter the big day.
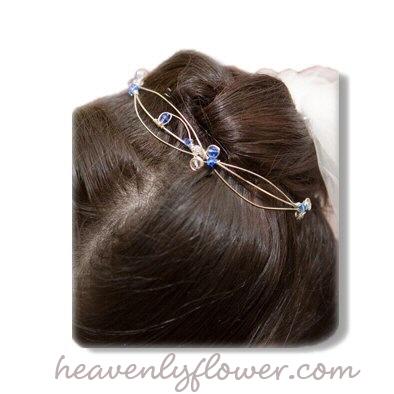
The “tiara” today: you know I have only worn it as a necklace once since! 🙂
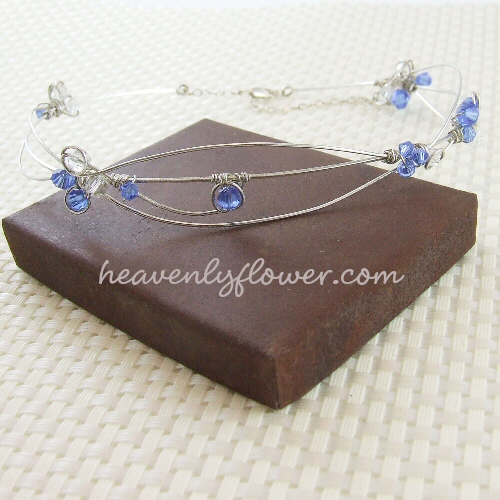
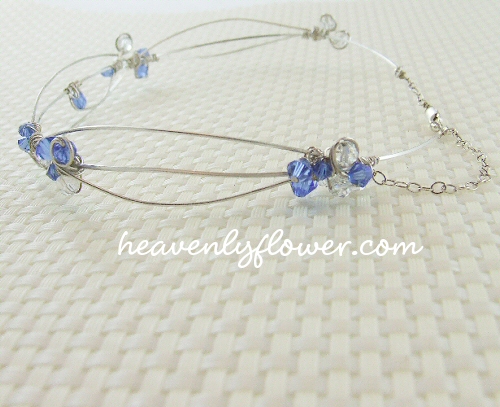
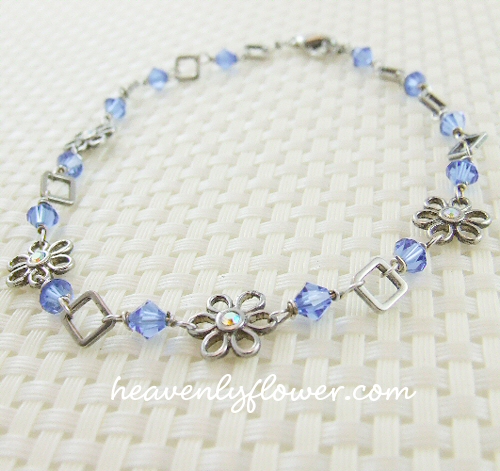
The final piece was a last minute addition, & in the excitement of it all I didn’t get a “then” photo. But here it is “now”, my wedding anklet. 🙂
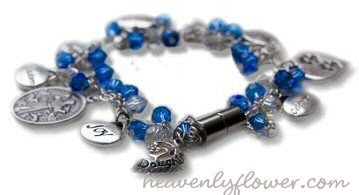
If you are familiar with my work, or have ever picked up my business card, you may recognize this bracelet. It is the official logo for heavenlyflower.com.
This bracelet has a lot of significance beyond just being something pretty to use as a logo. This piece represents many facets of my life, and it is ever changing.
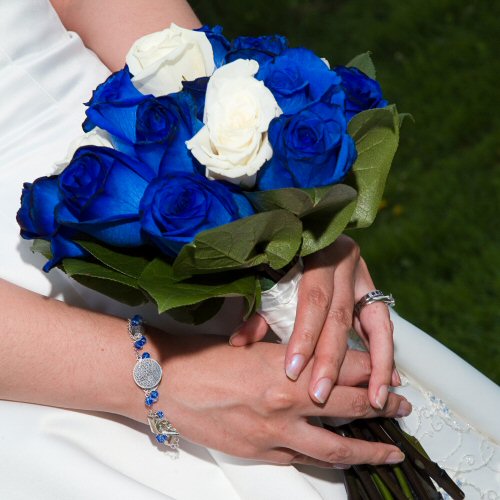
I designed this bracelet as part of my bridal jewelry. At the time, I wanted something that represented my wedding colours, and a few inspirational charms to serve as good luck for the big day. It wasn’t until after the wedding was long over that I realized that the bracelet held potential to become an ever-evolving keepsake of memories & symbolism.
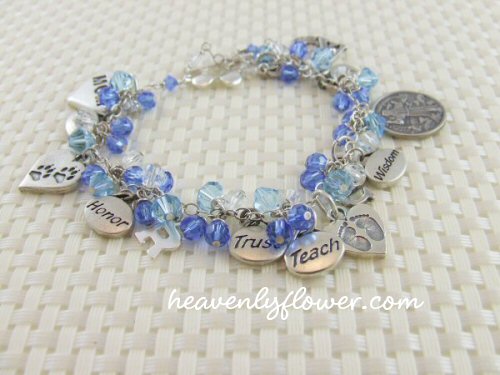
The bracelet originally was made up of sapphire & clear Swarovski crystals, a few inspirational word charms (“celebrate”, ” honor”, “trust”, “wisdom”, “joy”), symbols (paw print charm for my love of animals, St. Francis of Assisi medal), and an “L” and “R” for our first initials. I also had a mother daughter charm (I will get to that one, shortly…). I used a magnetic clasp because I didn’t want to be fumbling with clasps on the big day! 🙂
Fast forward 16 months after our wedding, and the birth of our first daughter. I started thinking about the bracelet again, and wanting to add elements to it that symbolized me now as a parent.
When I took the bracelet out of the jewelry box, I was astonished to realize that the two types of crystals used symbolized both my birthstone and my daughter’s (Sapphire for September – when Sophie was born, and April is diamonds – signified by clear Swarovski crystals). Sophie was supposed to be born in October – but was 2.5 weeks early. To me, this was fairly significant.
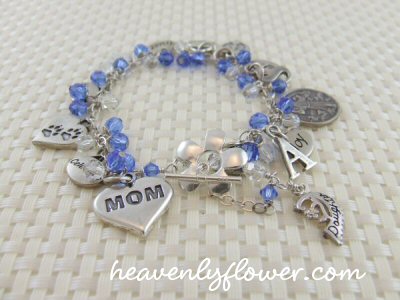
These past couple of years, I have added new elements. An ” S” for my daughter’s fist name, baby feet charm, and a ” Mom” charm. A ” teach” and “patience” charm when I needed to be reminded! Just recently I added an “A” for my second daughter, and updated the clasp to a sterling silver flower clasp.
I mentioned the mother-daughter charm earlier. I have half a heart that says “daughter” – I made a bracelet for my mother for my wedding, and it has the other half of the heart, that says “Mother”. Her bracelet contained the birthstones (symbolized with Swarovski crystals) for myself and two siblings.
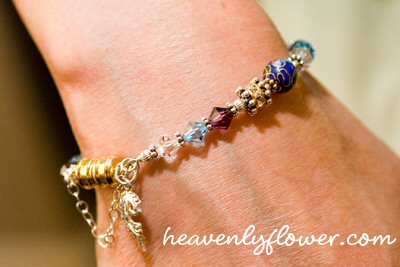
My mother passed away suddenly on October 25, 2008 at the age of 54. My dad had asked me if I wanted her engagement ring, and at that moment of grief I decided that she should be buried with this bracelet (I wear her engagement ring on my right hand and am glad I decided to keep it).
Over the weekend I decided to add my youngest daughter’s birthstone to the bracelet – and I used Swarovski bicones instead of the round beads. Ava is very angular in features just like a little ram – she is an Aries afterall, and it just seemed to fit better. 🙂
See the rest of my wedding jewelry in the post: Come Tour My Jewelry Box: My Wedding Jewelry Then & Now
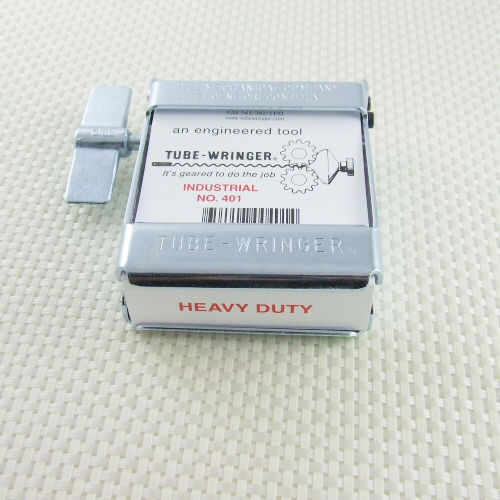
I can’t resist a new gadget, especially if it is an affordable one.
So with my Contenti order last week for polishing buffs, I found this little tool that I couldn’t help but add.
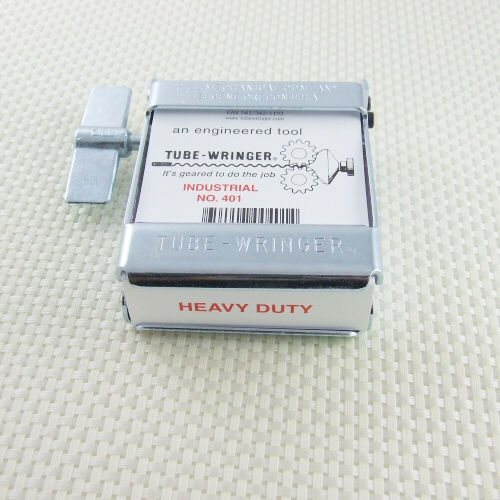
Meet the tube wringer. Technically, it is for industrial use to make seals and to squeeze every last bit of product out of well, tubes. Think toothpaste tube – on an industrial scale. 🙂
However, the tube wringer can be used to make an attractive crinkle pattern on metal sheet. Consider it a cheap little rolling mill. So for $22 I thought, why not give it a try.
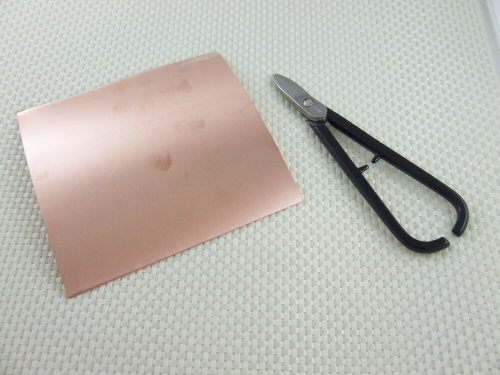
I got out some copper sheet and the metal snips to cut a length of the metal.
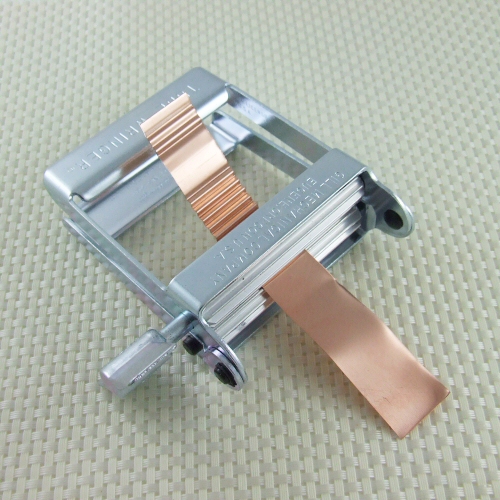
I inserted the metal and the tool clamps shut easy enough. It was awkward at first getting the length to start travelling through the tool evenly. I think with practice, I will be able to get the proper feel for even pressure. But once I got it started, the rest was very easy – very little effort was needed. I am sure this would depend on the gauge of metal sheet or wire you are using.
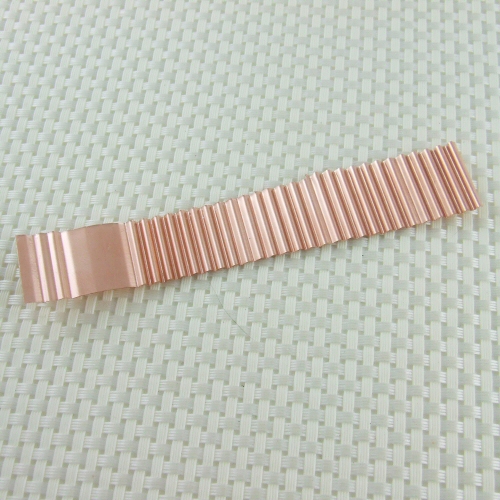
The crinkled metal. So many ideas come to mind: what would it look like with a patina? Hammered? Riveted to flatter metal…Hmmmmm….

Artbeads offered us bloggers a chance to try out some supplies* & design a summer theme. My first instinct is to gravitate toward blues, yellows, pinks, white: bright colours & pastels. Then I stopped myself. That is my assumption of summertime jewelry. But what does summer mean to me?
I grew up in Nova Scotia, so the ocean was never far away. But I grew up in the Annapolis Valley – so the ocean was not the prominent landscape. Now that I live in Québec, I live near a lake. So there is indeed water, but like the muddy banks of the Bay of Fundy, it is not the crystal clear blue/green water you will see in the Caribbean. It has more of an earthy quality.
Thinking of where I spend most of my time in the summer months, I like to be outside in my garden: either working with the dirt or relaxing in the shade when it’s too hot. I like to observe the plant life and insects as they exist in harmony with one another.
In the summer, you will see me in a lot of khakis, earth-toned capris & shorts: tank tops – very simple & casual. If I go out to an event, chances are you will see me in a simple black dress and black thong sandals. So it occurred to me – what summer means to me: spending time connecting with the earth & casual socializing.
After this contemplation, I decided to choose two pendants from Artbeads that I thought most represented me in the summer months.
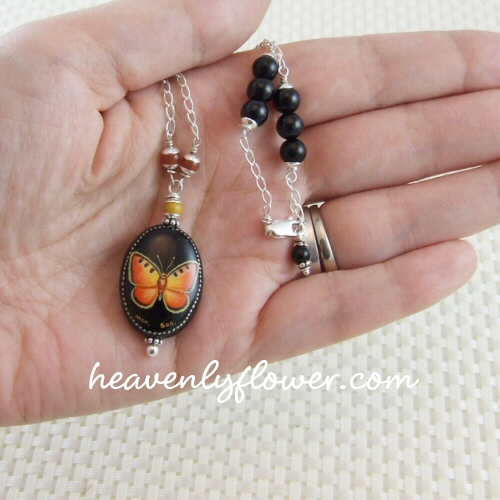
This 18x25mm onyx pendant is hand painted with a butterfly by a Russian artist. Butterflies are very symbolic for me: they represent beauty in nature, as well as transformation – something I strive to do many times in my life. This pendant would be perfect in a casual outfit or little black dress.
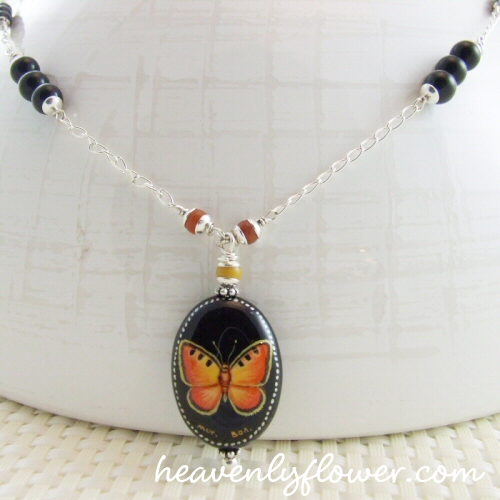
As mentioned in my last post, I had a hard time choosing colours for this piece. I just have too many hues of yellow & orange in my vast stash of beads! I ended up going with just a splash of colour with these 4mm jade beads. Too much colour with the black onyx and it would look too halloween-ish or bumble bee-ish! Plus I wanted the beauty of the pendant to take center stage & not get lost in a sea of bright colour. So I used mostly onyx beads (6mm and 4mm), sterling silver chain & bead caps.
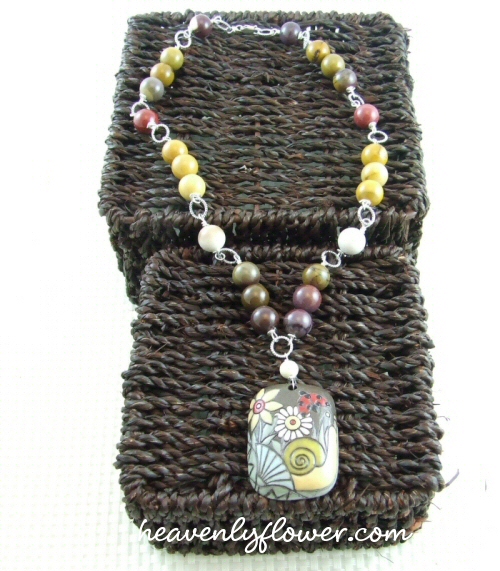
When I approached the design for the second pendant, I didn’t have to look far for the perfect matching component. Something about this stoneware pendant reminded me of a particular bead. Was it wood? No. It would have to be a stone, with many different colour layers. Then it hit me: Moukite!
Moukite (or mookaite, “mook jasper”) is a type of jasper found in Australia. I love this stone for it earthy colours & broad patterns – anywhere from reddish-brown, gold, white, or even mauve/pinks! It was the perfect compliment to this pendant, which is made of glazed stoneware clay.
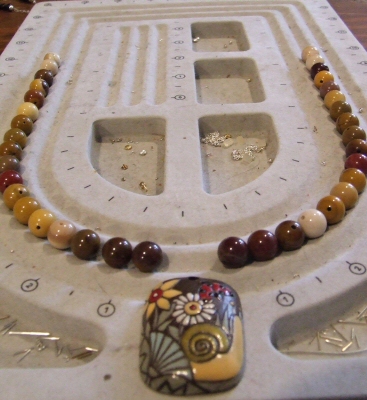
The pendant easily accommodates the 10mm beads. I decided to break up the bulk of the beads & add interest with these 8mm sterling silver twisted rope jump rings, mainly because they reminded me of the pattern of the white flower in the pendant.
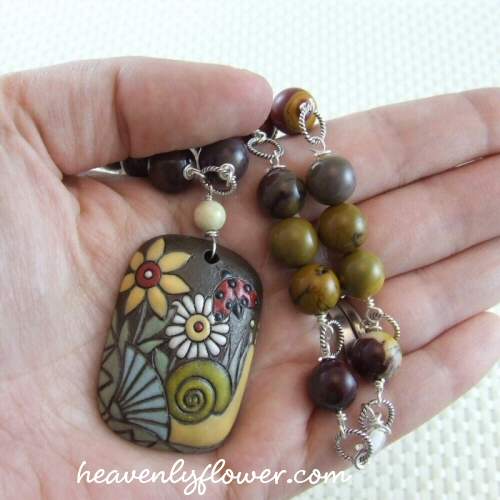
I thought I’d share a tip: I wanted the rings to lay flat on the neckline. In order to achieve this, I had to pay close attention to the pattern. I noticed that I had to twist the loop wraps around the single beads (the group of three beads have their loops facing the same direction). I had to make sure that the wrapped loops on the single beads were alternating: meaning, instead of them facing the same direction , I needed to have one facing outward. Here is a picture that hopefully will illustrate what I mean (sorry it’s a bad picture):
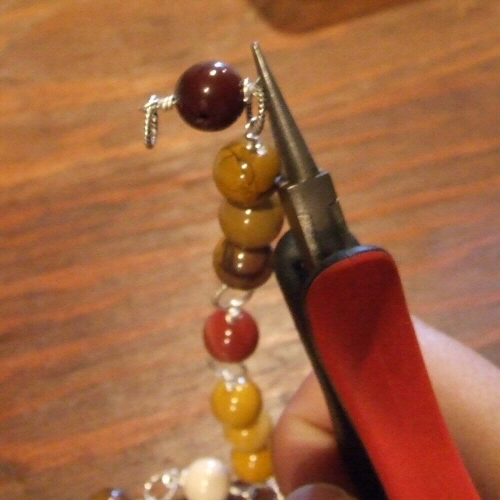
I held the loop to the left with my fingers, then gently twisted the loop on the right with my pliers 90 degrees. This variance in the loops means the rings laid flat against my neckline instead of sticking out uncomfortably.

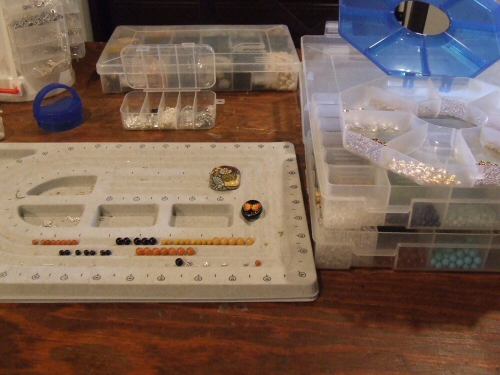
I haven’t done any beadwork in quite awhile since I have been teaching myself some metal techniques. Today I brought the beads out again in order to work on my Artbeads Blogging for Beaders Project for Summer.
I doubt I will finish both pieces today…actually I know I won’t, esp. since this beautiful weather is calling me outdoors!
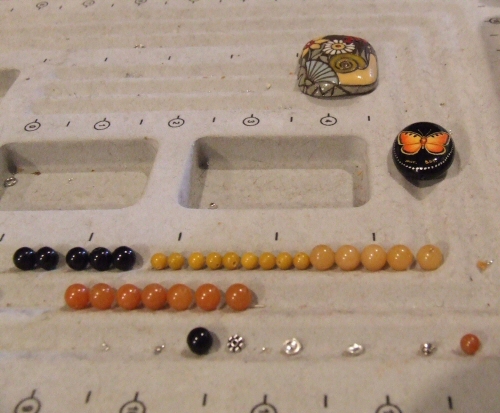
I have to admit something: I have WAY too many supplies. I am serious!! Not exactly a bad thing – but over the past two and a half years, I seem to have had more time to BUY beading supplies than MAKE jewelry! Plus I scope out suppliers, buy wholesale and volume discounts and close outs – well, you get the picture. When I sat down to look at colour options for these two necklaces, I had too. many. choices.!! In a way it was overwhelming – too many possibilities! I spent a half an hour this morning just looking & considering colour schemes!! I came to the conclusion for example, I have way too many gemstone beads in the hue of ORANGE!! I went to get large guage headpins and paused to consider dozens and dozens of different metal components. And I am organized – believe you me – it’s just too many choices staring at me. At this point, I think I could open a small store…if I had the time! HA!
Anyway, I mean that somewhat in jest of course – but still…anyone else feel the same way – even some days?? The possibilities are endless when it comes to beads…I thought I was limiting myself by not buying glass anymore but nope… 🙂
Happy Creating! I should be posting this project within a couple of days…
I am incredibly lucky to have an extremely supportive spouse. Perhaps maybe too much so: he loves cool tools as much as I do so he rarely tells me “no” if I want something tool related. Thankfully, I have some restraint…. 🙂
Here are a few items I received for my birthday on April 22 – Earth Day! Forget flowers & chocolate: get me some tools!!! 🙂
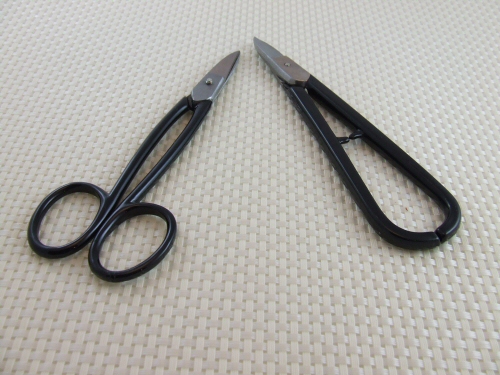
New metal shears! I have a large pair of shears but I wanted a smaller pair. The ones on the right cut on a curve. Neat-o!
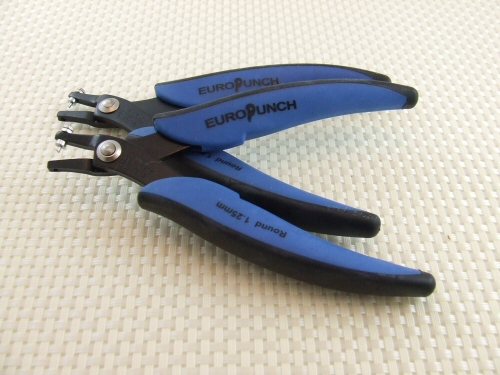
Metal hole punches. I have a screw-style metal punch, but I wanted to try this type as well. I will do a comparison review in an upcoming blog post.
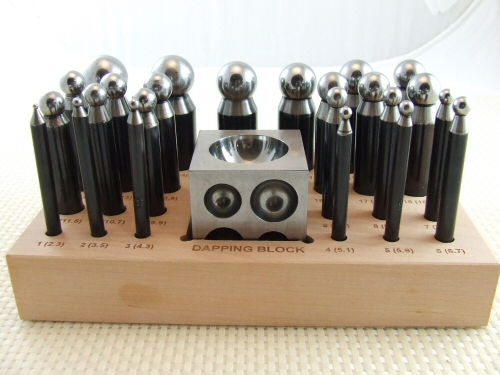
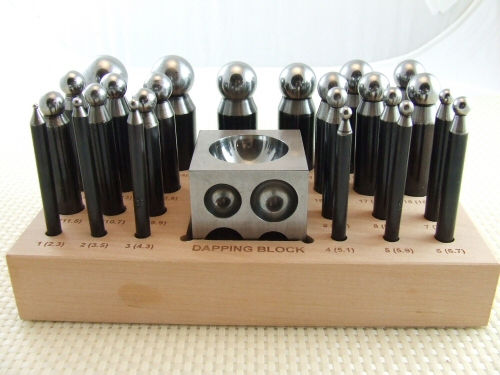
This is the item I wanted the most: a dapping block and punch set! I can’t wait to get my hammer on these! 🙂
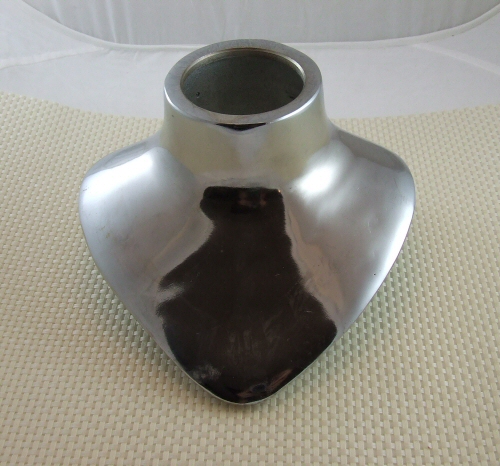
This is a really neat tool and a total splurge. It’s a necklace mandrel: so you can form a necklace by lightly hammering so that it lays properly across the neck. Very cool…!
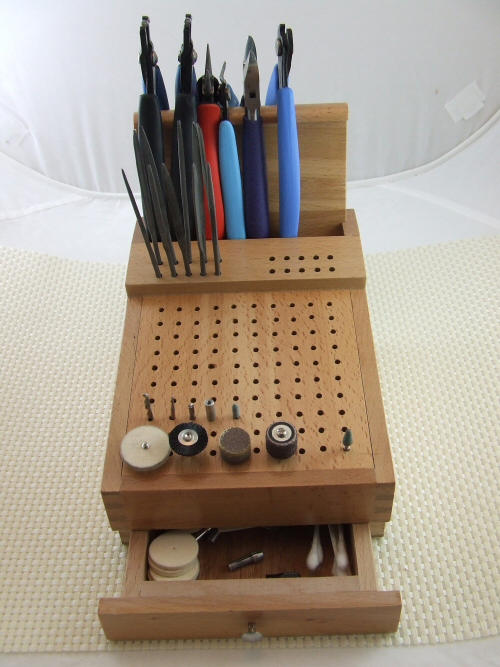
This was real nifty as well…what a great way to organize all the little burs and tools. I really like that I can hang my pliers on the back as well. You don’t know how much running around I do for these items! Now, all in one place. Ahhhhh…. 🙂
I also got muslin buffs for my polishing lathe and metal files but that’s BOR-ING compare to these. Now if I can get caught up housework, I can go play. 🙂
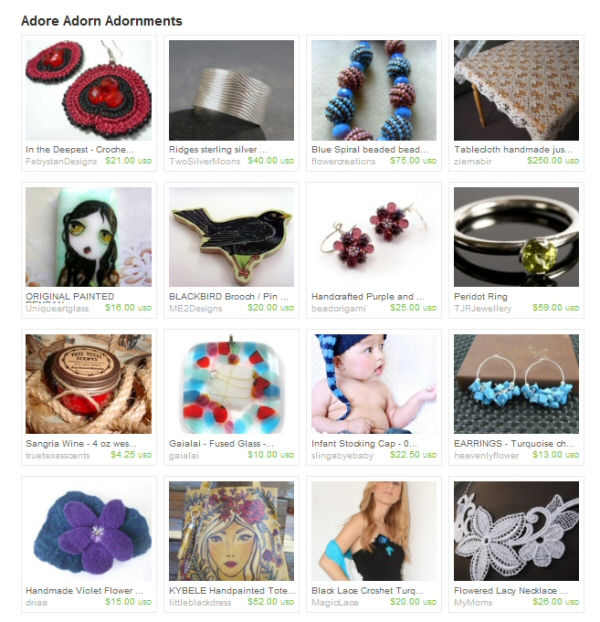
I got a convo from a fellow Etsian that I am featured in her curated Treasury East. This is the first time I have been included in one, therefore my first time to give it a test drive. I’ve not had the time to curate one myself as of yet, unfortunately.
Treasury East has been rather controversial with the Etsy community. With Treasury Main and Treasury West, you would have to wait for the full treasury to “open up” – when the current treasuries expire – and hope to grab one before they fill up. The treasuries fill up in seconds, and if you are the lucky one to grab one and curate, it is a fun and important marketing tool for many Etsy Users.
The difference with Treasury East, is that they never expire, and comments and the number of treasuries curated will be infinite. This left a lot of Etsy users wondering how they will become relevant regarding promotion and marketing: how will potential buyers see the treasuries and wade through the hundreds – if not thousands of treasuries?
Treasury East is still in the testing stage so these questions will hopefully be answered in the coming weeks. I do see some pros to the new format: you don’t have to wait around for one, and the never expiring element means that you can share it on social network or you blog and it will always be visible. The new format is also larger and cleaner looking. “Hotness” is gained not just by clicking and commenting as before, but gained through promoting outside Etsy, using social networking tools such as Twitter and Facebook.
I don’t know when or if I will curate a Treasury East. But I thank you, riorita for including my turquoise chip earrings! 🙂
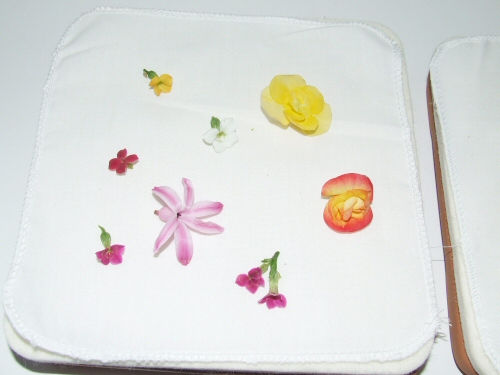
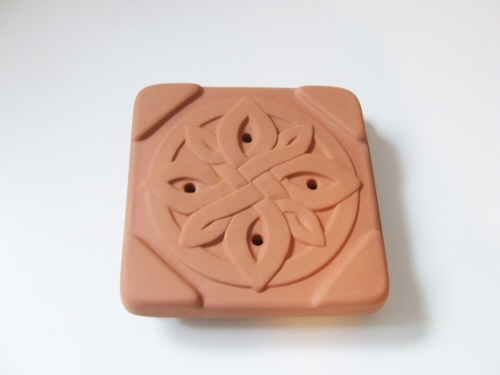
Earlier this year I obtained this neat little contraption called a Microwave Flower Press. They are available at many garden supply stores. I wondered if they really would dry flowers in minutes and still retain the same delicate quality of a flower traditionally pressed in heavy books.
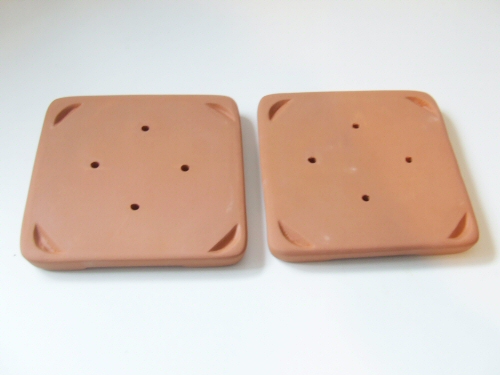
The press is comprised of two terracotta slabs, wool pads and broad cloth. It boasts the ability to dry press flowers in as little as three minutes, and that it will retain the colour of the flower better than the slow-drying method.
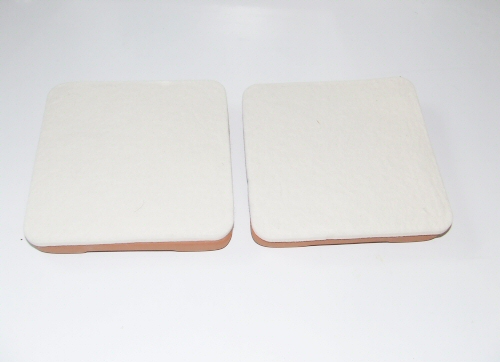
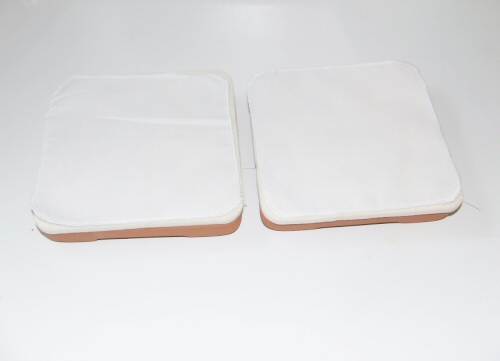
After laying the wool pads and cloth onto the terracotta, take the flower(s) you want to dry and arrange them on the broadcloth. It was the middle of winter when I tried this experiment, so I obtained some plants with small flowers from the home improvement store.
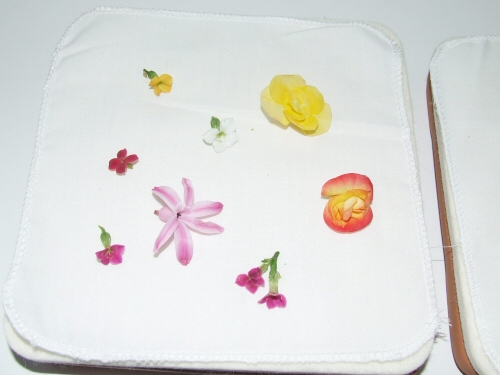
After you have the flowers placed as you like, carefully place the other broadcloth, the other wool pad and then the other terracotta slab on top – sandwiching the flowers in between.
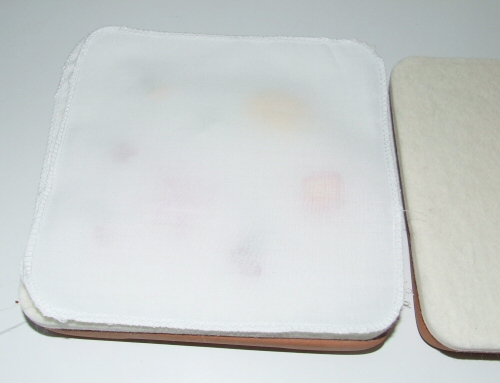
Into the microwave we go. It’s recommended that you microwave in 30 second intervals so not to over dry the flowers. Since these were small flowers, I complied with the suggestion. It took about 2 minutes to do most of these little flowers.
I did this experiment twice – and these are the successful flowers. One variety would not dry properly at all – either they were over done & flaky – therefore stuck to the broadcloth, or still retained moisture and stuck to the broadcloth – so just as unusable, either way.
These are the variety of flowers that did not work in the microwave press; I pressed them the traditional way – in heavy books – for 3 weeks. I agree with the claim that the colour is retained in the microwave press. The flowers I traditionally pressed did fade somewhat.
I look forward to trying out larger flowers this summer in the press. I’d also like to incorporate this into jewelry making somehow: maybe set the dried flowers in resin? Oh the ideas… 🙂
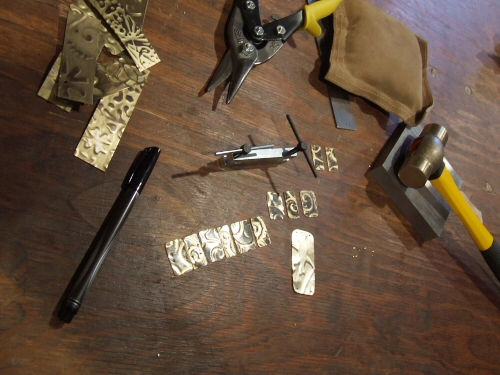
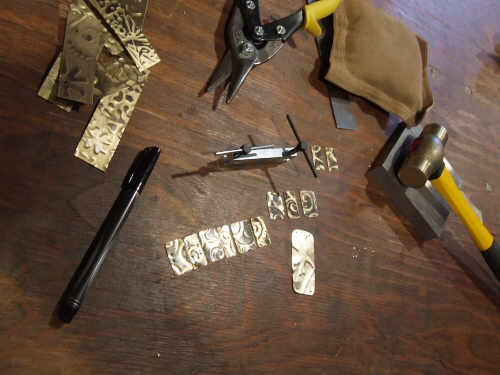
My first piece that I made via the brass oxidizing experiment was really, really crude – but it worked up fast. I know my fellow jewelry makers will appreciate the sentiment of just completing a project so that you gain the experience in working with the material – even of the end result is not up to your standards.
The piece turned into two pieces actually – a pair of earrings and a bracelet.
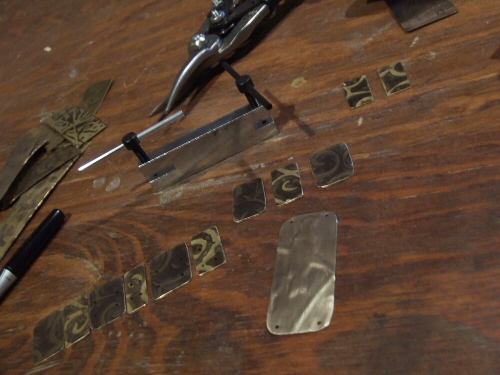
I cut out t he metal using a pair of shears. Then rounded and filed the corners smooth. With a sharpie, I marked where I wanted to punch holes with the screw punch. (You can see another project there on the left working up…for another day. :)). These pictures are straight from the bench, so you see the creative chaos first hand. Sometimes I need to drop what I am doing to develop another idea before I totally forget it. So there are normally many projects on the go at once!
After the holes are punched, I flattened/work hardened the brass using a brass mallet and leather sand bag. Then, the brass pieces were ready for earring assembly…
The completed earrings, with onyx and gold-filled components.
With the rest of the pieces of brass plate, I decided to punch holes – two on each side – and attach together with jump rings.
Sorry terrible pic – but I laid them out staggering the sizes and lightness/darkness from the two brass trophy plates this once was…(and a peek of yet another project in the top right…;)).
Added a magnetic clasp and…there you have it.
These two pieces will be displayed in my workspace as my first ever metal work pieces. I think that it will be neat to see the progression of skill in a few years time. I wish I had of kept the first piece of beaded jewelry I made over eleven years ago! But, I probably sold it! LOL!
Now that I got this get-a-feel-for-techniques project out of the way, my mind is going a mile a minute with ideas. The other projects I am working on involve incorporating the engraver so I am anxious to get them completed and shared. Let’s see how much life gets in the way of play! Stay tuned!
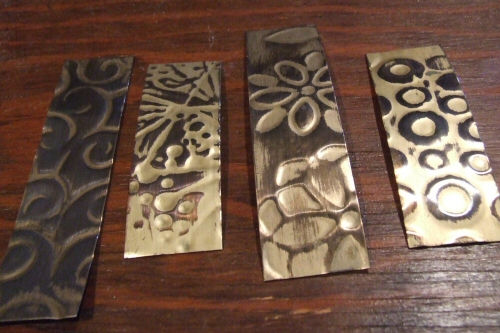
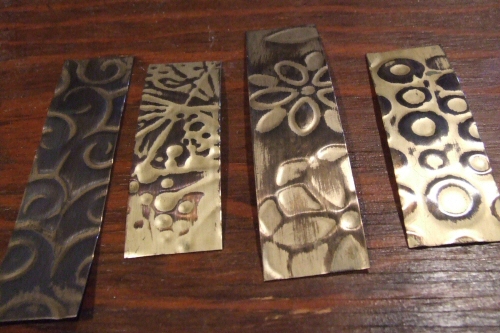
I inherited a lot of trophy brass for my engravers. Besides practicing engraving, I thought I would try my hand at some fun techniques and see what happens. I haven’t had any formal training in metal nor have a worked with it before, other than some crude wire work. I just like to think up an idea and try it out and see what comes of it.
The first thing I did was create patterns on the brass plate using a paper embosser.
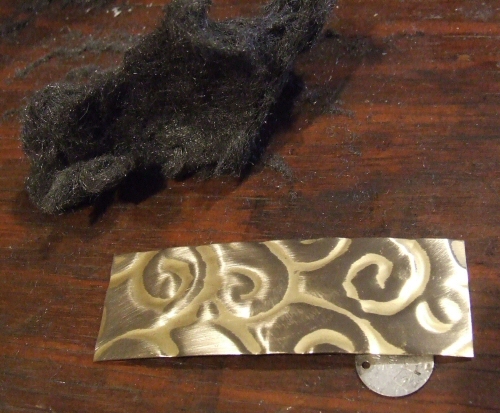
Then I needed to rub the surface with a very fine steel wool as trophy plate has a coating to protect it from tarnishing. The steel wool will remove the coating and this is the area that we will oxidize. The effect depends on how much of the coating you remove, but generally, the recessed areas will remain with the coating while the top will not.
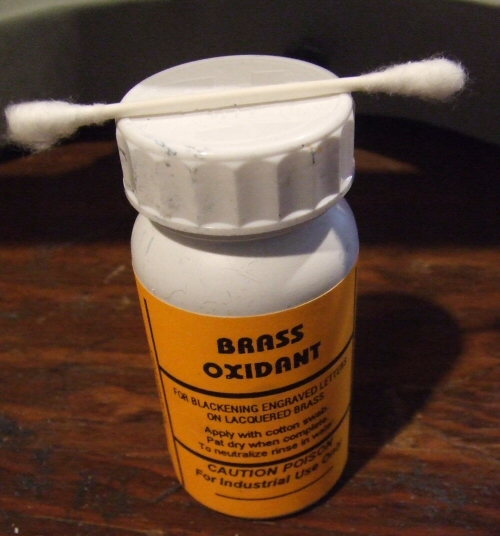
The brass oxidizer I have is for the colour black and I got it from an engraving supplier, but is available from many sources including jewelry supply shops. This is an acid so you want to wear gloves and keep out of reach of children.
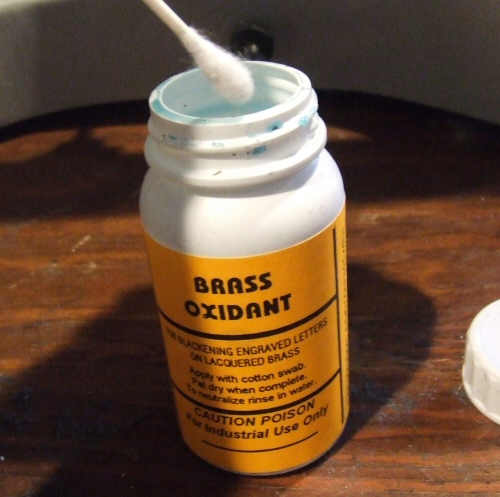
I used a Q-Tip to apply the solution to my brass plate.
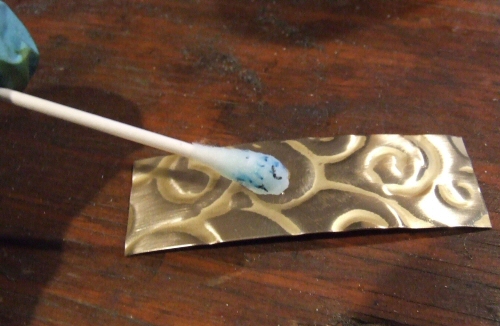
I applied the oxidizer evenly over the surface of the brass plate.
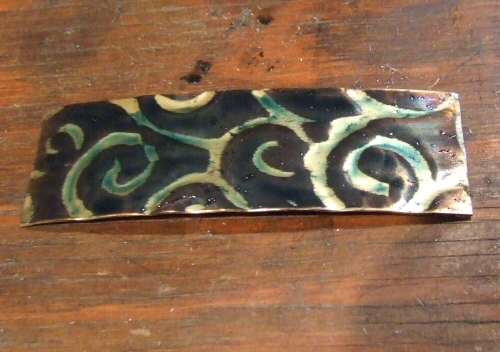
Almost instantly, you will see the brass turn black.
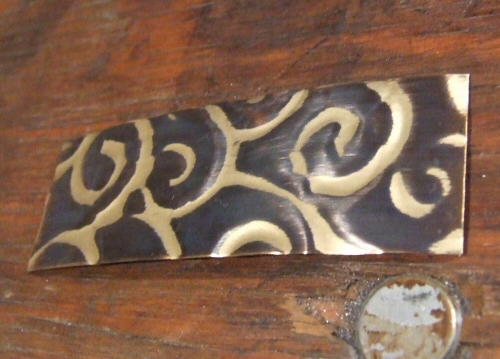
Wipe off the excess…and there you have it. Oxidized, patterned brass. I applied a jewelry wax sealer to the end product.
So what to do with this brass plate? Part two will be the a peek into the projects…
I am so severely behind with my blog posting. In March, my family & I ended up travelling home to Nova Scotia to attend a funeral. That wiped two weeks out of that month and therefore made me behind on my projects for my “Jewelry Sabbatical“. The 13 hour drive however, gave me a lot of time to think & refocus, and my priorities have shifted a bit. I had a brain wave for the engraving collection, and that is still in conceptual stage while I wait for some logo templates I ordered. I also had a clearer idea about which direction to take the website, so I have been working at updating the look of the site and the overall branding of heavenlyflower.com – all tasks that are severely needed & overdue – I just didn’t expect to be working on that element at all this year! Blame it on retrograde if you must, but these days I just feel motivated to work on getting projects cleaned up, completed and continuing on past goals (like the website). It’s not exactly spending all my live long day at the bench as I had planned, but I am happy with the direction things are headed so I have to go with it. For the first time in 8 years I feel like my goals & dreams are in reach. I tend to go with my gut day to day and this is no exception. Perhaps taking the pressure off this year helped my business goals come in clearer focus. Now to not self-sabotage…a topic I will leave for another post.
I will still be blogging about my new found adventures in creativity as planned however I do have a few topics revolving around the handmade market and business that I will also be writing about as it pertains to what is on my mind these days.
I am also happy to announce that I will be participating in yet another Market Mommy Blog Party next week. Stop by the blog and participate. There will be prizes from fellow mom entrepreneurs as usual. I will be giving away gift certificates! 🙂
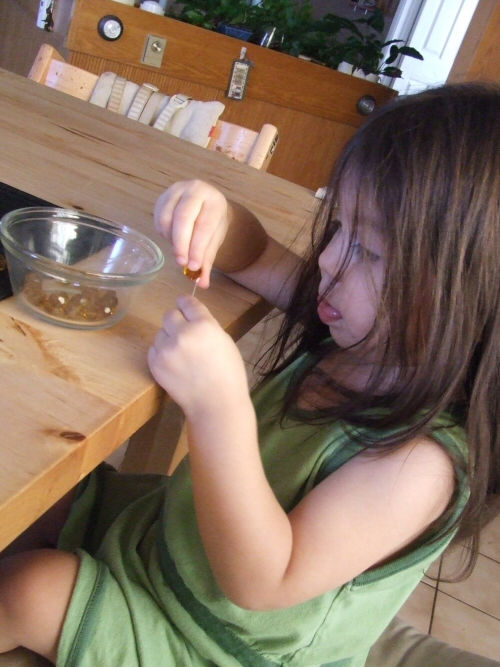
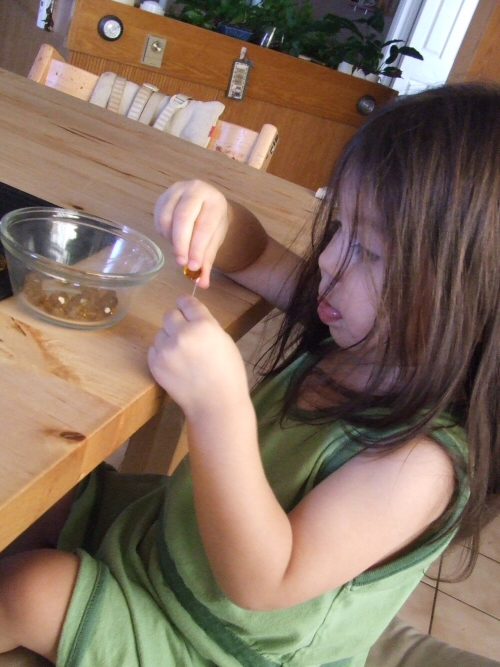
Finally: while I was organizing photos I came across this photo of my oldest trying her hand at what mommy does. 🙂 I don’t want them to “hurry up and grow up” but I do welcome the days when I can share my passions with my two girls. This was taken back in October, before my creative space/playroom was finished. She was just newly two years old when this was taken.
The piece I was working on:
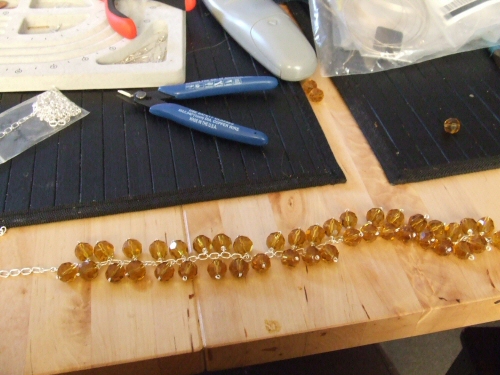
The finished project:
More goodies to follow…including my adventures in brass last month!