My New Comfy Work Chair

Chair

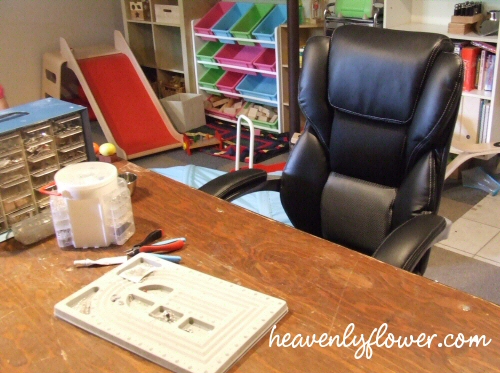
So the other day I was at Costco and broke down & bought myself a “proper” chair. I’m not sure exactly what a “proper” chair for jewelry work would be – before my house I was an apartment couch beader, so it’s all new to me.

All I know is, the chair I was sitting on previously – which was lovely by the way – handmade by the previous owner, sturdy and high backed, was still a dining room chair meant to enjoy meals with & not sit for long periods of time hunched over an engraver or beads.

So this was not too bad, $100 plus an instant $20 rebate. It is definitely comfy. My legs don’t fall asleep anymore, and if I lean back while thinking or doing certain kinds of work it is great. But there is still the problem of leaning over to do accuracy work. I still get pain at times in my middle back/between my shoulder blades. Hubby thinks I need a lower desk – I am using a flea market table due to its large size – but then wouldn’t I be hunching over more? Sure sitting on a yoga ball would probably be the best for my posture but terribly impractical – can you imagine – pliers in one hand and jeweler’s glue in the other – yeah, I see an accident waiting to happen. 🙂

So this will do. For now anyway. What is your work bench set up and how do you find it?

Jewelry Inspired: Custom Engraved Charm Necklace

Om

I have been talking for several months now about my newly acquired manual engravers – AKA pantograph engraver or engravograph as New Hermes likes to call them.

I thought it was about time I finally shared a completed piece of jewelry showcasing their engraving abilities. 🙂

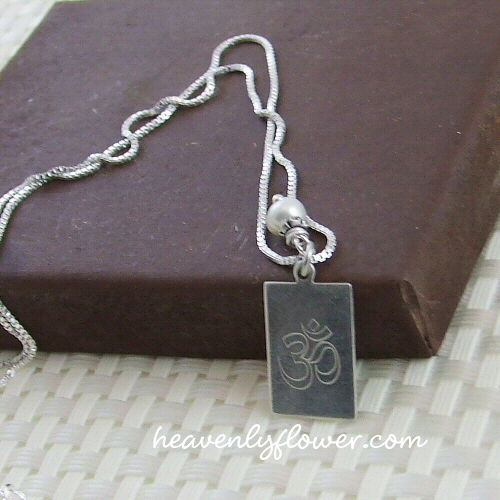
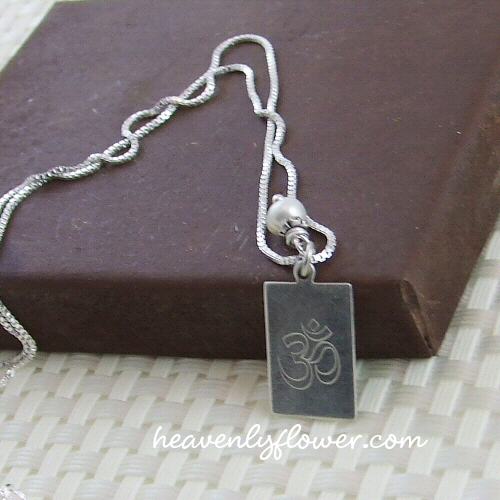
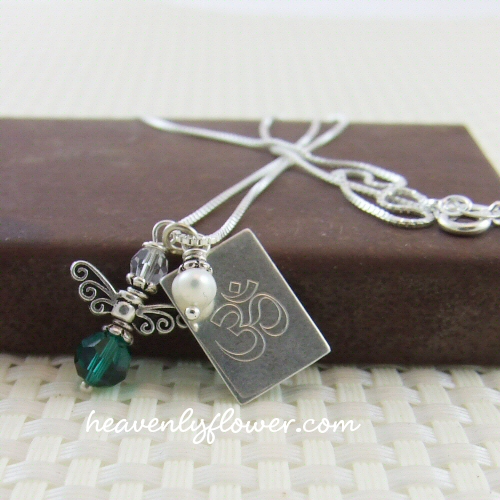
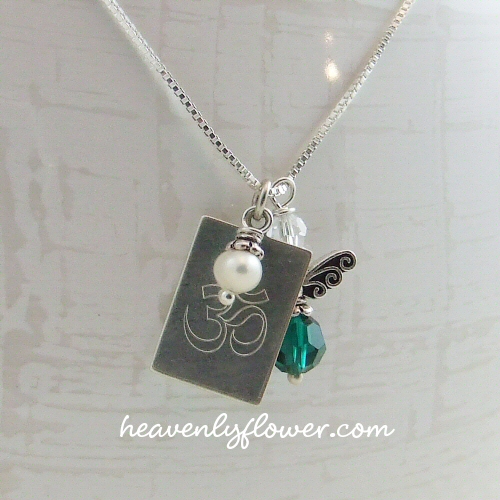
I call this piece a charm necklace because of the size. It is dainty and meant for everyday wear. Above you see the Om symbol engraved onto a 18x11mm sterling silver blank. (Besides the Om, I also have a Celtic knot, mother/child (which you will see in an up-coming post),  heart, butterfly, flower, awareness ribbon, cross, as well as several logos of organizations. I can order more shapes and symbols upon request). Above it hangs a 4mm freshwater pearl – symbolizing wisdom, faith, focus & luck.

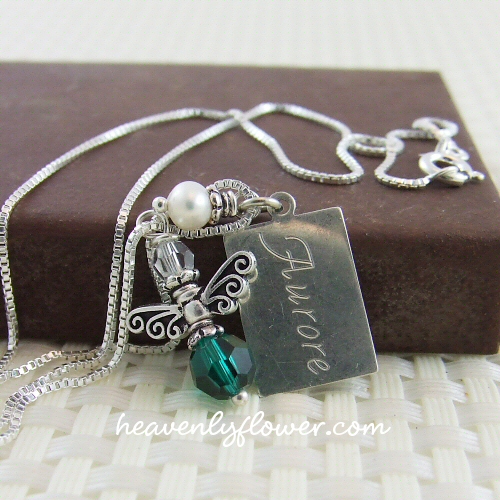
I then added a birthstone fairy in Swarovski crystal – the birthstone is emerald, for May.

Here’s a view of the back of the engraved charm – “Aurore” – the name of the recipient (this was a birthday gift for a dear friend – the entire piece is inspired by her).

A view of how the piece hangs when worn.

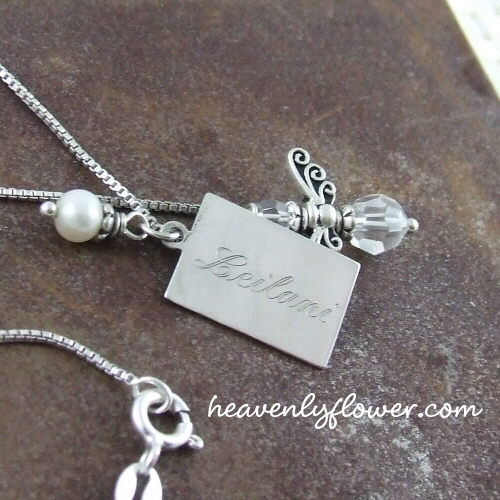
I loved this design, & decided to make one for myself! Here is the back of mine, showing my name engraved in a cursive font.

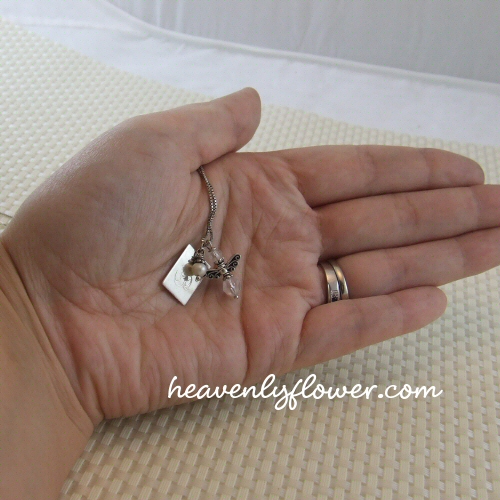
Just to get an idea of the size. It is small and ideal for everyday wear – I wear mine almost everyday!

So a little background – how does the pantograph engravers work? I’ll do a future blog post illustrating how they work exactly, but essentially they are large tracing machines. You have fonts and logos usually constructed out of the traditional brass, however recently I have also discovered a kind of hard resin that glides like butter in my machine, & it’s a fraction of the price of the brass sets (for example, a new brass font set with a fancy lettering can run you upwards of $800!) One end of the arm traces the font or logo plate while the other end has a diamond bit graver that engraves the image onto the metal. It works in ratios, so if you have it set to a 2:1 ratio – usually the largest size, the engraved image will be half the size of the template….and through approximately 12 different settings (including half sizes), gets smaller from there.

Unlike hand-stamped jewelry, engraving in this manner will give you a near-perfect image since it’s tracing a template. It does take a bit of practice and skill to not slip while tracing and get the even pressure (since this is manual afterall!) necessary. Also, blackening the image via oxidation as is the norm with hand stamping will give an engraved image a dull appearance – it is best to simply let it it remain in the colour of the metal. (I love hand stamping too and is another skill I hope to acquire down the road! It is a totally different look & feel!).

My mind is bursting with ideas…but before I get ahead of myself, the plan moving forward is to use this piece as the test object for mywebsite of custom jewelry. If all goes well with the programming I will add more pieces from there.

Until then, for more info on ordering this piece contact me directly: leilani@heavenlyflower.com

Cool Tool: Tube Wringer

Tubewringer

I can’t resist a new gadget, especially if it is an affordable one.

So with my Contenti order last week for polishing buffs, I found this little tool that I couldn’t help but add.

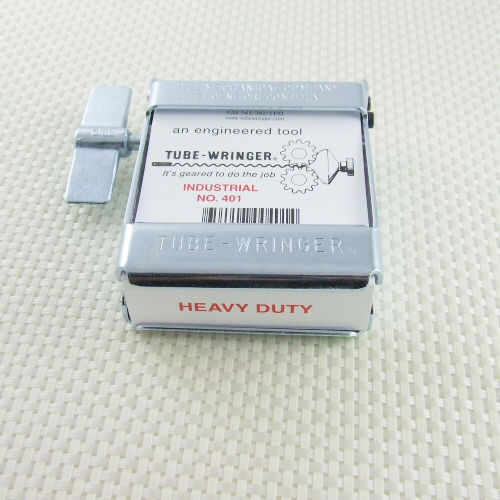
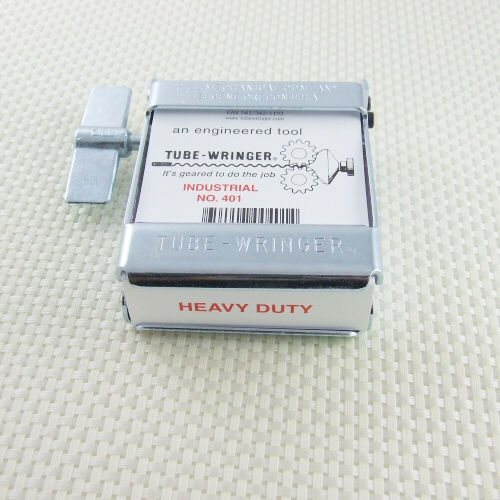
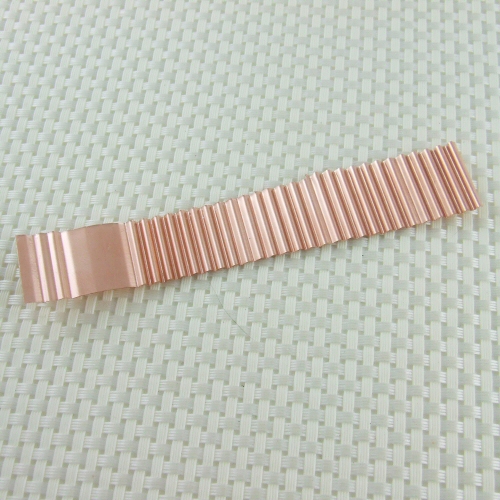
Meet the tube wringer. Technically, it is for industrial use to make seals and to squeeze every last bit of product out of well, tubes. Think toothpaste tube – on an industrial scale. 🙂

However, the tube wringer can be used to make an attractive crinkle pattern on metal sheet. Consider it a cheap little rolling mill. So for $22 I thought, why not give it a try.

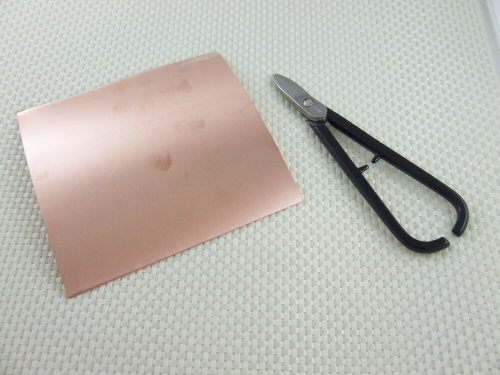
I got out some copper sheet and the metal snips to cut a length of the metal.

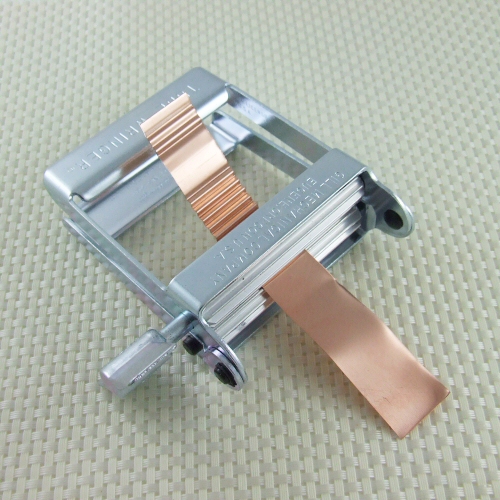
I inserted the metal and the tool clamps shut easy enough. It was awkward at first getting the length to start travelling through the tool evenly. I think with practice, I will be able to get the proper feel for even pressure. But once I got it started, the rest was very easy – very little effort was needed. I am sure this would depend on the gauge of metal sheet or wire you are using.

The crinkled metal. So many ideas come to mind: what would it look like with a patina? Hammered? Riveted to flatter metal…Hmmmmm….

Tool & Supplies: Nu Gold Sheet

Nugold

I needed some fine polishing buffs, so I decided to order a product called “nu gold” along with them to try.

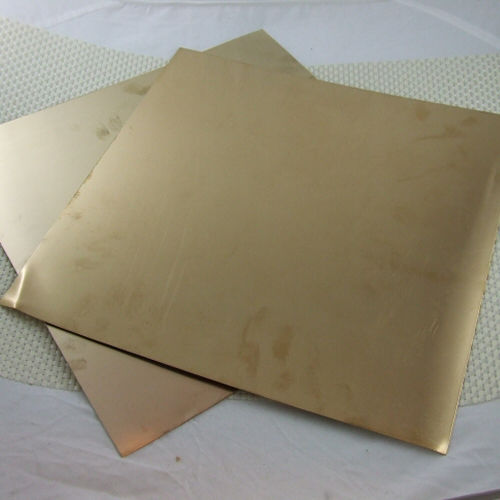
I bought sheet in two gauges, 24 and 26. Nu gold is 85%  copper & 15% zinc. It looks like gold sheet, only at a fraction of the price. I thought it would be a great way to practice working with metal sheet with the appearance of gold without buying the real deal. If I screw this up – who cares? No need to be gun shy working with this product!

Jewelry Inspired: What Summer Means to Me

Butterfly

Artbeads offered us bloggers a chance to try out some supplies* & design a summer theme. My first instinct is to gravitate toward blues, yellows, pinks, white: bright colours & pastels. Then I stopped myself. That is my assumption of summertime jewelry. But what does summer mean to me?

I grew up in Nova Scotia, so the ocean was never far away. But I grew up in the Annapolis Valley Рso the ocean was not the prominent landscape. Now that I live in Qu̩bec, I live near a lake. So there is indeed water, but like the muddy banks of the Bay of Fundy, it is not the crystal clear blue/green water you will see in the Caribbean. It has more of an earthy quality.

Thinking of where I spend most of my time in the summer months, I like to be outside in my garden: either working with the dirt or relaxing in the shade when it’s too hot. I like to observe the plant life and insects as they exist in harmony with one another.

In the summer, you will see me in a lot of khakis, earth-toned capris & shorts: tank tops – very simple & casual. If I go out to an event, chances are you will see me in a simple black dress and black thong sandals. So it occurred to me – what summer means to me: spending time connecting with the earth & casual socializing.

After this contemplation, I decided to choose two pendants from Artbeads that I thought most represented me in the summer months.

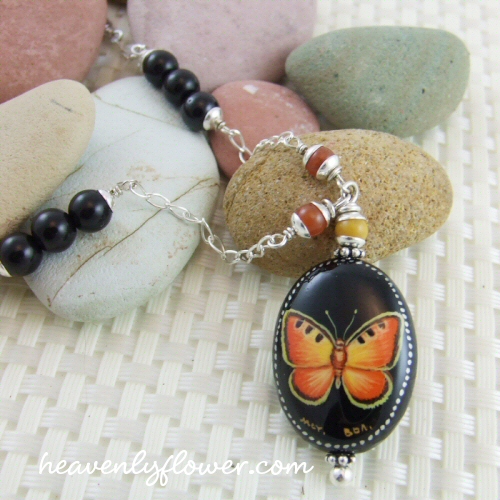
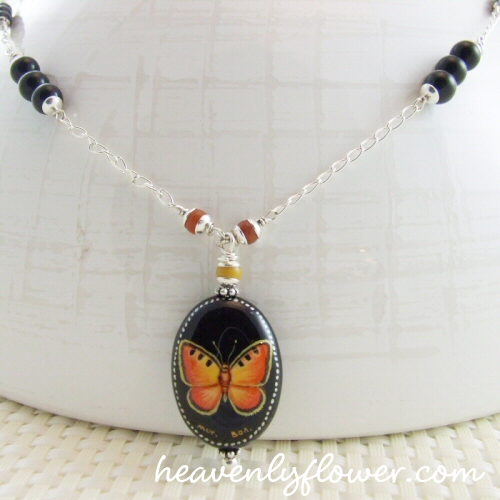
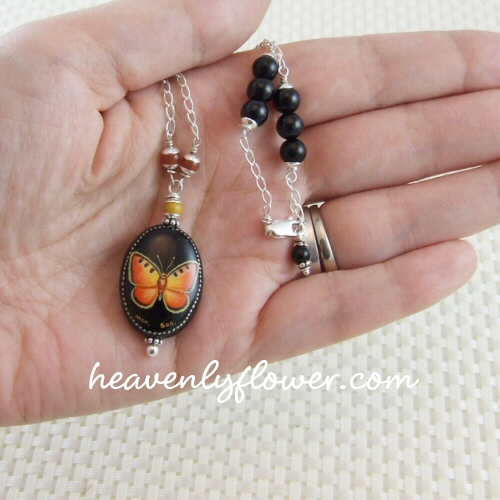
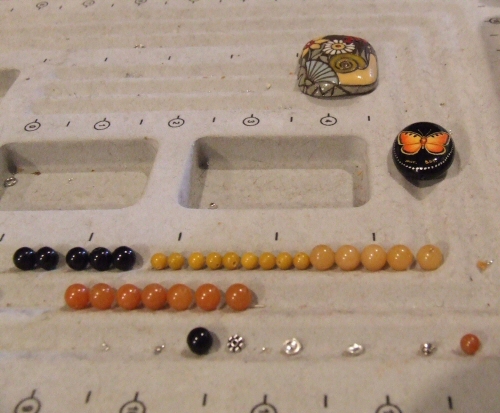
This 18x25mm onyx pendant is hand painted with a butterfly by a Russian artist. Butterflies are very symbolic for me: they represent beauty in nature, as well as transformation – something I strive to do many times in my life. This pendant would be perfect in a casual outfit or little black dress.

As mentioned in my last post, I had a hard time choosing colours for this piece. I just have too many hues of yellow & orange in my vast stash of beads! I ended up going with just a splash of colour with these 4mm jade beads. Too much colour with the black onyx and it would look too halloween-ish or bumble bee-ish! Plus I wanted the beauty of the pendant to take center stage & not get lost in a sea of bright colour. So I used mostly onyx beads (6mm and 4mm), sterling silver chain & bead caps.

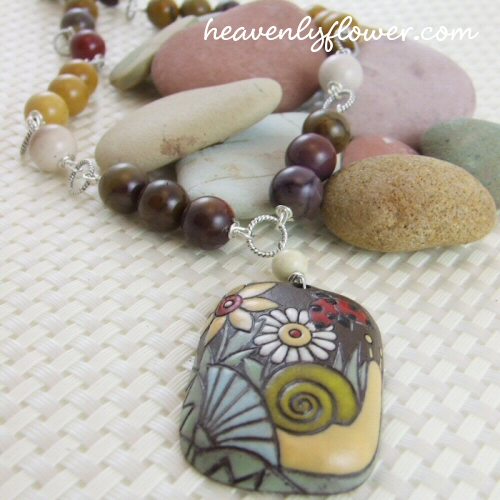
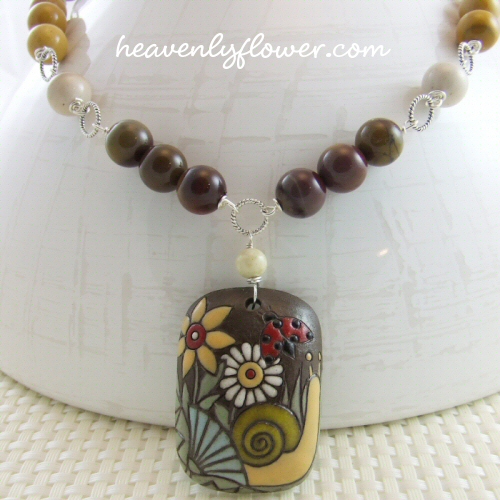
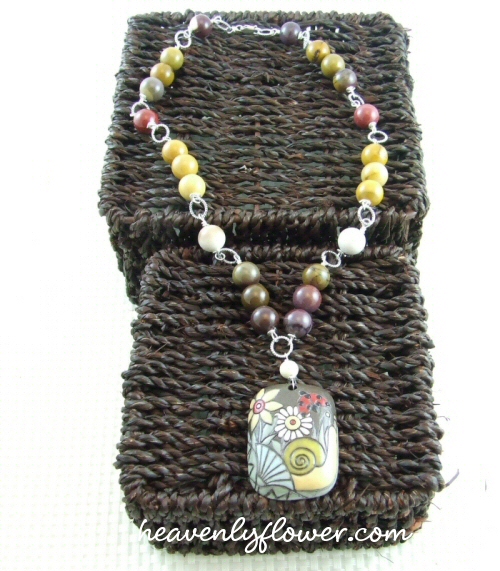
When I approached the design for the second pendant, I didn’t have to look far for the perfect matching component. Something about this stoneware pendant reminded me of a particular bead. Was it wood? No. It would have to be a stone, with many different colour layers. Then it hit me: Moukite!

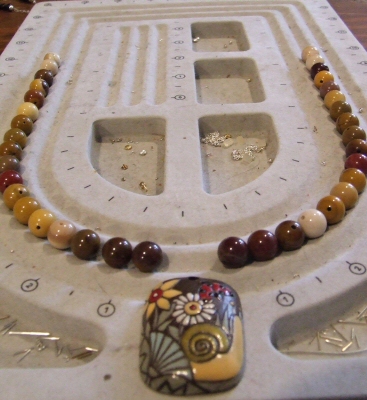
Moukite (or mookaite, “mook jasper”) is a type of jasper found in Australia. I love this stone for it earthy colours & broad patterns – anywhere from reddish-brown, gold, white, or even mauve/pinks! It was the perfect compliment to this pendant, which is made of glazed stoneware clay.

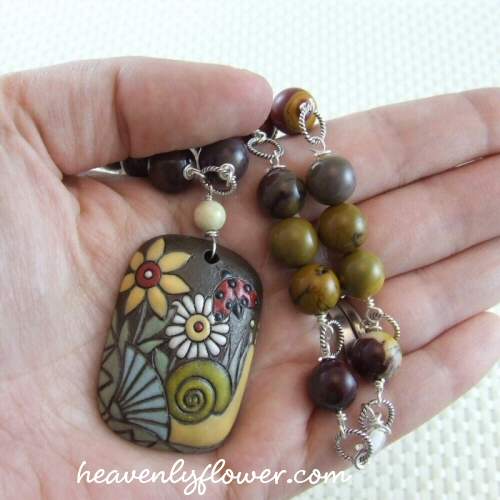
The pendant easily accommodates the 10mm beads. I decided to break up the bulk of the beads & add interest with these 8mm sterling silver twisted rope jump rings, mainly because they reminded me of the pattern of the white flower in the pendant.

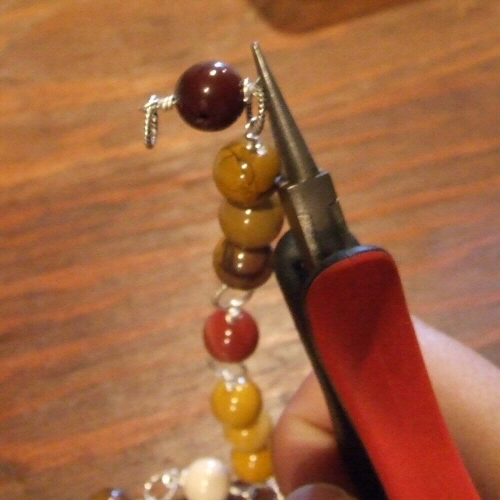
I thought I’d share a tip: I wanted the rings to lay flat on the neckline. In order to achieve this, I had to pay close attention to the pattern. I noticed that I had to twist the loop wraps around the single beads (the group of three beads have their loops facing the same direction). I had to make sure that the wrapped loops on the single beads were alternating: meaning, instead of them facing the same direction , I needed to have one facing outward. Here is a picture that hopefully will illustrate what I mean (sorry it’s a bad picture):

I held the loop to the left with my fingers, then gently twisted the loop on the right with my pliers 90 degrees. This variance in the loops means the rings laid flat against my neckline instead of sticking out uncomfortably.


Bringing The Beads Back to The Bench…

Bench

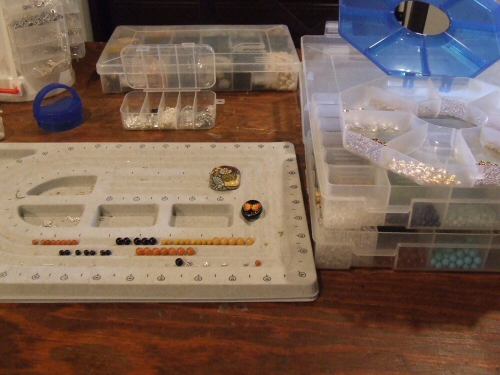
I haven’t done any beadwork in quite awhile since I have been teaching myself some metal techniques. Today I brought the beads out again in order to work on my Artbeads Blogging for Beaders Project for Summer.

I doubt I will finish both pieces today…actually I know I won’t, esp. since this beautiful weather is calling me outdoors!

I have to admit something: I have WAY too many supplies. I am serious!! Not exactly a bad thing – but over the past two and a half years, I seem to have had more time to BUY beading supplies than MAKE jewelry! Plus I scope out suppliers, buy wholesale and volume discounts and close outs – well, you get the picture. When I sat down to look at colour options for these two necklaces, I had too. many. choices.!!  In a way it was overwhelming – too many possibilities! I spent a half an hour this morning just looking & considering colour schemes!! I came to the conclusion for example, I have way too many gemstone beads in the hue of ORANGE!! I went to get large guage headpins and paused to consider dozens and dozens of different metal components. And I am organized – believe you me – it’s just too many choices staring at me. At this point, I think I could open a small store…if I had the time! HA!

Anyway, I mean that somewhat in jest of course – but still…anyone else feel the same way – even some days?? The possibilities are endless when it comes to beads…I thought I was limiting myself by not buying glass anymore but nope… 🙂

Happy Creating! I should be posting this project within a couple of days…

Cool Tools: What I Got for My Birthday…

Dapping

I am incredibly lucky to have an extremely supportive spouse. Perhaps maybe too much so: he loves cool tools as much as I do so he rarely tells me “no” if I want something tool related. Thankfully, I have some restraint…. 🙂

Here are a few items I received for my birthday on April 22 – Earth Day! Forget flowers & chocolate: get me some tools!!! 🙂

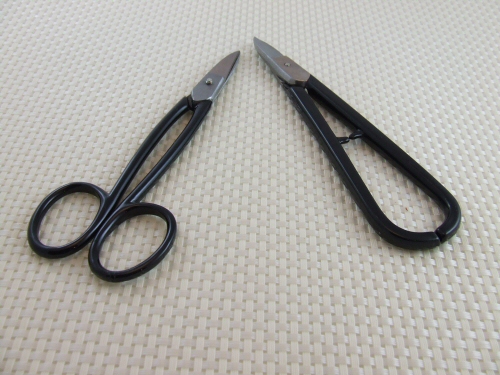
New metal shears! I have a large pair of shears but I wanted a smaller pair. The ones on the right cut on a curve. Neat-o!

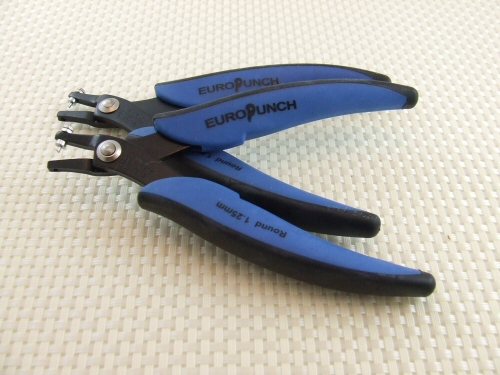
Metal hole punches. I have a screw-style metal punch, but I wanted to try this type as well. I will do a comparison review in an upcoming blog post.

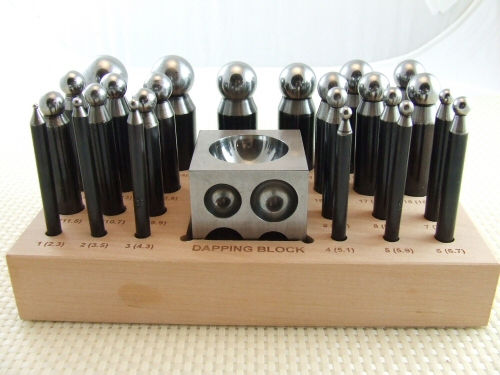
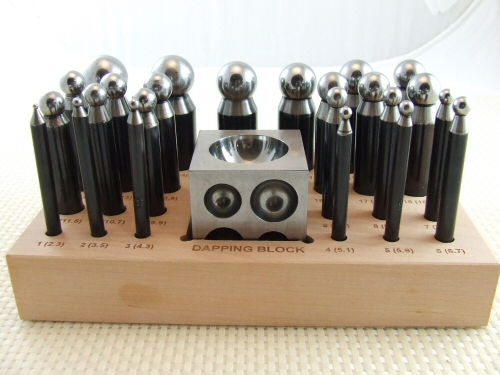
This is the item I wanted the most: a dapping block and punch set! I can’t wait to get my hammer on these! 🙂

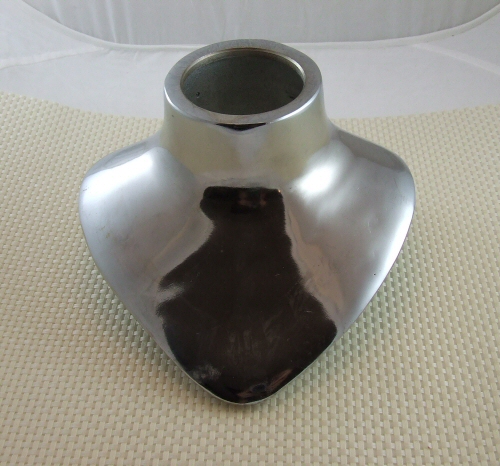
This is a really neat tool and a total splurge. It’s a necklace mandrel: so you can form a necklace by lightly hammering so that it lays properly across the neck. Very cool…!

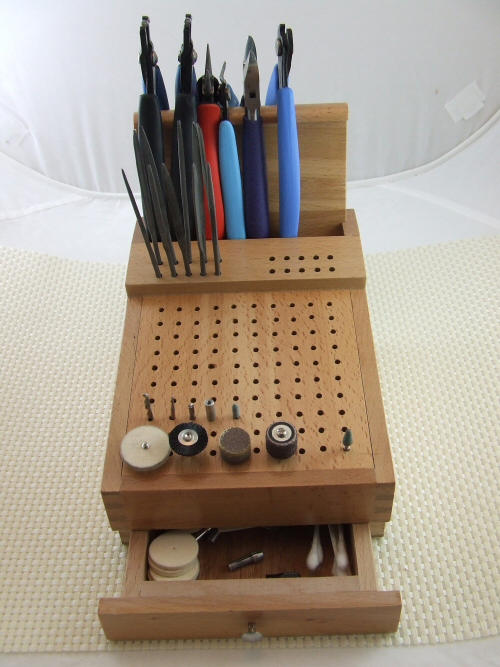
This was real nifty as well…what a great way to organize all the little burs and tools. I really like that I can hang my pliers on the back as well. You don’t know how much running around I do for these items! Now, all in one place. Ahhhhh…. 🙂

I also got muslin buffs for my polishing lathe and metal files but that’s BOR-ING compare to these. Now if I can get caught up housework, I can go play. 🙂

Etsy’s Treasury East: New Feature

Treasuryeast

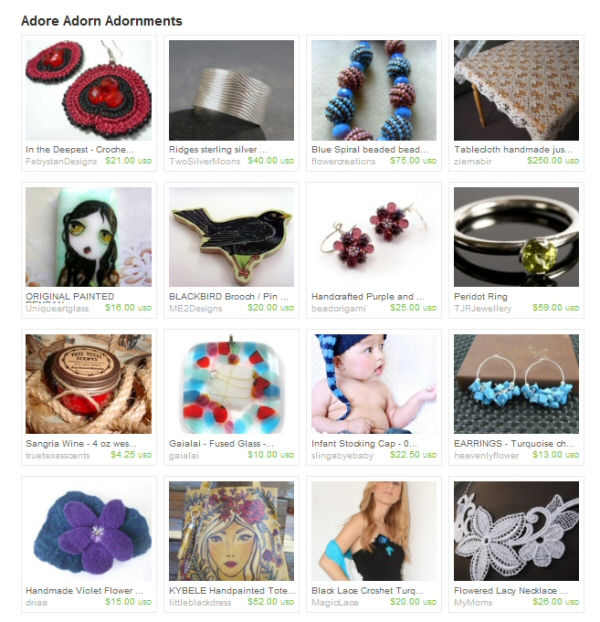
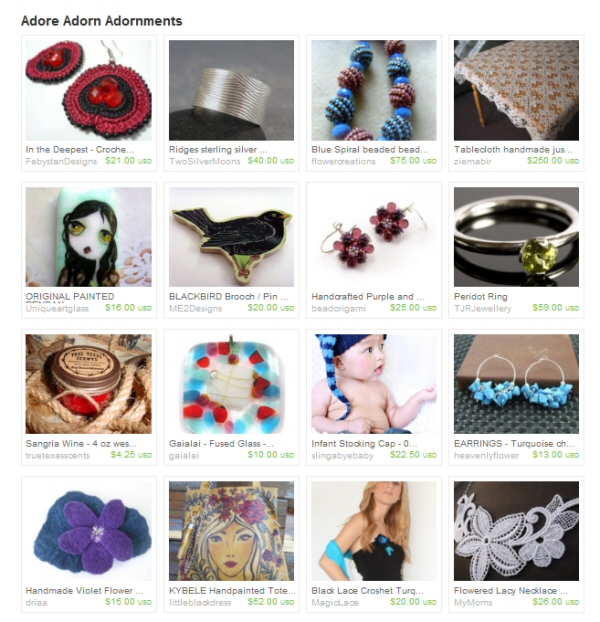
I got a convo from a fellow Etsian that I am featured in her curated Treasury East. This is the first time I have been included in one, therefore my first time to give it a test drive. I’ve not had the time to curate one myself as of yet, unfortunately.

Treasury East has been rather controversial with the Etsy community. With Treasury Main and Treasury West, you would have to wait for the full treasury to “open up” – when the current treasuries expire – and hope to grab one before they fill up. The treasuries fill up in seconds, and if you are the lucky one to grab one and curate, it is a fun and important marketing tool for many Etsy Users.

The difference with Treasury East, is that they never expire, and comments and the number of treasuries curated will be infinite. This left a lot of Etsy users wondering how they will become relevant regarding promotion and marketing: how will potential buyers see the treasuries and wade through the hundreds – if not thousands of treasuries?

Treasury East is still in the testing stage so these questions will hopefully be answered in the coming weeks. I do see some pros to the new format: you don’t have to wait around for one, and the never expiring element means that you can share it on social network or you blog and it will always be visible. The new format is also larger and cleaner looking. “Hotness” is gained not just by clicking and commenting as before, but gained through promoting outside Etsy, using social networking tools such as Twitter and Facebook.

I don’t know when or if I will curate a Treasury East. But I thank you, riorita for including my turquoise chip earrings! 🙂

Creativity Inspired ~ Cool Tool: Microwave Flower Press

Flowerpress

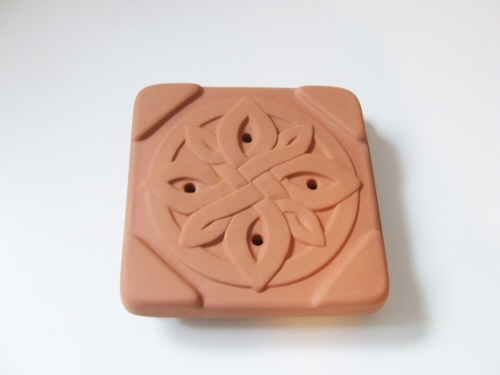
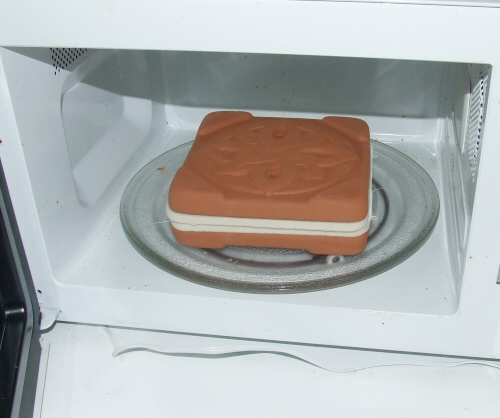
Earlier this year I obtained this neat little contraption called a Microwave Flower Press. They are available at many garden supply stores. I wondered if they really would dry flowers in minutes and still retain the same delicate quality of a flower traditionally pressed in heavy books.

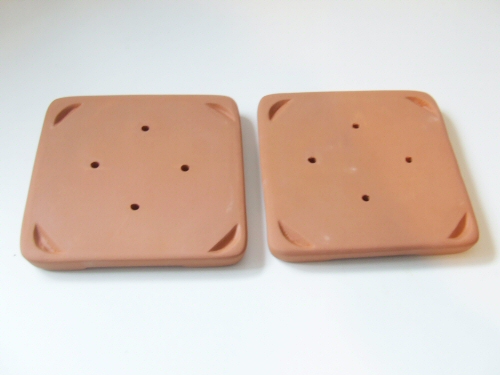
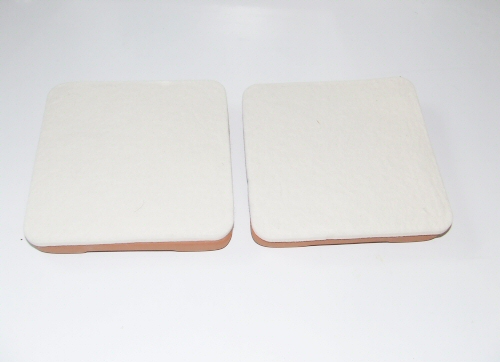
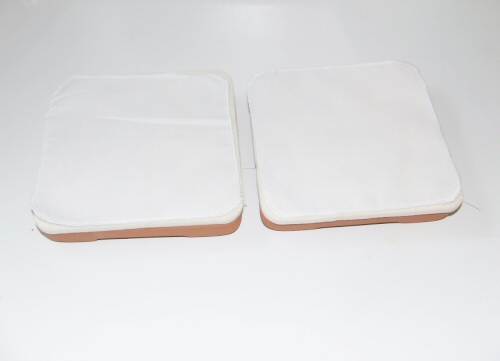
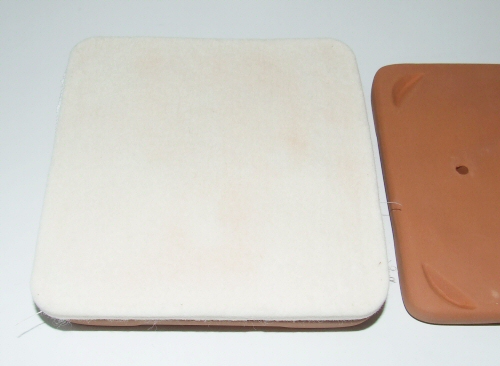
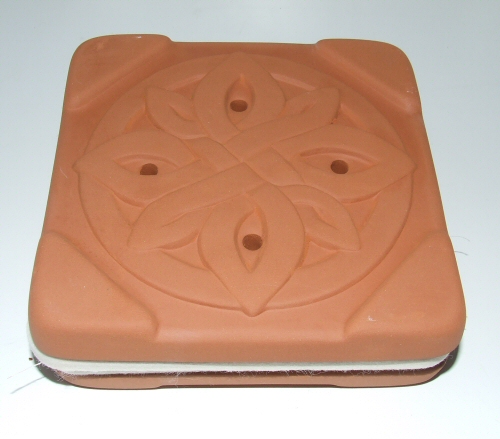
The press is comprised of two terracotta slabs, wool pads and broad cloth. It boasts the ability to dry press flowers in as little as three minutes, and that it will retain the colour of the flower better than the slow-drying method.

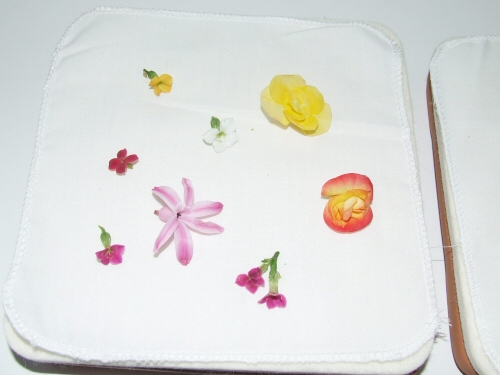
After laying the wool pads and cloth onto the terracotta, take the flower(s) you want to dry and arrange them on the broadcloth. It was the middle of winter when I tried this experiment, so I obtained some plants with small flowers from the home improvement store.

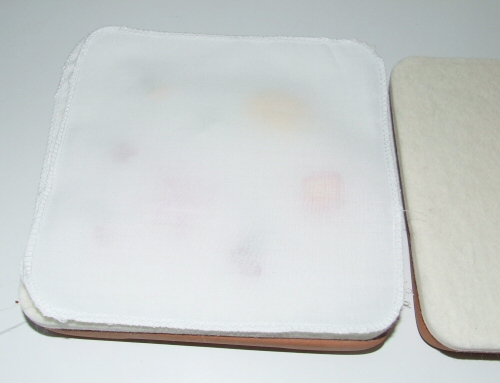
After you have the flowers placed as you like, carefully place the other broadcloth, the other wool pad and then the other terracotta slab on top – sandwiching the flowers in between.

Into the microwave we go. It’s recommended that you microwave in 30 second intervals so not to over dry the flowers. Since these were small flowers, I complied with the suggestion. It took about 2 minutes to do most of these little flowers.

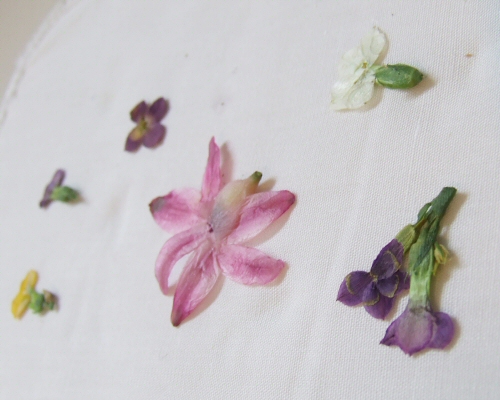
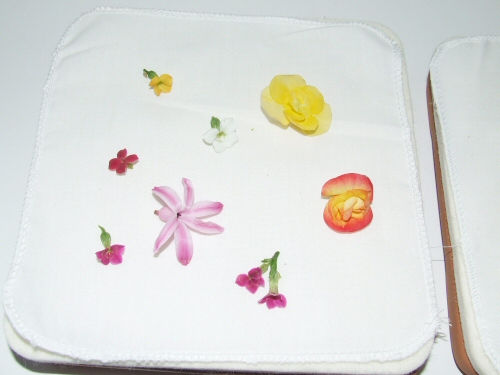
I did this experiment twice – and these are the successful flowers. One variety would not dry properly at all – either they were over done & flaky – therefore stuck to the broadcloth, or still retained moisture and stuck to the broadcloth – so just as unusable, either way.

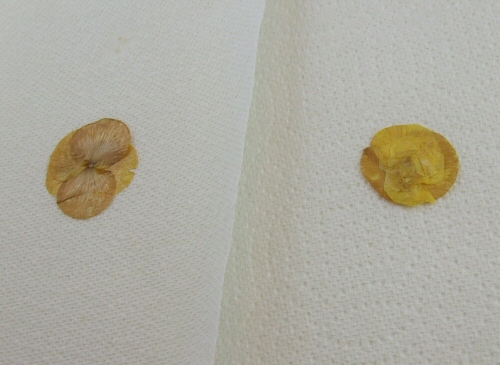
These are the variety of flowers that did not work in the microwave press; I pressed them the traditional way – in heavy books – for 3 weeks. I agree with the claim that the colour is retained in the microwave press. The flowers I traditionally pressed did fade somewhat.

I look forward to trying out larger flowers this summer in the press. I’d also like to incorporate this into jewelry making somehow: maybe set the dried flowers in resin? Oh the ideas… 🙂

Adventures in Brass: Part Two ~ The Initial Project

Brass

My first piece that I made via the brass oxidizing experiment was really, really crude – but it worked up fast. I know my fellow jewelry makers will appreciate the sentiment of just completing a project so that you gain the experience in working with the material – even of the end result is not up to your standards.

The piece turned into two pieces actually – a pair of earrings and a bracelet.

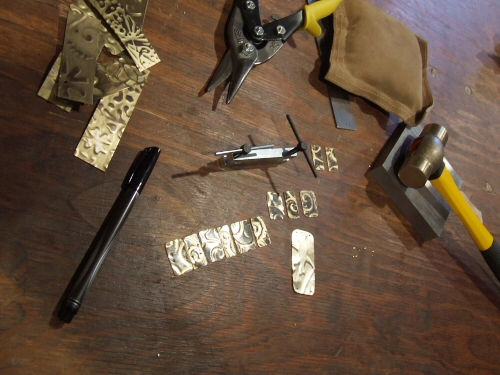
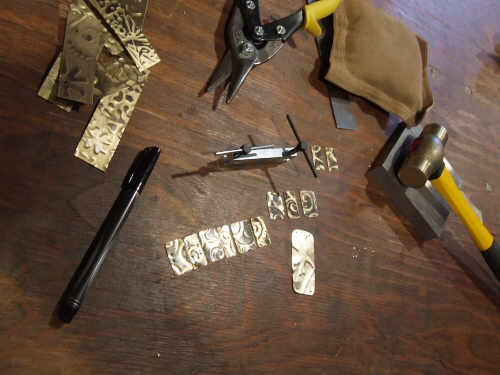
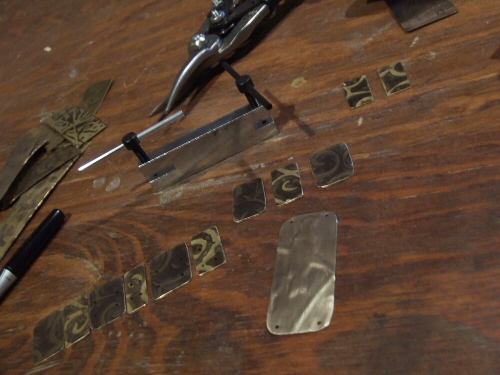
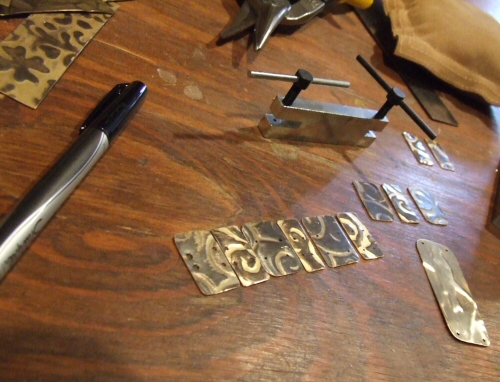
I cut out t he metal using a pair of shears. Then rounded and filed the corners smooth. With a sharpie, I marked where I wanted to punch holes with the screw punch. (You can see another project there on the left working up…for another day. :)). These pictures are straight from the bench, so you see the creative chaos first hand. Sometimes I need to drop what I am doing to develop another idea before I totally forget it. So there are normally many projects on the go at once!

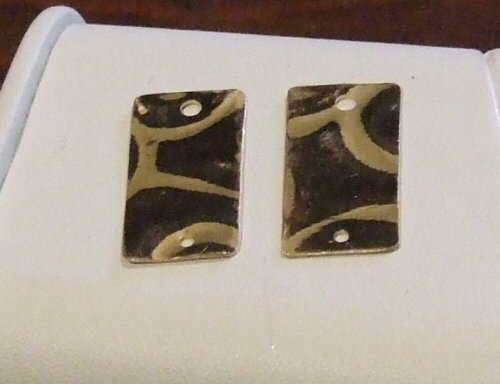
After the holes are punched, I flattened/work hardened the brass using a brass mallet and leather sand bag. Then, the brass pieces were ready for earring assembly…

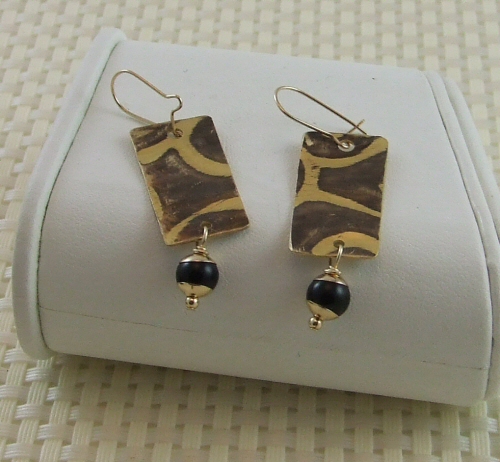
The completed earrings, with onyx and gold-filled components.

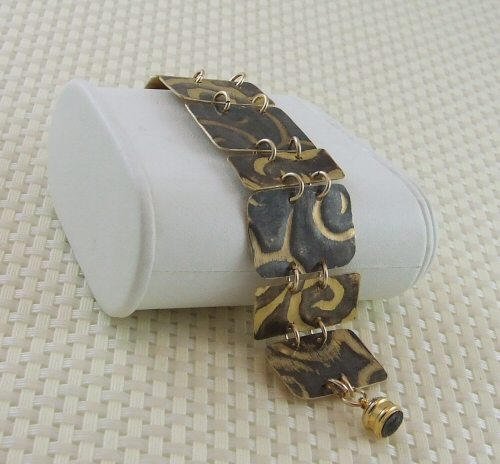
With the rest of the pieces of brass plate, I decided to punch holes – two on each side – and attach together with jump rings.

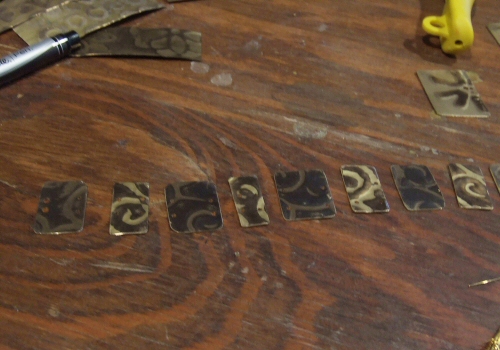
Sorry terrible pic – but I laid them out staggering the sizes and lightness/darkness from the two brass trophy plates this once was…(and a peek of yet another project in the top right…;)).

Added a magnetic clasp and…there you have it.

These two pieces will be displayed in my workspace as my first ever metal work pieces. I think that it will be neat to see the progression of skill in a few years time. I wish I had of kept the first piece of beaded jewelry I made over eleven years ago! But, I probably sold it! LOL!

Now that I got this get-a-feel-for-techniques project out of the way, my mind is going a mile a minute with ideas. The other projects I am working on involve incorporating the engraver so I am anxious to get them completed and shared. Let’s see how much life gets in the way of play! Stay tuned!

Adventures in Brass: Part One ~ Oxidizing

Brass2

I inherited a lot of trophy brass for my engravers. Besides practicing engraving, I thought I would try my hand at some fun techniques and see what happens. I haven’t had any formal training in metal nor have a worked with it before, other than some crude wire work. I just like to think up an idea and try it out and see what comes of it.

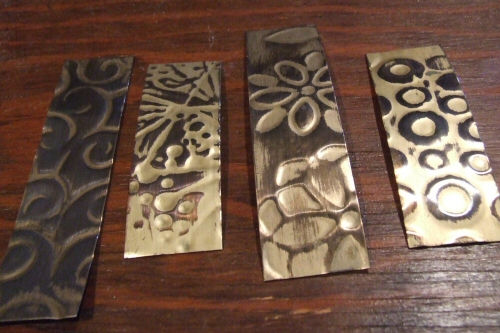
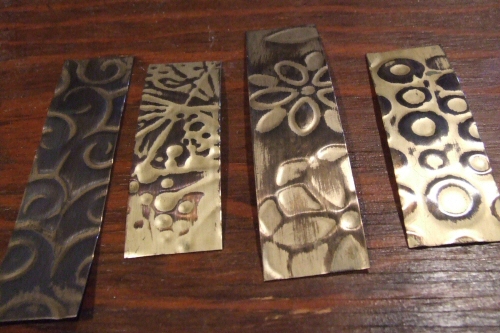
The first thing I did was create patterns on the brass plate using a paper embosser.

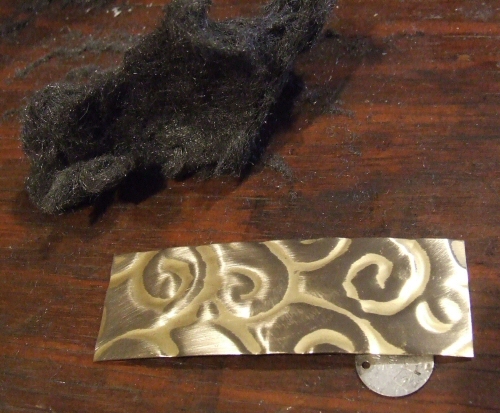
Then I needed to rub the surface with a very fine steel wool as trophy plate has a coating to protect it from tarnishing. The steel wool will remove the coating and this is the area that we will oxidize. The effect depends on how much of the coating you remove, but generally, the recessed areas will remain with the coating while the top will not.

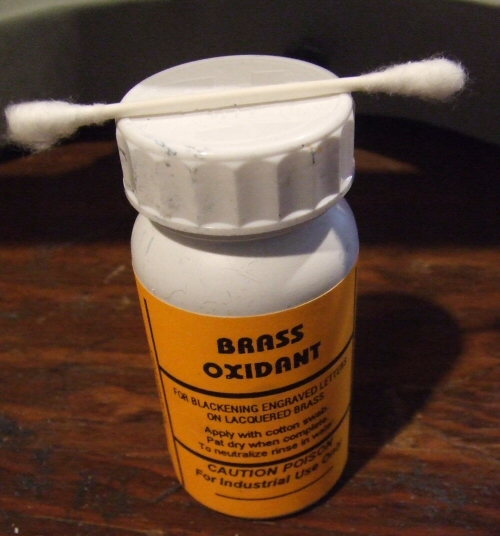
The brass oxidizer I have is for the colour black and I got it from an engraving supplier, but is available from many sources including jewelry supply shops. This is an acid so you want to wear gloves and keep out of reach of children.

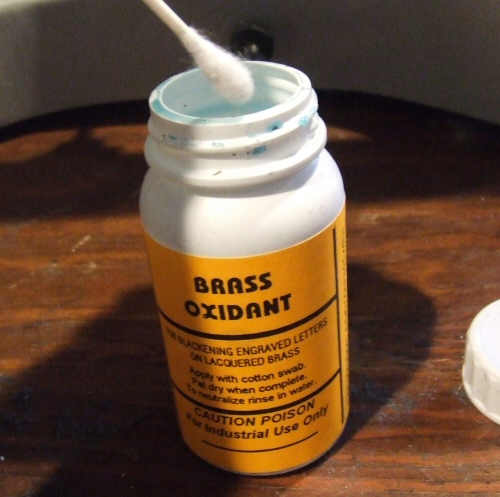
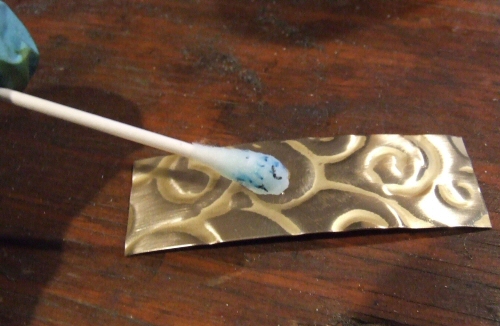
I used a Q-Tip to apply the solution to my brass plate.

I applied the oxidizer evenly over the surface of the brass plate.

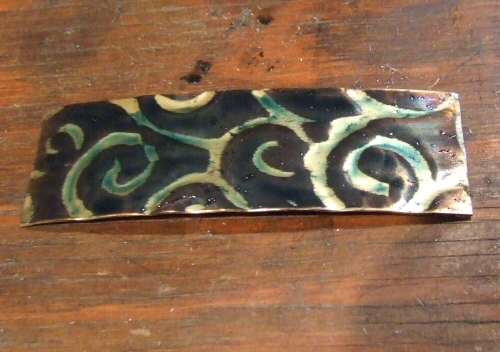
Almost instantly, you will see the brass turn black.

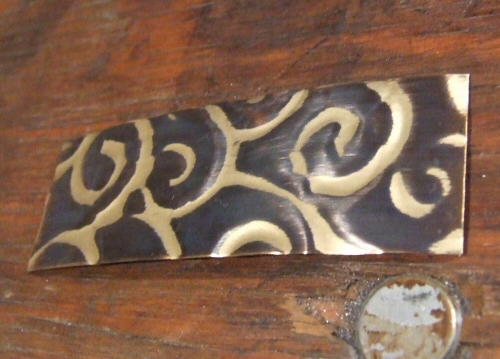
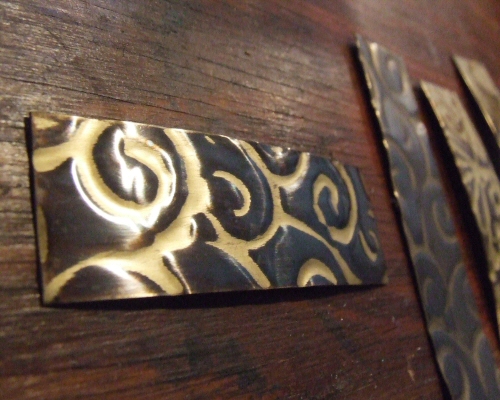
Wipe off the excess…and there you have it. Oxidized, patterned brass. I applied a jewelry wax sealer to the end product.

So what to do with this brass plate? Part two will be the a peek into the projects…

Playing Catch Up…

Babysophie

I am so severely behind with my blog posting. In March, my family & I ended up travelling home to Nova Scotia to attend a funeral. That wiped two weeks out of that month and therefore made me behind on my projects for my “Jewelry Sabbatical“. The 13 hour drive however, gave me a lot of time to think & refocus, and my priorities have shifted a bit. I had a brain wave for the engraving collection, and that is still in conceptual stage while I wait for some logo templates I ordered. I also had a clearer idea about which direction to take the website, so I have been working at updating the look of the site and the overall branding of heavenlyflower.com – all tasks that are severely needed & overdue – I just didn’t expect to be working on that element at all this year! Blame it on retrograde if you must, but these days I just feel motivated to work on getting projects cleaned up, completed and continuing on past goals (like the website). It’s not exactly spending all my live long day at the bench as I had planned, but I am happy with the direction things are headed so I have to go with it. For the first time in 8 years I feel like my goals & dreams are in reach. I tend to go with my gut day to day and this is no exception. Perhaps taking the pressure off this year helped my business goals come in clearer focus. Now to not self-sabotage…a topic I will leave for another post.

I will still be blogging about my new found adventures in creativity as planned however I do have a few topics revolving around the handmade market and business that I will also be writing about as it pertains to what is on my mind these days.

I am also happy to announce that I will be participating in yet another Market Mommy Blog Party next week. Stop by the blog and participate. There will be prizes from fellow mom entrepreneurs as usual. I will be giving away gift certificates! 🙂

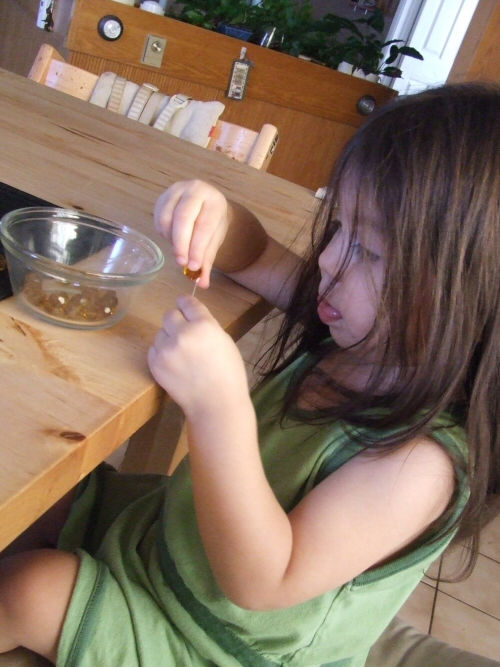
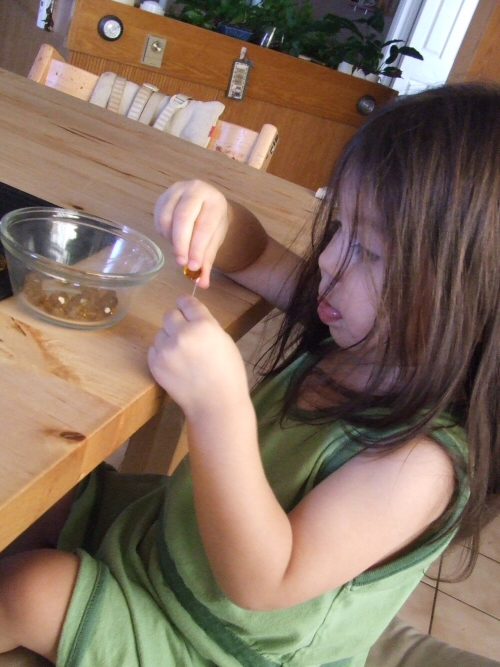
Finally: while I was organizing photos I came across this photo of my oldest trying her hand at what mommy does. 🙂 I don’t want them to “hurry up and grow up” but I do welcome the days when I can share my passions with my two girls. This was taken back in October, before my creative space/playroom was finished. She was just newly two years old when this was taken.

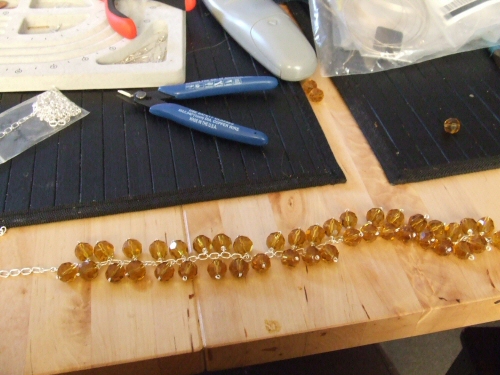
The piece I was working on:

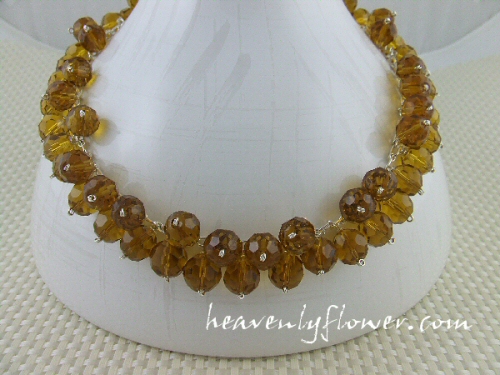
The finished project:

More goodies to follow…including my adventures in brass last month!

Come Tour My Workspace…

Workspace

The creative madness (um, I mean, magic…) unfolds in my head. But I have never in the 10+ years of jewelry making & paper crafts had a proper work area to transfer those ideas into the tangible world. I’ve always lived in apartments for my whole adult life; and when we bought our house 3+ years ago, two children have been born since so I have been working from the kitchen table. 🙂

As summer drew to a close and my youngest was gaining independence, I decided it was time for a proper workspace. But what would work? Where? I needed a place that I could multi-task: make jewelry, fill orders & prep them for shipping, take photos (I was so sick of setting up and tearing down my photo box), and also work on my other creative endeavours which include cosmetic making, paper crafts, candle making…on top of this, I needed a way to keep the girls occupied while I work. So the space would also have to act as a playroom.

Upon pondering on my open-concept home, it became clear that one room would be perfect: the laundry/mud room.

What? You say. A laundry room. Sounds silly doesn’t it? Here is where ” outside the box”  creative thinking is key.

Our laundry room is very large. In the initial plans for the house, it was supposed to be three smaller storage rooms and an exit to the garage. Thankfully, the original owners opted to make it one large back room. Prior to last August, this room served as a laundry room and very large bathroom for my cats; and because the kitty litter was there you really did not want to spend a lot of time in it, let alone have babies crawl all over the floor.

My husband had plans to move his computer gear into that room as well, so a plan formed. Cat litter was moved out of the room entirely. One side would be set up with carpet tiles so the girls could have a play area. The other side, my desk/work station. The room was already equipped with lots of cupboard space and counter space which would house all my creative products. And bonus – I could also get the laundry done as well! Perfect solution for a busy mom who rarely made it down the stairs to do the laundry…

In October we set up the space; and I did some more organizational arranging last month when I realized I was going to take a jewelry sabbatical.

The space esthetically is nothing to shake a stick at: I do hope to do some painting and refreshing in the future. Functionally however, it is a dream come true.

Above is a view of my main workspace. We have three of these flea market tables and one works well for a large work area. The other desk/cabinet was here when we moved in; not great looking but it’ s free and functional! You can see my shipping materials in the hanging file above the table. My light box for photo taking is in the middle and that small fridge at the very left keeps any cosmetic concoctions or supplies that need to be kept cool (and my husband’s beer!). See those two carpet tiles missing at the top left of the carpet? Spilled beer. Sigh. They will return after we can get the smell out. LOL!

The fridge sits on my cart that holds my “hardware”: metal working materials, polishers and all of my engraving fonts. I also have a printer that comes in handy when I am not at my usual computer.

And of course…my daughters’  toys…they never stay in one area. 🙂

The above view is of the entrance to the room. My work area is directly behind me. You see my oldest on her slide on the right. My washer & dryer that I adore; and the cupboards above are great places to stash my supplies for making cosmetics, their packing materials and misc. supplies such as mixing bowls, the ever useful Popsicle sticks, etc. That blue thing on the floor is a tunnel in case you are wondering. Endless fun for babies. 🙂

A view of the play area. There are lots of baskets and bins to store their wooden blocks, musical instruments, and pretty much any toy that I don’ t like to have under foot in my living room. 🙂 That cupboard is where I keep my beading supplies and craft paint; we’ll get a peek inside shortly.

Inside my jewelry cupboard…at least the beading side of it…still room to grow! *grin* It could be neater but it will do for now.

My very useful “built-in” bookshelf that holds paper,  books, jewelry (those two large binders on the right of the third shelf houses my completed jewelry ready for shipping), my engraving plates and charms in metal and wood, and that wooden case is where I keep my hole punches and rubber stamps.

I found this scrapbooking cart at Costco awhile back & although I do not scrapbook, it’s handy for holding all my decorative paper! On top is my Provo Craft Cuttlebug.

The room also came equipped with ample counter space. Here in one corner is my microwave for flower pressing & melting soy wax for candles.

Above the microwave you see my main cupboard filled with cosmetic making supplies. I haven’t delved into making mineral makeup as of yet; just soaps, lotions, scrubs, lip balms, etc etc….

This is a fairly messy end of the room…but I wanted to show two of my three pantograph engravers….my husband’s computer gear is to the left of them (that’s our router stuck to the wall) and recycling bins underneath…it’s a hot mess at the moment so I’m only showing off the engravers. 🙂

Here’s a closer look at my workspace…the wicker baskets above hold remnant fabric, candle making supplies (mostly holders), extra shipping materials, and packing supplies. I use my old laptop downstairs if I ever want to look up something on the internet or get info off our server. That little box on the wall was a great find! I forgot to take a photo of the inside…but I got it at Ikea for half price. It is supposed to hold CD’s, but I keep my inks, pigments, embossing powders, glitter & stamping pads in it. Robbin is kept neat & accessibly hung on dowels and wire off the top rack.

(That hook rug raccoon was a creation of my late mother’s when I was a child. It always makes me smile to look at it).

This little photo box was such a great, inexpensive investment! I still believe natural light is the best light for photographing jewelry, but if I waited for great weather to take photos outside in this climate I would be unable to take photos year round! My photos still could use work but they have improved dramatically since buying this light box.  Underneath I keep props for photos as well as other jewelry making materials.

It’s always great to have a whiteboard to stay organized and brainstorm! Mine is under-used this month; I must remedy that next month.

Thanks for taking a peek at my workspace…it may not look like much, but my girls & I love to spend our time down there. Hopefully it will inspire you & your creative space however big or small!

2010: My Jewelry Sabbatical

In December, I thought really long and hard about what direction to take my jewelry business for the future. Last January, I was very pregnant with DD#2 (now 10 months old) & decided to start this blog and embark on “100 Days of Creativity”.

Last year was a very critical year for me. I had taken a break from designing jewelry (let alone selling it) in 2007 in order to relocate to another province, buy a house & have DD#1. I had put together an Etsy Shop in April 2008, but never really did anything with it.  I was longing for a life less complicated & was concerned my love for jewelry making was adding to the consumerism mindset I was trying to shed.

Luckily after joining an Etsy Street Team and networking with others in the handmade community, I realized that my passion was truly a gift not to be ignored. I was more than satisfied with sales & interest in my business again, particularly since I was doing this all on-line while taking care of two little girls.

As December Holidays arrived, & I had time to reflect on the year, I felt strongly that now was the time to take a risk and grow my skill set. I love gemstone beads but I really want more for myself, particularly in the customizable jewelry market. There are techniques I have been longing to have the time to try out for many years.

Profits from jewelry sales in 2009 was just waiting to be spent. I decided that the best use of this money was to buy equipment & supplies and embark on one year of skill building. To me it sounded very much like a sabbatical (noun: any extended period of leave from one’s customary work, esp. for rest, to acquire new skills or training, etc. (per dictionary.com)). So, the 2010 Jewelry Sabbatical was born.

I have spent the month of January buying supplies, & cleaning up my workspace. Some of the techniques I wish to try & hopefully be successful at are: engraving via engravograph (pantograph engraver), jewelry making with resin, copper etching and patinas, wood engraving/burning, metal stamping…so far I have been playing with the engraver and am impressed with the results.

I’ve given myself a timeline month by month to which I will loosely follow in order to keep myself focused and on track, but the journey is bound to change esp. with a creative journeys! Rigidity just doesn’t work in order to have the inspiration flow…

I look forward to sharing my journey on the blog. I still will be taking custom requests and selling my jewelry, I just won’t be heavily promoting it or branding it for now. In the long run, these dreams and goals I have will help expand & streamline my business in the direction I have always wanted to take it. And much more importantly, help grow my creativity which is a pinnacle part of me, as an individual.

Stay tuned!

Clasp-o-phobia: Getting over my fears ~ a review of Bali Silver Clasps.

Onyx

For December, Artbeads offered through their Blogging for Beaders program the opportunity for us to try products from their Bali Bead line. Upon reviewing my choices, I decided to try & review the clasps.

You see, I am self-diagnosed with clasp-o-phobia: the fear & doubt of the functionality of most clasps on the market. I have tried different clasps in the past, including barrel clasps, toggle clasps, “S”-clasps, hook & eye clasps, etc…but none really impressed me or gave me a sense of security. I am one who hates the frustration of doing up clasps on bracelets, and also the feeling of a clasp that may become undone during regular use.

So because of this, I have stuck to using two tried and true clasps: the lobster clasp and the magnetic clasp. Although the lobster clasp can be tricky to get latched at times, the security you get from knowing that it is not going to come undone makes it a winner in my books. It’s a clasp we are all familiar with, and can be used in adjustable bracelets and necklaces.

The magnetic clasp is a dream for us who hate to fiddle with clasping bracelets. The worst thing that has happened is it accidentally pinching my skin if it was too close to my wrist when the magnets come together. I also like to include a safety chain with magnetic clasps in case they become attracted to another metal object and possibly come undone.

So when Artbeads offered the opportunity to review items in their Bali line, I thought this was a good chance for me to overcome my clasp-o-phobia. Many of the Bali clasps are very ornate and add beauty to the piece. I also know from past experience with Bali products that they are sturdy & well made.

As you can see I am a bit late with December blogging due to the holiday rush, but here are the finished pieces inspired by the Bali clasps…

The first clasps I wanted to try were the toggle clasps. I immediately noticed how ornate & well crafted they were: very sturdy – great for big stones that I love to work with! They also had chain already attached which I appreciated. In the past, the sterling silver toggles I have tried did not contain a chain, and for me to add one was trial and error – sometimes too long, sometimes too short. These totally took the guess work out of it!

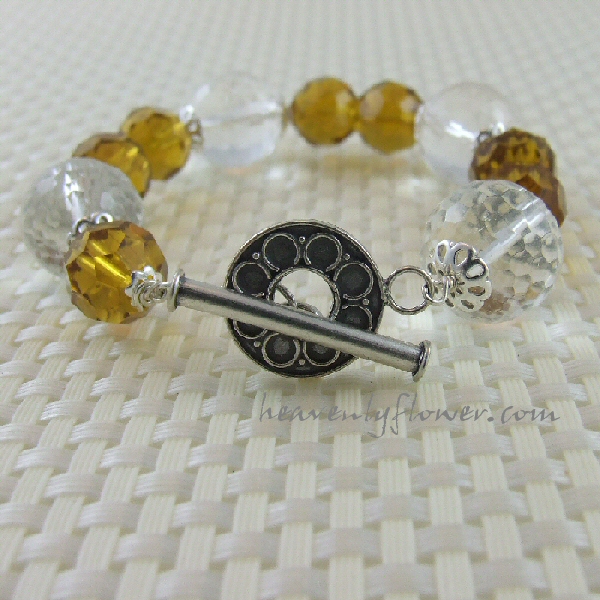
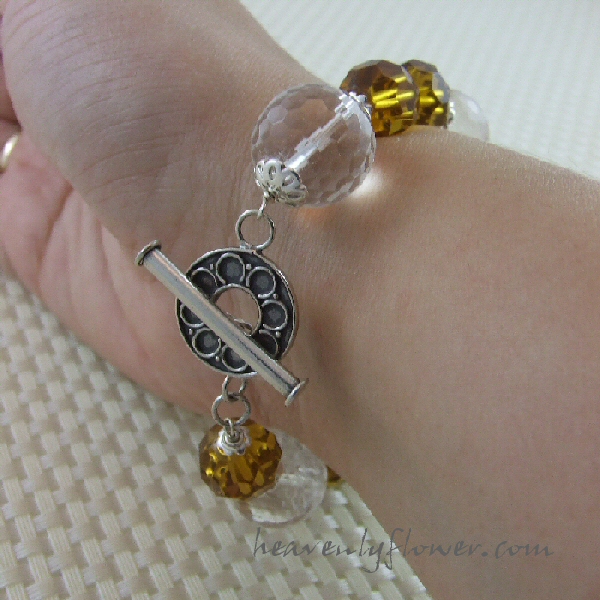
Above: toggle clasp with wire loops paired with 16mm faceted quartz & 12mm reconstituted smoky quartz beads.

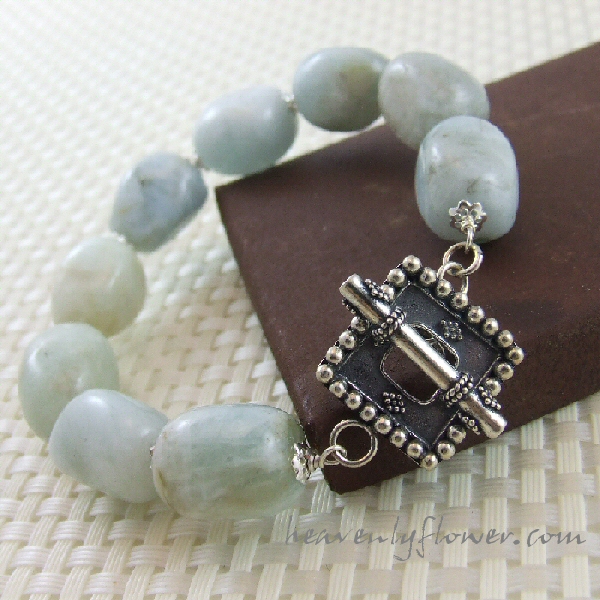
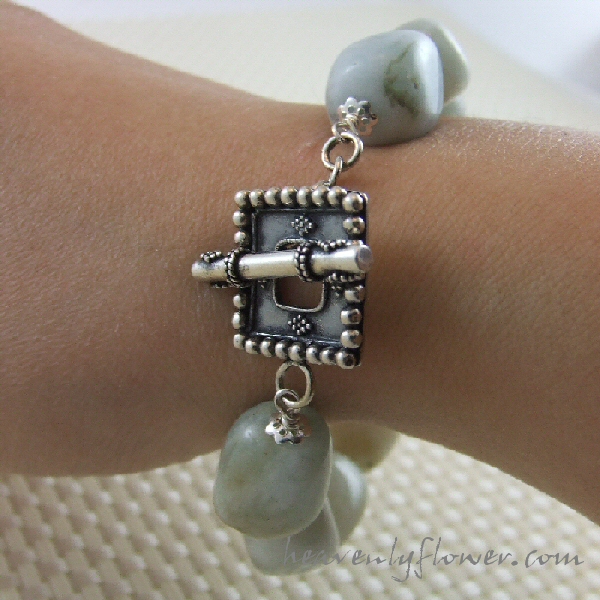
Above: square beaded toggle clasp paired with large aquamarine nugget beads.

The verdict: I *LOVE* these clasps…who knew the functional part of a bracelet could also be a focal point! Very easy to put on and pair well with large stones. You will probably find when buying a bracelet with a toggle clasp you will appreciate going up a size so to have room to maneuver the bar piece through the clasp. For example I usually make my bracelets 7.5 inches – the common ladies wrist size, but these are approx. 8 inches. I don’t think I could comfortably get them on if I made them the standard 7.5.

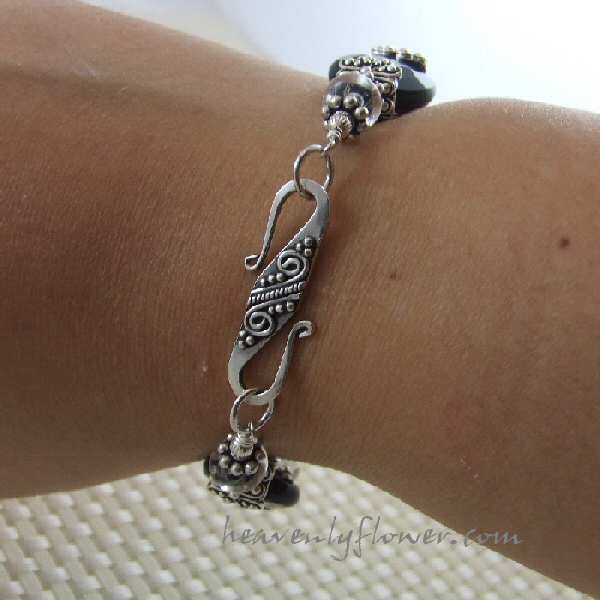
Next I tackled designs around the “S”-clasps. At first, I found these clasps very frustrating. Again very sturdily designed, and very beautiful…but since they are made out of such a strong gauge of wire I found them very hard to get clasped & undone. Some slight manipulation with the pliers to loosen the “S”  part slightly, and success! A beautiful clasp that was fairly easy to use. A good shake and it was clear that these were very well designed: I was not worried of it coming undone accidentally.

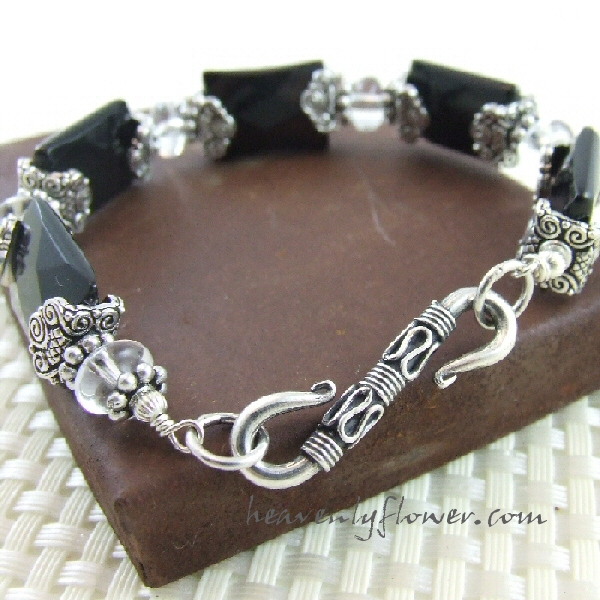
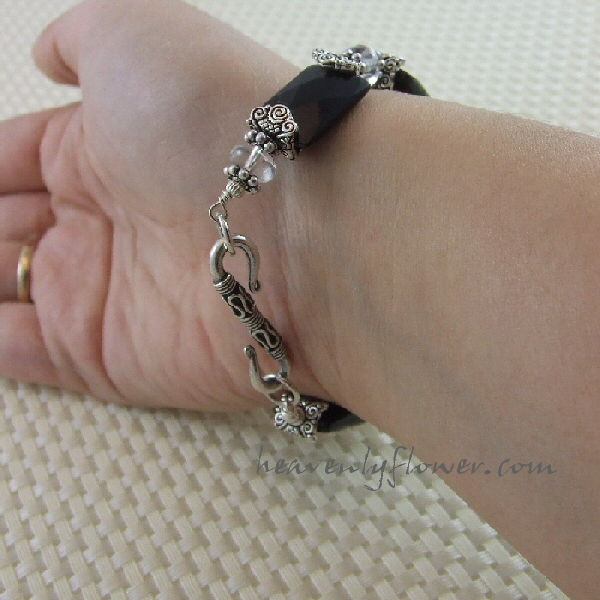
Above: “S’ Clasp with double wrapped and snaked wire paired with square faceted onyx beads and pewter bead caps.

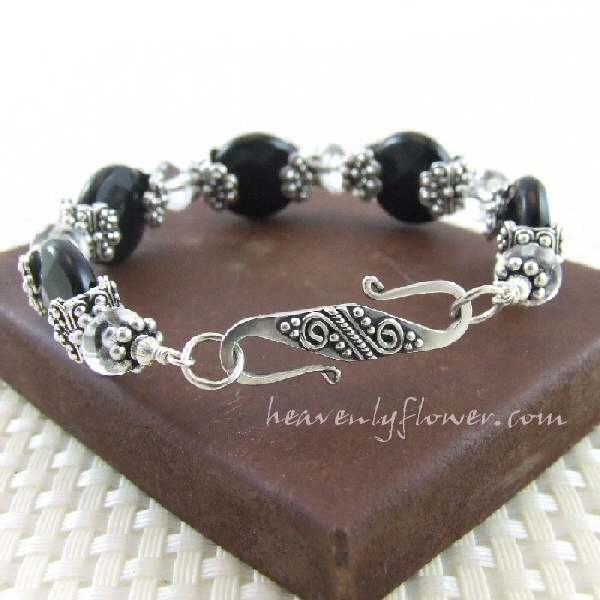
Above: “S” Hook Clasp with granulation & wire work with faceted onyx coins & pewter bead caps.

Finally, I tried the hook & eye clasps. I want to comment separately on these since all three were so very different.

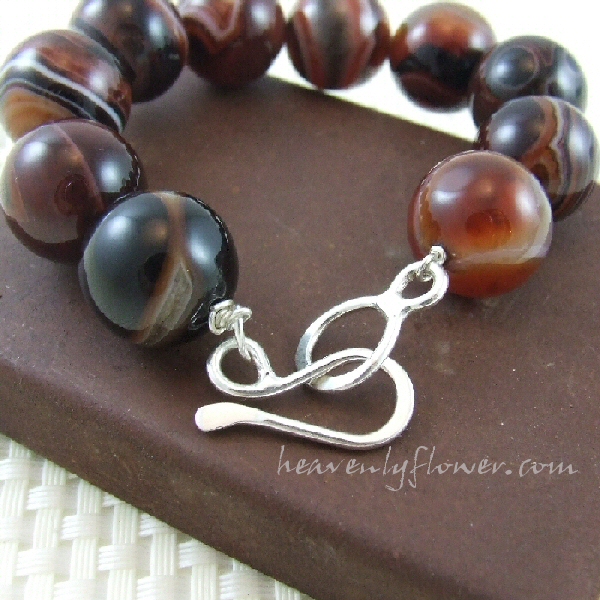
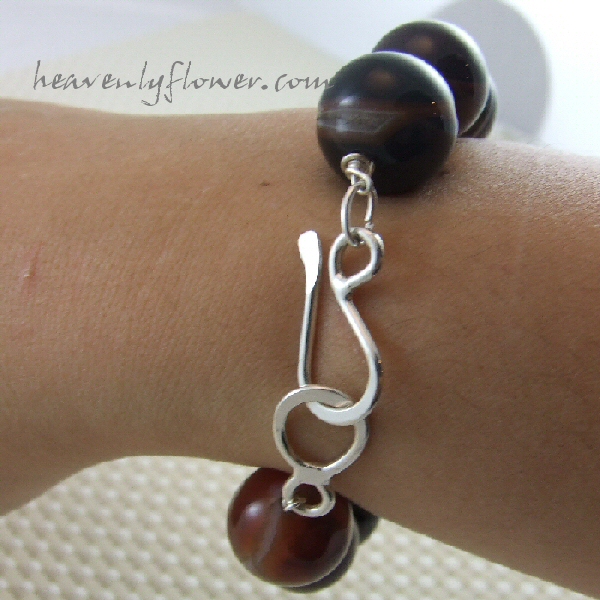
I was really excited with this Simple Hook & Eye Clasp. This large clasp works perfectly with larger stones, as seen above with 16mm red banded agate beads. Because of the size it is quite simple to use.

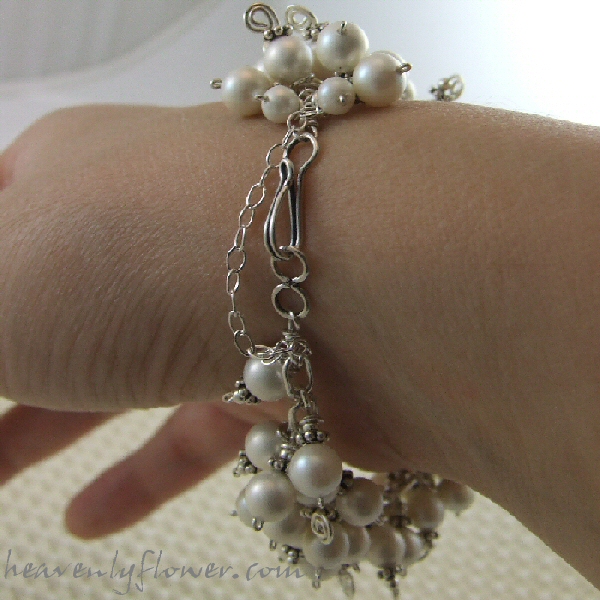
The Hook and Eye Clasp Set is the polar opposite of the previous clasp. Very petite and great when you want a clasp that is inconspicuous. It works beautifully with the bracelet above showcasing 6mm South Sea Shell Beads in Sterling Silver. I was happy to find this clasp very easy to use – definitely a good alternative to the lobster clasp and I will be keeping this one in mind for future adjustable pieces as well.

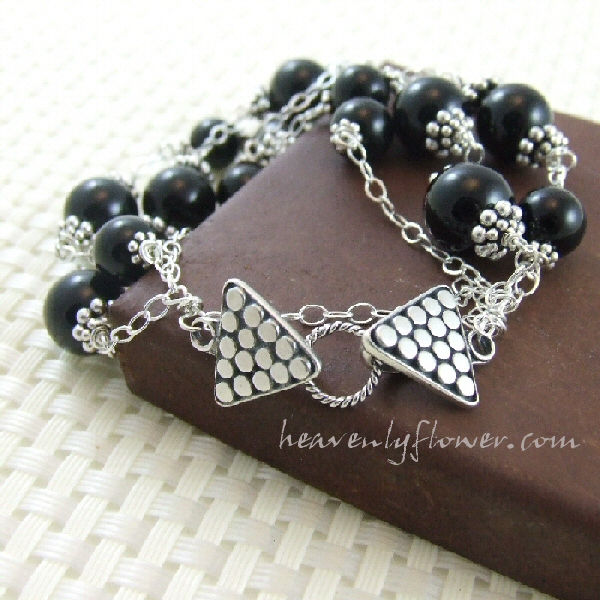
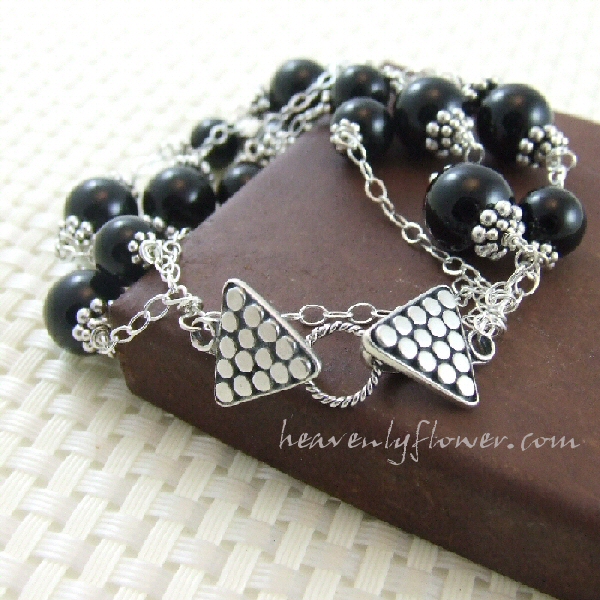
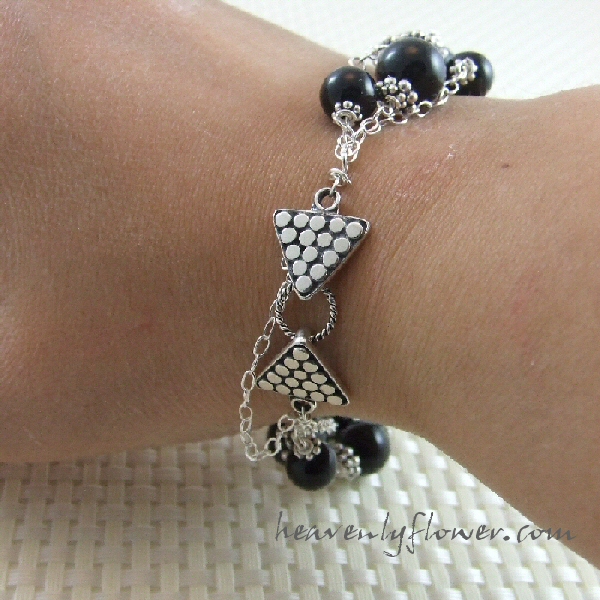
I decided to use the Triangular Hook & Eye Clasp last. I had a hard time deciding what to make with it, considering its design. I found it rather awkward to use. Although it was my favourite clasp esthetically, it was my least favourite in terms of usability. When I finally decided to make a three-strand sterling silver & onyx bracelet with it, I really had to bend the hook part out with my pliers in order to get the clasp undone & easily done up. Because of this I added a safety chain. But to be honest although it takes some practice to learn how to use this clasp, it wasn’t so bad in the end. And it looks fabulous!

For 2010 – Free Gift With Every Purchase

Due to the success and positive feedback of my “free earrings with every purchase” holiday promo, I have decided to give a free gift with every purchase for 2010. It maybe a pair of earrings, a gift certificate for $5 off your next purchase (or pass it along for a friend to use), a beaded bookmark or hair pin…the fun is that you never know what you are going to get, but because it is from heavenlyflower.com you know that it will be quality!

Happy 2010 everyone…I am embarking on a new journey I am calling my “jewelry sabbatical” ~ new equipment and supplies are on its way and I will be blogging about it so you can take the journey with me. Hopefully we will be inspired together!

Fundraising Inspired: Elly’s Pageant Fund

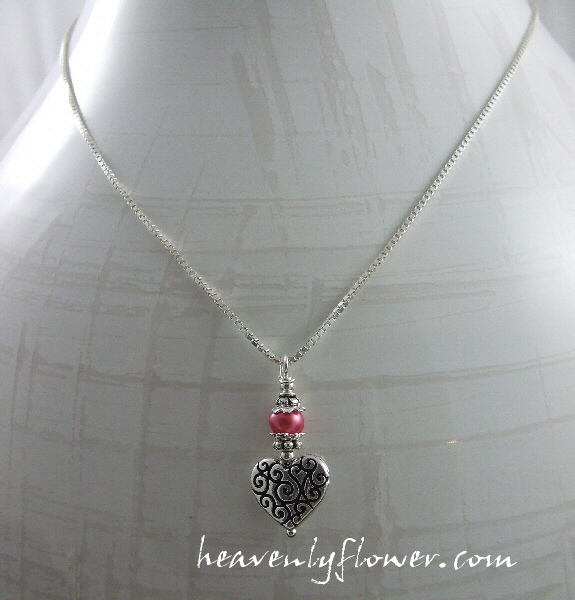
Sweetheart

I’ve always enjoyed donating my jewelry for silent auctions and door prizes, but it has always been a goal of mine to host fundraisers on my site.

The basic idea is, a particular piece of jewelry will be designed and listed specifically for a grassroots or community cause. A percentage of the profits would then go to the individual or group.

So when I found out Abby was looking for donations or corporate sponsorship for her 12 year old daughter’s pageant in March, I suggested we do a jewelry fundraiser. I know Abby from back in my pen palling days, and we recently connected again on Facebook. Pageants are something Elly asked to do, and it’s not a cheap hobby for this mom of four.

So that kicked my butt into action. As usual I work on impulse: having a light bulb moment and just…going for it. My website is slowly coming together, but in pieces. I don’t even have the framework to sell jewelry set up on my website yet, which is why I use Etsy & Artfire.

The first order of business, was what type of jewelry to make for Elly’s fundraiser. I decided that earrings would be a good option as I could set them at an affordable price point. I found out from Abby that Elly likes pink, and she is a big Taylor Swift fan. I had some recently designed pieces for my new custom section on Etsy that I thought would be a good fit.  I was not surprised as to what her favourite pair was.

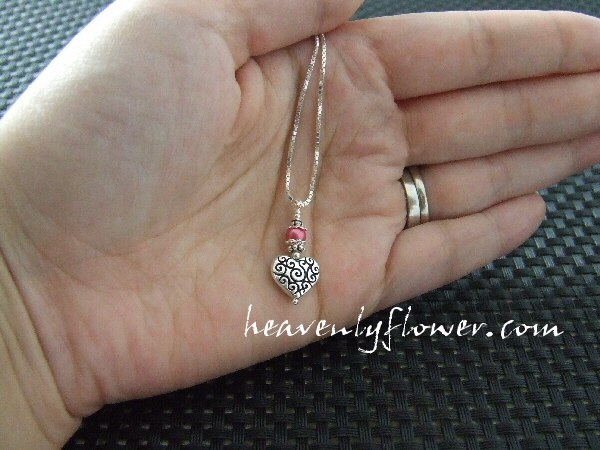
I decided to set her pair at a special wholesale price to encourage sales and give her $5 per each pair sold, donating my time to the project. I also did a pendant version of the earrings:

I decided to use Artfire to host the fundraiser. Basically because they do not have listing fees, justifying the lower price, and that you do not have to sign up to use the service like you do with Etsy. Also, Artfire now has integration with Amazon Wishlists!

You can check out more on Elly’s fundraiser here:

Would you like me to host a fundraiser? Check out my fundraising section of my website, and see if my philosophy would be a good fit for you.

Jewelry Inspired: Fun With Swarovski Filligree Flowers

Sunflower

Artbeads allowed me to pick out some Swarovski components to try out free of charge. I decided that one of the items I wanted to try were these Swarovski Filligree Flowers as I had not seen this type of component up close & personal before. When it arrived, it certainly lived up to the standards I have come to expect from Swarovski: solid design and the crystals sparkle beautifully.

At first I didn’t know what to do with it. The flower itself has a very vintage feel, so it is unlike my usual modern funky design. It has such an elegant yet bold factor on its own: paring it with stones and beads just made it feel very busy and over done. I realized that this component on it’s own would make a very nice piece: like a nice brooch or earrings…then it hit me. I immediately had to purchase more from Artbeads, because these would make the perfect hairpins!

I usually shy away from making this type of jewelry because there doesn’t seem to be any challenge design wise. Glue the component onto a hair pin. Okaaay…now what? Seems very uninspired for someone who wants to inspire & be inspired.

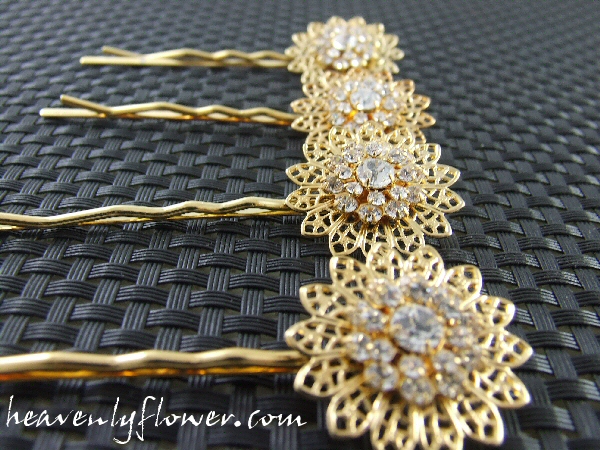
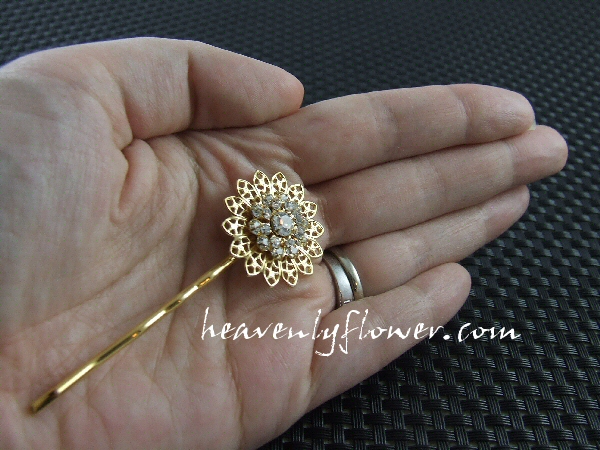
But when the order arrived from Artbeads with my extra Swarovski flowers I knew I made the right decision. I can totally see these as hair adornment: perfect for a bridal party, the prom or any formal event – or even just to jazz up your hair any day of the week.

And remember when I said this would be not very challenging? I was left scratching my head when trying to decide what glue to use. I have just about every kind of glue you could imagine for jewelry making or crafting. I decided the best glue for this would be Zap-A-Gap: it’s like Super Glue, but also waterproof & will adhere to any surface, even oily ones, and dries clear. Seemed pretty fool proof.

Only it was slightly tricky. I had to find just the right pressure to hold the component onto the hair pin and keep it really straight so that it would adhere evenly. I did not want to use a clamp or tool for this in case it damaged the Swarovski component. So it was a little tense & frustrating to start out trying to decide how much pressure and for how long to hold…and not glue my fingers to it! 😉

But once experimenting with one the other three worked up quite quickly.

I was excited with the results. The glue cured for 24 hours and this is one solid unit.

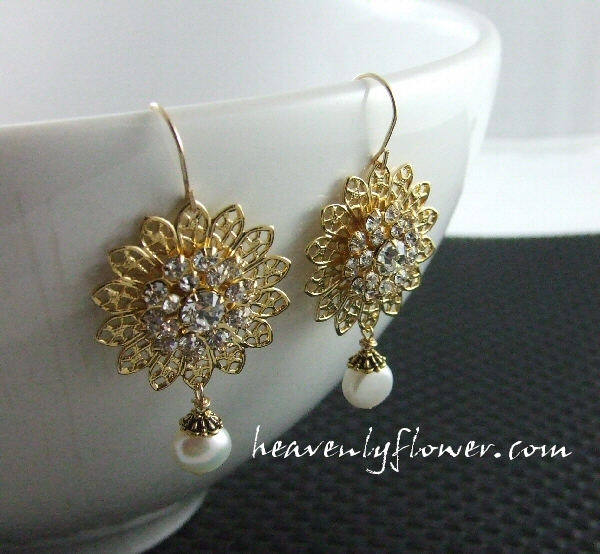
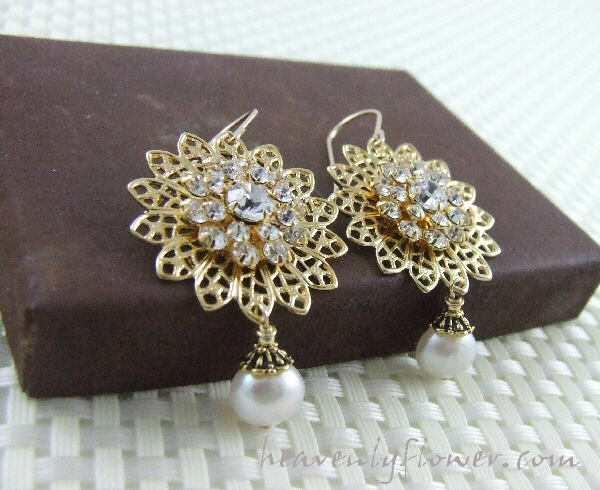
I decided an elegant pair of earrings to go with these were in order. I simply paired them with 8mm freshwater pearls, antique gold culinary grade lead free pewter bead caps and gold filled ear hooks….

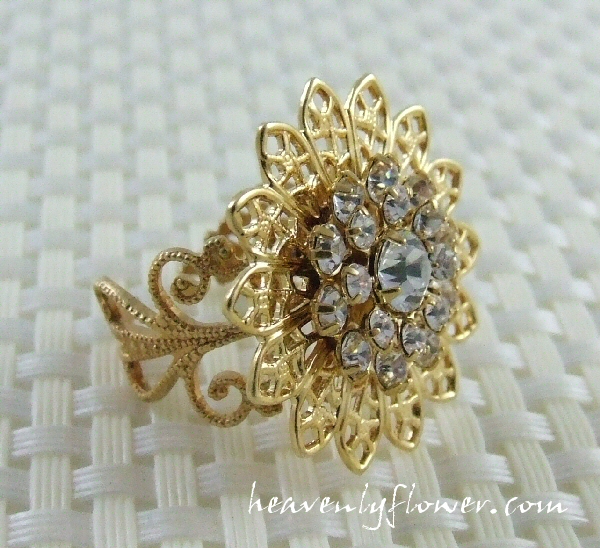
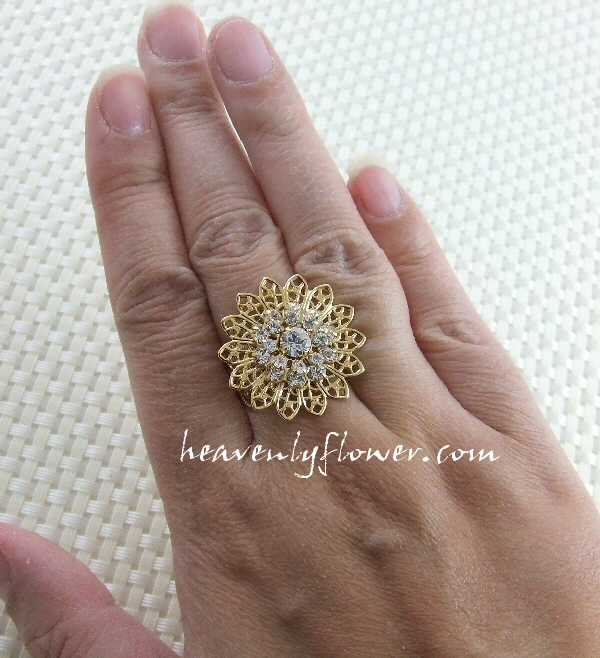
Remember that original component Artbeads sent me that inspired this whole project? Well, I made a ring out of it, glued onto an adjustable filigree ring base:

I am really impressed with how this project turned out (and am now totally hooked on Swarovski flowers!!) and will definitely be offering this on a by request basis on my website. Stay tuned!

Prizes to be Won from Mom Entrepreneurs including heavenlyflower.com

The Market Mommy Holiday Blog Party has begun! This is a fun interactive event is sponsored by marketmommy.com. This is a great way to “meet” some very talented Mom Entrepreneurs and have the chance to win some fabulous prizes! Including some from heavenlyflower.com: a $50 Gift certificate and 5 $10 gift certificates!

You may also like to check out their Holiday Gift Guide for some fantastic & unique gift ideas.

Best of luck to all who participate!!

The 6 Characteristics of Highly Creative People

J0411792

I found this article several years ago, after looking up the exact wording to one of my all-time favourite quotes by Thomas Moore. The article spoke to me so much I cut & pasted it for future reference. I found it the other day while cleaning out folders on my hard drive. I thought I would share it here as I’m sure many of you can relate, esp. other “innerpreneur” types like myself. Unfortunately I am not sure what website this originally came from, however I was able to give credit to the author.

by Michelle L. Casto

Thomas Moore said, “We are all poets and artists as we live our daily lives, whether or not we recognize our role and whether or not we believe it.” Human beings have an innate need to create. Even you! There is a continuum of creativity, ranging from being slightly creative to highly creative. The good news is that you can learn to be more creative by observing creative people and modeling yourself after them. Artists, writers, and creative types seem to have similar characteristics. Some of the personality traits listed below may seem eccentric, odd, even “out there”—but that is where creativity lies— in the outreaches of our consciousness, in the depths of our souls. If you had the opportunity to speak to Picasso, Walt Disney, or Jane Austen, you would probably find out that they are ordinary people, much like you and I. The difference is that they have allowed more of their soul to come out and play and have freed themselves of convention and restriction. Creativity is essentially the art of discovery and an act of faith. When you create something— a work of art, book, software program, dance routine, or role for a play, you discover parts of yourself that you never knew existed. Creative people have a strong need to express more of who you really are and often have to fight for that right. The character Isabelle in the movie, Fire and Ice, has a great outlook on what it means to be creative, she says, “To create, sometimes you must rebel.”

1. Unconventional
Creative people do not feel the need to conform to society’s standards. They often swim against the current and flow with their own way of thinking and living. They have original ideas that literally turn the world upside down and right-side out. Take for example, the 16th century Italian astronomer, Galileo, who proved that the earth revolved around the sun (instead of the other way around), which was revolutionary in his time.

2. Individualistic
Creative people want to find out what the truth is, and they have a strong need to decide for themselves what works and what does not. Often they are ahead of their time, and much of their work is appreciated/acknowledged after they are dead and gone. Many writers are famous for marching to the tune of their own drum, such as Ralph Waldo Emerson, who wrote the book, Self-Reliance, and Robert Frost who penned, “two roads diverged in a wood, and I took the one less-traveled.”

3. Inventive
Creative people live in the world of ideas, and don’t always have the best interpersonal skills. Because they are so highly intelligent, and live in the realm of possibility, they are constantly coming up with bright ideas. They also take notice of what is missing in the world and/or what could be improved. Take for instance, Thomas Edison, who invented hundreds of things in his time, his most famous invention being the light bulb. He saw that there was darkness and then created light.

4. Driven
Creative people cannot “not do something”-they are almost compulsive until they can bring their internal vision into fruition. They have that “fire in their belly”—a passion to contribute to the beauty and betterment of the world. Because of their high drive, they can produce a lot in a relative short amount of time. Talk about drive— the material girl herself, Madonna, has not let public praise or criticism stop her from being a super star. She is a modern day Diva, multi-talented as a singer, dancer, and actress who has released hundreds of songs, albums, videos, movies, books— all the while reinventing herself as someone new.

5. Visionary
Creative people have a guiding vision in their head, heart, and soul that they are often called to bring to life. Who else but Michelangelo could look at a large piece of marble and “chip away at everything that wasn’t David?” According to him, “I saw an angel in the marble and carved until I set him free.” One of his best-known works is the immense ceiling of the Sistine Chapel, which took him three years to complete, where he often had to work upside down for hours at a time. If you ever have seen any of his work, you can easily see that it is a vision to behold.

6. Intuitive
Creative people are very in touch with their inner selves. They pay attention to the signs, synchronicities, symbols around them, and make use of that information in their work. They often act as a channel, where ideas and inspiration come from a higher plane. They allow the work to guide them to where it needs to go. The work clearly originates in their soul, not from their ego. Talk about ideas coming from out of the blue, remember how the scientist, Isaac Newton “discovered” gravity? He was sitting under a tree and an apple fell on his head! Had he not made a connection with his intuitive nature, he would have missed a major theory about the world we live in!

As you read this, do you find yourself relating to some of these traits? If so, it is time to start creating. Getting started can often be the hardest part, because we often limit our creativity by listening too closely to our negative inner voice. But so did all of these examples of creators. Even the famous painter Vincent Van Gogh struggled with that, but he created a remedy for that, he said, “If you hear a voice within you saying, you are not a painter, then by all means, paint, and that voice will be silenced.” Robert Henri says, “When the artist is alive in any person, whatever his kind of work may be, he becomes an inventive, searching, daring, self-expressing creature.” Once you have created, you now have to put yourself out there for all to see. This is where your faith comes in to support you. Remember that if you are creating from your soul, it will not matter whether other people accept your work or not. You are simply doing what you are called to do as a human being, create.

Michelle L. Casto is a whole life coach, speaker, and author of Get Smart! About Modern Romantic Relationships, Get Smart! About Modern Career Development, and Get Smart! About Modern Stress Management. Her coaching practice is Brightlight Coaching, she helps people come up with bright ideas for their life and empowers them to freely shine their bright light to the world. Contact her for a free 30 minute coaching session: www.getsmartseries.com and www.brightlightcoach.com

Contributed by:

Michelle Casto
©2003, Michelle Casto
Website: Get Smart! LearningBooks, Seminars, and Life Coach

Jewelry Inspired: Funky Copper Disc Choker

Copper

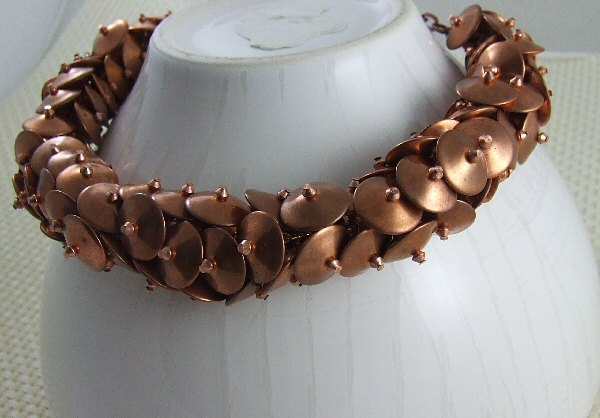
I added a little somethin’-somethin’ to my Artfire Studio today. This copper choker has been sitting on the bench for some time begging to be finished. I bought these copper discs – no word of a lie – 10 years ago. I used to buy a fair bit of Estate sell-offs back when ebay wasn’t so saturated. I admit at the time, being new to the jewelry making game, I wasn’t aware of the size when I bought them. 15mm just didn’t compute in my brain as being on the large side. So when the lot arrived – almost 100 – I had no idea what to do with them. They seemed so big and flying saucer like…

So they sat in the supply pile for well, a decade. Then this summer I decided to pick up some copper headpins, and see if I could make one of my signature funky chunky bracelets.

(Oh and I decided to pair up the discs with a 3.3mm bicone copper bead to add some dimension…)

I wanted the piece to be really solid so I started putting the discs really close together on the links of dash dot sterling silver chain (I love this chain by the way – although it is expensive it is really heavy duty, perfect for projects like this). It definitely was solid…however by doing this it did not have much bend…kind of hard to make into a bracelet. Since I already started it, I didn’t want to dismantle and start again, and I knew I had a fair bit of beads, so I decided to turn it into a choker.

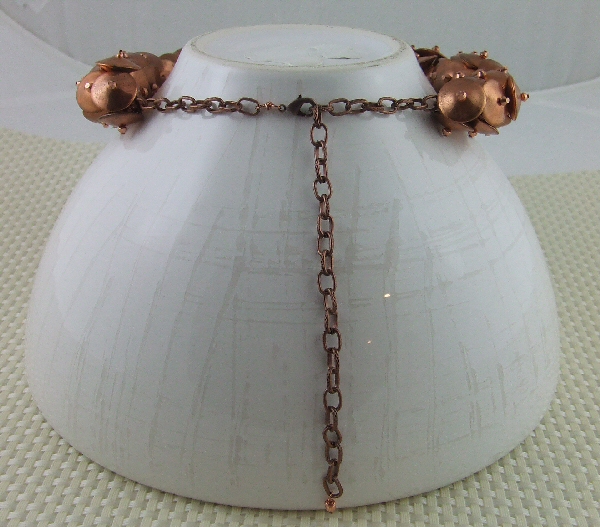
So I got the beads put on and then, there it sat for a very long time. About three months! I just couldn’t decide how to finish it. Although I had assembled the discs on a heavy gauge sterling silver chain, I did not like the way the sterling stood out against the copper for the extender chain portion of the necklace. I probably could have oxidized the chain, but I was lazy. Instead I found some really heavy duty vintage copper chain to finish off the piece.

NLE149 (1)

NLE149 (4)

I put a fairly long extender chain on it so that it can be adjusted to wear in a variety of ways. I also like the dramatic effect it has: the large beads at the front, and the slender sleekness of the chain trailing down in the back…I really love how it feels like a puzzle in your hands.

This is a piece for someone who wants to make a bold statement, and own a truly one-of-a-kind. I know I could never get these beads again. They are assumed “vintage” although I cannot confirm this…

Jewelry Inspired: Sparkly Reconstituted Smoky Quartz…

Amber

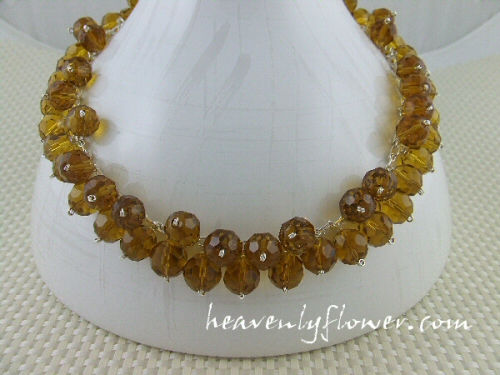
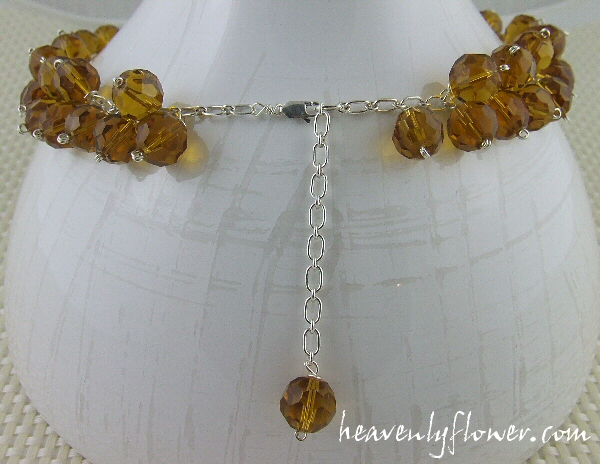
Expanding on yesterday’s post, that lately I have been working with colour themes, I now introduce you to one day’s project: fun with reconstituted smoky quartz. Essentially, these are glass beads that contain particles of smoky quartz. So yes, they are “just” glass but are they ever so pretty! I don’t purchase a lot of glass anymore but when I saw how these faceted beads danced under the lights I had to have them. They are a nice size too – 12mm, so they really make a statement.

Initially, I set out to make one of my signature chunky bracelets. However, as the piece evolved it became clear that it laid better across the neckline than on the wrist. And so, voilà – this piece was born:

NLE148 (1)

NLE148 (3)

Unfortunately, my photography skills do not do it justice. It looks and feels like a million bucks on. This is probably due to the heavy sterling silver dot dash chain, as well as the 22 gauge sterling silver wire each bead is affixed on the chain with. I also made sure to make it adjustable length wise so that it could be worn in different ways: choker style or longer. I love how it looks and feels on –
I was really, really tempted to keep it for my own personal collection!

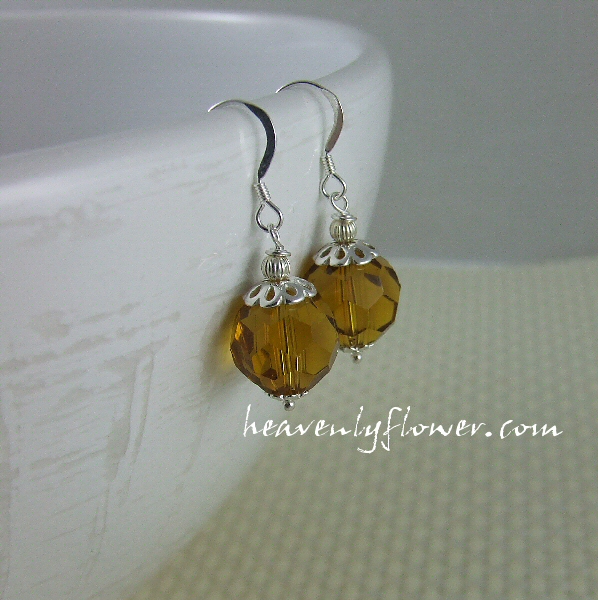
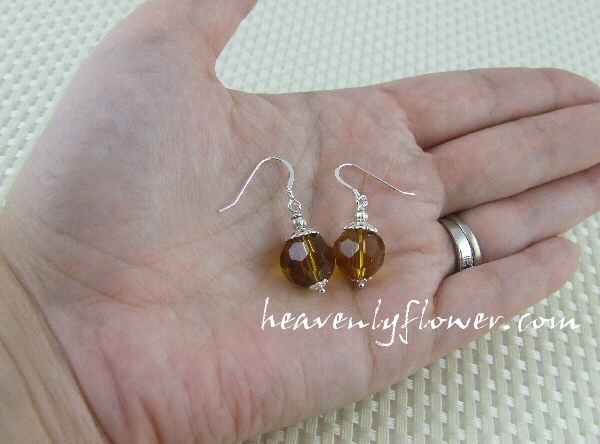
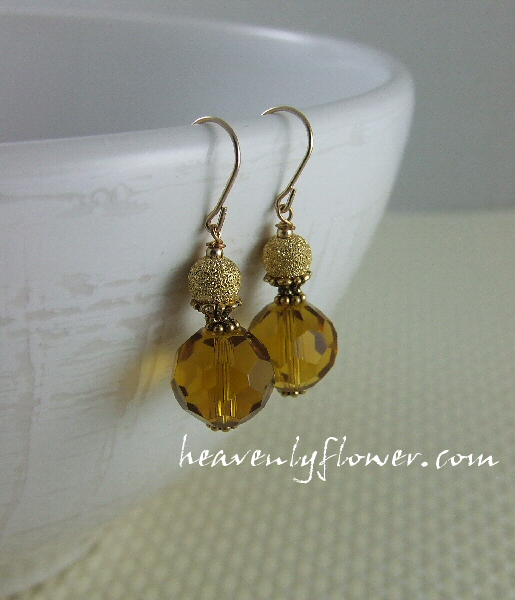
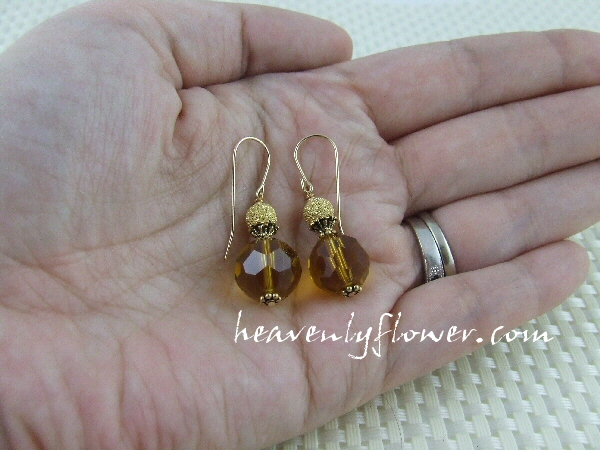
If you can imagine, this was a fairly labour intensive project, so I finished up my adventures in sparkly amber coloured bead land with two elegant and tasteful pairs of earrings:

ELE098 (1)

ELE098 (5)

ELE099 (1)

ELE099 (5)

That was fun! I am really hoping to find time to do more projects like this!

Jewelry Inspired: Aqua Blues…

Aqua

So the other day I had the opportunity to have an adventure in sea blue – or aqua blue as these particular beads are properly called. I currently have dyed quartz and fiber optic cat’s eye beads in aqua blue. I have beads of all colours of the rainbow in the cabinet…so I love to get requests for specific colours to work with esp. if it is one I have not touched in awhile. I mean really, do I need an excuse to get creative? Twist my rubber arm…

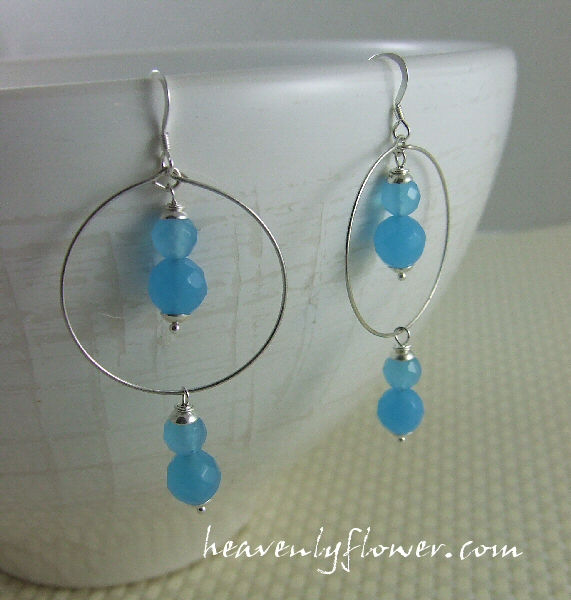
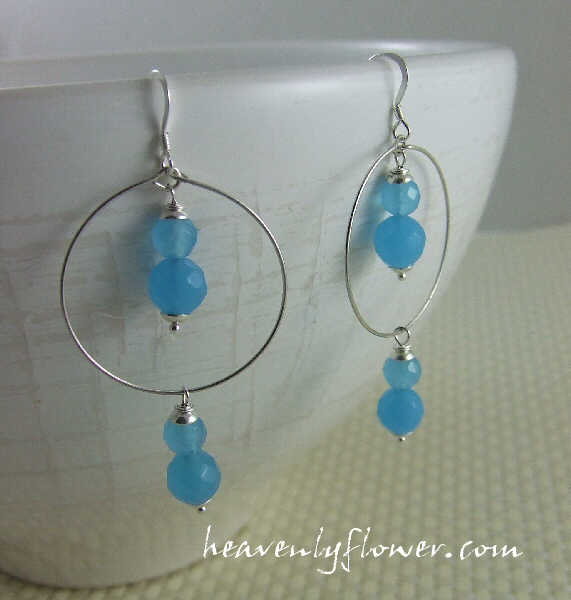
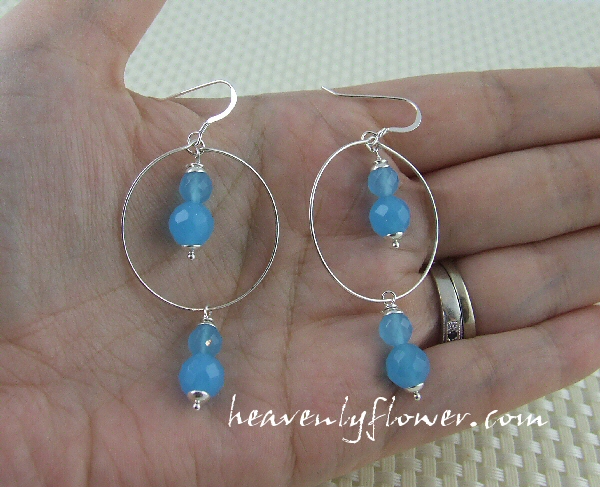
Check out these dyed faceted quartz beads paired with sterling silver hoops. I tell you, the pictures do not do these babies justice: so pretty and sparkly!

ELE101 (1)

ELE101 (5)

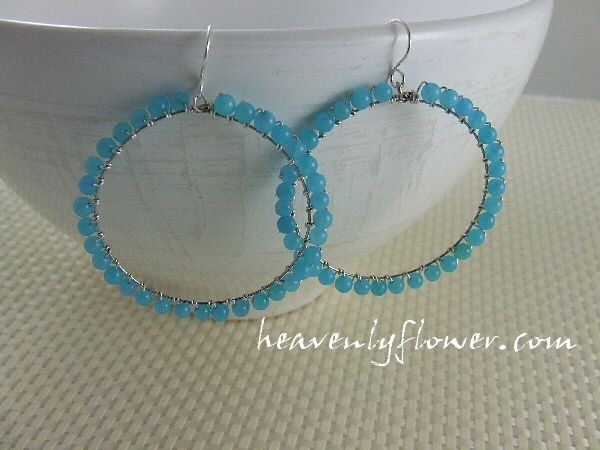
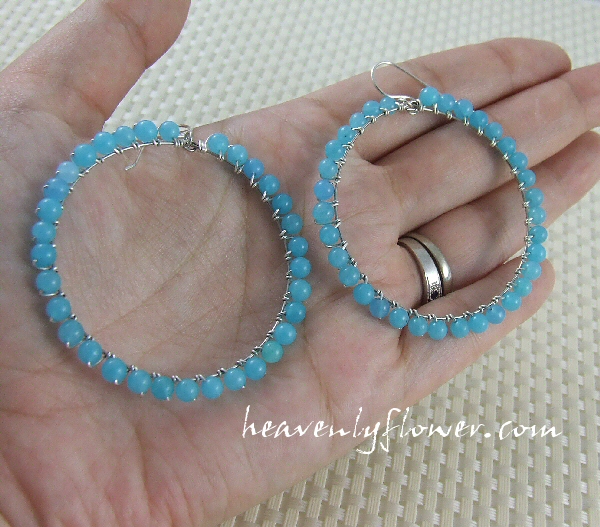
I also have many round 4mm dyed quartz beads. Kind of boring, you know? So I had this idea to wrap them around some memory wire  – the bracelet size – with 24ga sterling silver wire to make a fun & funky hoop earring. I have not worked in memory wire in a long time, & due to the success of this experiment I think I will be doing more projects using memory wire in this way. I can also see making some cool pendants & such as well, not just earrings!
ELE100 (1)

ELE100 (3)

The hoops face back-to-front when you wear them – just like a normal pair of hoop earrings. I decided to put them on sterling silver French ear hooks (earwires) for comfort.
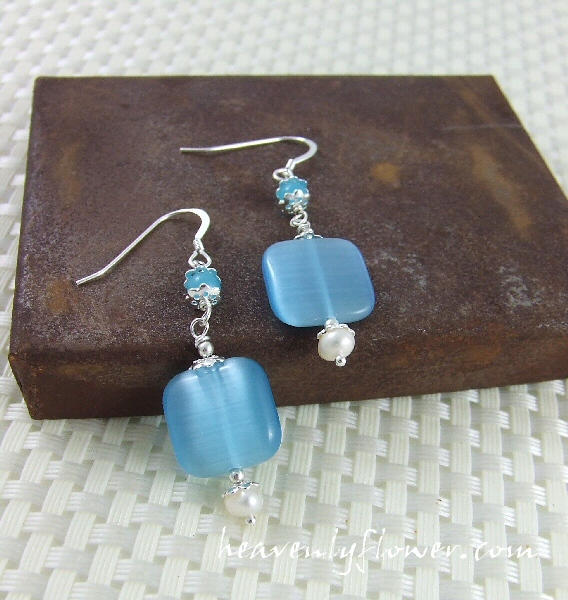
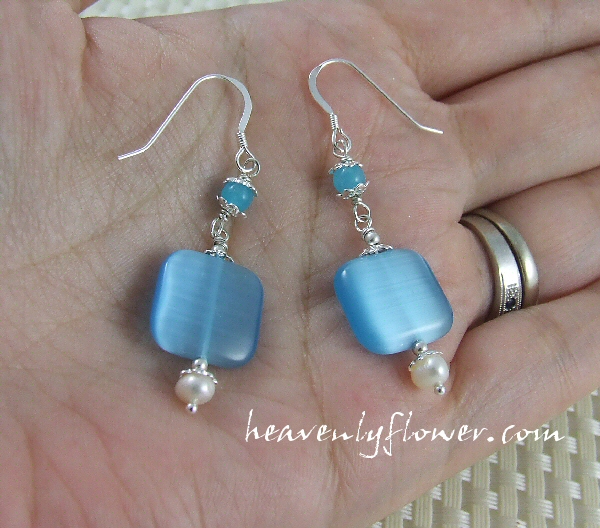
Finally, I really love the look of this hue of blue with white, so I wanted to make a dangly pair coupled with a freshwater pearl accent…and here you have it: 4mm dyed quartz, fiber optic cat’s eye beads and 5mm frewshwater pearls on sterling silver:

ELE102 (1)

ELE102 (4)

It was really fun to work with this colour amongst all the Fall colours here in Québec…really makes me long for white sandy beaches and turquoise seas! 🙂

The Gift of Re-Gifting: heavenlyflower.com’s Holiday Promotion

Re-gifting. You can’t tell me the thought has never popped into your head. You receive a gift that really, is perfectly fine but just not your personal taste or style.

So, I decided to give you my re-gifting blessing! Every purchase from my Etsy Shop or Artfire Studio will receive a gift from me.: A free pair of earrings. You can keep these handmade artisan earrings as a gift from me to you, or use as a gift for someone on your holiday shopping list.

The earrings will be made of good quality materials: either sterling silver or gold-filled ear hooks, hand-painted cloisonné beads or semi-precious gemstones.  ANY PURCHASE qualifies. Just my way to say thank you and to give back. I know there is always someone on that list you’d like to give a little something to that maybe the budget doesn’t allow.

As always, there is free shipping worldwide on all items! 🙂

The promo is currently on and will continue until January 11th, 2010. You will automatically receive a pair with your purchase.

SATeam Wrist Candy Holiday Giveaway!

Sateamxmas

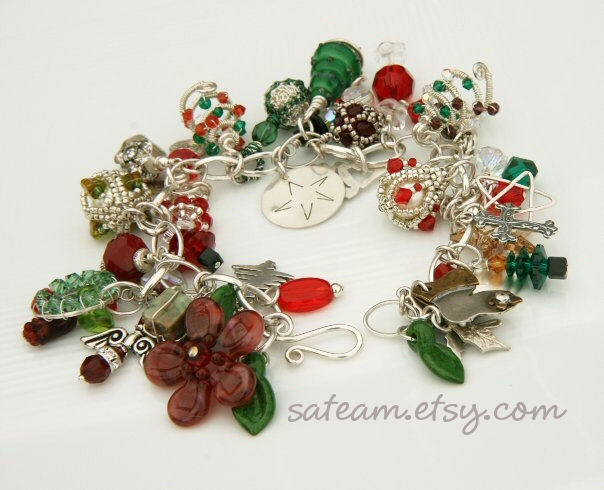
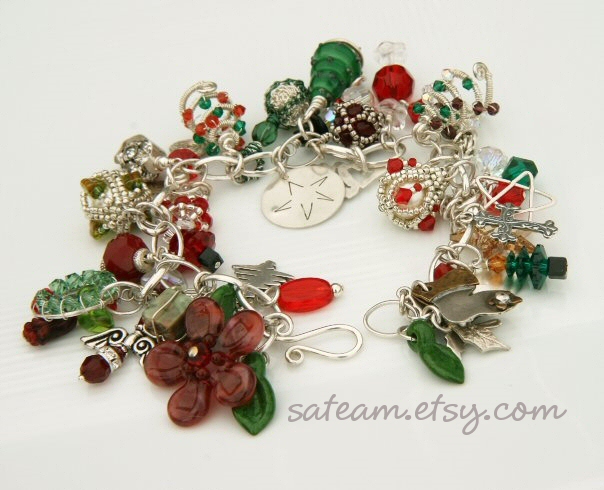
See this charm bracelet…

2009_giveaway

Want to win it?

2009_giveaway_2

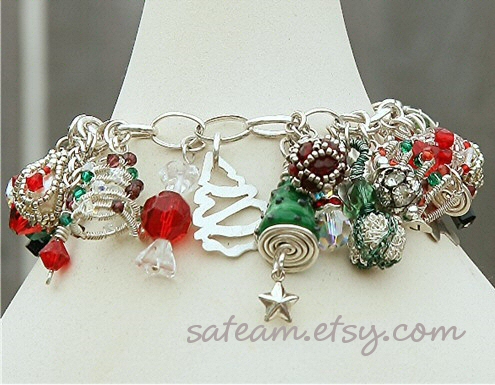
This bracelet is the collaborative effort of members of the SATeam – Starving (Jewelry) Artists Team on Etsy. You can see my own pewter/sterling  silver and Swarovski angel charm poking out at the bottom left in the top photo.

Basically, for every item purchased at participating shops, you get an entry to win this beauty. We can’t even start to guess what kind of price tag to put on this. We’re talking high quality handmade charms from fellow artists.

You can check out each shop to see more savings and deals. The list of participating Etsy Shops can be found here:
http://starvingartiststeam.blogspot.com/2009/10/sateam-wrist-candy-holiday-giveway.html

Take note as per the above post you can enter this contest without purchasing. Simply follow the directions indicated on the starving artists blog. 🙂

You can also do a search on Etsy for “SATEAMWRIST”. This will bring up the available items for sale in all participating shops.
The sale is running starting today, October 26, 2009 to December 6th, 2009.

Good luck!! I can’t wait to see who wins!!