Why I Switched to Sterling Silver for my Engraving Designs

Dpp 5909
DPP_5909
sterling silver personalized necklace featuring culinary grade pewter ladybug

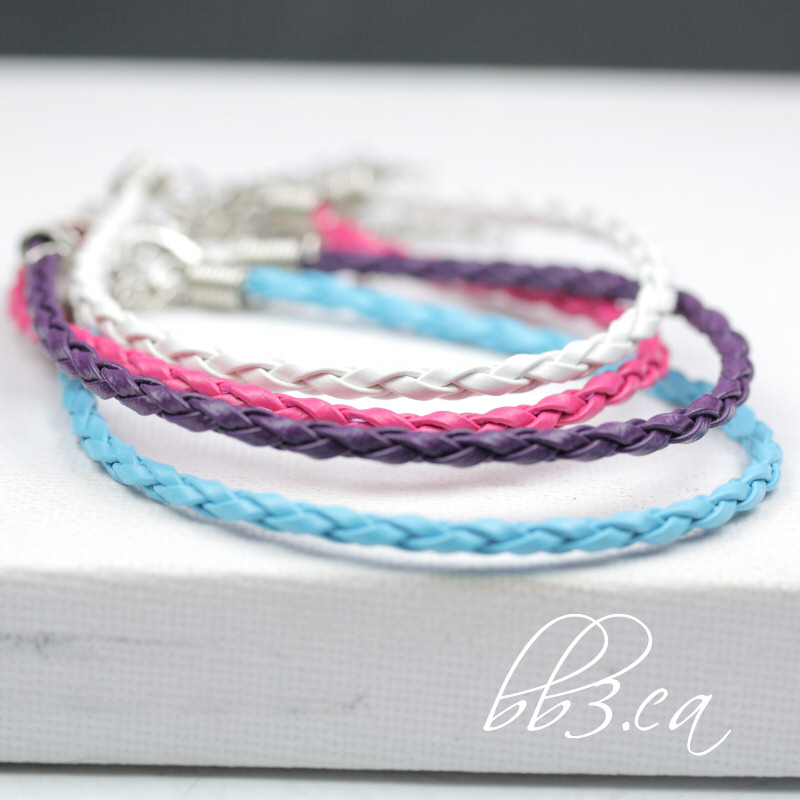
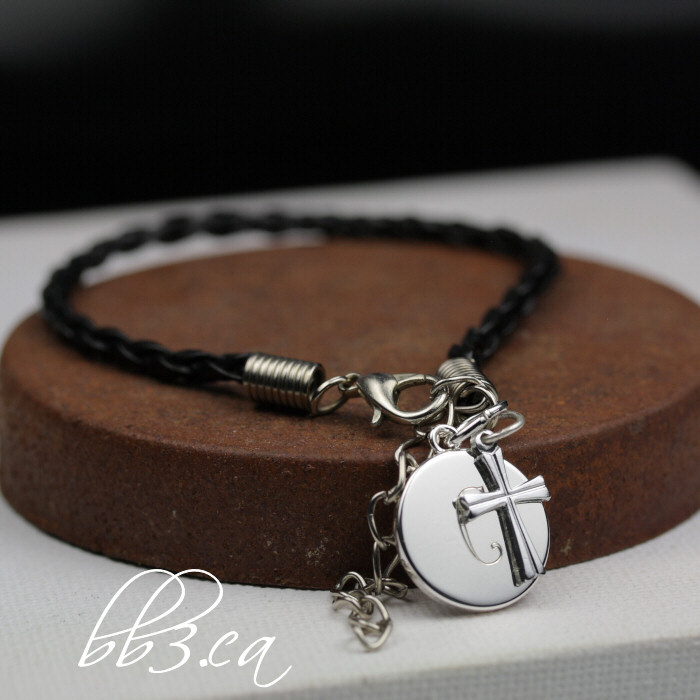
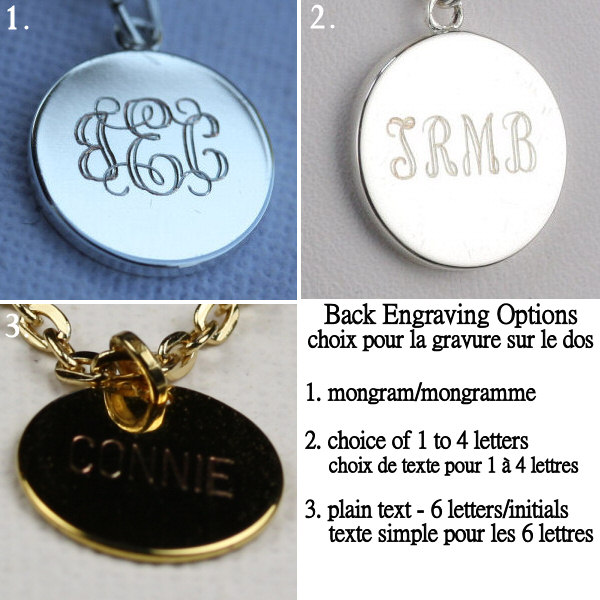
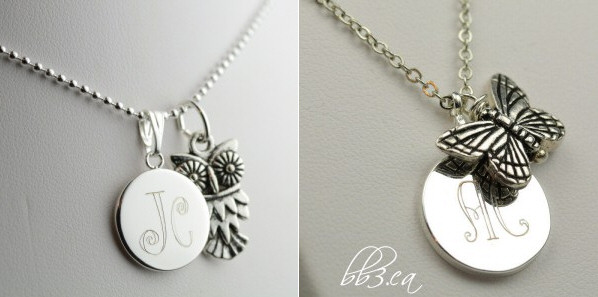
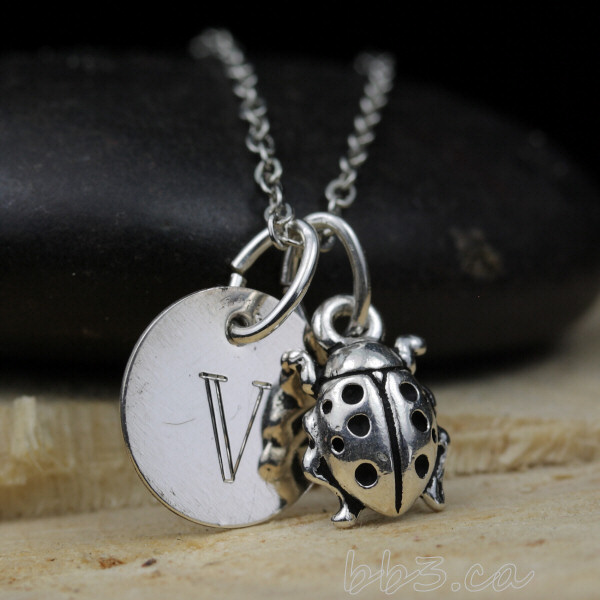
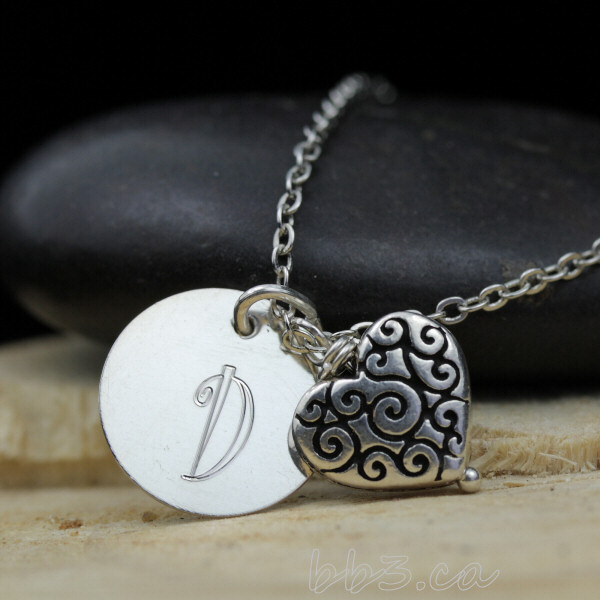
I should clarify: why I switched to sterling silver for my engraved necklaces. For now I will still be offering bracelets in silver plate and cord, and the engraved stitch markers will remain silver or gold plate (but I’ll certainly take requests for sterling silver versions ;)). As far as my most popular items – which are my necklaces – we’re going sterling silver all the way. 🙂

Time for Change

Back in mid-January it hit me: it was time for a radical change. I was slogging through my list of sterling silver requests. The list of, “if you ever do a sterling silver version, let me know…” and I was feeling both overwhelmed and under-whelmed. There is no fun remaking something that you already make, and happen to make a decent amount of. Quite frankly, I was bored. Normally I combat boredom by developing something new. But by necessity I was pushing myself to do sterling silver versions of certain designs. People asked for them a year ago and I had to make it happen. It was the key to shaking this stale feeling, the unmotivated feeling that has been creeping up over time. I was going through the motions, with something that I am passionate and love to do.

A-H engraved stitch markers have gotten an updated look but will remain silver plated

To throw another wrench into it, I think too much. I over think everything. One reason why sterling silver versions had not yet been completed, is because I over analyze and essentially talk myself out of it. It seems too complicated. So finally one afternoon I asked myself, what do I find the most complicated about it? And the answer was juggling all the options. Having a silver plated option, vs. a sterling silver option. Then add to it a gold plated option vs. a gold-filled option. That’s up to 4 options for one necklace design. The answer was to upgrade everything to sterling silver, and concentrate on 14kt gold-filled later.

What? Discontinue successful products? Why in the world would I do that? But this time instead of thinking it over (and over) I just did it. Like, when you have a really stuck band-aid. Just rip it off really fast, rather than peeling it slowly and feeling every single tug on the skin. This is the analogy of my entire life. Otherwise, I would never make a decision!

DPP_5933
Culinary grade pewter teddy bear (I love the detail in this little guy!) on a personalized sterling silver necklace

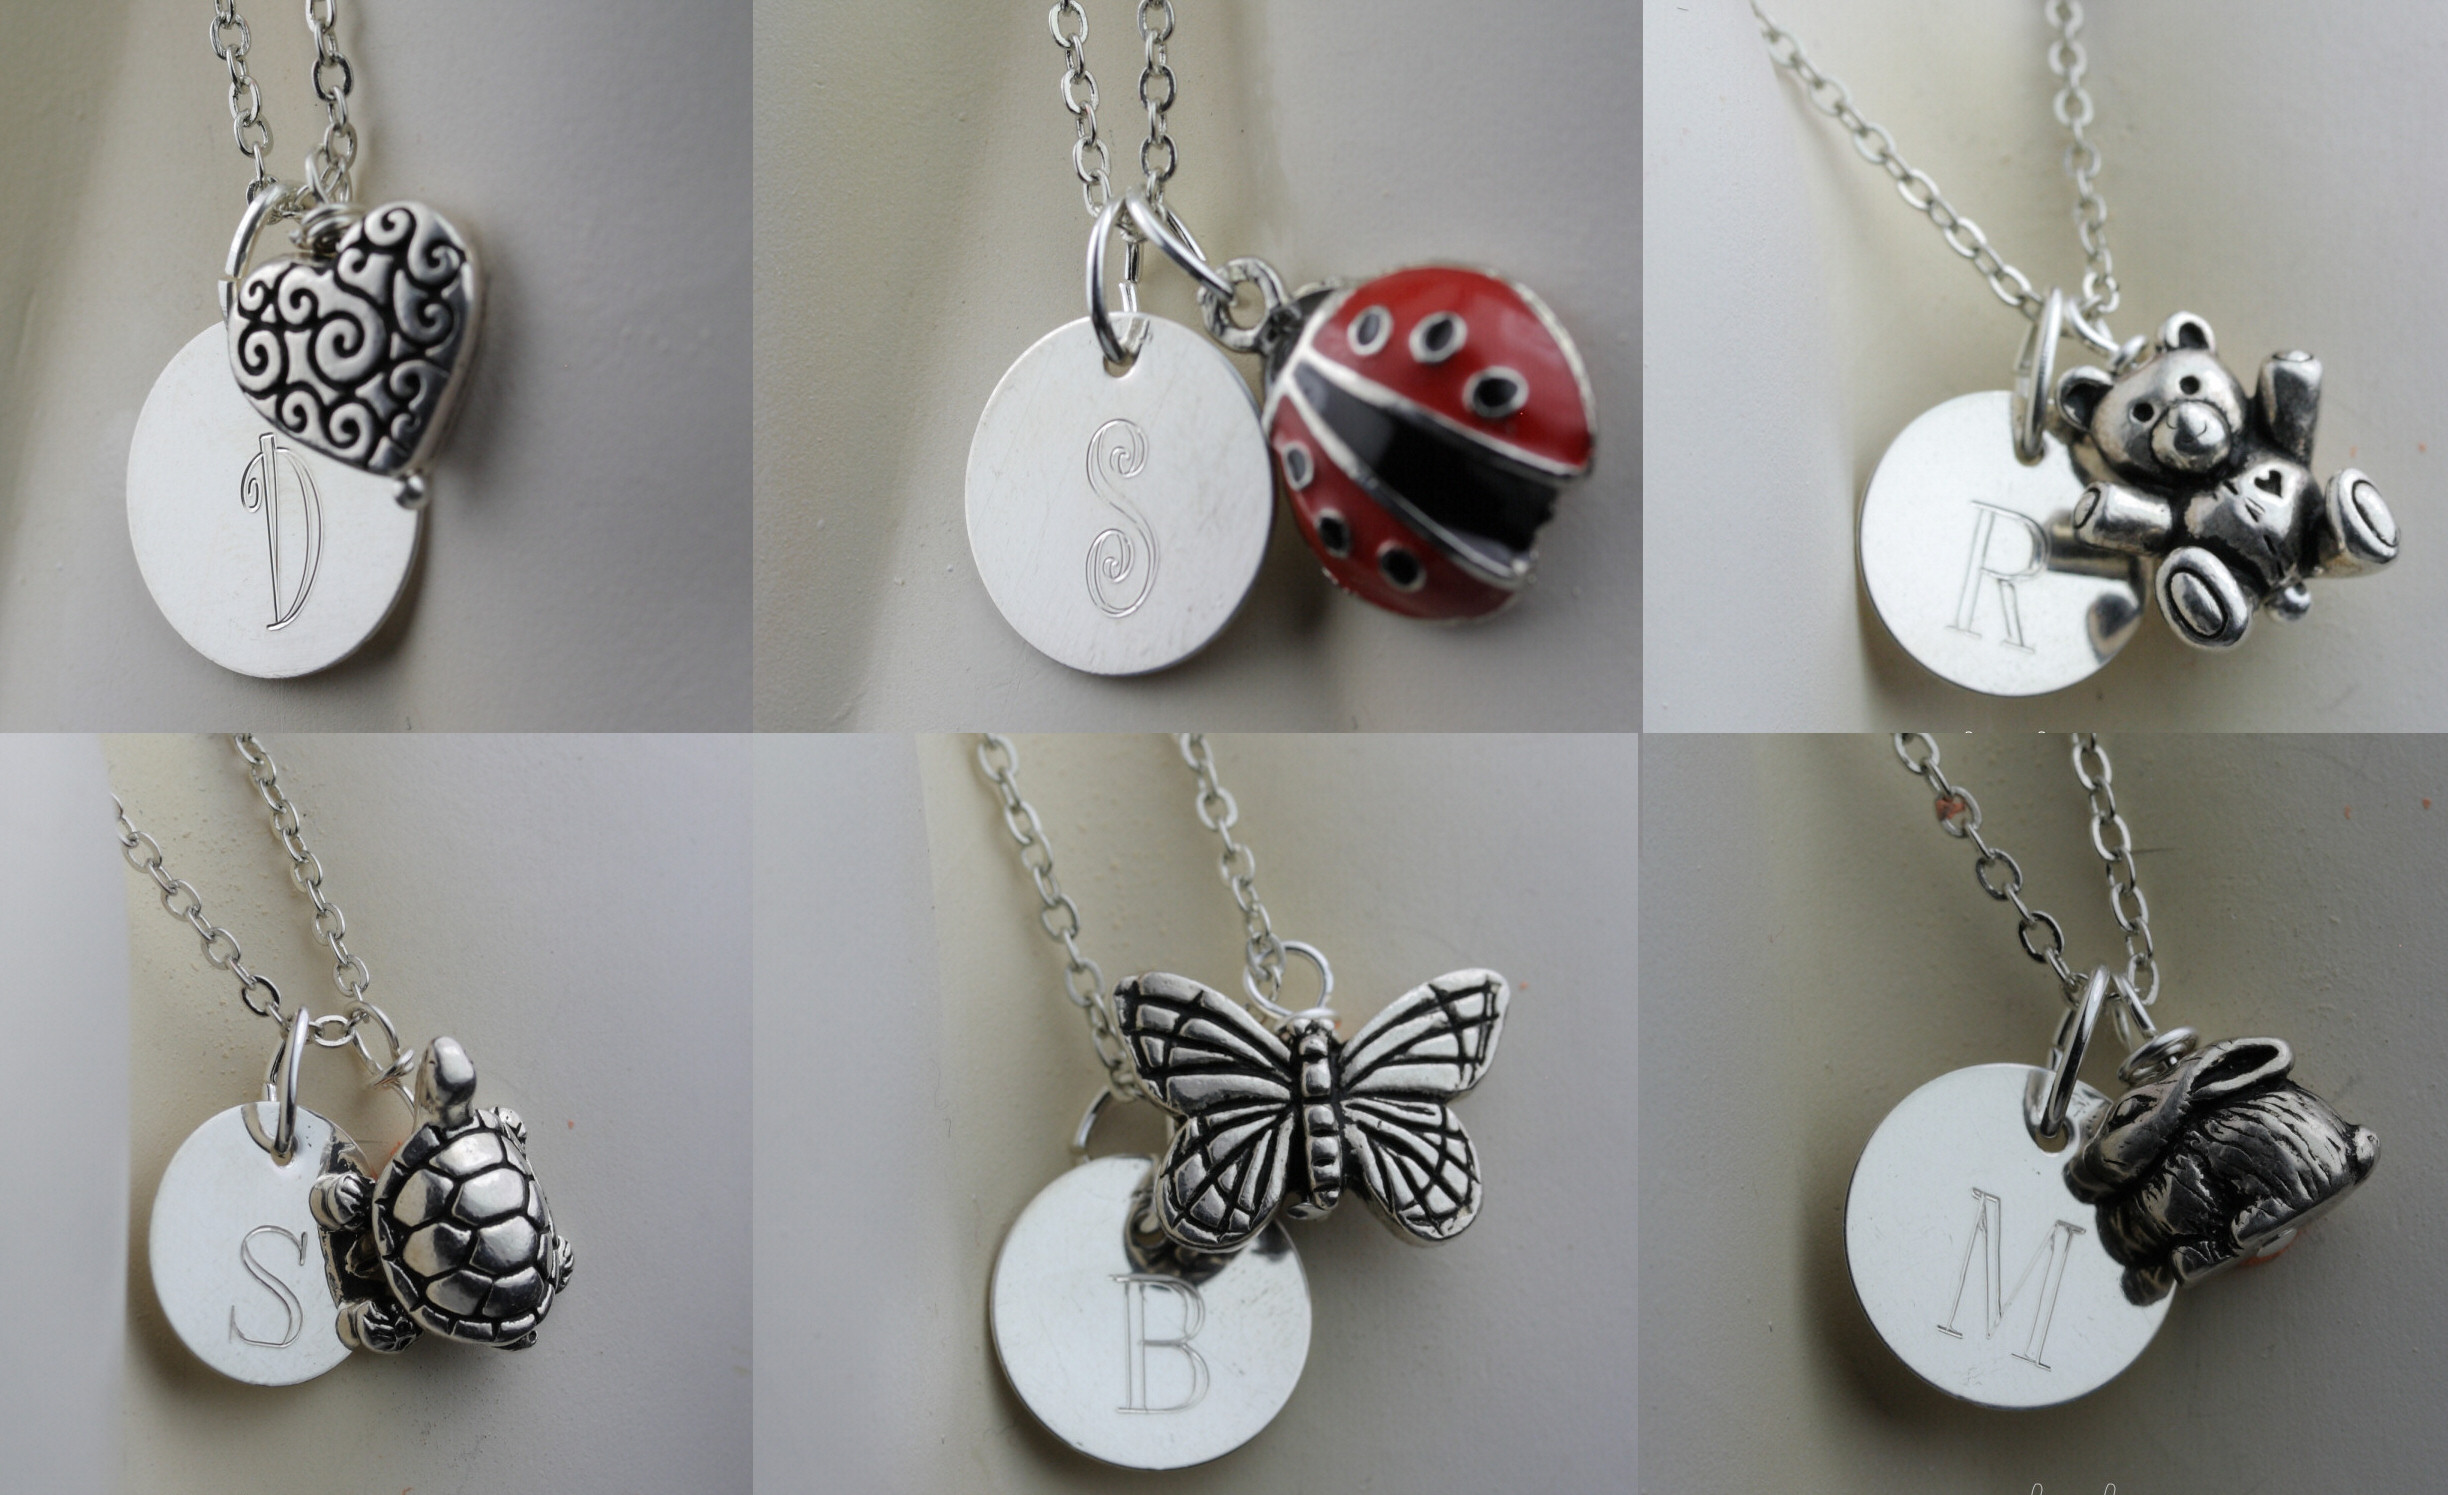
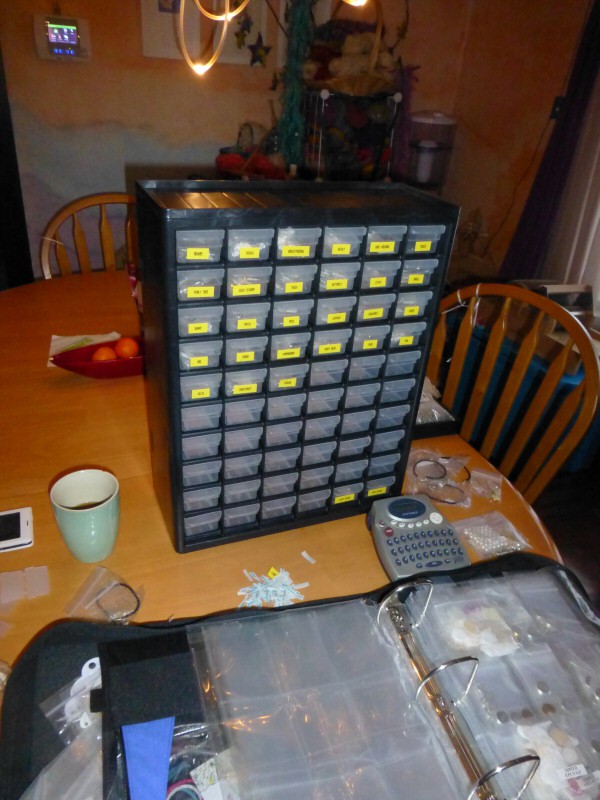
You know what? The decision has been just what I needed. By discontinuing many products I was able to see more clearly what needed to be done, instead of feeling overwhelmed with too many products, too many options, and too many what-ifs. I got so much done in a week. Many prototypes were completed, and photographs taken. The pictures were okay – but they were good enough to get the items relisted and presented for the February newsletter (I have since re-taken the product photos and my photography skills aren’t the strongest, but the final set of photos has the energy and vibe I want to convey). I have that excitement again: the sweaty palm, bubbling from the pit of my stomach feeling that I get when I create something wonderful.

Value

A few years ago (okay, maybe a tad more than a few) I would never dream to use plated items or base metal for my jewelry. That’s because sterling silver was so. cheap. I used to do all my prototypes in sterling silver – I considered it scrap metal! When I purchased my manual engraver and started teaching myself engraving, I had bought some silver plated blanks for practice. The price of silver soared, and the landscape of selling handmade online totally changed. All of a sudden, everyone was selling something they made on the internet. Plus, there were mass-produced companies popping up everywhere that needed individuals to sell their products, often times masquerading as handmade. And the prices were all. over. the. place. On top of it all, many people were struggling financially so there was no room for life’s extras. I had to look at where I could cut cost, and the best way to do it was in the supply cost. My cost: AKA my time and expertise was already as low as I could go.

How cute is this little pewter turtle paired with the sterling silver engraving blank

I rarely get complaints on my silver plated and gold plated items. I think most people understand that plated items are a crap shoot since there is no guarantee the level of tarnish or when tarnish will happen – everybody’s body chemistry is different. And the pieces were priced accordingly. It was certainly affordable. But even one disappointed customer is a disappointment to me, especially when you consider most of the purchases are as gifts and have stories attached to them. Many people are hurting and grieving, or have overcome a hardship that they want to honor. The silver plated items were intended to be a gesture – I never dreamed that people would become so attached to their necklace, that they would wear it often, even to the point of not taking it off.

Sterling silver does not always agree with everyone’s body chemistry, I do know a few individuals who can’t wear it at all. But for the majority of people the main issue with sterling silver is tarnish. Luckily, tarnish can be removed via a polishing cloth or even with hot water, tin foil and baking soda. Offering products in sterling silver gives me piece of mind that they will stand up to much love and wear.

Keeping it affordable

The biggest issue with offering sterling silver is to how to keep it affordable. I design with the philosophy that everyone deserves a nice product that they can be proud of. Silver has stabled in price, so it makes it more attainable. I buy in bulk: wholesale lots. So I have to make sure I have the funds to front the cost of large orders. It is the only way I can offer my work at the prices I do. That, and I donate a lot of my time. A lot. That’s the truth. Being the sole designer, sales person, marketer, photographer, copywriter, graphic designer, web designer (with help from my developer husband), and accountant means I really should be tripling or even quadrupling my cost (a topic for another day…).

Knowing where my supplies come from

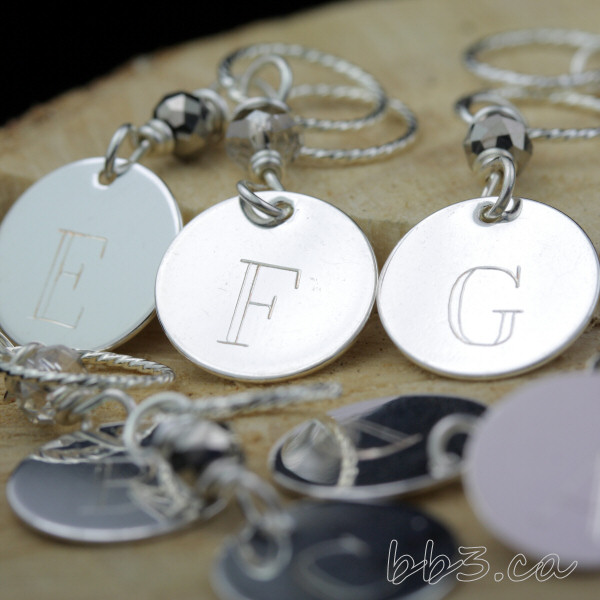
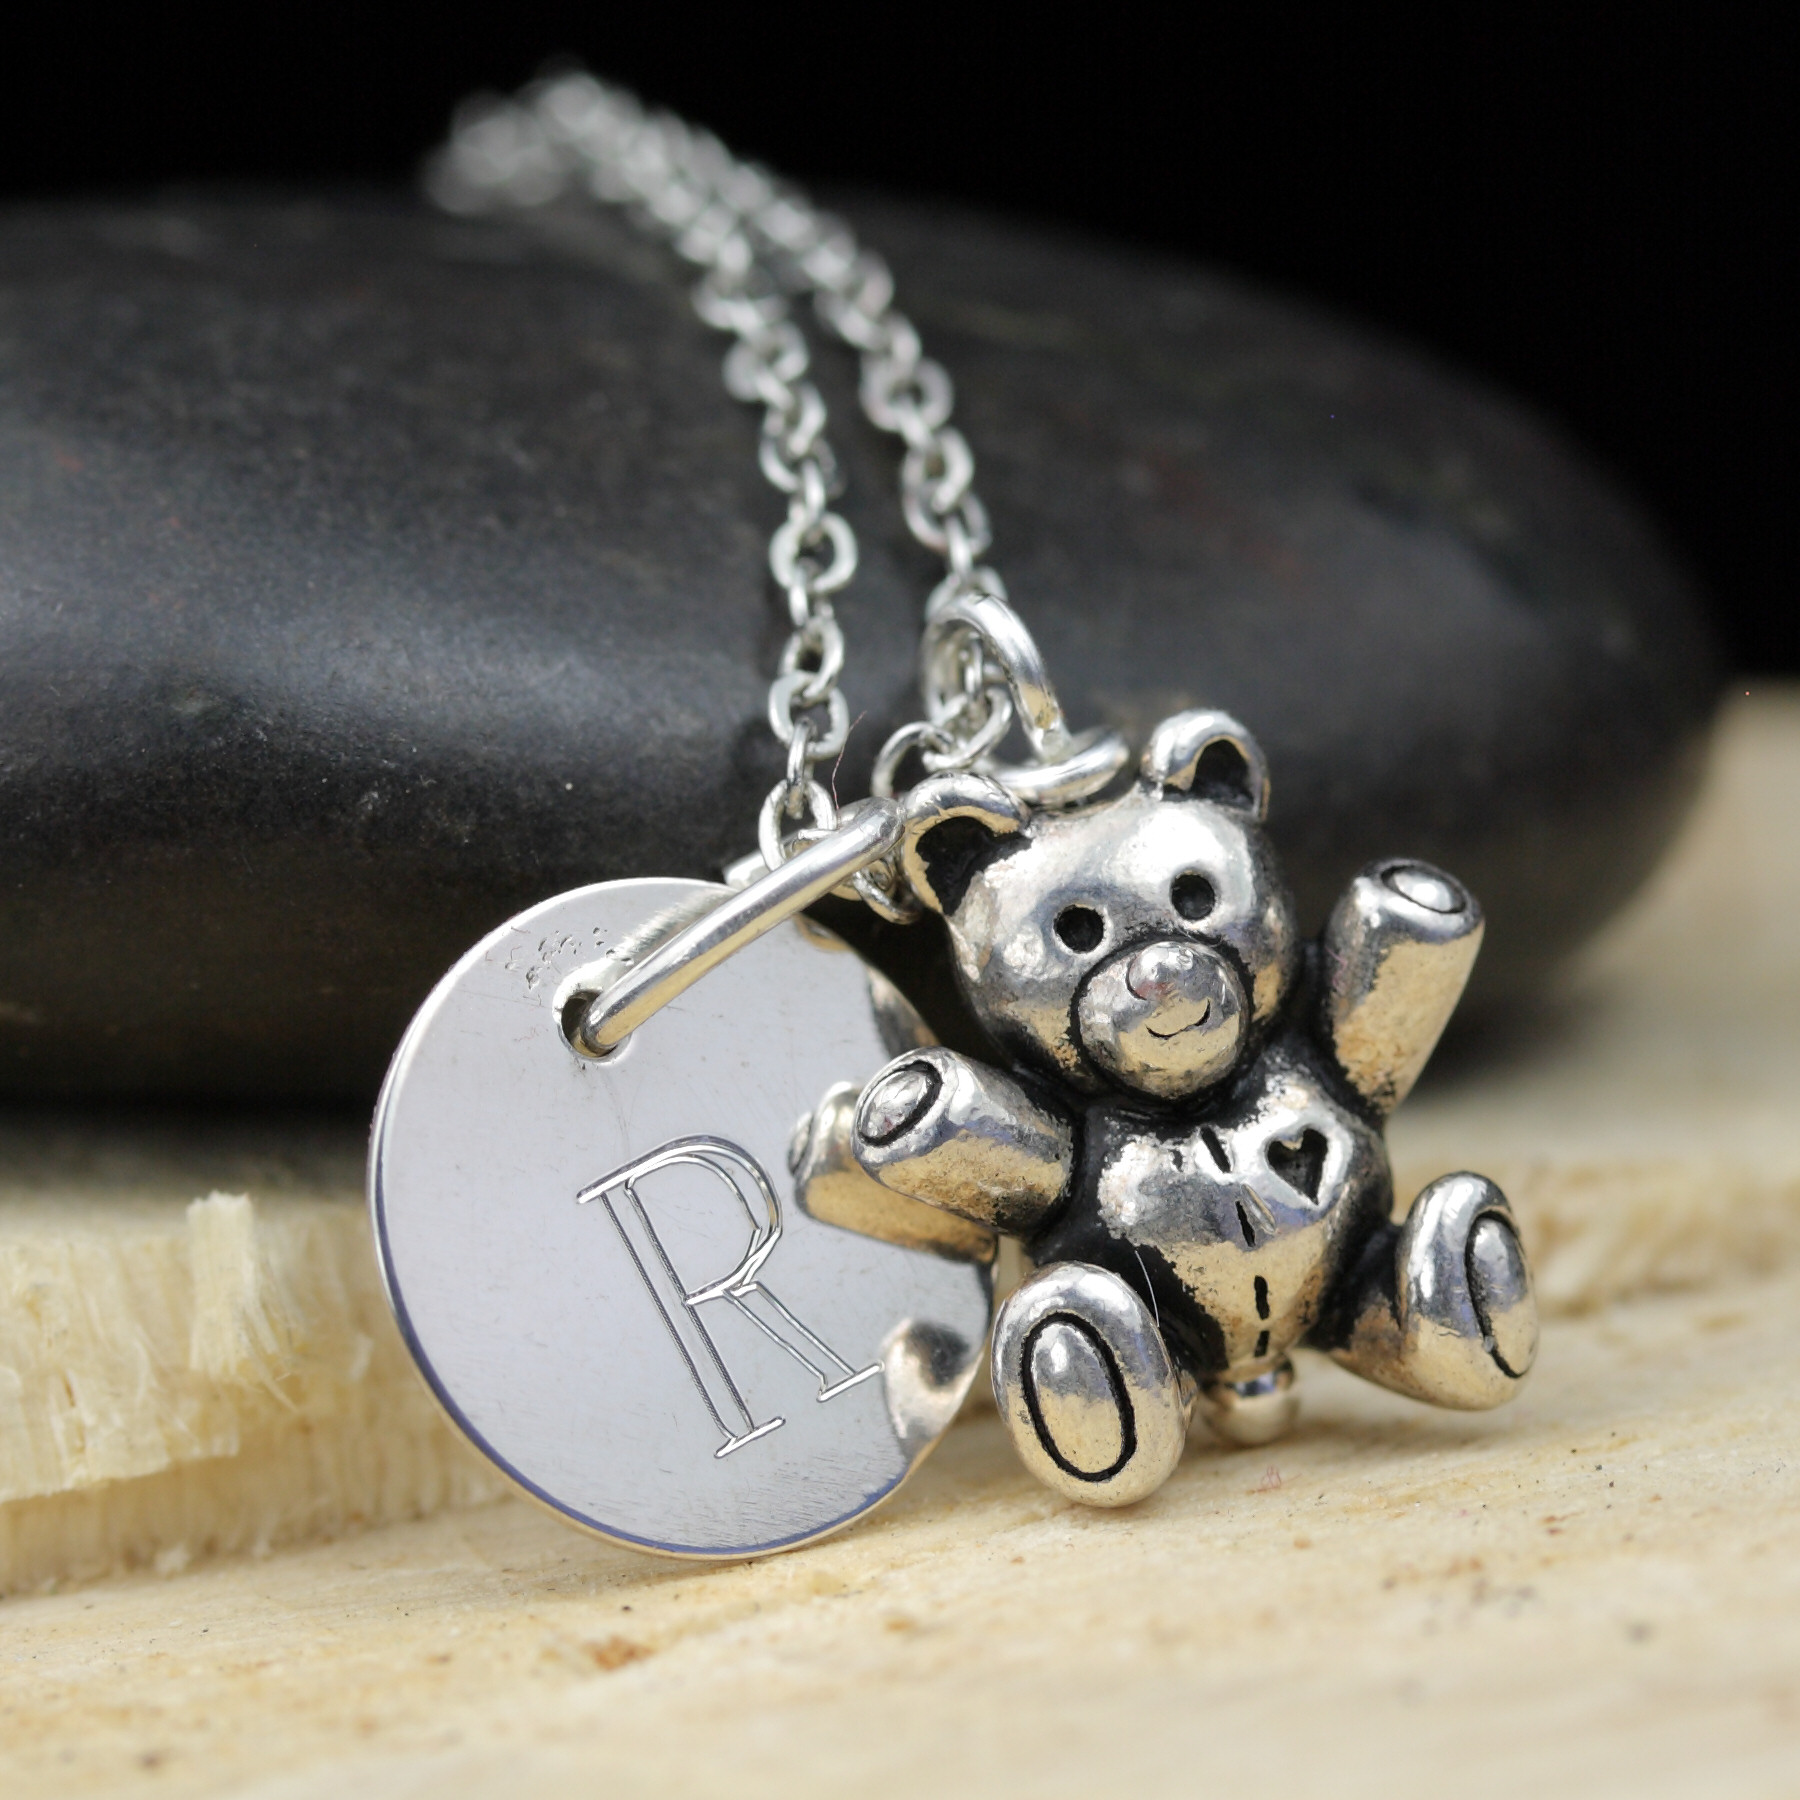
I buy my sterling silver engraving disks from US suppliers. The disks are made in the USA and one supplier in particular smelts scrap metal to make their sterling silver sheet (disks are cut from sheet). The culinary grade pewter charms are made in the USA. The sterling silver cast charms are European or US made. The older I get, and the more informed I get, the more I would prefer to buy as close to home as possible. Plus, I have an established relationship with these suppliers. I can trust them.

Sterling silver engraving disks and culinary grade pewter charms: Made in the USA

An over-all product I can be proud of

I am confident with my skills and abilities. Am I perfect? No. Do I make mistakes? Of course. I am happy to fix and honor them. It happens. But I have no control over supplies that are simply not up to par. I am at a different place in my life. My philosophy has always been, would I wear it? And these days I don’t wear many of the items I originally developed. So after it is all said and done, this is the crux of change for me.

bb3 is still a project: I hesitate to call it a business as I just don’t have the time or resources to hire or grow it. It is a labour of love born out of the belief that we truly can get back to basics, express ourselves, be creative – and support local and small industries. It’s my reflection of where we are as a society – where mass produced, non-personal, bought without a thought does not always equate to better. It’s about spreading a little joy, a little positivity, a little healing, one item at a time.

blogsig2

February Newsletter & Giveaway bb3.ca

Products

P1030313

This month’s newsletter is jam packed with new products, and the giveaway is for a sterling silver necklace. Read all about it here.

products

I think the most exciting news is the revamp of products in sterling silver as well as 14kt gold-filled…and yarn…coming soon. I have so much to do but I am really excited to do it. If you are a subscriber and have entered the giveaway, good luck! And if you are not yet but would like to enter, register here first. Entries will be taken until Feb 29th, 2016 and all non-newsletter subscribers will be disqualified.

You can view my work at bb3.ca.

blogsig2

Setting Goals to Learn Skills: Creative Goals

Dscf0393
watercolor painting with my girls

It’s been 2016 for 3 weeks and now that I feel like I have a good foothold into the year I have set my creative goals. I’m not big on resolutions: they always seem to be unattainable and are easily forgotten/broken. But giving myself a list of goals always keeps me excited to continue learning and growing, and always gives me a place to start from when I feel like I am unproductively spinning in a circle.

I can’t say enough about how important creative projects are to me. They have not enhanced my life: they have saved my life. They gave me a place to focus nervous energy and stress after a day at work, and eventually gave me a place to focus my sadness and anxiety when these emotions overcame me and left me unemployed. They allowed me to turn negative emotions into something beautiful and tangible, and much to my surprise, that others wanted to share in as well. Not every day was motivating, but with some perseverance creating made me feel that my existence was just as important as everyone else. It was a way to express myself when words could not properly articulate my feelings. I believe that in our hectic world of work and schedules (even the “fun” stuff is scheduled!) we all need creative balance; creative voice; creative outlet.

Whether you are looking to advance your skill level or add a creative project to your life a simple list is all that is needed to get started and get motivated. You need not make a fancy vision board – unless you want to. Pinterest is a great way to visually plan your projects and it can always be with you via your smart phone. Let’s face it, they are handy little gadgets – they need not consume your everyday life – use them to your advantage. You will not find me spending much time on social networks. But you will catch me checking my phone often as I work on a new knitting pattern I downloaded or do a web search for some creative inspiration.

My finger after teaching myself how to needle felt: whoops!

Getting Started

Like most things, getting started is the hardest part. I started creating because a therapist told me to 16 years ago. So I just started exploring. In my school days I loved to write. So I bought a nice book and starting writing poems, and did a bit of journaling. But I found this to be a bit intense for me, so I turned to making goods instead. First it was making books that I could write my thoughts in. We’re not talking anything complicated here. A hole punch, some ribbon, and some pretty paper. Eventually this lead to playing around with clay, to making beads with clay, to jewelry making. I forced myself to set some time aside at least once a week to explore what I enjoyed doing.

Jewelry making: my longest - and most successful - hobby
Jewelry making: my longest – and most successful – hobby, enjoyed even outdoors

You don’t have to spend too much money

One of the common excuses we tell ourselves as that we don’t have the extra income to purchase supplies necessary to be creative. We walk into a craft store and are overwhelmed by all the options available. The price tag can climb high if we are not careful, but it doesn’t have to. Thrift stores are great places to find skeins of yarn for only a dollar or two. I am constantly finding unused skeins at my local second hand store. Costume jewelry from thrift stores or rummage sales can be dismantled for jewelry components. I have picked up some great beads for as little as a quarter by buying costume jewelry at a flea market. I’ve also expressed to family & friends creative items I would like to have for my birthday: a coloring book, a how to book, a nice set of pencils or markers, a tool…

Thrift store find: all this for under $50

Building on a skill

If you already have a creative skill under your belt but want to expand on your knowledge, You Tube is a great place to start. This is where I am now. At the tail end of last year I taught myself how to magic loop knit by watching You Tube videos. This gave me the confidence to say that this is the year that I would teach myself how to knit cables.

St. Blaise combs one of my favorite tools
St. Blaise combs: one of my favorite tools

Don’t be hard on yourself

If you don’t do every goal on your list, or you feel unsuccessful, be proud that you took the time to attempt it. You made some time for you, and that is what matters. Tomorrow is a new day. If you decide a particular hobby is just not for you, swap your items with a friend for a project they have not had the chance to do. It’s okay to change your mind. Just be open to change, and be open to exploring the untapped talents we all possess.

blogsig2

January 2016 Newsletter bb3.ca

P1030299
P1030299
Click the above image to read the January 2016 Newsletter

Read the January 2016 Newsletter to find out the winner of the sterling silver necklace from last month. As well as what’s new, I’m launching a monthly gift with purchase and blog reader’s discount. Read all about it above. I wish you all a creative 2016 and thanks for your continued support!

blogsig2

January Coupon Code for Blog Readers

Blogpromo

blogpromo

This month’s promocode: BLOGJAN15

In 2016 I’m kicking off monthly promos for blog readers rather than one static discount for the year. This month receive 15% off your entire order at bb3.ca – even on sale items. That means on an item that is 30% off you will receive an additional 15 – for a total of 45% off. many items in the clearance section are at or below cost.

Simply use the January coupon code: BLOGJAN15 at checkout. Discount good until end of day January 31st, 2016.

blogsig2

New Cord Bracelets in 5 different Colors bb3.ca

Dpp 5014

One of the most popular requests I had in 2015 is to offer my engraved charms on a bracelet. I found these cord bracelets in several different colors and they make a nice affordable option. I am currently carrying the cord bracelets in 5 different colors. I may add more colors in the future depending on popularity of this option. Browse the new designs below:

DPP_4993
International Breastfeeding Symbol on Cord Bracelet
DPP_4998
International Babywearing Symbol on cord bracelet
DPP_5000
Symbol of the International Child on cord bracelet
DPP_5006
Puzzle piece for Autism Awareness with initial charm on cord bracelet
DPP_5013
Personalized charm with cross charm on cord bracelet
DPP_5014
Four other colors of cord available

More bracelet designs coming this year in different styles, including chain. If you see a necklace on the website that you would prefer on a cord bracelet I’d be happy to do that for you. All cord bracelets come with a piece of extender chain to help aid in the perfect fit. Back engraving on these items available at an additional charge.

blogsig2


Jewelry & Supply Organizing in my Makeshift Studio

P1030325
My diningroom aka temporary studio here in Nova Scotia

I’ve taken over our diningroom here in our little vacation home in Nova Scotia. It serves as a makeshift studio space for me when I’m in town. When we want to do sit down lessons, the girls will also do “schoolwork” here. It is a high traffic area in this home and prone to clutter. Creating tends to lead one into the direction of a…creative mess, but I cannot work in an area prone to chaos. The energy simply doesn’t flow. If the energy gets stuck my ideas feel stuck too.

Which brings me to my early New Year’s organizing today. I had originally set up binders with business card/baseball card inserts to hold my supplies (as shown above). Tiny ziplock bags organize all the components necessary to make one item from the website. I usually have on hand at least 3 of these pre-pulled supplies per item. I try to aim for 6, if not 12 for very popular items. Efficiency is very important. It is the main reason why I can keep my prices so affordable. If you can imagine, it takes less time to pull the supplies needed for 6 necklaces at once than to pull them one at a time after each order. Having the supplies pre-pulled means they are ready for assembly and engraving at time of order. It is also the secret as to why I usually can turn around an order in 24 hours, and is handy for travelling when you are working out of more than one location.

I am finding though, as my product base grows I am becoming more and more frustrated with the binder setup. It is easy for things to become misplaced, particularly since the binders are becoming so full. Most of the time the item I am looking for is staring me right in the face in a sea of supplies that all look the same. The fuller the binders are also means spillage, and more misplacing of products that are located…somewhere in there. Not being able to find what I need will send me into a feeling of panic, and I usually enjoy what I do. But not when I am stressed out unable to find something, or taking more time than usual and my family is waiting on me to get done.

After scouring the internet, including jewelry suppliers and wholesalers with somewhat pricey solutions, I found the most affordable option today at Canadian Tire:

A supply organizing dream! I am excited to fill orders again. :)
A supply organizing dream! I am excited to fill orders again. 🙂

It’s a small parts cabinet with 60 drawers. I got two for $39 each! They are lightweight, stackable and can even be mounted to the wall, which is great when space is at a premium. With my handy Dymo label maker everything is clearly and neatly labeled. This is going to make me really efficient; so much so that it’s time to reassess and adjust the pricing on some of my items…lower. 🙂

blogsig2

Studio Closed for 1 Week

Sidead Closed

bannerblock_closed

bannerblock_closed_fr

I am in need of some time away from the studio but will be back by December 7th, 2015 and shipping from my Nova Scotia address. Thank you for your patience and sorry for the inconvenience!

Je besoin de temps personnel Je expédie à partir de mon adresse Nouvelle-Écosse, le 7 Décembre 2015. Merci pour votre patience!

Feel free to browse while I am away.

Return to bb3.ca

retourner à bb3.ca

blogsig2

Picking vs. Throwing: Continental Knitting in my Jammies

P1030116

Since teaching myself to knit I have been a thrower – formally known as English style knitting. This is the way that made the most sense to me when learning and I have been content to do so – until now. I really like to knit (or crochet) in bed. It is definitely not the most ergonomic way to knit, but I am too fidgety to sit and knit. Let’s face it, if I’m sitting in a chair I am pulling one of my spinning wheels up. Yup. I’d literally rather sit and spin. 😉

All this obsess – er- excessive spinning really puts tension on my right arm, around the elbow area. I’m finding my preferred way of knitting puts more strain on the right arm. Strain means I slow down, slowing down means the projects don’t work up as fast as I would like and then I lose interest. It was time to look at an alternate way to knit so that I could give the right arm a rest.

I’ve never really tried continental knitting (aka picking). I’ve seen videos of the technique but since I was comfortable with the English style I never saw a reason to really give it a go. But I am left handed (left dominant mostly with ambidextrous tendencies) and it seems that the speed knitters out there use this style. I also hear that pickers find their knitting works up looser. I do tend to have tight stitches as a thrower. Since I knit a lot with handspun bulky art yarns a looser stitch is definitely appealing.

Earlier this month I found myself laid up in bed feeling under the weather so since I wasn’t feeling well enough to sit up and spin, a little personal knitting workshop was in order. Off to YouTube I went to see different styles of Continental knitting. After trying different people’s styles below is what has worked well for me thus far. I was amazed that not long after I was continental knitting in my jammies. 🙂

beginning to wrap the yarn around my pinkie finger for tensioning

In the videos I watched, many people liked to simply let their yarn hang between their fingers. I definitely prefer to have the yarn tensioned. The best technique was wrapping the working yarn around my pinkie twice then laying it across my fingers towards the index finger.

twice wrapped around pinkie
laying yarn across all 3 fingers toward the index finger

So once I found a comfortable way to hold the yarn in my left hand – which by the way – felt so awkward at first since I am so used to using my right hand – I found that my knitting for the first few rounds resembled crocheting with my index finger held up in the air. The problem being that my index finger would get tired really quickly, and I definitely could not get the rhythm for purling with my finger so far away. In another video, I found my answer: rest my index finger against the needle. It was all starting to make sense now.

holding my finger too high and too far away from my work
this made it much easier
tada!
tada!

The outcome is I really like Continental knitting. I started by knitting in the round with a bulky reclaimed yarn that already had stitches done in the English style. There was a definite difference in the tensioning of my stitches. I found with continental my stitches were looser and thus looked/felt much better with the bulky yarn. I also found my knitting worked up much faster with the picking method, although I’m not sure if it is because I am quick at it yet or simply because I don’t get fatigued as quickly and can sit for more rounds before stopping. I’ve also practiced ribbing since then and I do like the closer change up between the knit and purl stitch. I’m finding my ribbing maybe a little too loose for my liking, but I think that will change with practice. All and all, I am so stoked to have another way to knit, so when I get tired (or injured!) on one side I can switch it up and keep knitting. 🙂

Are you a picker or a thrower? Have any tips for me? Drop me a line, I’d love to heard from you!

blogsig2

P.S. I didn’t keep a list of the videos I watched on YouTube, but if you search for “continental knitting”, “continental vs. english knitting” and even “speed knitting” you should get a good amount of examples to help you.

Deconstructed: Unravelling Thrift Store Finds for Yarn

P1020859

P1020858
I have read a few articles with great fascination about buying wool sweaters from thrift stores with the sole purpose of unravelling them to reuse the yarn. It seemed like a lot of work to me, but I loved the idea nonetheless. I am surrounded by fleece and my own handspun, but what a great idea to a) reuse and b) obtain wool yarn without breaking the budget. If you have the time you can get a nice stash of yarn for just a few dollars.

P1020856Although the idea of unravelling sweaters sounded daunting to me, I am a picker and puller – I love to undo things. I find great satisfaction peeling paint and glue, dismantling jewelry that was not quite right (or to reuse components), or unravelling my own knit/crochet to make something bigger/better (in my mind, anyway). I have even been known to unravel my own handspun yarn – which is no easy feat but very satisfying when I can use the plies again.

P1020859

I haven’t had any luck finding suitable sweaters, but I did find these 2 scarves, one with the tags still on. Although this is synthetic yarn they were super long, soft and bulky. Lots of yarn to be had here not to mention easy to unravel (in theory). I figured it was a great place to start – for practice anyway.

IMG_3676

I vegged in front of the tv one night and gave it a go. The tags and tassels came off easily, and the end was petty obvious – just a loose knot so they unraveled like magic! Of course the unworn one unravelled the easiest. What to make? Definitely not more scarves. I have many of those with my handspun already. Slippers? I am thinking maybe chunky mittens/arm warmers or even some quick hats for my kids. They are always losing their hats/mitts so it would not be a shame if they lost ones made out of old scarves from the Thrift store. 🙂

blogsig2


Studio Closed for the Long Weekend

Sidead Closed

bannerblock_closed

bannerblock_closed_fr

This up-coming weekend is Thanksgiving in Canada. So the studio will be closed for the long weekend. I will be unavailable to make orders from October 9th to October 13th, 2015. Orders should commence no later than October 14th. You may still order via the website but expect a delay in the shipping of your order. Please contact me if you have any questions.

Je ne suis pas disponible pour rendre des commandes d’octobre 9 – 13. Les articles seront expédiées par le 14 octobre. Contactez-moi si vous avez des questions.

blogsig2


Engraving: How Much Text Can I Really Have…?

Backengrv
Examples of engraving I can do

I get asked often to engrave full words or even 2 lines of text & sentences on my items. It’s been happening so often lately that I thought I should write a blog post about it. I try to be very clear on each piece just how much space I have to work with. In the age of computerized engraving I think most potential customers don’t realize that this is done manually and I am limited with size and space. I can really only comfortably fit 7 characters (letters like this: ABCDEFG) – and in some cases 8 characters (letters like this: ABCDEFGH). This is with the plain font (#3 option above). My script fonts definitely cannot do more than 4 letters on the typical 15mm blank that most of my pieces are made with. Remember that the more letters you add the smaller I have to go, and I will not sell anything that does not look good. The smaller the letters the less detail you can see, and thus it does not look clean or in some cases legible. So if you are going to need a magnifying glass to see it, I won’t be offering it. 😉

blogengraveeg
Example of curlz font; example of curlz vintage font

With the popular curlz & curlz vintage fonts, they are larger templates and are only intended as a focal initial. That means even at my smallest setting I can only get 2 letters, max on the blank.

I’d love to be able to fulfill all your requests and maybe in the future I will have bigger blanks that will accommodate more text. More text = more work which = more work for me, and potentially higher costs to you. Manual engraving is a skill that I have been honing for 5 years now. It’s not as simple as choosing the right letters and go. I have to position the blank accordingly, gauge what size to go with; often times deciding which of the fonts will look the best (it really does depend on initials vs. a word), and this is all done more by feel and intuition than by measurement. Mistakes do happen, so then I have to scrap that blank and start again. Sometimes I scrap a blank not because I made a mistake per se but because I think I can do better. Many times before I even start on the actual blank I will engrave on a piece of scrap metal first to make sure I have the size and spacing just so. By the time I offer an item to the world I have spent a lot of time perfecting its execution. It’s important to really stick with what the piece is intended to be: an affordable gift with an initial or two, or a simple word with meaning for the intended recipient.

I don’t want to discourage you from contacting me, I love to hear from you all, and if you have a request out of the norm feel free to send me an email. But hopefully this answers some questions in regards to size. 🙂

Back to bb3.ca

blogsig2

The Website is getting a Facelift…

Bannerblock Reno

Click here to go back to the website

bannerblock_reno bannerblock_renofr

I’ve been quiet as far as my online presence goes, while I desperately finish this website facelift: upgrade and design. I finally came to the conclusion that I need to just put it up and change things on the fly, otherwise my complicated creative mind gets wrapped up in making everything just perfect.

Everything has been tested as far as ordering an item goes, and you should have no problems there. There may be some wonky things, such as asking if you’d like to receive updates and offers from our partners – obviously, my little creative project has no partners, and we do not give your personal info to any 3rd party. These options are hardcoded into the website software and I will have to get hubby to remove them from the code.

If for any reason you have difficulty with ordering, because I have been unable to test every single item, please drop me a line so I can complete your order. If you let me know specifically how your order failed I will be happy to give you a 25% discount. 🙂

Click here to return to bb3.ca

signature


bb3 August 2015 newsletter

Newsletteraug
August 2015 newsletter

The August 2015 newsletter was sent to inboxes last night, if you missed it you can read it here. This month I am giving away an International Breastfeeding Symbol necklace in honor of World Breastfeeding Week, or an item of your choice from the advocacy/awareness section. Check it out before the end of the month so you don’t miss the opportunity to win.

signature

Sneak Peek at the New bb3.ca Website Design

Websitescreen
fresh look for bb3.ca launching fall of 2015

Back in June it became very clear that the website needed more than just a simple update. So instead of making the old theme work with the new software version, I decided to go ahead with a new, clean design.

I naively thought it would take me a month to do, but there have been delays along the way – not to mention it is summer vacation here! So I’m aiming to be done in September. I hope to get this completed soon as I have many new projects I would like to get listed and shared with you all.

signature

Cats Love Yarn: Here’s Proof.

P1020840

We all know that cats love to play with yarn. Anything that moves, it seems. But how about cuddle up to a ball of yarn? Here’s my photographic proof that cats love yarn, they really, really do. These are my 11 and 13 year old cats, cuddled up to some of my handspun on two different occasions:

P1020846 P1020843 P1020841 P1020840 P1020614 P1020613 P1020612 P1020611

Life would be so boring without pets! 🙂

signature


Jumbo Knitting Needles: (Not Quite) The Biggest I Have Seen

P1020827
Officially the largest knitting needles and crochet hooks I own.

I was browsing Michael’s the other day and I was happy to see these jumbo knitting needles size 50(!). Since I had a coupon I decided to add them to my needles collection (along with the crochet hook to match).

trying out the needles

I haven’t made anything with them yet, just playing around with some of my jumbo handspun. Other than a scarf I wonder what I could make with these. I’d happily take suggestions and advice! I love jumbo yarns and large needles, but I am definitely out of my element with these.

As far as the largest needles I have seen, here is one of my all-time fave extreme knitting videos:

signature

Experimental Crazy Handmade Yarn Creation

P1020704
scarf; shrug; accent piece: I am not sure exactly what I would call this but I am quite satisfied with how it turned out.

I made this yarn out of…frustration? Boredom?

P1020648

I was really dissatisfied with the original yarn. So I decided to go for broke, and see what would happen if I boucléd it around some commercial cotton. This crazy handmade yarn is the result.

P1020655
The outcome is certainly interesting to say the least! So what to do with it? I now have a bulky, buckled spiral yarn made of wool, banana fibers and beads (now, cotton yarn added to that mix). What in the world to make with this hot mess & a half?

P1020701
When in doubt with a funky bulky handspun, I always turn to the elongated knit stitch. There are many different variations but one that I love to do is really simple. Cast on the number of stitches you want, insert needle to knit one, but bring yarn around both needles before looping around the inserted needle like a regular knit stitch. This extra bit of wrapping will elongate that stitch nicely.

Here is a video by Ashley Martineau of Neauveau Fiber Arts demonstrating the stitch. I love Ashley’s videos and her spinning style! I probably learned this stitch from her originally, a video tute on a pillow cover comes to mind. 🙂

So back to this funky creation I made with this yarn-I-was-so-fed-up-with and a simple knit stitch. I was shocked by the result. I didn’t expect much from this so I didn’t keep any notes. But I cast on approx. 80 stitches on large circular needles (17 comes to mind, possibly bigger). Then it was elongated knit stitch until I had just enough to bind off. That was it. Total TV watching knitting.

P1020703

My intention was to make a cowl or infinity scarf, but I guess you could call this what – like a shurg or a shawl too? And once I started to tug it out/form it it was screaming for this chain detail.

P1020704

These are the things I love to make. Happy accidents. Throw all the rules out the window and just go! I get so caught up in perfecting technique sometimes it’s nice to forget it all; not have a plan and see what comes. This may still be a total hot mess, but I know one thing. I throw this on with a nice jacket, and I have a conversation piece. And that is true artistry to me.

The moral of this story is: don’t be shy to go there and totally own the result. 🙂

signature

Necklace Lengths for Personalized Gifts

Chainscreen
what necklace length should I choose?

What necklace length is appropriate for a gift? If you google necklace lengths there are many good diagrams to give you a visual idea of the different lengths available. Here’s my advice for some of the common chain lengths that I offer with my personalized engraved and artisan jewelry.

First and foremost, who are you buying for? What body type do they have? What length of necklaces have you seen them wear before? As with most things, all necks are not created equally. When I first started making jewelry, I was barely out of my teen years & far more petite than I am now. I really liked chokers, thus I made a lot of choker style necklaces.  So I naively made all my necklaces in the 14- adjustable-to-the-16 inch range, believing this would fit my target clientele just fine. Until a 6 foot plus co-worker tried a necklace and she could barely get it around her neck. My bracelets, in that 7.5 – 8 inch size would not fit her either, and let’s not even go there with anklets. It made me re-examine the “average” size stereotype, and why it’s more important to know who you are buying for rather than relying on the S, M, L, XL size categories.

Here is my general guideline for picking necklace lengths, but again think of who you are buying for:

14 inch – this is my general child size, or choker size for a petite person.

16 inch – Another length on the smaller size, great for children, teens or petite/slender build people

18 inch – I consider this the “when in doubt” size. It is a decent average length without being too long or short.

24 inch – for those who prefer longer chain or are more bigger boned or curvy/full figured.

30+ inch – this is a nice long chain that I find great for layering with shorter necklaces.

I will emphasize that this has simply been my experience & observation selling jewelry for 15 years. It is definitely not true of all people. I hope it helps with your decision making if you are unsure which length to go with.

signature