Not seeing what you are looking for? Interested in potentially carrying my products in your shop or business? Need a large (bulk) order for your event or organization? Fill out this form and I will get back to you with the possibilities. Wholesale is available to Canadian & US customers while consignment is available to Canadian businesses only.
Tag: custom jewelry
Going Solo: Setting Up My Own eCommerce Website
When I decided back in January to set up my own website using open-source cart software, I had every intention of blogging about the process along the way in hopes of inspiring or helping others in the handmade community who were thinking of doing the same. I have always felt rather suffocated & limited by third-party sites. I tend to like to do things my own way and not have to play by the rules -or agendas- of others…it’s the artist and the entrepreneur in me, I guess… 😉
What I wasn’t prepared for, was how time-consuming it was going to be. Oh, open source, la la la…once I learn how it works, how hard can it be? I have enough geek knowledge under my belt – this will be fine. Truthfully, it was a HUGE learning curve…one that has left me feeling totally accomplished – but still, jewelry making (development & skills) has been put on the back burner while I take on this very big endeavor (all the while, I still am taking custom requests. Eeek!).
So here is what I came to realize:
1. You can’t go it alone – unless you are a programmer in your “day” job.
Whether you use ZenCart, Magento, PrestaShop or OSCommerce…whatever the software you find, it will never be perfect, and will need tweaking. Unpacking the software and uploading it to the web space in the first place was a head scratcher. And then, I cannot express my frustration loud enough of loading in a section or a product and having it not display properly. Luckily for me – I happen to live with a developer. My husband got me set up with the site, and tweaked the style sheet when items would not display properly. I am geeky but I do not code – unless you count simple html and that ain’t gonna cut it. 🙂 So, no matter how many hours of sweat equity you want to put in, you will still need to have help from someone with technical know-how. That may mean paying someone – or maybe setting up a bartering system for goods in trade for programming. In my case all I have to do is turn really red and mash the keyboard really hard and my hubby comes to my rescue. I know everyone cannot be so lucky. 😉
2. Be willing to make compromises.
One of the reasons why it has taken me so long to even develop my own site is because I had visions of grandeur…all the things I wanted it to be able to do, to represent – AND do it all the while with an edgy, artsy look. Over the past 7+ years I have sketched out the website of my dreams on paper over and over again…tweaked and re-tweaked. The truth is, to have the kind of website I envisioned it wouldn’t have taken several hundred dollars in development time, it would have taken a few THOUSAND dollars in development time. Although I am married to a developer – time taken to put together that kind of site is food out of my children’s mouths. Literally! If he is working for free for me he is not doing work for his clients…
So I realized that I had to settle for heavenly flower, version 1. You have to start somewhere. So when demo-ing different cart software I looked for one that was closest to what I wanted. The one I chose has a fairly easy to understand back-end, it also had modules I could add for features I wanted. Besides being able to sell a product to customers, this one allowed browsing with different currencies, had a customer wishlist and also a rewards program. Also, I was able to find a theme I liked that was inexpensive, that was fairly easy to implement and fairly easy to tweak (again – hubby took the lead here…it would have been a disaster if I gave it a go solo!!). It’s not perfect. There are things I would like to change – and being open source we will probably change. But for now, version 1 is usable and presentable so onward & upward as they say. 🙂
3. Be realistic with your goals
In January when I finally decided to go ahead with this project, I thought end of May would be ample time for implementing and launching the whole site. We are talking 4 months. Then, life happens. I am a mom to 2 little ones – and at the time I decided this timeline, I didn’t realize I was a *pregnant* mom. Yet, I like to give myself tight deadlines as I tend to procrastinate. It turned out the fact that there is a new family member on its way really kicked my butt in gear. I spend my days with my kiddos, and added an hour or two extra at night to get my crap together. It did mean compromises – like going with older photos I had taken with the old camera. But this is heavenly flower, 1.1. I had to tell the perfectionist in me to politely eff off. I can always go back & retake photos later, once the site is finally live.
4. educate yourself as much as possible about the software you choose
I read many tutorials & posts on message boards to understand how the software worked, what I could expect, and any issues people had encountered with it. Hard on the head, yes – but if I hadn’t of done this, there would have been useful features that I would have totally missed. Not to mention when something wasn’t working it was such a time saver to pin point the exact problem.
5. weigh out the pros and cons of having your own site, and think long term
Are the sales rolling in since launching the site a little over a week ago? Oh hell no, of course not! I still have SEO (search engine optimizing) to do, not to mention all my own promotion and advertising I did when I sold on the third party sites. It ain’t that easy folks. For me, it is a long term plan. First, set up shop on a site like Etsy and try out this online thing for a couple of years. It had been over a decade since I first sold online – a lot of things have changed about online shopping since then. As a busy mom I love to shop online so I soon learned what I like and dislike about the experience. I plan to spend the next year building up my brand…which is a never ending process whether you have your own website or not. The point is, I have not made and am not making sales my goal for this year. If I get requests, great, but again I am thinking long term. I’ve never really been comfortable with my name attached with such-and-such selling community. So it is worth it to me to take the time -finally- to build something for myself. For others that may not be such an issue. Nor is everyone ready to invest that kind of time (and possibly money) on something that is not necessarily a sure shot. Remember that your own site means not only paying to set up the site, but for hosting. In my case, once I stopped paying Etsy listing/renewing fees and downgraded my Artfire to basic I have ample money to pay for the monthly hosting cost. The goal is to eventually offer my own credit card processing as well. What you want to offer, who to and when are all questions to ask yourself.
***
So it’s the end of May – did I reach my goal? Yes in the sense that the site is live. No, because I am not done – yet. Still more products to load. And we need to move over to the faster more reliable hosting. Am I happy with the direction things are heading? Absolutely! Having my own site in many ways is like birthing a baby. It’s a huge responsibility and can be scary/intimidating at times. But I have never felt so free and excited about the future of my handmade business! 🙂
New Engraving Font
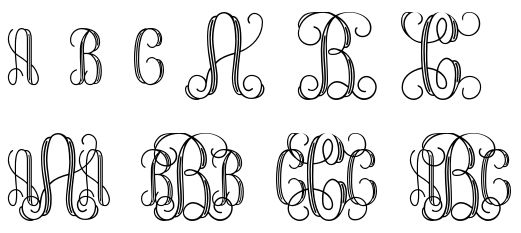
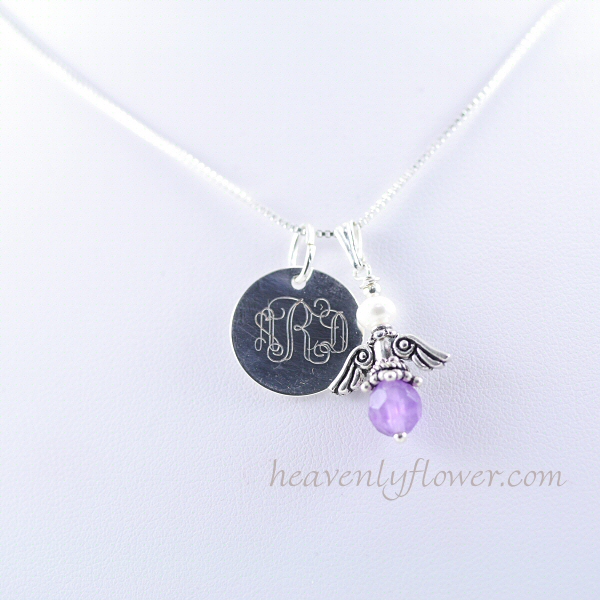
I am excited about this new engraving font. And even more excited that I mastered it quickly. I engrave manually so it takes a bit of skill to have the letters of this monogram interlock:
Here is an example of it actually engraved:
This font will be available as part of my engraving collection on my website. The website will be going live shortly with my clearance section active – over the coming days I will be loading in the custom collections as well as upgrading to faster hosting.
Artist Inspired: Keepsake Necklace Featuring N Valentine Studio
Last week, I received a real gem in the mail. Not a precious stone per se, but a handmade keepsake that means the world to me.
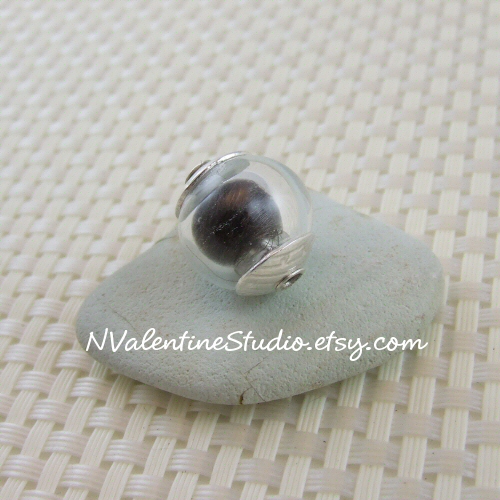
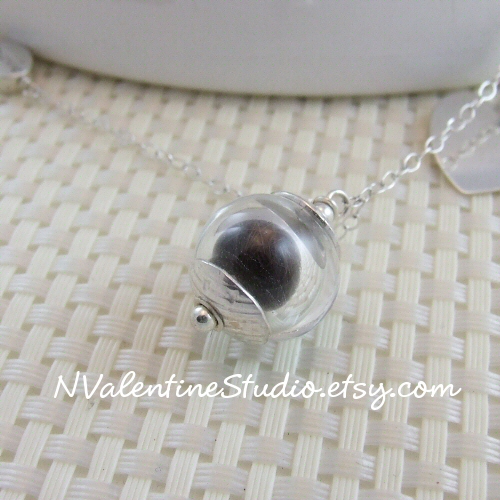
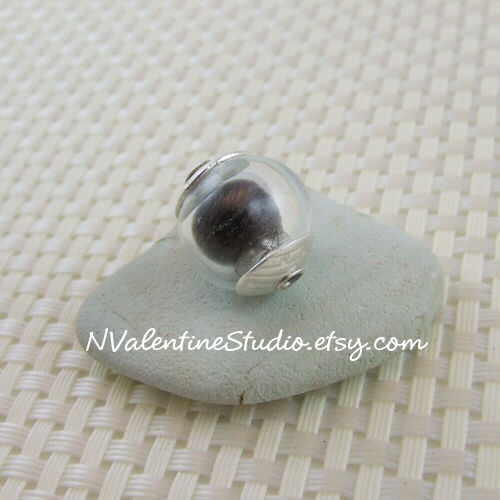
This is one of Nicole Valentine-Rimmer‘s (of NValentineStudio) keepsake lampwork beads: and inside contains two locks of hair – each from both my girls’ first hair cuts.
I was so amazed when I received it – I had sent her the locks of hair and was astounded at how she got it inside the bead – and so neatly displayed as well! So my task at hand was – what to design along with it? The bead on its own is a true focal and I didn’t want to attract too much attention away from it. In fact I put it on a sterling silver chain and declared: done! 🙂 But what could I do to make this more special to me, as I wear it on a regular basis?
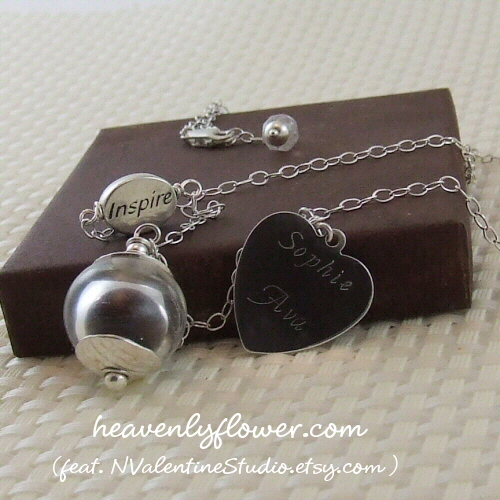
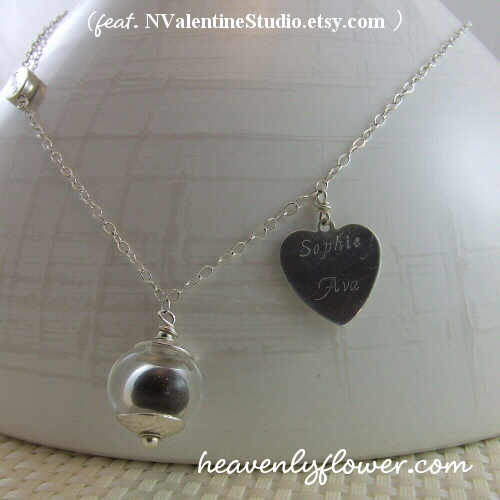
So I started forming this idea for an asymmetrical style necklace which contained an engraved sterling silver heart pendant (as I am working toward developing a customized engraved line) and a sterling silver word bead. I didn’t want a lot to detract away from Nicole’s keepsake bead – and something asymmetrical to me would still allow the bead itself to be the focal point.
I will have to admit – this was not an easy necklace to photograph. The glass of the bead reflected the light and camera – and I buffed the pendant on my polishing lathe to a high shine so – finger prints – as much as I tried to remove them at set up, would be glaringly obvious, and looked like scratches in the photos. After some fiddling with lights and camera position, here’s what we have:
I engraved my girls’ names on the heart blank – and added a word bead: “inspire” – because I am dedicated to living an inspired life and my children certainly inspire me. I also wanted the word as a reminder to always inspire them.
The word bead is stamped on both sides so regardless of which way you wear it or if the bead flips around it will always say “inspire”. So I needed to engrave something on the back of the heart pendant. I decided to go with a mother and child symbol – a mother holding baby in arms.
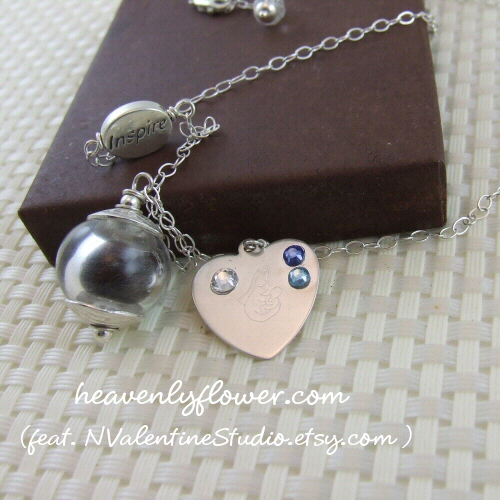
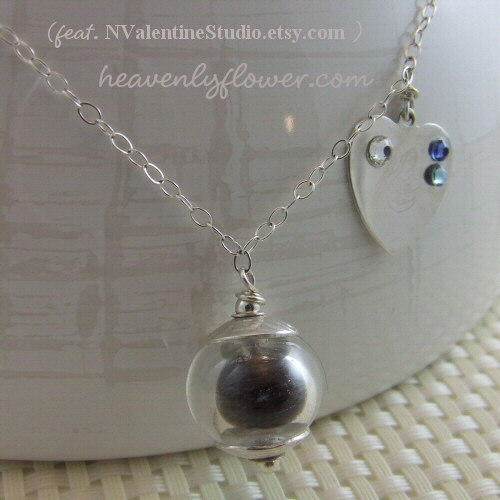
When I engraved the symbol – I would have liked it to be one maybe two sizes larger to fill up the pendant more. So I had this idea to adhere Swarovski flatbacks in our birthstone colours to help fill up the space. The larger one on the left is mine: for April – diamond, the girls (September and March – Aquamarine & Sapphire ) on the left.
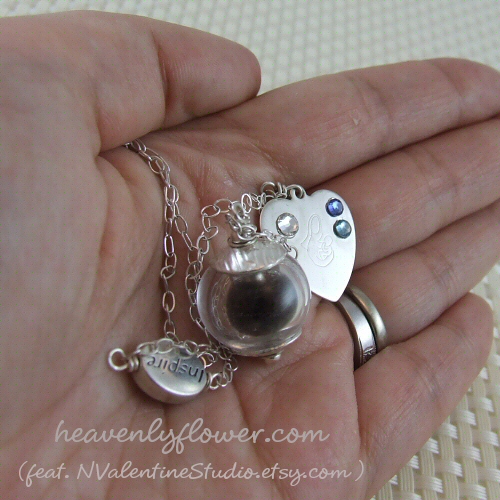
I’m not sure how I feel about the Swarovski flatbacks. They certainly look nice on the necklace as I wear it, but it is hard to remove finger print smudges around them. One good thing is that they bond really well to the metal. I put them through a bit of abuse this weekend to see if I could get them to fall off – suffice it to say unless I plan on soaking the pendant in acetone, they should stay put. 🙂
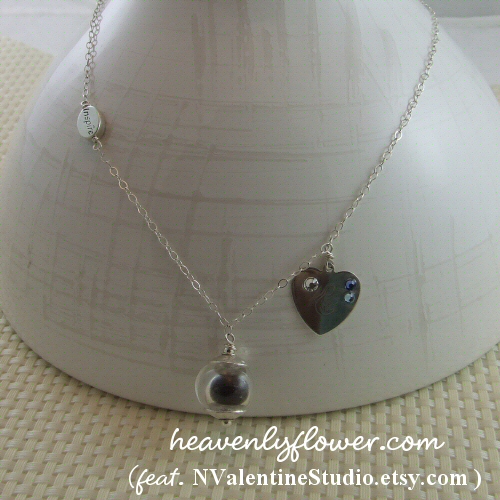
I’ve been wearing this necklace all day, and will probably wear it almost everyday! What makes it so special to me, is the keepsake bead.
Nicole has been making beads at her home studio in Victoria, British Columbia for almost 6 years; 2 years full time. Besides making lampwork beads she is also a metalsmith & does some viking knit and byzantine. She also teaches her craft, developing a class specifically for silversmithing for lampworkers.
She is inspired by the wilderness, her animals, and color. “I love color the brighter the better right now.” On her inspiration for the keepsake beads, she says, “I’ve been wanting to offer something unique as a keepsake for a while. We lost a horse last year and I was trying to think of a way to have a memory of him. Hence the filled beads were inspired.”
Check out more of Nicole’s work by visiting NValetintineStudio on Etsy and her blog.
It is my hope that we can collaborate on this piece together and it is my plan to offer it for sale on my website. I want to be able to allow the customer to choose either just the bead or add my elements to it as well. Of course, you can also buy the bead direct from Nicole as well! Whatever you decide, it is sure to be cherished for years to come.
Creativity Requested: Adventures in Komboloi
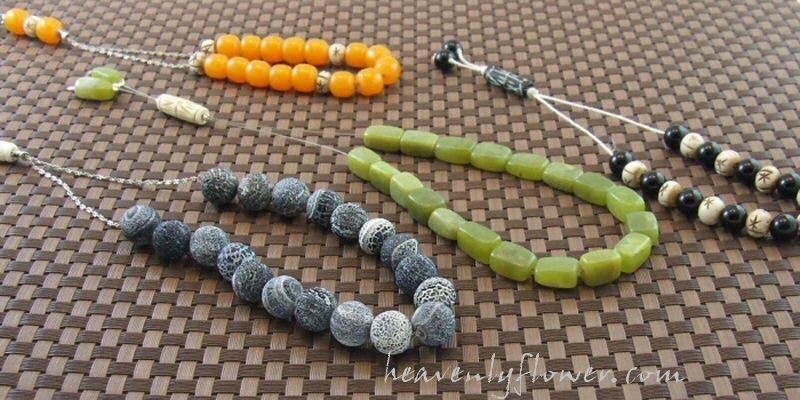
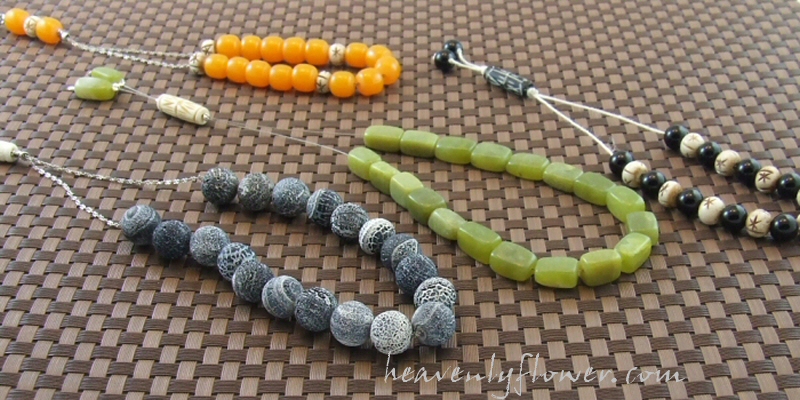
I had a request for a komboloi (worry beads). I have never made worry beads before, so I jumped at the challenge. After getting a few details, I started searching through my supplies to see what I have that would be suitable. Luckily I have a pretty decent stash of supplies now. I buy wholesale, so unless I need to order a few hundred dollars in supplies, I don’t take custom requests unless I have the beads on hand. With the exception of, the chance I may be attending a gem show or personally visiting a supplier where I can pick up a few things at wholesale price. In this instance, I was putting in an order for chain anyway so I added a couple of strands of carved bone beads for accents.
A traditional komboloi is constructed out of light organic materials such as amber, coral, wood or nut beads, bone, horn…although they can be made out of just about any kind of bead from glass, crystals or gemtones. The key is to have a good feel weight wise but still be light enough to make the pleasant clicking/tapping sound when the beads hit together.
So…since I have never constructed one before, this posed several challenges for me. I had to judge size, weight and length as well as decide which materials I felt would work the best.
In the instance that I get a request for something that I have never encountered before, I will come up with a few variational designs (at least three, usually), show them to the potential client, and have them judge which they like best or tweak a design to their liking (if possible). This way the client can see my creative take on the design. Extra pieces get listed in my online shops.
The design itself looked simple enough, but I ran into a few challenges. Without having the client feel the beads first hand, I wasn’t sure which size would be suitable. So I had to do a lot of digging through my supplies picking a few variable sizes that the client could try to help decide which felt the best to them.
Just when I thought I had the right variations, I ran into a major problem with stringing the beads. I had originally laid out some leather cord & chain – of which none of the beads fit through. Holes on stone beads tend to be on the small size to prevent slippage.
So before throwing in the towel I dug deep into my stringing supplies and also got out a very useful tool: a bead reamer! It’s used to help file & shape out the holes of beads to (hopefully) make the passage wider. I ended up with 4 different designs in the end.
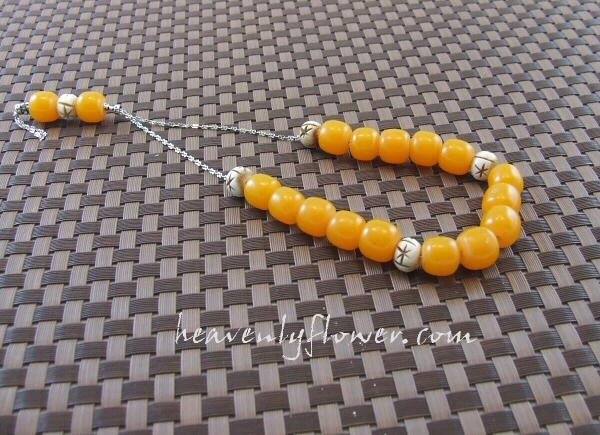
I decided to construct this horn & bone piece first since they had large holes & slipped easily through the chain. 11mm translucent butterscotch horn beads with 10mm carved bone beads on an antiques silver chain.
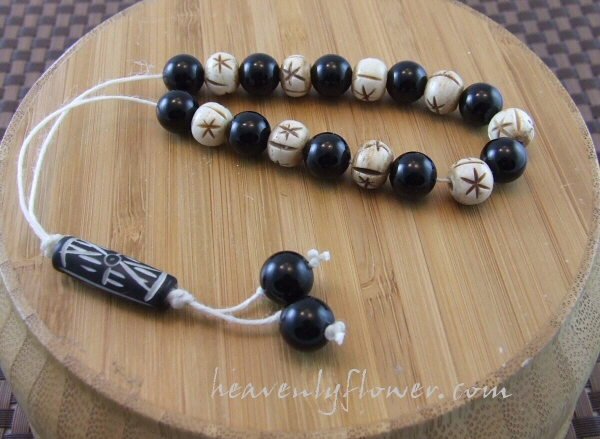
I dug out some waxed linen cord to make this one & was delighted that it easily slipped through the holes but has a durability that is needed for the constant clicking together of the beads. This one is 10mm onyx beads with 10mm carved bone beads. A 25x8mm carved horn bead is accented at the bottom.
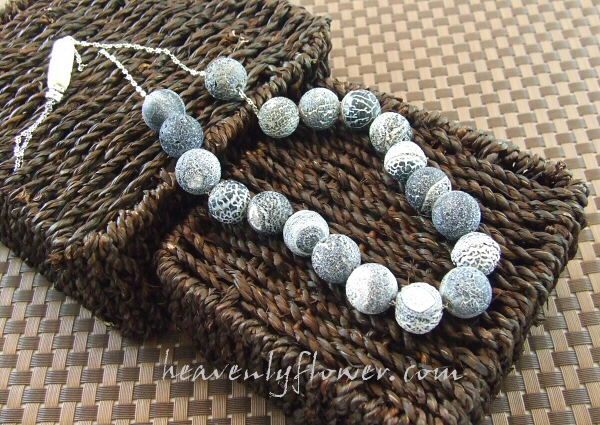
I was really excited to work with these beads as they are very unique. I bought them sometime ago with the intention of making a men’s piece out of them, and never got around to it. It’s 14mm black banded agate that has been treated with an acid to give it this cool denim crackle finish. These are the beads that I had to ream (file) the inside of the hole to get he to fit through the chain. But it worked! Accented with a 25x8mm carved bone bead.
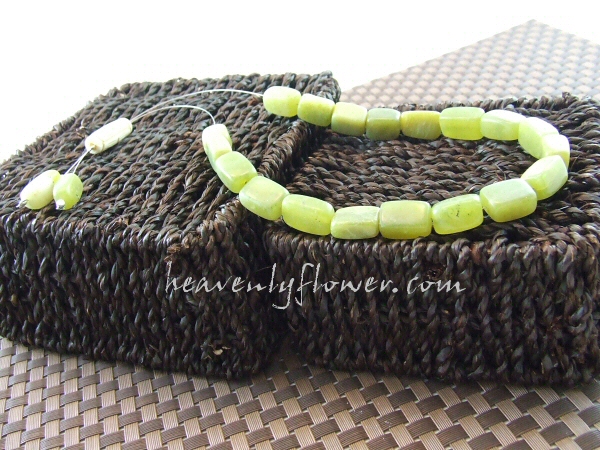
Finally, I chose these 16 – 18mm jade rectangles to make the final piece. It is constructed with a tough beading wire, and accented with a 25x8mm carved bone bead.
It was a fun experiment nonetheless. Always good to be pushed outside the box!


