Spinning Inspiration: Creating Yarn Outside My Comfort Zone

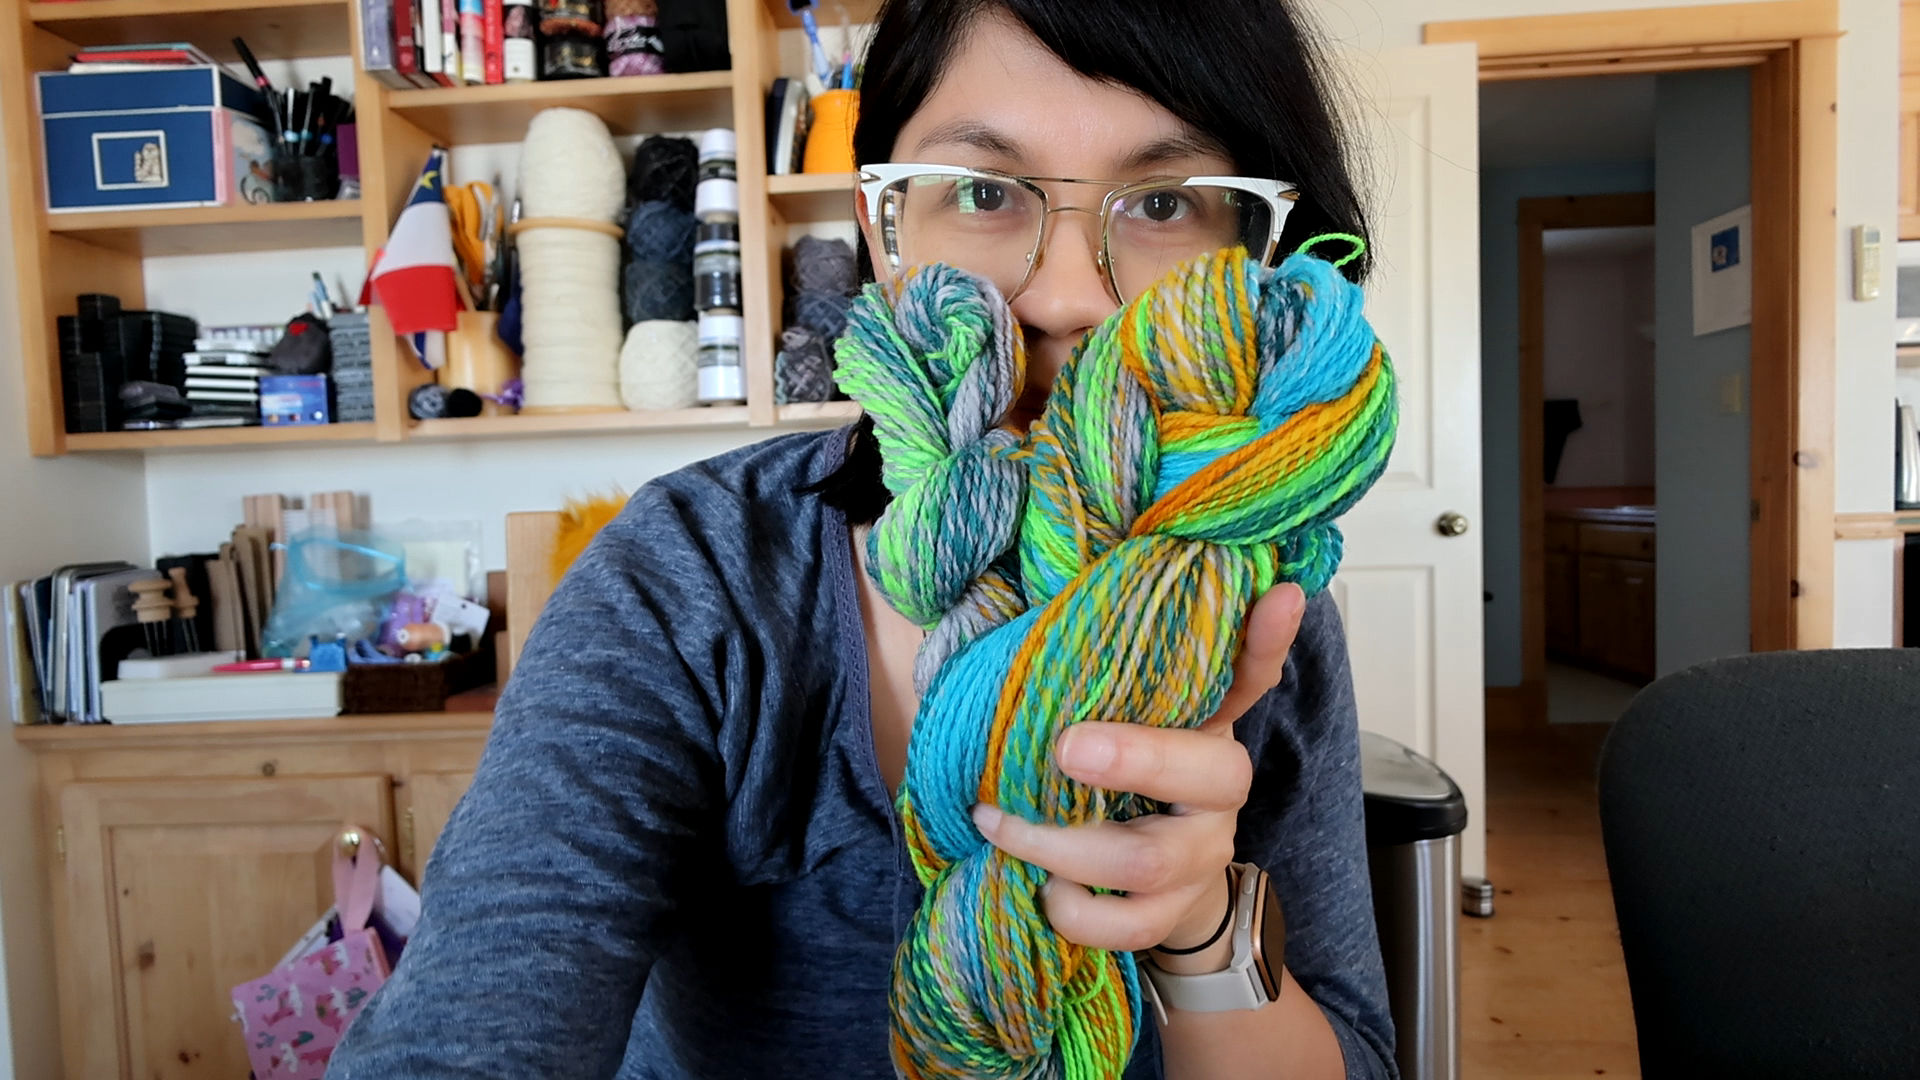
A typical 3-ply Handspun Yarn, but not the colors I would typically dye

Close-up of three thick braids made from wool roving in deep colors, including shades of yellow, orange, and cream. They are arranged side by side on a wooden surface, creating a textured and colorful display. These rovings are for creating yarn.
Sorry for the blurry image taken from the video. These hand-dyed rovings will be used for creating yarn: a 3-ply handspun.

Once again, I began creating yarn and decided, hey, this may make good content for spinning inspiration—or, more specifically, color inspiration. I’m unsure if I captured enough of the process for this to be useful to others, but we’ll put it out there anyway. I know I’m always looking online for new color inspiration for dyeing my fiber for spinning, so why not?

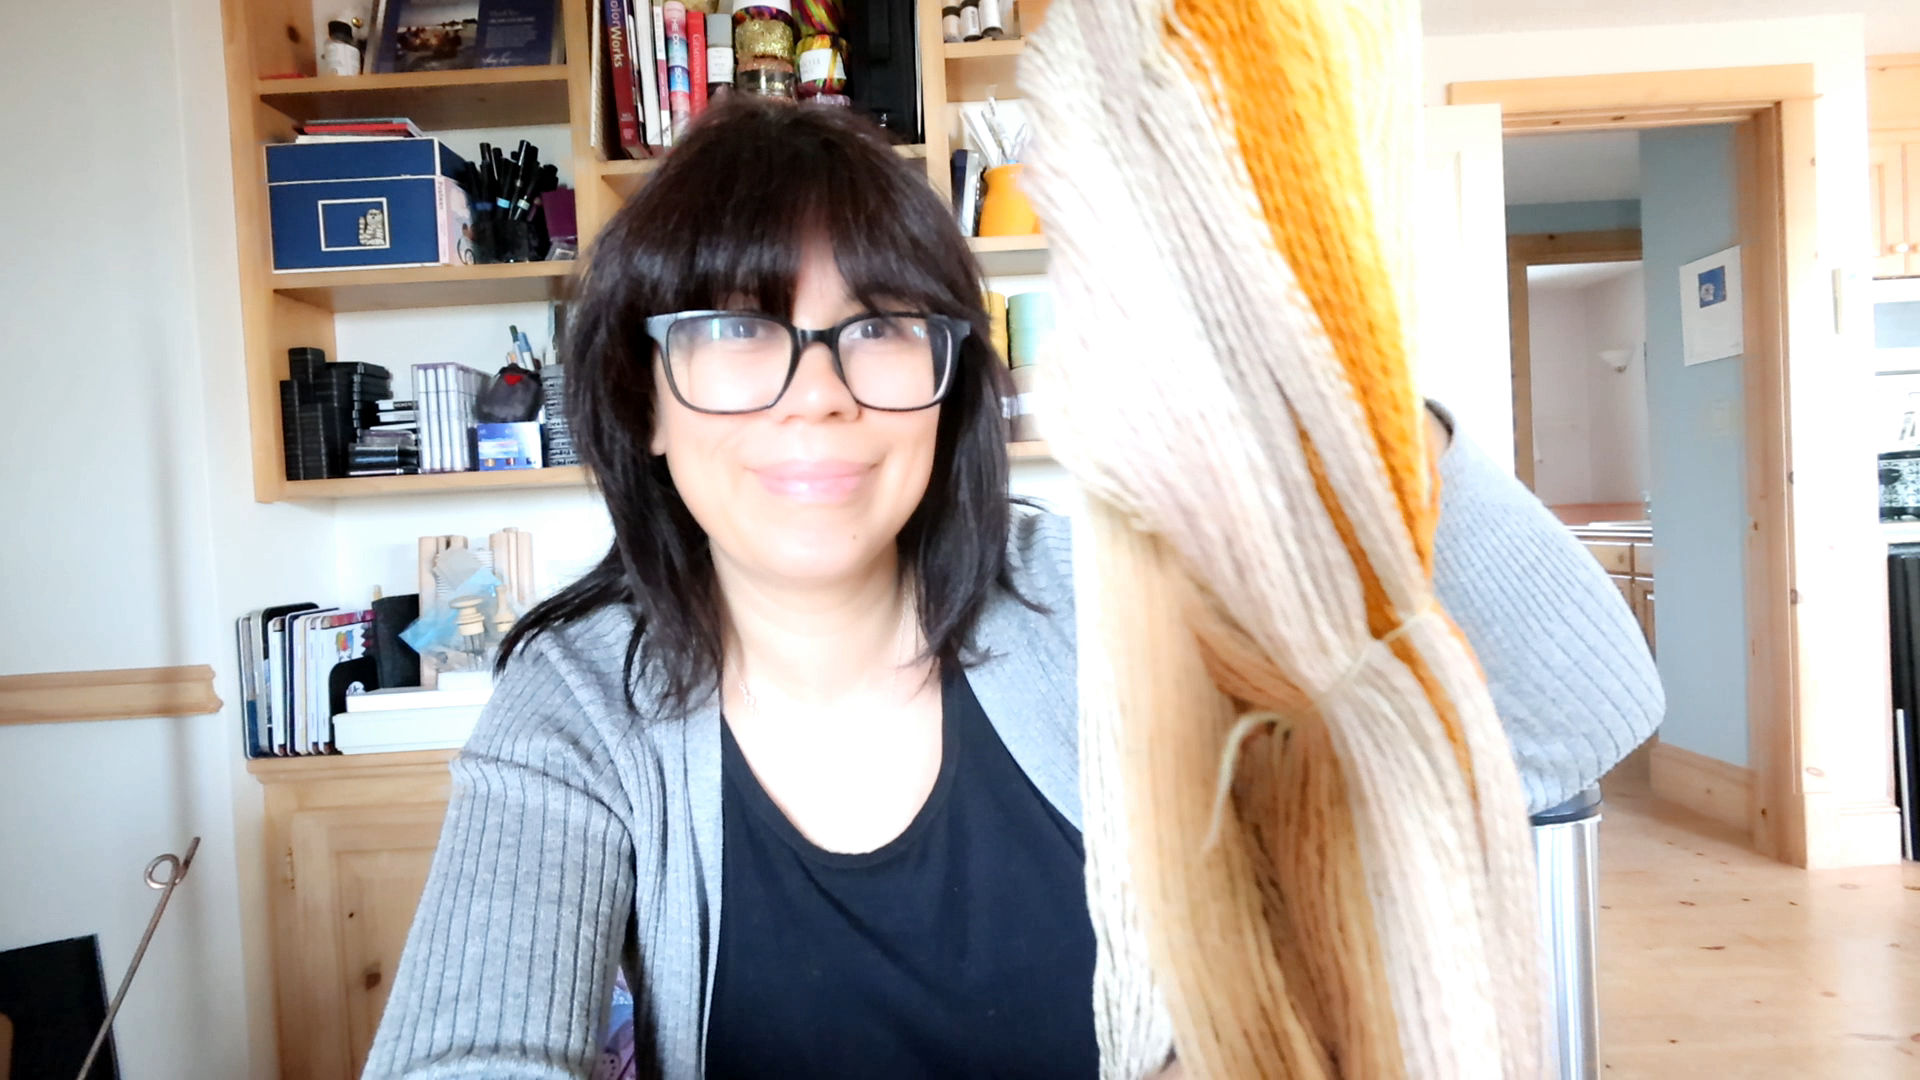
This is your typical 3-ply yarn that I have spun many times, but I hand-dyed some non-typical colors using Merino roving. Well, non-typical for me, anyway! I wanted to go outside my comfort zone of vibrant, deep-saturated colors and use more neutral tones and less saturation.

A couple of years ago, I got into a dyeing tangent, dyeing pairs of rovings the same color. I think I was in the mindset that I wanted to have a decent amount of potential yarn to spin, and if I didn’t use it all, I would sell the braids. I invested in large quantities of roving (commercial top) years ago, mostly targhee and merino, and with the way the price of everything is going today, I am glad I did.

So, this roving challenged me to try out colors that were totally out of my norm. Compared to the usual vibrant roving I prefer to dye and work with, I would call this boring. I have spun more calm, muted colors before, but I can’t say I’ve ever set out to dye a roving with such a neutral palette.

Even then, you could argue that the Aztec Gold is certainly not muted, even with my best intentions dye-wise. Ultimately, I was delighted with the result, and I’ll have to make a note to dye more calm, neutral colors in the future.

A person holds up three large spools of yarn in shades of brown, each with a different colored base: white, blue, and purple. The background shows a cozy living room with a couch and windows.
The 3 singles are ready to be plied for this spinning inspiration video. This yarn’s solid yet soothing tans and neutrals are so satisfying.

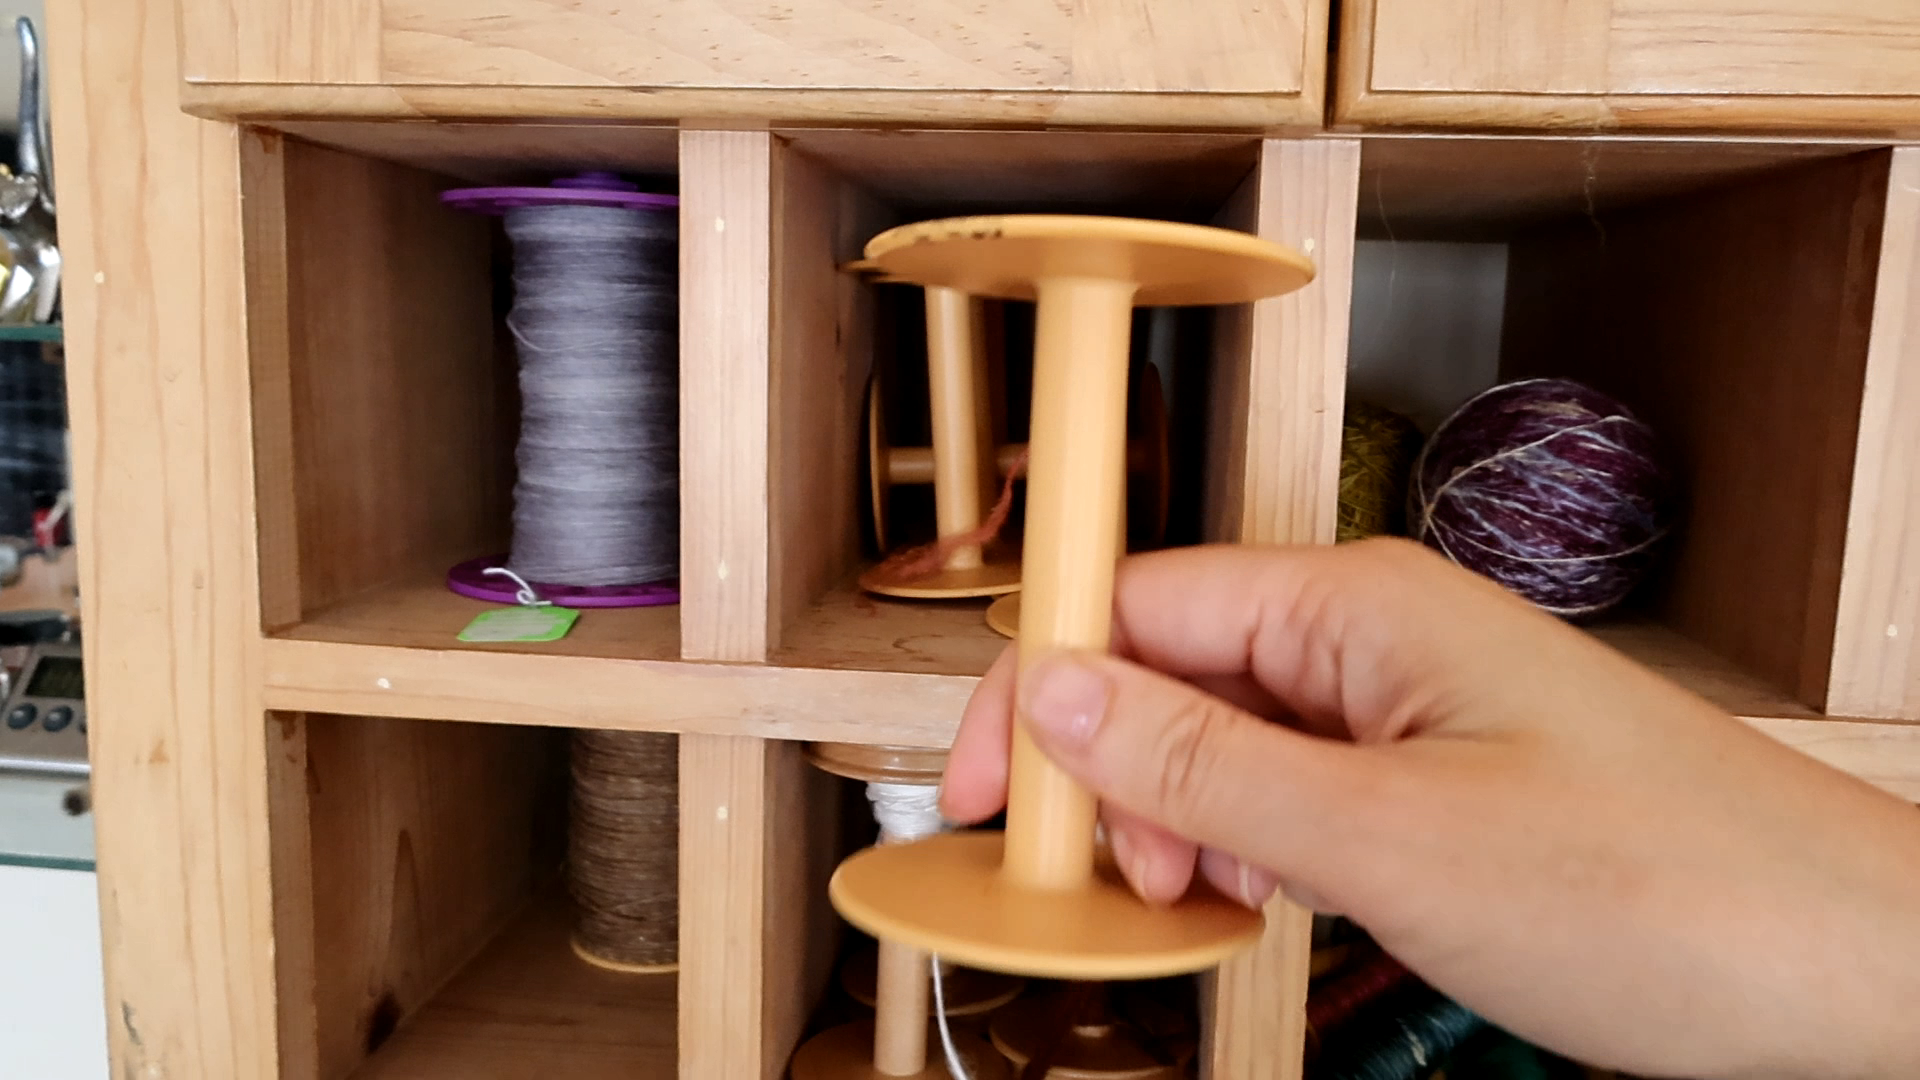
Splitting 2 Rovings into 3

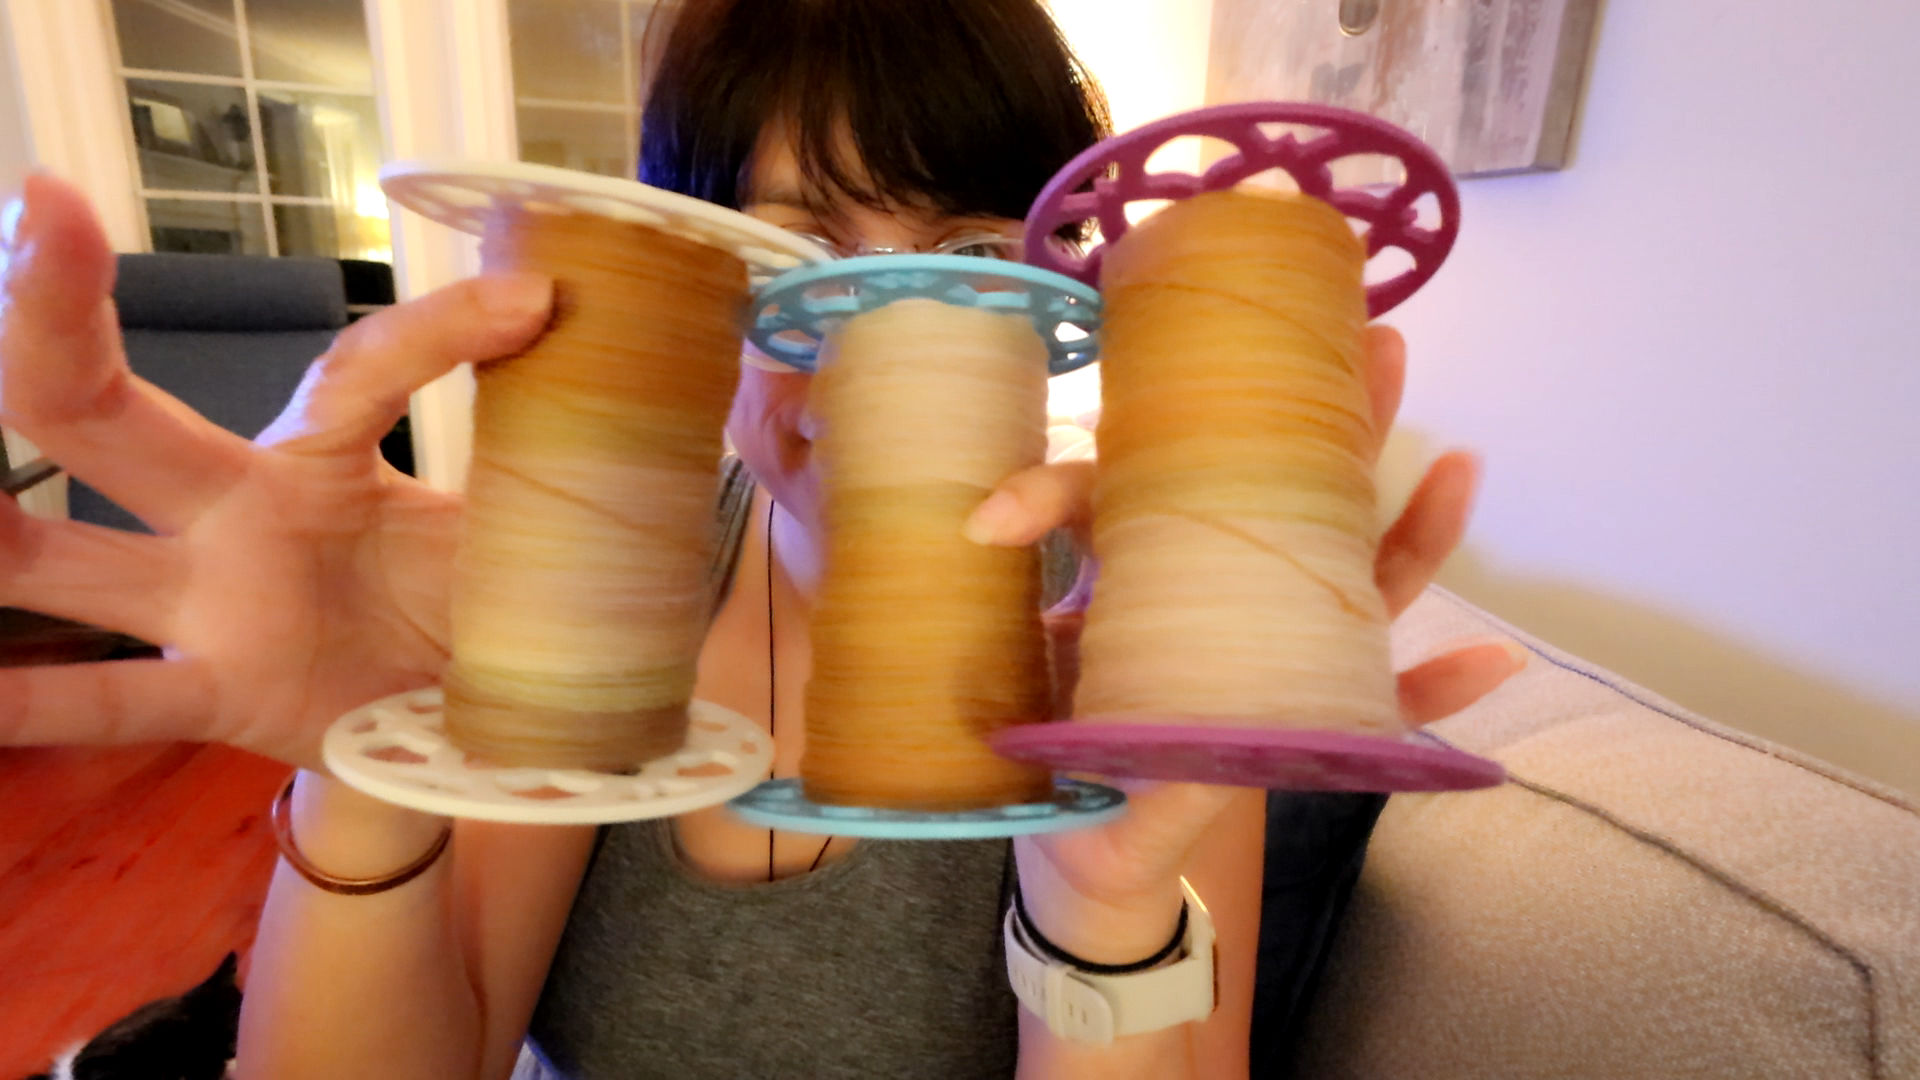
Color is one of many factors when creating yarn. How you will spin that colored fiber is also a big one. I wanted to make a 3-ply yarn since I had two 4-oz braids to work with. I’m so bored with 2-ply handspun and have so much of it spun to go through. I’ve been opting to spin thinner with my e-spinner, making it well-suited to make a 3-ply that will not end up bulky (too many of those, too!). Don’t get me wrong, I still spin 2-ply when I deem fit, but if I can add more 3-ply to my stash, that’s what I want to do.

To make the third singles match the other two, I took a bit of roving one and a bit of roving two by carefully splitting both down the center but off-center so that the third “roving” would be about the same weight as the two remaining. I do this by feel, and sometimes I win the guesstimate lottery, and sometimes I lose. This time, I was off only by a fraction of an ounce, so much like playing yarn chicken and winning, I was pretty happy with that.

Even though I now have two pieces of roving making up my third, I just hold them together and spin like color with like color. It works pretty well if you remember to consistently spin across the two as you hold them. If you start spinning in one area downwards and not across, you can run into the next color and not get a solid block of color. That’s great if you want that effect, but my goal was to spin a self-striping yarn with blocks of color.

A person with glasses and long dark hair smiles while holding a skein of yarn with shades of yellow and beige. They are seated in a room with wooden shelves filled with books and various items. They a re excited about creatingyarn, and are holding up the finished skein from the video.
Creating yarn has become one of my passions. I love choosing the colors and then deciding how to spin it.

How I Dyed This Roving

I dyed this roving in a crockpot, section by section. I weighed out 4oz of Merino top roving, twice. Then, I loosely tied the fiber together, keeping it unbraided. I like to tie the roving together so that it enters the dye in the same place at the same time and will uptake the dye at the same rate. It’s the best chance to get a close to identical color match.

Most of the colors used in this dye combination were Country Classics. Country Classics is an all-in-one dye that requires no mordant. I add the amount of dye to the hot water in the crockpot, dip the desired fiber length in, and let it sit until all the dye is absorbed. If the dye is sluggish to uptake, I add additional boiling water.

For the other acid dye used, Jacquard, I added citric acid to the hot water just before the dye. You can see this process in my post: How To Dye Roving in a Crockpot Step by Step.

Let each color exhaust entirely before adding the next color. I reuse my water as long as it is clear. If some dye remains, you will want to change to fresh hot water. You can add a new color to any non-exhausted dye if you want that effect.

I also measure my powdered dye in small increments and gradually increase it until I get the desired shade. You can always add more dye, but not take away. I like to do this for my notes as well, because if I decide that I want to replicate the dye combo and tweak some of the color I can easily take away or increase the amount of dye to either lighten or darken the shade. This is why you will see 1/3 tsp x3 instead of 1 tsp.

Give your fiber a gentle squeeze to remove some of the water before placing the dyed section into a plastic bin, but don’t try to squeeze all the water out to avoid felting.

Add hot water as needed in between colors, as some of the water will absorb into the fiber as well as evaporates.
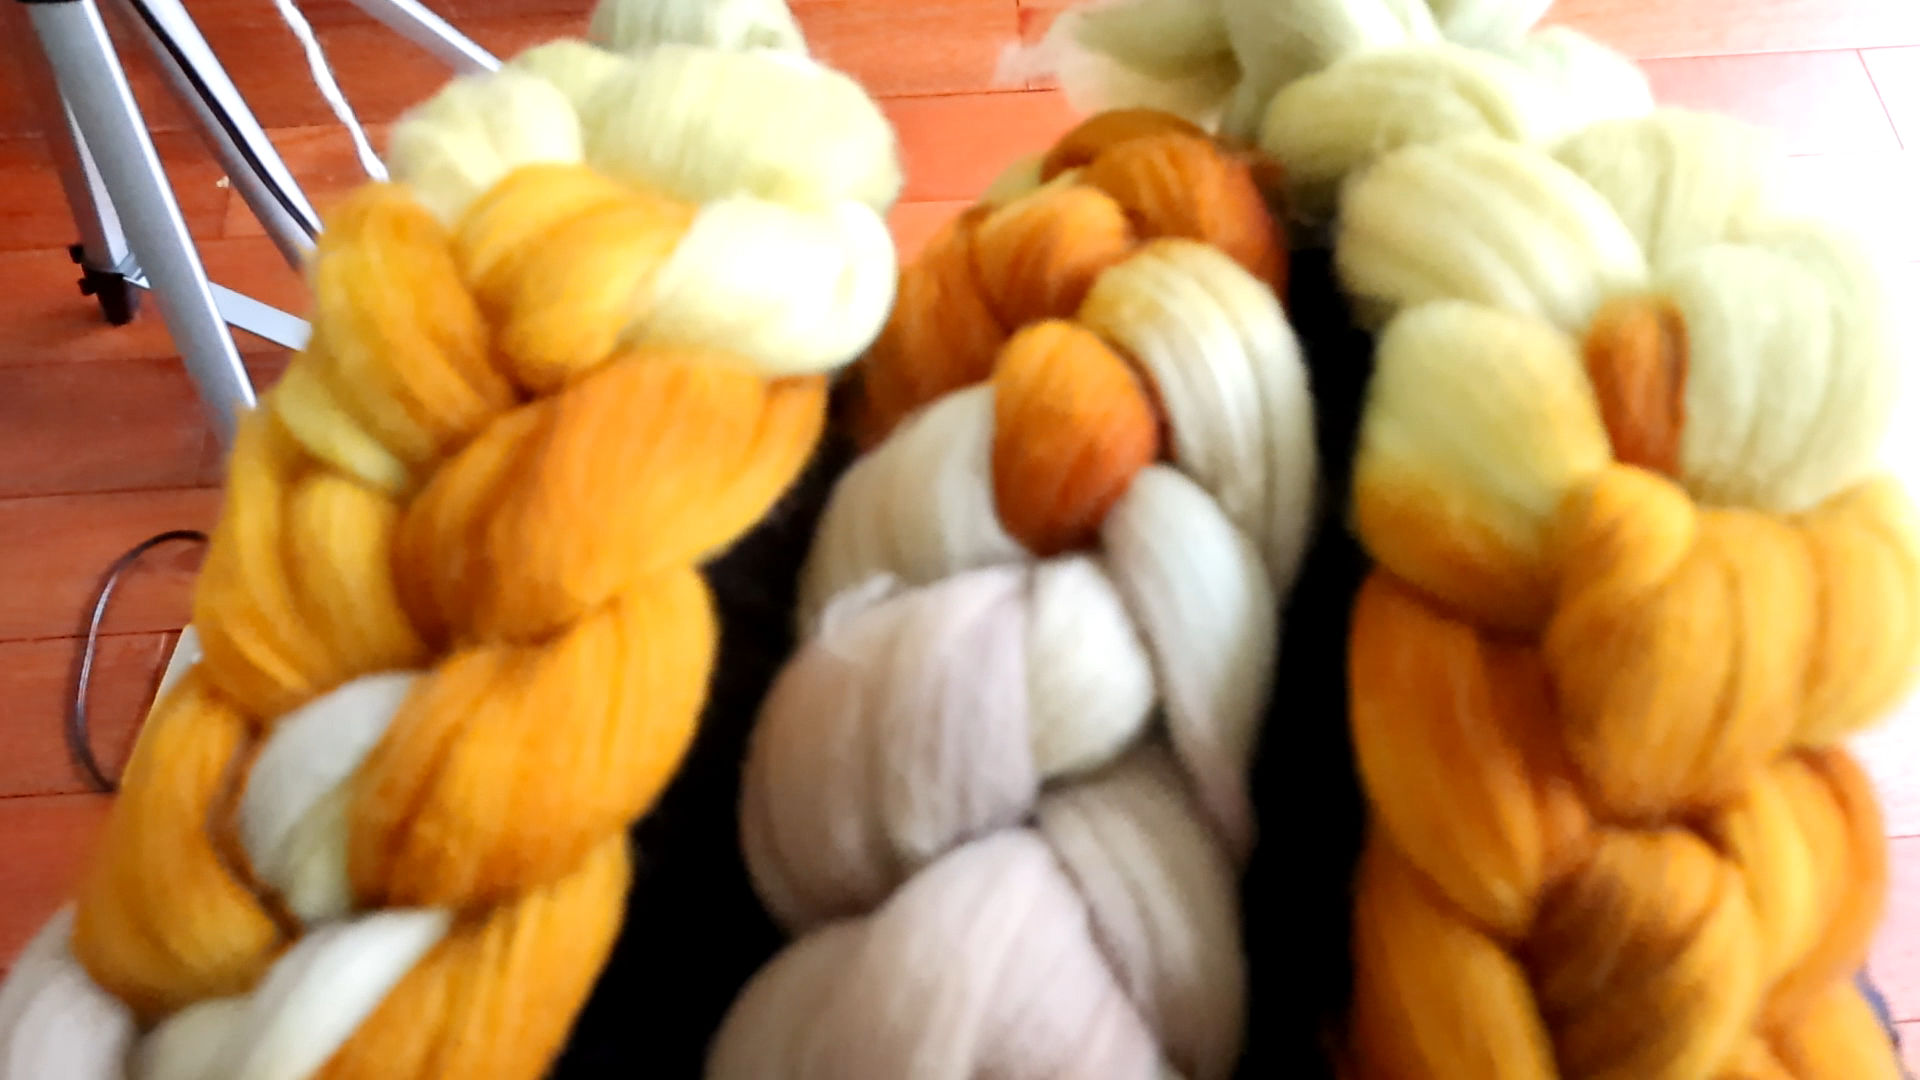
The Dye Formula

Section 1: Country Classics Tan, 1/3 tsp x3. (1 tsp total). Mix to dissolve, add fiber to crockpot and stop when you see the uptake color lightening in the fiber.

Section 2: Country Classics Bermuda Sand 1/3 tsp x2, slightly overlapping where the color lightened for section 1.

Section 3: Country Classics Clay 1/3 tsp x2, slightly overlapping where the color lightened for section 2.

Section 4: Country Classics Golden Pear 1/3tsp x2 slightly overlapping where the color lightened for section 3.

Section 5: Country Classics Straw 1/3tsp x2, slightly overlapping where the color lightened for section 4.

Section 6: Add citric acid to the hot water. I don’t measure, but approx. 1/2 tbsp. Then add: Jacquard Aztec Gold 1/3 tsp., slightly overlapping where the color lightened for section 5.

After the Completed Dye

Give the roving a quick soak in the sink with hot tap water and Synthrapol or an equivalent soap like TNA Soap. You can also use blue Dawn dish soap, but use it sparingly, or you’ll be rinsing a lot of suds, and too much manipulation can lead to felting.

You can skip the final soak, as you will be setting your yarn once completed anyway, and that final soak at the completed yarn stage will remove any excess dye. I don’t recommend this for bright or super saturated colors.

Hang your roving to drip dry, preferably outside, but I have done this indoors with a towel and basin underneath to catch the drips. I don’t like to squeeze the water out to prevent felting. You could also run the fiber through a salad spinner to remove excess water. I’m also not a fan of hanging fiber or yarn to dry in the shower or tub because of poor airflow, but if your bathroom has good air circulation, this would be fine.

For me, roving typically dries entirely overnight or at most within 24 hours.

Watch the Video to see Me Creating Yarn

I hope this bit of spinning inspiration is helpful to you on your fiber arts journey. If I can challenge myself to work outside my comfort zone, so can you! This experiment has made me realize that I can create new color favorites if I only push myself to design yarn from colorways I wouldn’t usually choose.

By the way, I’ve caught up to my backlog of content for videos and blog posts and need to film more, mainly showcasing spinning tools, dyeing-spinning techniques, and creating yarn. Right now, I only have time to do one video a month. I have so many ideas but so little time. I hope you enjoy my YouTube channel regardless, and thank you for subscribing if you do! 🙂

I hope you enjoy creating yarn as much as I do.

Until Next time,

Leilani signature

I am a jewelry artist, spinner, and indie dyer in Nova Scotia, Canada, self-taught in all areas. I hope these posts help encourage and inspire you along your creative journey, no matter if you approach your craft my way or not. 🙂 Check out my About Me page for more info and the Fiber Arts/Spinning/Dyeing Category for more content like this.

Join Me as I Spin Vibrant 2-ply Targhee Wool Yarn

Spinning a Basic 2-ply Yarn

Join me as I spin hand-dyed Targhee top roving into a 2-ply yarn using my electronic spinning “wheel,” AKA e-spinner. I spin the singles first and then ply, using joins where I decide to detach and reattach the singles when the color doesn’t match up just right. The yarn is finished via wet finishing and thwacking.

This video was made with the beginner or novice spinner in mind, or those curious to see how another spinner creates handspun yarn. I am a self-taught indie dyer and spinner with over 12 years of experience. I am by no means an “expert,” but someone passionate about the fiber arts who hopes to inspire others to take up the craft or expand their skill set without intimidation.

You may want to check out my post on How to Dye Yarn in a Crockpot. I hope to do a video in the near future of dyeing roving this way.

I filmed this video in the winter of 2023 – and I’m just getting around to finishing it, in the Fall of 2024. Better late than never, right?

The truth is when I filmed myself making this yarn, I wasn’t sure I was going to do anything with it. Last winter is when I was contemplating whether or not I wanted to make videos for the blog, so much of this was just me playing around with cameras and angles to see if I could get useable footage. All I can do is improve from here, right?? 🙂

Spinning Targhee Wool Roving from Start to Finish

I’ve subtitled the video, so feel free to watch with the sound off. 🙂

I’m still pressed for time so I don’t have the time to write a detailed blog post on this subject, but I am always happy to answer questions or support others in their spinning journey, as best as I can from a distance, anyway! So feel free to ask any questions to this seasoned but by no means perfect, or expert self-taught spinner. 🙂

Video Description

In this short video, I cover:

  • Different ways to split roving for spinning
  • Spinning two sets of singles and weighing them to see if I have an even amount on each bobbin
  • attaching the singles to the leader with a square knot
  • plying two singles together, with my advice for those getting started
  • how to do joins for reattaching yarn in the middle of plying
  • wrapping yarn onto a niddy noddy
  • how I tag/inventory my handspun yarn
  • wet setting my super fast way, great for small skeins
  • thwacking yarn
  • showing the final 2-ply yarn

This is not detailed instruction on how to do the above, but a quick example that will (hopefully) inspire you to continue spinning or to appreciate the art of spinning. 🙂

A person with glasses holds colorful skeins of yarn in front of their face. They are in a room with shelves filled with books and more yarn in the background. The yarn is vibrant with green, blue, yellow, and orange hues. Join me as I spin this yarn in the above video.

Thanks for joining me as I spin this hand-dyed targhee top. 🙂

Until next time…

Leilani signature

My slowly growing Youtube Channel (If you like my content, I’d love for you to subscribe! :))

Other Fiber Arts Posts

Plying Yarn: Mixing Alpaca and Merino Singles

I’ve been plying yarn with a spinning wheel for 12+ years, and have mixed and matched fiber types before. But I was curious: What happens when you mix 10+ year old alpaca singles with a (fairly) newly spun Merino singles? Will I actually achieve a balanced yarn or just a hot mess?

Wow—what a transformation! When I started spinning—and more specifically, plying yarn—I would have assumed there was no hope for this twisted mess. Plying yarn with even these two different singles shows that you can successfully create a beautiful and usable yarn.

A Small Plying Experiment

I consider plying yarn not just a skill but an art form, so I’ve played around with different forms of plying many times in the past. Plying a balanced yarn, or chain plying yarn is up there among the techniques that spinners want to master. Have you ever wondered what happens if you mix two different fibers in the same yarn? I don’t mean blending before spinning, I mean one singles is one kind of fiber, plied to another singles of another type of fiber.

This past winter, I decided to spin this little skein of yarn to see what would happen. I have several storage bobbins with leftovers from past spinning projects. The leftover alpaca was a gorgeous natural black color that I obtained from the New Hampshire Sheep & Wool Festival circa 2013 (!!) and spun in 2013-2014. Yep, it’s a 10-year-old singles! Talk about resting!

As the color was a near-perfect match to some dyed Merino top that I had spun recently, I decided to ply them together to see the end result.

Unsurprisingly, it was a whirly, curly mess when I took it off the niddy noddy! But I had faith. It was nothing water, and a good thwack wouldn’t fix. The outcome was gorgeous, and I wish I had more.

What is a Storage Bobbin?

a hand holding a plastic storage bobbin used before plying yarn
Storage bobbins, like the one shown, are used for winding off newly spun singles to even out the twist and for storage until ready to be plied into finished yarn. It is not advisable to store singles for extended periods, though it certainly isn’t the end of the world if you do

Storage bobbins are empty spools that store rewound singles after spinning. It helps even out the twist and gives them a place to rest before plying yarn. It is NOT advisable to leave your singles resting on bobbins for extended periods of time, especially not ten years! The longer your singles rest on the bobbin, the more relaxed the twist is, only to have that twist spring to life once wet. If you don’t consider this, you probably will not like the end result of your yarn.

It’s also important to wet set your yarn once spun. Imagine knitting with yarn made with well-rested singles and washing it for the first time. You’ll probably be dealing with quite a bit of shrinkage.

Believe it or not, I add more twist when plying well-rested (i.e., practically dead!) singles. Then, a wetting and thwack help redistribute that twist throughout the yarn, compensating for any unevenness.

Disclaimer: I am a self-taught spinner, I am not a technical spinner nor has anyone taught me the “proper” techniques. I prefer to learn by trial and error, and this is the method that works for me. Someone else will most likely tell you differently. I spin for enjoyment and find my own way in my craft. Now, with that out of the way…

Do I need Storage Bobbins?

Not necessarily. If you are only going to do small batch spinning, the three bobbins that came with your wheel may suffice. I usually have more than one project on the go, so I need storage bobbins. Mine are LeClerc brand, and they are larger bobbins used for weaving. I got them at a now-closed fiber store here in Canada and purchased a manual bobbin winder from LeClerc directly. I also found just the right size chuck for my drill to do it battery-powered.

I used to be adamant about re-winding my singles before plying. But between the time, the extra wear and tear on my shoulder, and the fact that my singles are always well rested before I get around to plying anyway, I only wind my singles onto storage bobbins if I am doing a large project or I have leftovers. If you are doing a lot of spinning, you may want to consider investing in storage bobbins. If you are using them solely for evening out and resting your singles, I find that as your skill grows and you become a better spinner, this step is not necessary. Just let it rest for 24 hours or so, and get plying. 🙂

How will I know my Yarn Has Enough Twist?

After you’ve been plying yarn for a while, you get more of a feel for how much twist, when, and where to add more. This is not a skill that anyone can teach you. Sure, someone can give you instruction, but from my experience, plying yarn successfully is something that you must feel.

My motto is: When in doubt, add more twist, then wet and thwack. 🙂 I know this will sound intimidating if you are starting to spin and have areas severely overtwisted. You know what? Give your singles a quick run through your wheel in the opposite direction before plying, minding those heavily twisted sections. I did this many times when I started spinning.

a person holding a bundle of black yarn
Plying Yarn Success! One singles Merino, one singles Alpaca = deliciously soft 2-ply yarn, even after one singles resting for 10 years!

I am so pleased with this yarn; I wish I had more of it! I love to experiment because it’s in those times that I end up with these little gems and gain knowledge. Spinning alpaca and merino separately and ply together: check! Success! I wish you could touch it through the internet. It’s a really nice, soft, bouncy yarn with a delicious twist!

If you want to read more of my posts about fiber arts topics, see this blog’s fiber arts/dyeing/spinning category. You can also access all the videos as I make them on my new YouTube channel, which will have links to the posts they were made for.

Thanks so much for checking out my little plying experiment. 🙂

Until Next time…

Leilani signature