One Method: Start to Finish with an Overspun Example
This month, I am continuing with my Fiber Arts Video series, this time about wet-setting handspun yarn. Last month, I gave an example of steam setting handspun yarn. However, wet setting is how I set most of my handspun. This example is for wool yarn.
Here are my steps for Setting Wool Handspun Yarn:
- Prep yarn for its soak by tying off the skein in additional places to avoid tangling. I use ribbon or highway tape. If you choose to use yarn, be sure to use something that won’t felt to the skein, such as cotton
- If you are dyeing more than one skein you can tie them together using the method above. Just make sure your sink is big enough to accommodate the amount of yarn for soaking
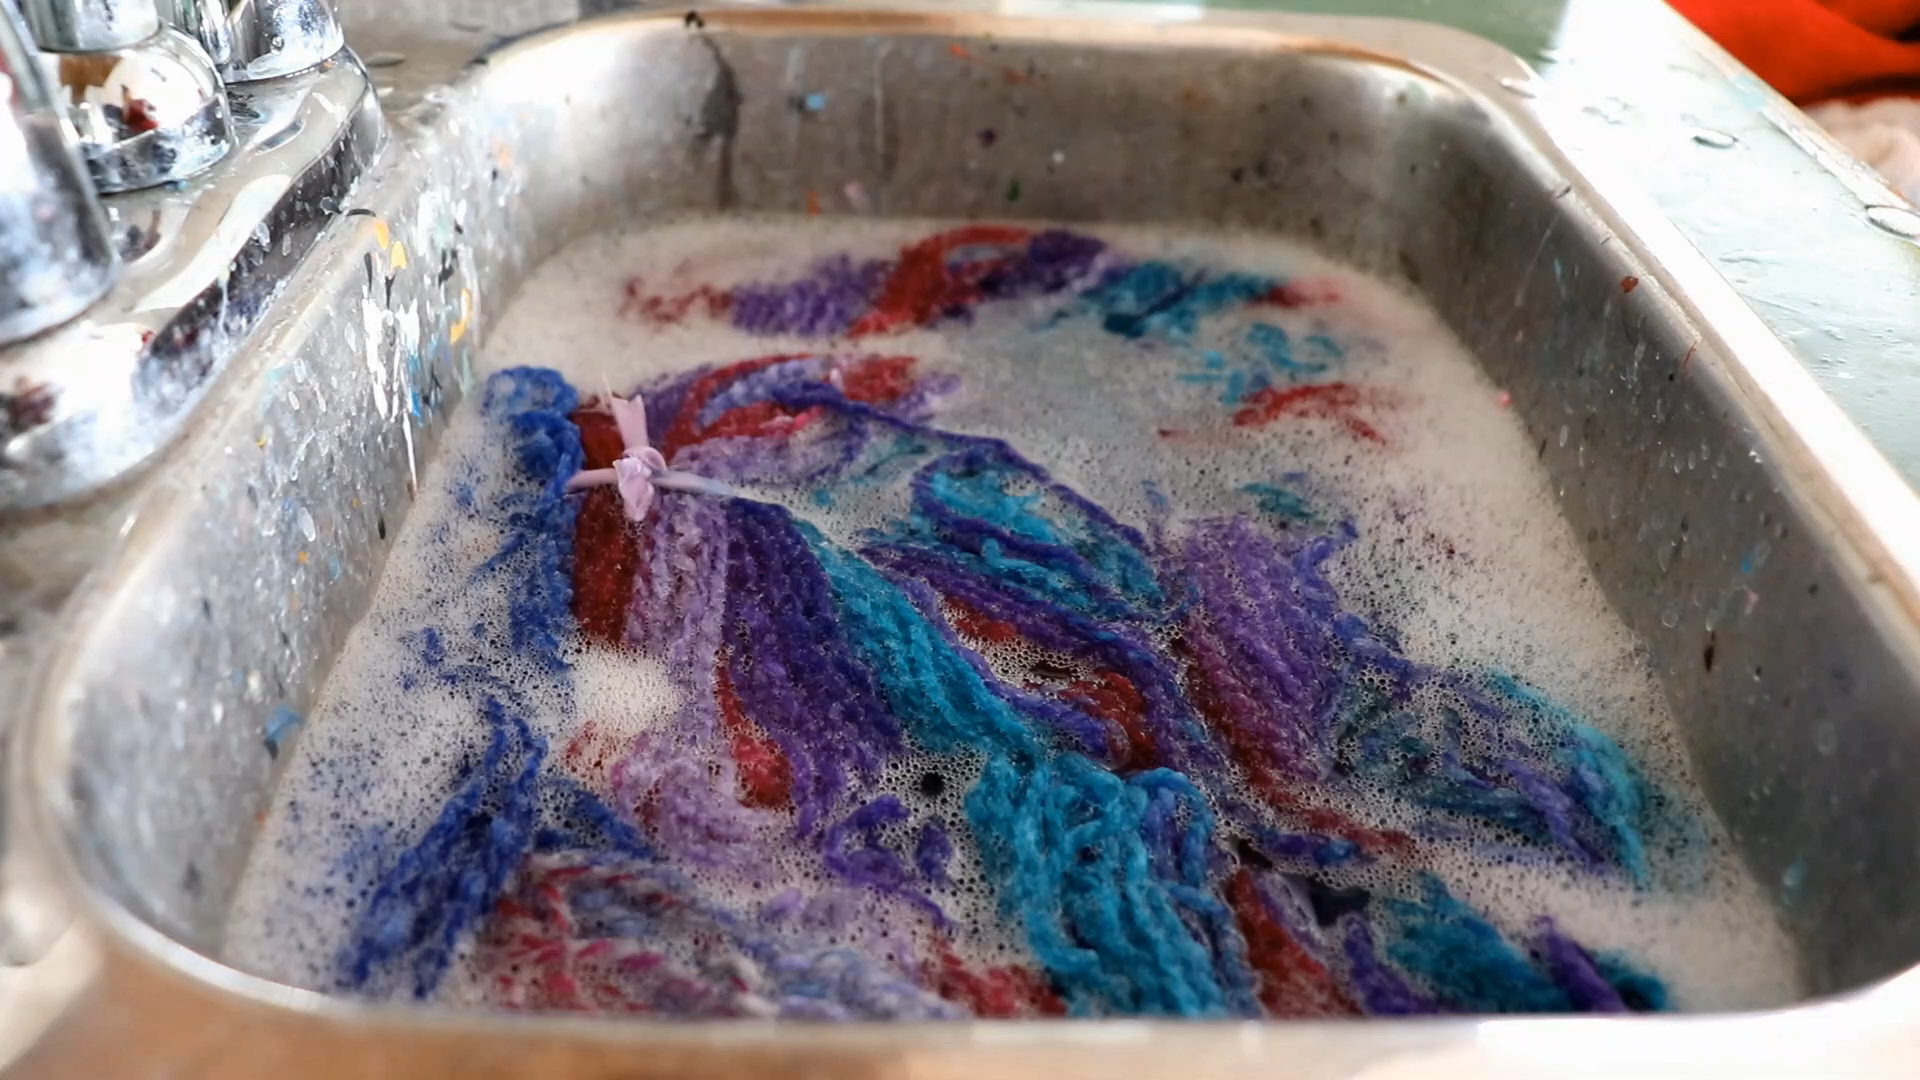
- fill your sink (or tub, or basin) with hot tap water and add soap, such as Synthropol or blue Dawn dish detergent
- Gently press the yarn into the hot water, and let soak for 20 or so minutes
- Check the water. If it is clear from dye runoff and dirt, drain the water and rinse with the same temperature water
- gently press and squeeze the water out of the skein(s) careful to not twist or tug
- Take it outside for a good thwacking (optional)
- Hang up to dry where there is good airflow
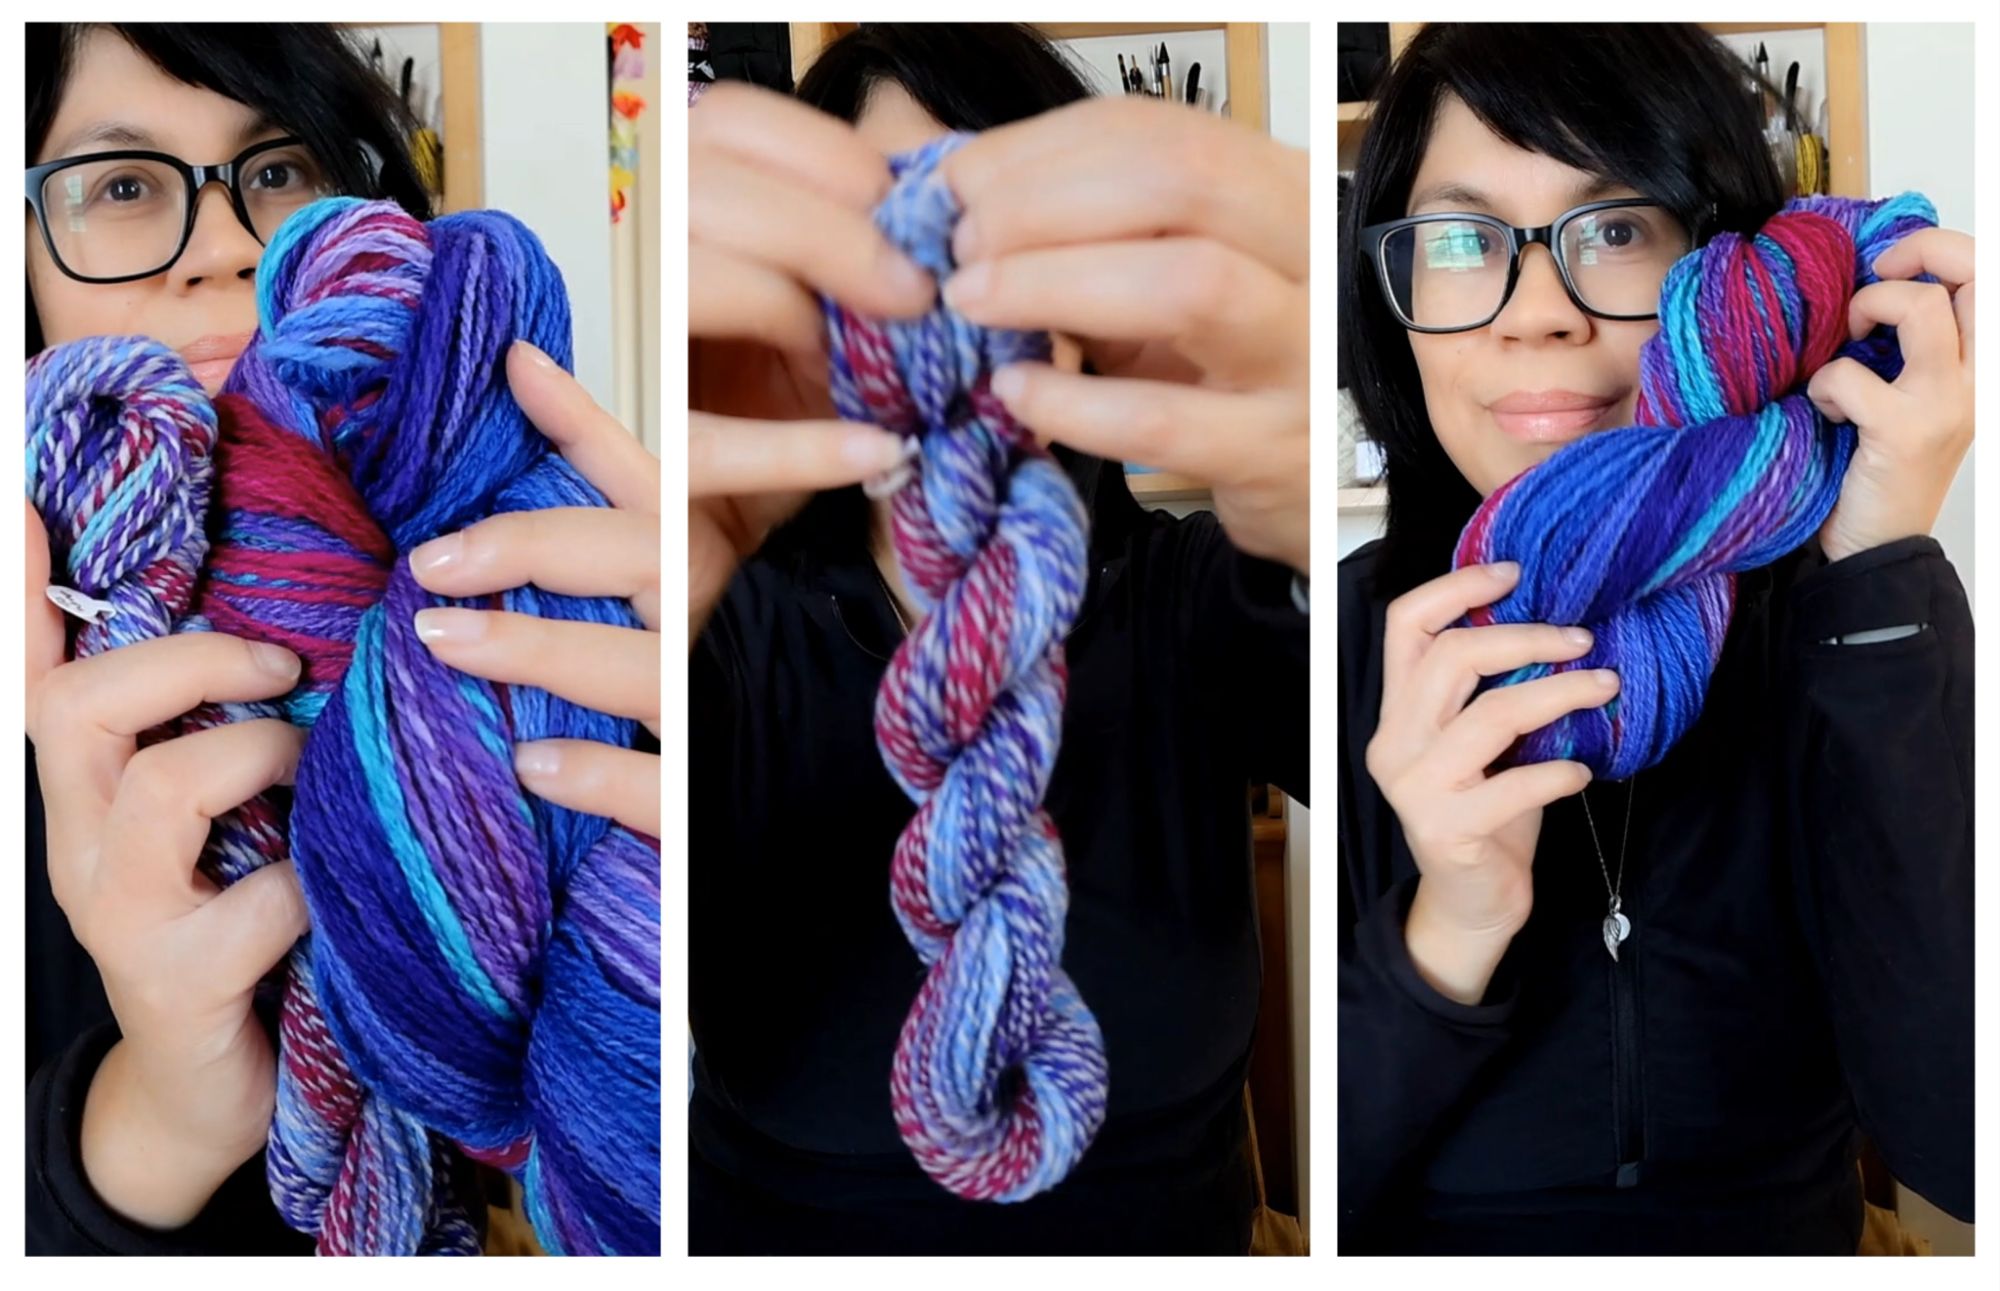
The Yarn
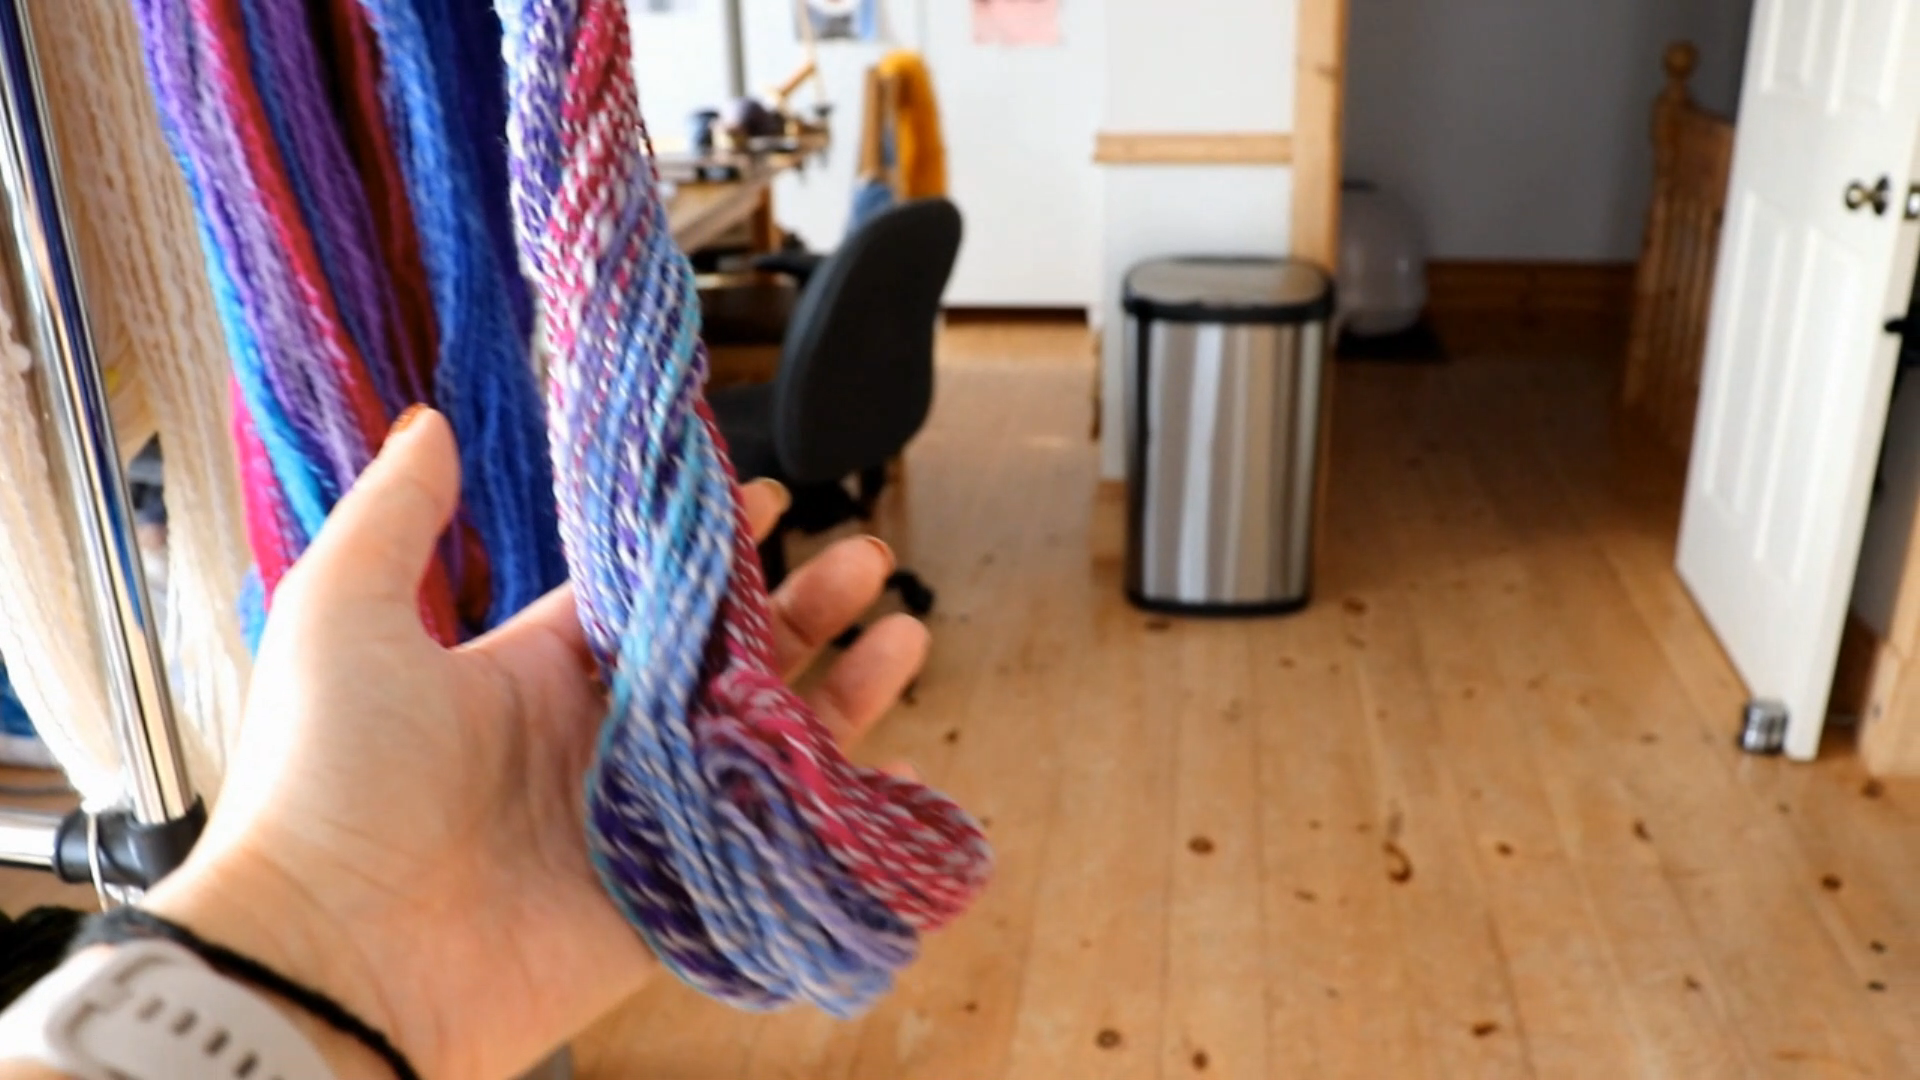
I spun a 2-ply merino roving top that I hand-dyed. There was a bit left over, so I decided to spin it with a grey singles I had spun quite awhile ago. I thought this would be a good example of an unbalanced yarn with extra twist, and how important wet setting is.
A Trial and Error Process
When I first started spinning, I would get dejected because the yarn would always have extra twist. So, I would ply looser, which doesn’t make for good yarn construction. Perplexed, I continued on, determined to get a properly balanced spun yarn. Two things I didn’t realize when I first started spinning:
- Letting yarn rest on the bobbin for an extended period of time relaxes the twist
- Wet-setting yarn will return that twist/energy into the singles
I’m self-taught, so no one told me this. Thus, I discovered all about twist and resting singles on my own! I’ve learned now to spin and ply much tighter than I thought necessary and to always set my yarn.
Soaking the Yarn
As I discussed in a previous blog post, you can steam-set yarn, and sometimes I do, but I always recommend wet-setting handspun for best results. It is an absolute must for unbalanced yarn/extra twist.
Here is the two skeins tied together and having a soak in soapy water for approximately 20 minutes.
Rinsing the Yarn
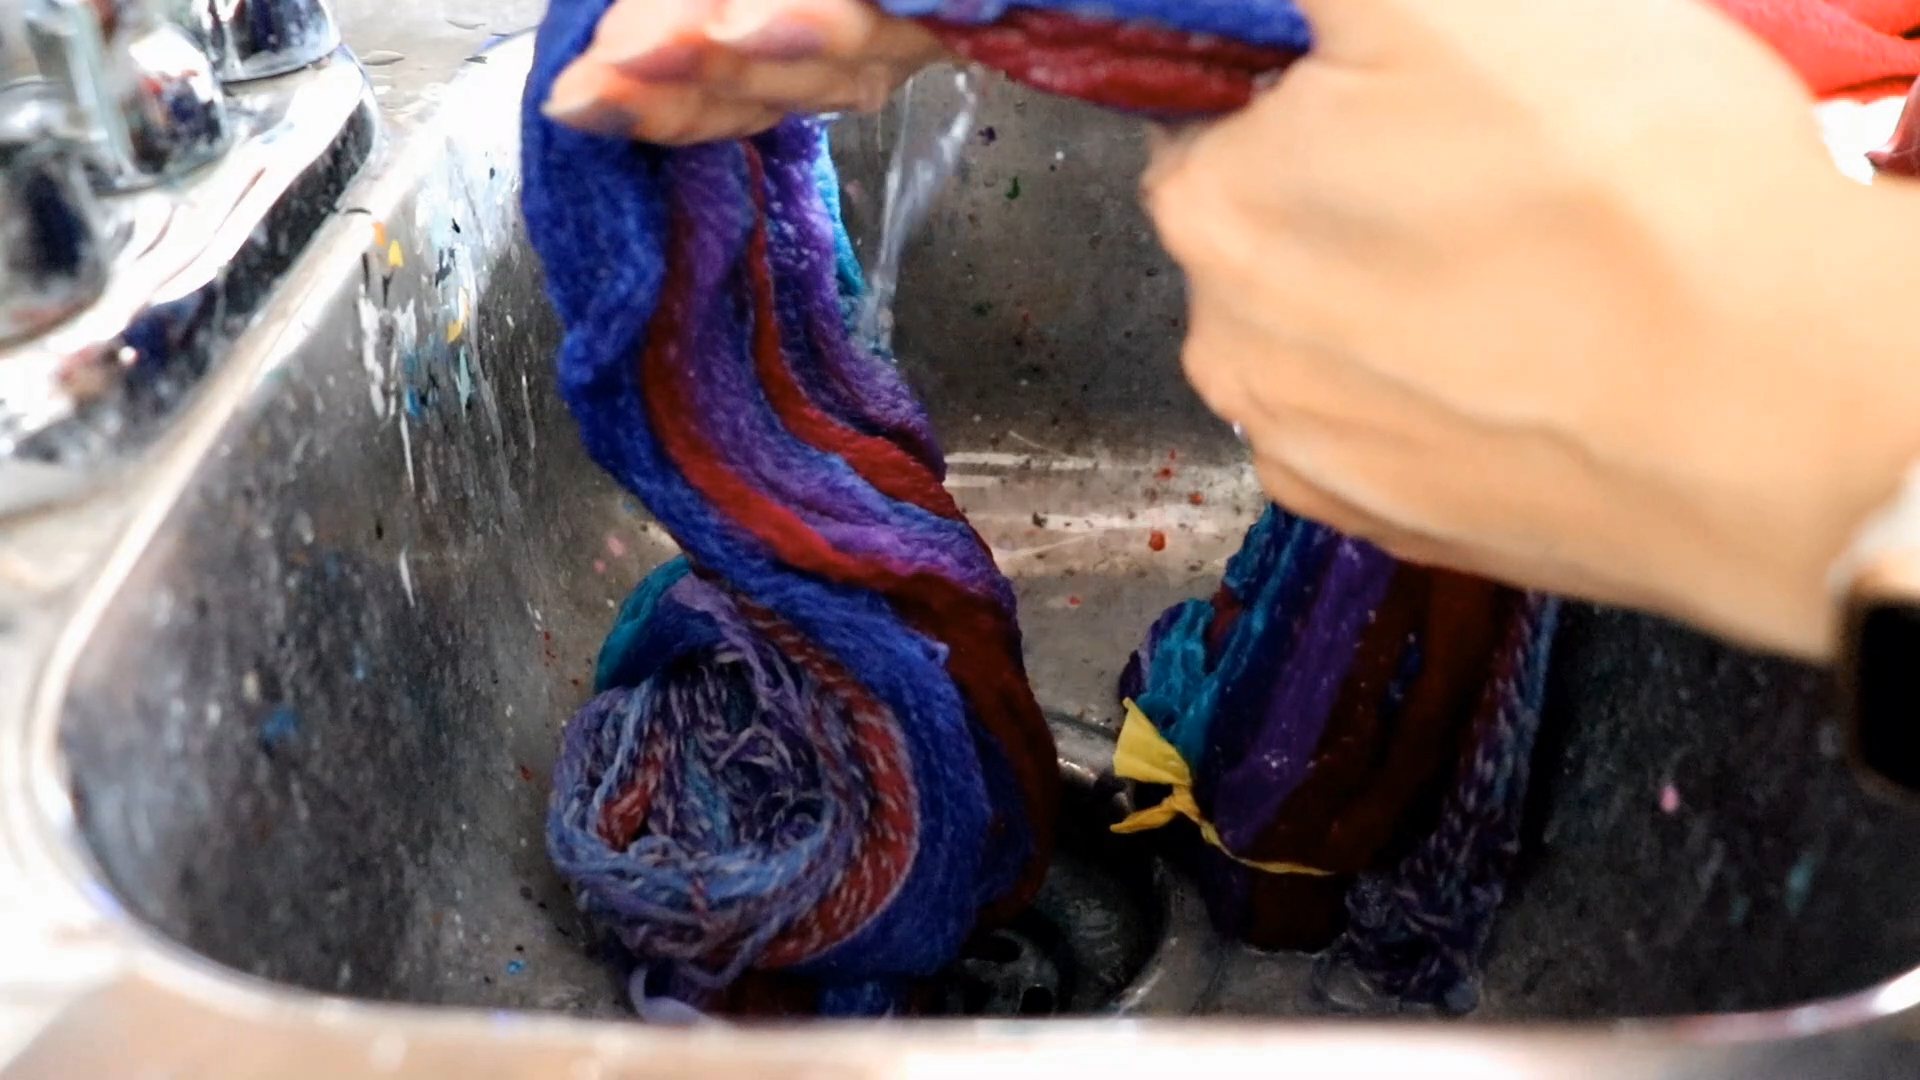
As there was no dye runoff in the water, I went ahead and rinsed the yarn carefully—no wringing or tugging/pulling. It’s not just about felting but about not overstretching the fibers. If you’ve ever hand-washed and dried a wool sweater, you get what I mean.
Thwacking
What is thwacking – and why do it?
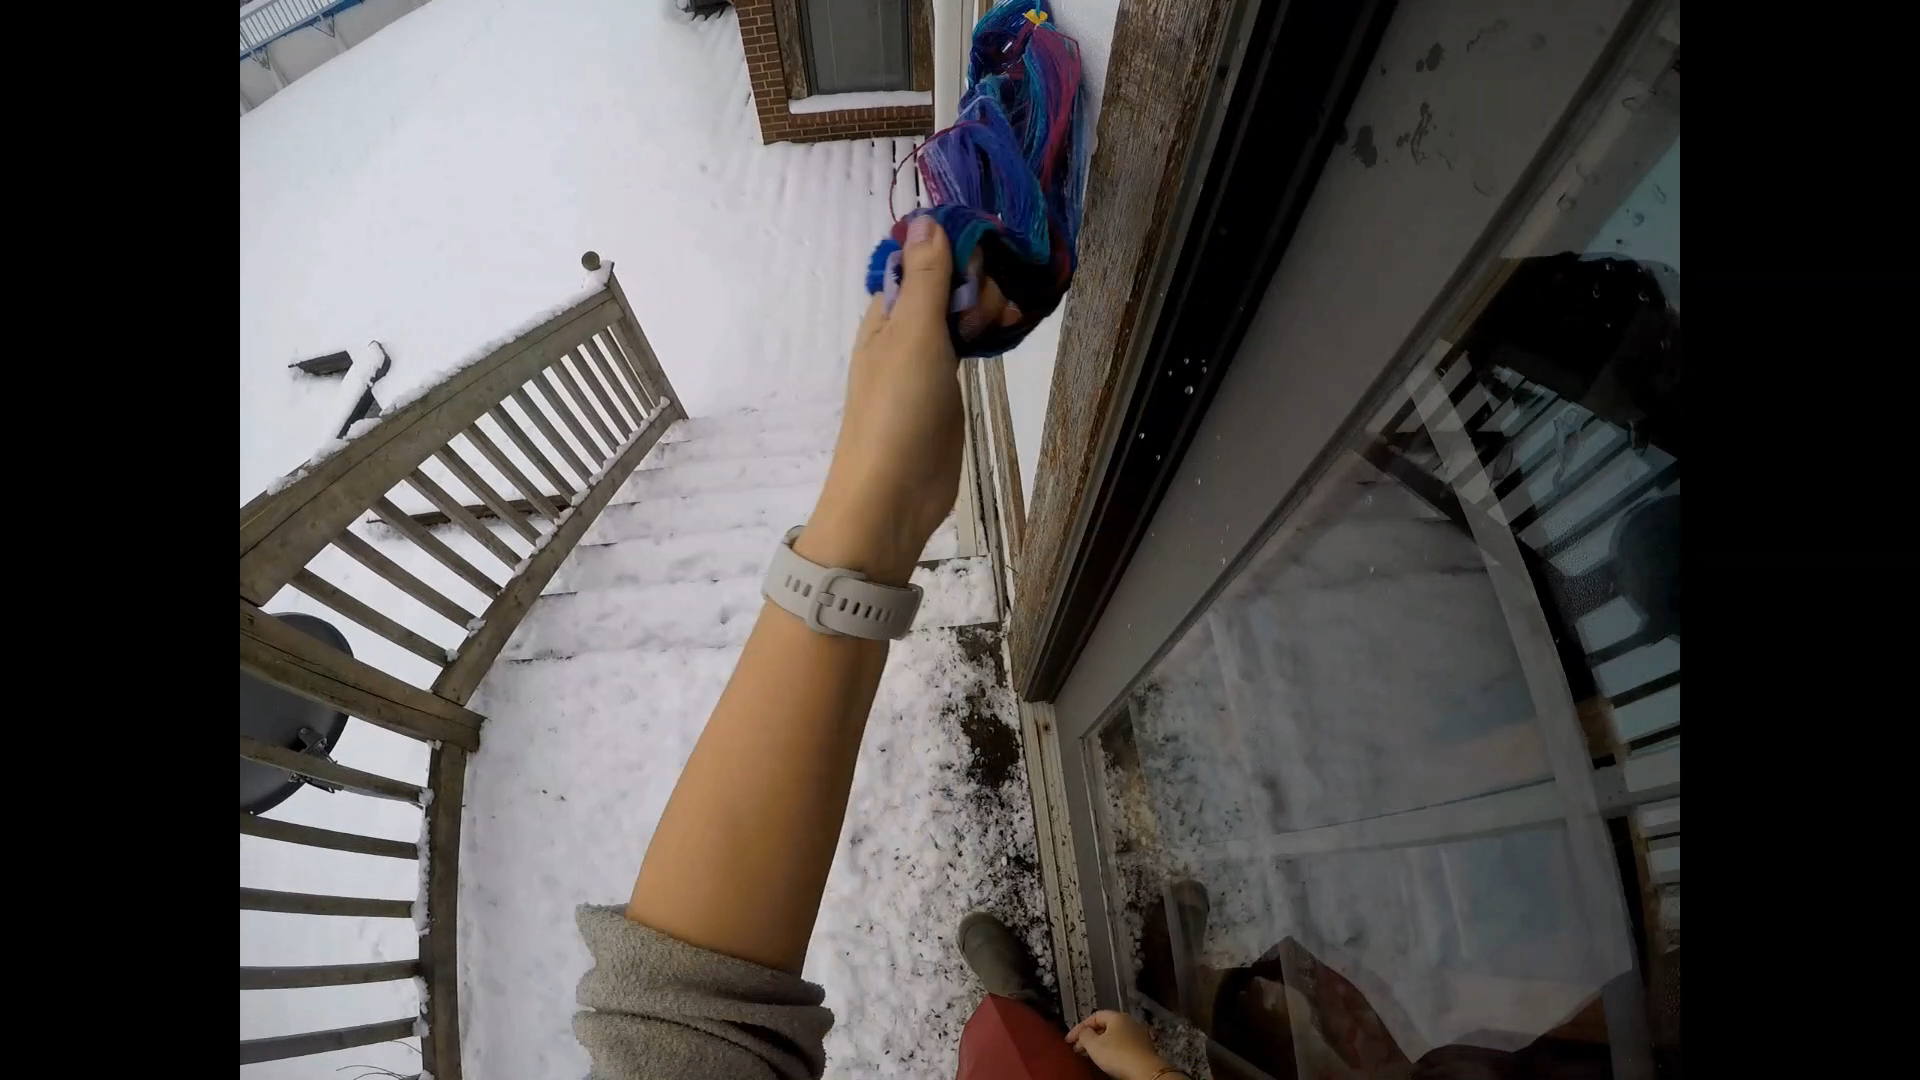
I probably wouldn’t have bothered thwacking this yarn if it was just the main skein since it was pretty balanced to begin with. Maybe just a quick snap between my hands, if that.
But I wanted to give an example of thwacking in the video, and since the small skein warrants a good thwack and is tied to the big one, I went ahead and gave it a good crack on the side of the house. My goodness. It’s so satisfying!
To Thwack or Not to Thwack
There are many opinions on why and when to thwack yarn, and even if you should. I started out making chunky textured art yarns, so thwacking was pretty much a given with those. It helps open the fibers and gives the yarn strength.
Since I started with thwacking as my foundation, I continued to do so, learning that some handspun yarns don’t take to it well. Take silk, for instance. It’s a sleek yarn that looks best when laid flat, and whacking it only makes the fibers go willy-nilly, leaving the yarn looking dull and less lustrous. So, I steam my silk handspun now.
I still like how my handspun wool yarns look after a good whacking. The plies seem to line up, and the yarn itself drapes nicely.
I usually opt not to thwack a wool yarn to save time when it is already pretty balanced.
Drying the Yarn

It’s June, and I have some roving outside drying in the sunshine as I type this. But this yarn was set in the winter, so I hung it up to dry inside. My studio is equipped with a heat pump, so hanging it here is the best option for me. Bathrooms never have enough airflow, from my experience, but if you need to use your shower to dry your yarn, be sure to run the fan to get some air circulating.
The yarn looks nice and balanced now, but it’s weighted down with water. Did I achieve balance on that extra skein?
The Final Product

Here’s the finished product. There is still a very slight twist in the unbalanced bonus skein, but this is miles better than what it started out as. I wouldn’t hesitate to use this yarn.
This is why it’s important to set your handspun. Don’t judge it until you do. I don’t find the feeling of satisfaction or the beauty in the yarn is revealed until it’s set and dry!
Thanks for Watching/Reading
I hope this quick video and post helps if you have any questions about wet setting yarn. I’m committed to making short videos that would be of interest to up-and-coming fiber artists.
Why I’m Sharing My Experience
I’m a self-taught spinner, so what I know is trial and error. I’m sure there are others out there who have a more scientific explanation for it all, but my goal in sharing my experiences is to encourage others to experiment and figure out what works for them.
I prefer to figure things out on my own rather than be told the “proper” way to do things. This is the only way that I have found my way in my craft, and made me passionate to keep learning.
Happy soaking/thwacking/experimenting! 😉
Until next time…